November Tulip Planting: Your Ultimate Guide
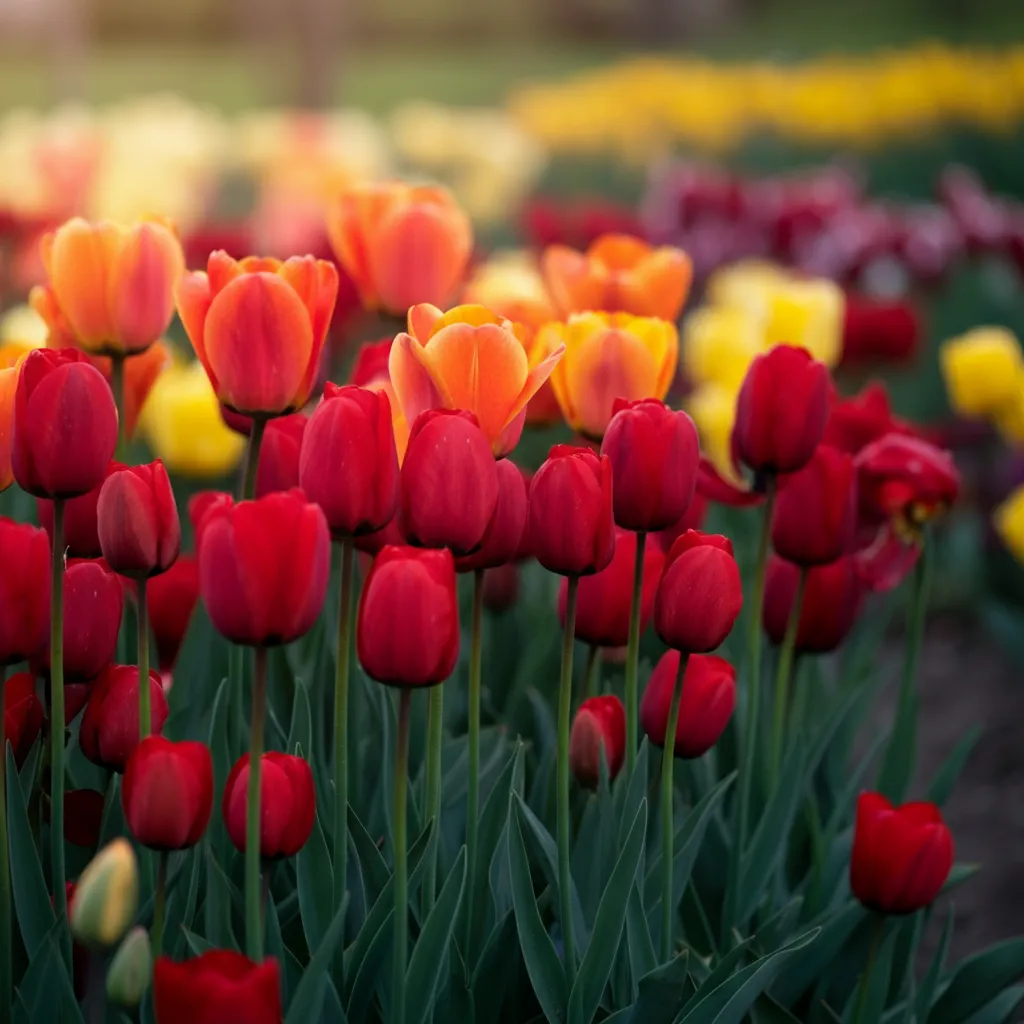
The crisp November air carries a promise that many gardeners overlook. While most are storing away their tools and clearing the last autumn leaves, seasoned gardeners know this is actually one of the most exciting times of the year. November marks the perfect window for tulip planting—a simple task now that guarantees spectacular spring rewards.
November isn't just convenient timing for tulip planting; it's absolutely essential. The cooler soil temperatures create the ideal conditions for healthy bulb development while significantly reducing the risk of devastating diseases like tulip fire. Your bulbs will establish strong root systems over winter without the threat of premature top growth that could be damaged by harsh frosts.
This comprehensive guide will walk you through everything you need to know about planting tulips in November. You'll discover why timing matters so much, master the step-by-step planting process, explore creative design ideas that will make your neighbours envious, and learn the essential care tips that ensure your tulips thrive. By the end, you'll have all the knowledge needed to transform your garden into a breathtaking spring spectacle.
Why November is the Golden Month for Tulips

Disease Prevention Takes Centre Stage
November's cooler soil temperatures offer a crucial advantage that many gardeners don't realise. The fungus responsible for tulip fire (Botrytis tulipae) becomes far less active in cold conditions. This devastating disease can destroy entire tulip displays, causing brown spots on leaves and preventing flowers from opening properly. By planting tulips in November, you're giving your bulbs the best possible start with significantly reduced disease pressure.
Root Development Without Risk
November planting allows tulip bulbs to focus their energy exactly where it's needed most. The cool soil encourages steady root development throughout winter without triggering premature leaf growth. This root establishment period is absolutely vital—strong roots mean stronger plants that can support those magnificent spring blooms. Bulbs planted too early risk putting up shoots before winter, leaving them vulnerable to frost damage.
The Science of Vernalisation
Tulips have evolved with a built-in timing mechanism called vernalisation. Simply put, they need a prolonged cold period—typically 12 to 16 weeks below 9°C—to trigger their flowering response. November planting ensures your tulips receive this essential chilling period naturally. Without proper vernalisation, bulbs may produce leaves but refuse to flower, leaving you with a disappointing green display instead of vibrant blooms.
Step-by-Step Guide to Perfect Tulip Planting
Step 1: Choose Your Bulbs Wisely
Quality starts with selection. Look for firm, plump bulbs that feel heavy for their size. Avoid any with soft spots, mould, or obvious damage. The papery outer skin should be intact—this protective layer helps prevent disease and moisture loss.
The variety of tulips available is staggering. Single Early tulips like 'Apricot Beauty' provide reliable spring colour, while Darwin Hybrids such as 'Red Apeldoorn' offer sturdy stems perfect for cutting. For something truly spectacular, consider Parrot tulips like 'Black Parrot' with their ruffled, dramatic petals, or elegant Lily-flowered varieties such as 'White Triumphator'.
Step 2: Prepare Your Planting Spot
Tulips demand excellent drainage above all else. They'll tolerate various soil types but will quickly rot in waterlogged conditions. Choose a sunny to partially shaded location where water doesn't pool after heavy rain. If your garden has heavy clay soil, improve drainage by adding coarse grit or consider container planting instead.
For gardeners with challenging soil, raised beds or large containers offer perfect alternatives. A simple mix of quality compost and gritty sand creates the well-draining environment tulips crave.
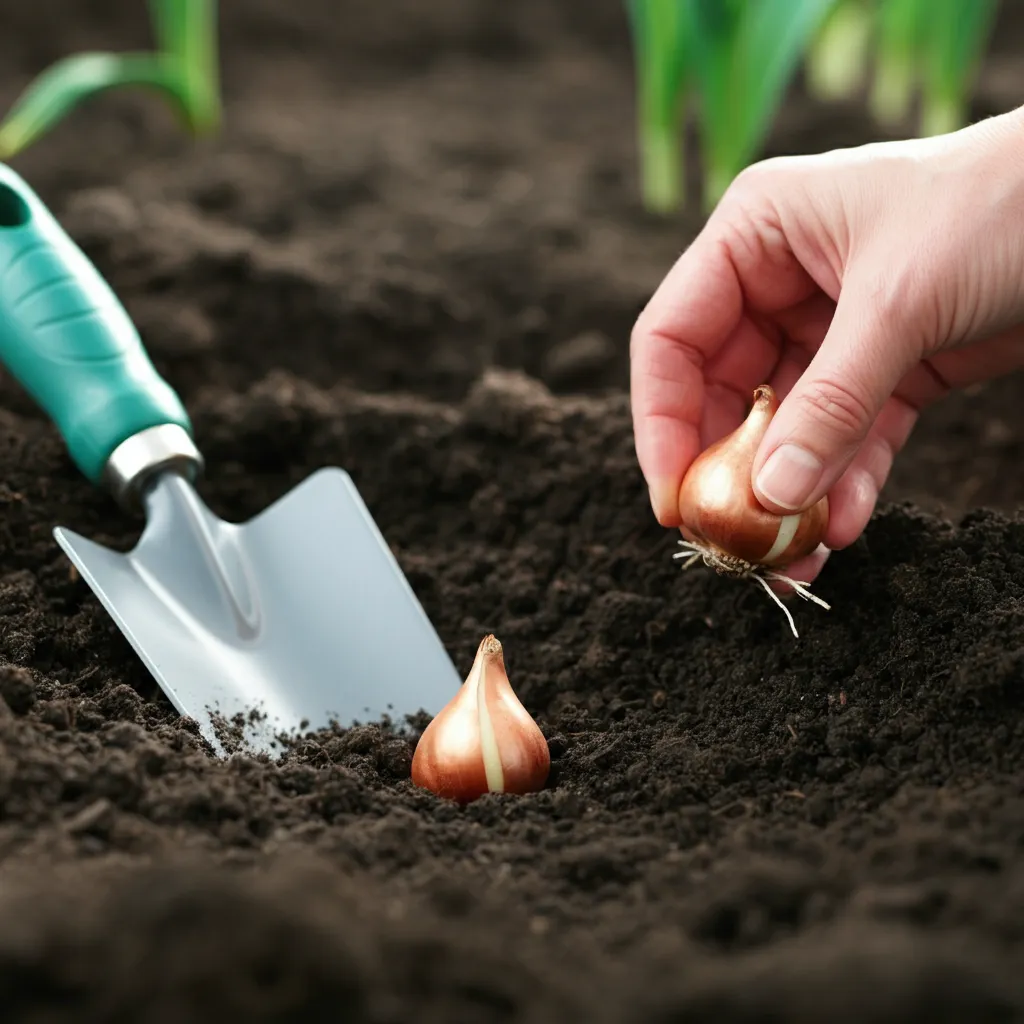
Step 3: Get the Depth Right
The golden rule for bulb planting is deceptively simple: plant at a depth of two to three times the bulb's height. For most tulip bulbs, this means planting 10-15cm deep. Use your hand trowel as a measuring guide—most quality trowels are approximately 15cm long.
Proper depth provides several benefits. Deeper planting protects bulbs from temperature fluctuations, provides stability for tall stems, and helps prevent squirrels from discovering your investment.
Step 4: Plant with Precision
Always plant bulbs with the pointed end facing upward—this is where the shoot will emerge. For naturalistic displays in borders, try the scatter method: gently toss your bulbs across the planting area and plant them wherever they land. This creates beautifully random clusters that look completely natural.
Container planting offers more creative possibilities. The famous "bulb lasagne" technique involves layering different bulb types at various depths in one large pot. Place late tulips at the bottom, medium-flowering daffodils in the middle, and early crocuses near the top. This creates months of successive blooms from a single container.
Step 5: Cover and Water
Backfill your holes with the excavated soil, firming gently to eliminate air pockets. Avoid compacting the soil heavily—tulip shoots are surprisingly strong but prefer loose earth. Give newly planted areas a light watering if the soil is particularly dry, but avoid overwatering. November's natural rainfall usually provides adequate moisture.
Don't forget to label your planting areas! Use weatherproof markers to note varieties and planting dates. This prevents accidental disturbance during spring garden maintenance and helps you plan future displays.
Creative Combinations: Designing with Tulips

The "Bulb Lasagne" Technique
This ingenious planting method maximises container impact while extending the flowering season. Start with a large pot—at least 30cm wide and deep. Place late-flowering tulips at the bottom (15cm deep), cover with soil, add mid-season daffodils (10cm deep), add more soil, then finish with early crocuses just 5cm down.
The result is magical: crocuses appear first in February, followed by daffodils in March, with tulips providing the grand finale in April and May. Each layer has room to develop without interfering with others below.
Colour Scheming for Maximum Impact
Consider your spring colour palette carefully. A "sunset" theme using warm oranges, reds, and yellows creates dramatic impact. Try combining 'Orange Emperor' with 'Red Riding Hood' and 'Golden Apeldoorn' for a fiery display.
For sophisticated elegance, stick to a cool palette of whites and purples. 'White Triumphator' pairs beautifully with deep 'Queen of Night' and pale lavender 'Blue Heron'. This combination creates depth and visual interest without overwhelming the senses.
Pairing with Perennials
Smart gardeners use perennials to solve the "dying tulip foliage" problem. Plant tulips amongst hostas, hardy geraniums, or day lilies. As tulip flowers fade and leaves yellow, the perennial foliage emerges to hide the untidy bulb foliage. This natural succession keeps borders looking attractive throughout the season.
Ornamental grasses make excellent tulip companions too. The fine texture of grasses provides perfect contrast to bold tulip blooms, while their growth habit conceals fading bulb leaves naturally.
Caring for Your Tulips After Planting
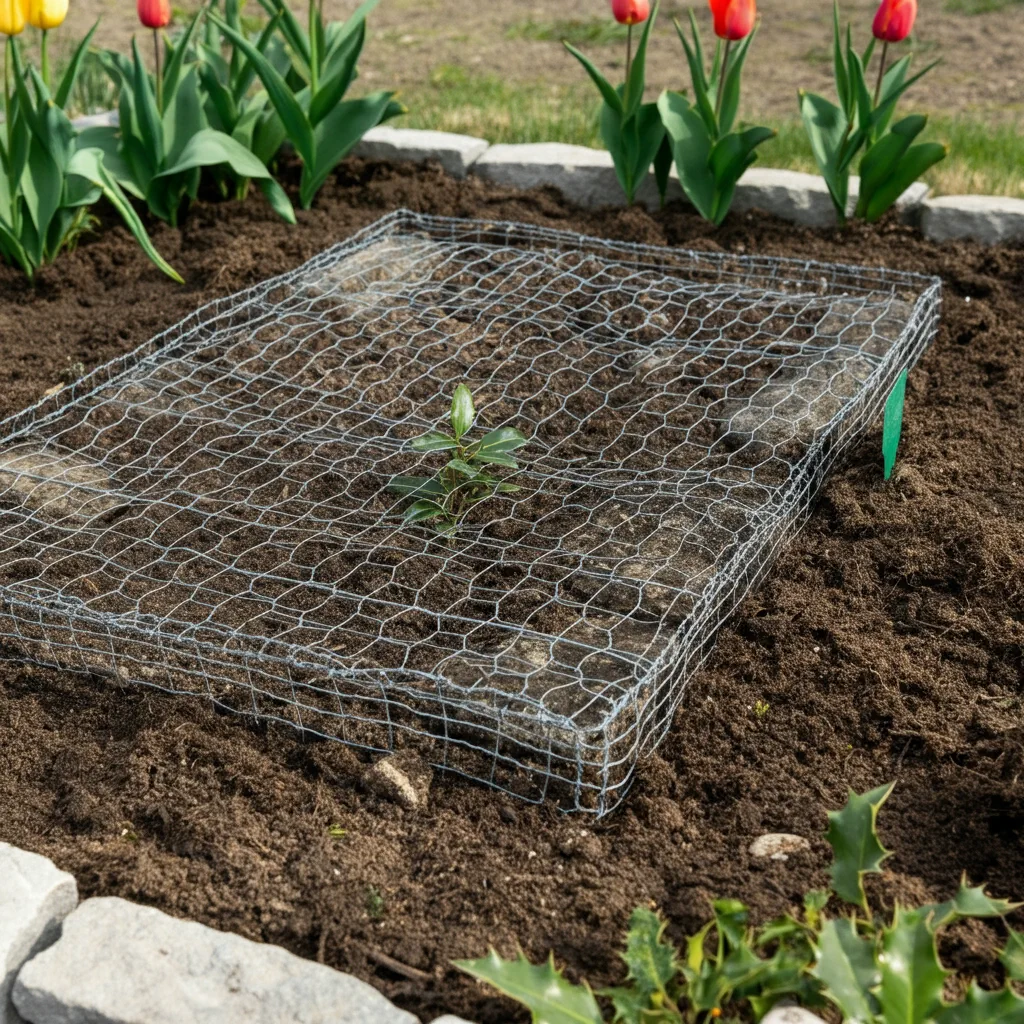
Pest Protection Strategies
Squirrels pose the biggest threat to newly planted tulip bulbs. These persistent creatures can detect buried bulbs and will dig them up for a tasty winter snack. Combat this by laying chicken wire flat over planted areas, securing the edges with stones. Alternatively, scatter prickly holly leaves over the soil surface—squirrels dislike the sharp texture.
For container plantings, consider covering with decorative gravel or bark chips. This not only deters pests but also improves the pot's winter appearance while helping retain soil moisture.
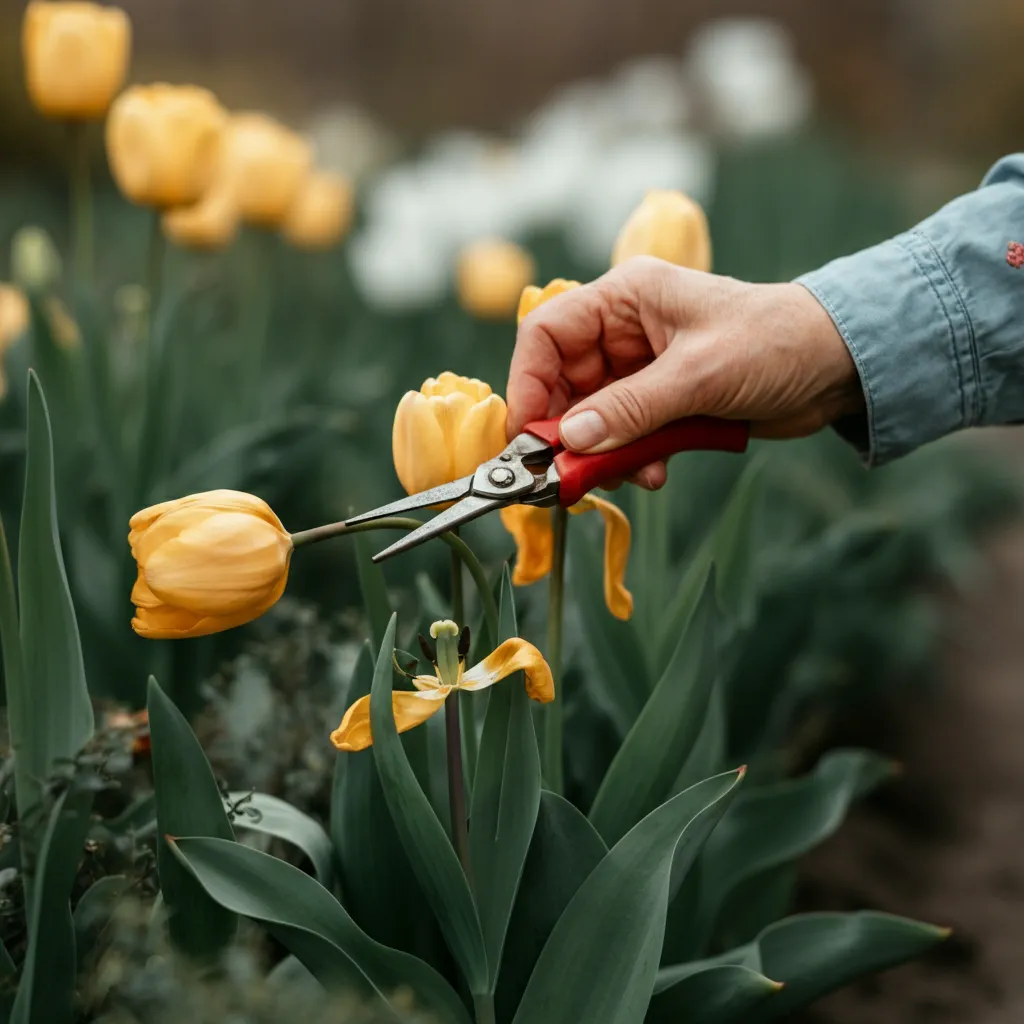
After Flowering Care
Next spring's display depends on proper aftercare. Once flowers fade, immediately deadhead spent blooms to prevent seed formation. However, resist the temptation to cut back foliage until it yellows naturally. Those green leaves are working hard to replenish the bulb's energy reserves for next year's performance.
Many tulip varieties naturally diminish after their first year, particularly modern hybrids. Species tulips and some Darwin Hybrids prove more reliable for naturalising. For consistent displays, treat tulips as annuals and plant fresh bulbs each November.
Transform Your Garden This Spring

November tulip planting represents one of gardening's most rewarding investments. A small effort now guarantees months of spectacular colour when winter finally releases its grip. The sight of those first green shoots pushing through soil in late February never fails to lift spirits and promise better days ahead.
Your local garden centre is currently brimming with bulb possibilities. This weekend, choose varieties that excite you—perhaps try something completely new alongside reliable favourites. Whether you're planning grand border displays or simple container arrangements, November planting sets the stage for spring magic.
Head out this weekend, select your tulip bulbs, and start planting. Your future self will thank you when those first magnificent blooms appear. Share your chosen varieties in the comments below—fellow gardeners love discovering new favourites, and your recommendations might inspire someone else's perfect spring display.


Community Feedback