Composting 101: The Beginner's Guide to Starting Your First Compost Heap
Welcome to the enriching world of composting! Frequently hailed as gardening gold, compost stands as a cornerstone for nurturing a flourishing, eco-friendly garden. This marvelous substance not only enriches the soil but also reduces the need for chemical fertilizers, promoting a more natural growth process for your plants.
Whether you're a seasoned green-thumbed guru with years of gardening under your belt or a novice just beginning to explore the wonders that lie beneath the surface of the soil, getting a grip on the fundamentals of composting can significantly elevate the health and vibrancy of your garden. Moreover, by converting kitchen scraps and yard waste into compost, you contribute to a larger environmental cause, reducing landfill waste and cutting down on greenhouse gas emissions.
By understanding and implementing the basics of composting, you take an active step towards transforming your garden—and the planet—one heap at a time. So, let's embark on this eco-friendly journey together, turning waste into treasure, and in the process, nurturing our green spaces to thrive in harmony with nature.
We hope this guide inspires you to start your compost heap and explore the endless benefits of composting. Remember, each peel, each leaf, and each handful of compost is a step towards a healthier garden and a healthier world.
The Magic of Composting
At first glance, composting might seem like a mysterious alchemical process, turning kitchen scraps and yard waste into rich, fertile earth. But at its heart, composting is a simple, natural way to recycle organic material. It's a practice that not just enriches the soil, but also reduces the burden on our landfills, cutting down on methane emissions—a win-win for your garden and the environment.
Getting Started: The Basics of Composting
Selecting the Right Spot
- Selecting the perfect spot for your new compost heap is not just a matter of convenience; it's about creating a thriving ecosystem right in your garden that will benefit your plants for years to come. Imagine transforming kitchen scraps, lawn clippings, and fallen leaves into black gold that nourishes your garden. It’s a bit like alchemy, only this magic is real, and it all starts with placing your compost heap in the ideal location.
1. Seek Out Partial Shade: You want to find a balance for your compost heap, a spot that benefits from the warmth of the sun but doesn’t turn into an oven under direct sunlight. A location that gets partial shade will help maintain an even temperature, speeding up the composting process without drying it out too quickly.
2. Consider Drainage: Good drainage is crucial. A slightly elevated or level spot that drains well will prevent your compost from becoming waterlogged. Remember, you’re aiming for moist, not soggy. This is where your compost heap thrives, breaking down material efficiently without becoming a smelly quagmire.
3. Accessibility Matters: Even in the dead of winter, you’ll need to visit your compost heap, adding new materials and turning it to aid decomposition. Choose a location that’s convenient to access year-round. If you’re trekking through mud or snow to reach it, you might be less inclined to keep it properly maintained.
4. Think About Wind Direction: If possible, consider the prevailing wind direction in your garden. Placing your compost heap downwind from your house and outdoor living areas will make sure any odors are carried away, keeping your garden oasis smelling fresh.
5. Proximity to Planting Areas: While not essential, situating your compost heap near your vegetable patch or flower beds can make transporting compost much easier when it’s time to enrich your soil. Think of it as planning for future ease of use—your back will thank you.
6. Space and Expansion: Start with what you need, but remember, gardening is a growing passion. Allow room for your compost heap to expand as your garden does. This foresight will save you the hassle of having to relocate your compost heap later on.
By taking these factors into consideration, you're not just selecting a spot for your compost heap; you're embedding it into the heart of your garden's ecosystem. Every shovel of compost you spread is a testament to your efforts, turning waste into wonder and enriching the soil from which your garden blooms. It’s a beautiful cycle of renewal that starts with choosing the right spot for your compost heap. Happy composting!
Would you like more tips on how to manage your compost heap effectively once you've found the perfect spot?
Understanding What Goes into Compost
Composting is all about balance. Imagine your compost as a gourmet meal for worms, with a perfect balance of 'greens' (like vegetable peels, coffee grounds, and fresh lawn clippings) and 'browns' (such as dried leaves, cardboard, and eggshells). This mix provides the essential nutrients and structure needed for effective decomposition.
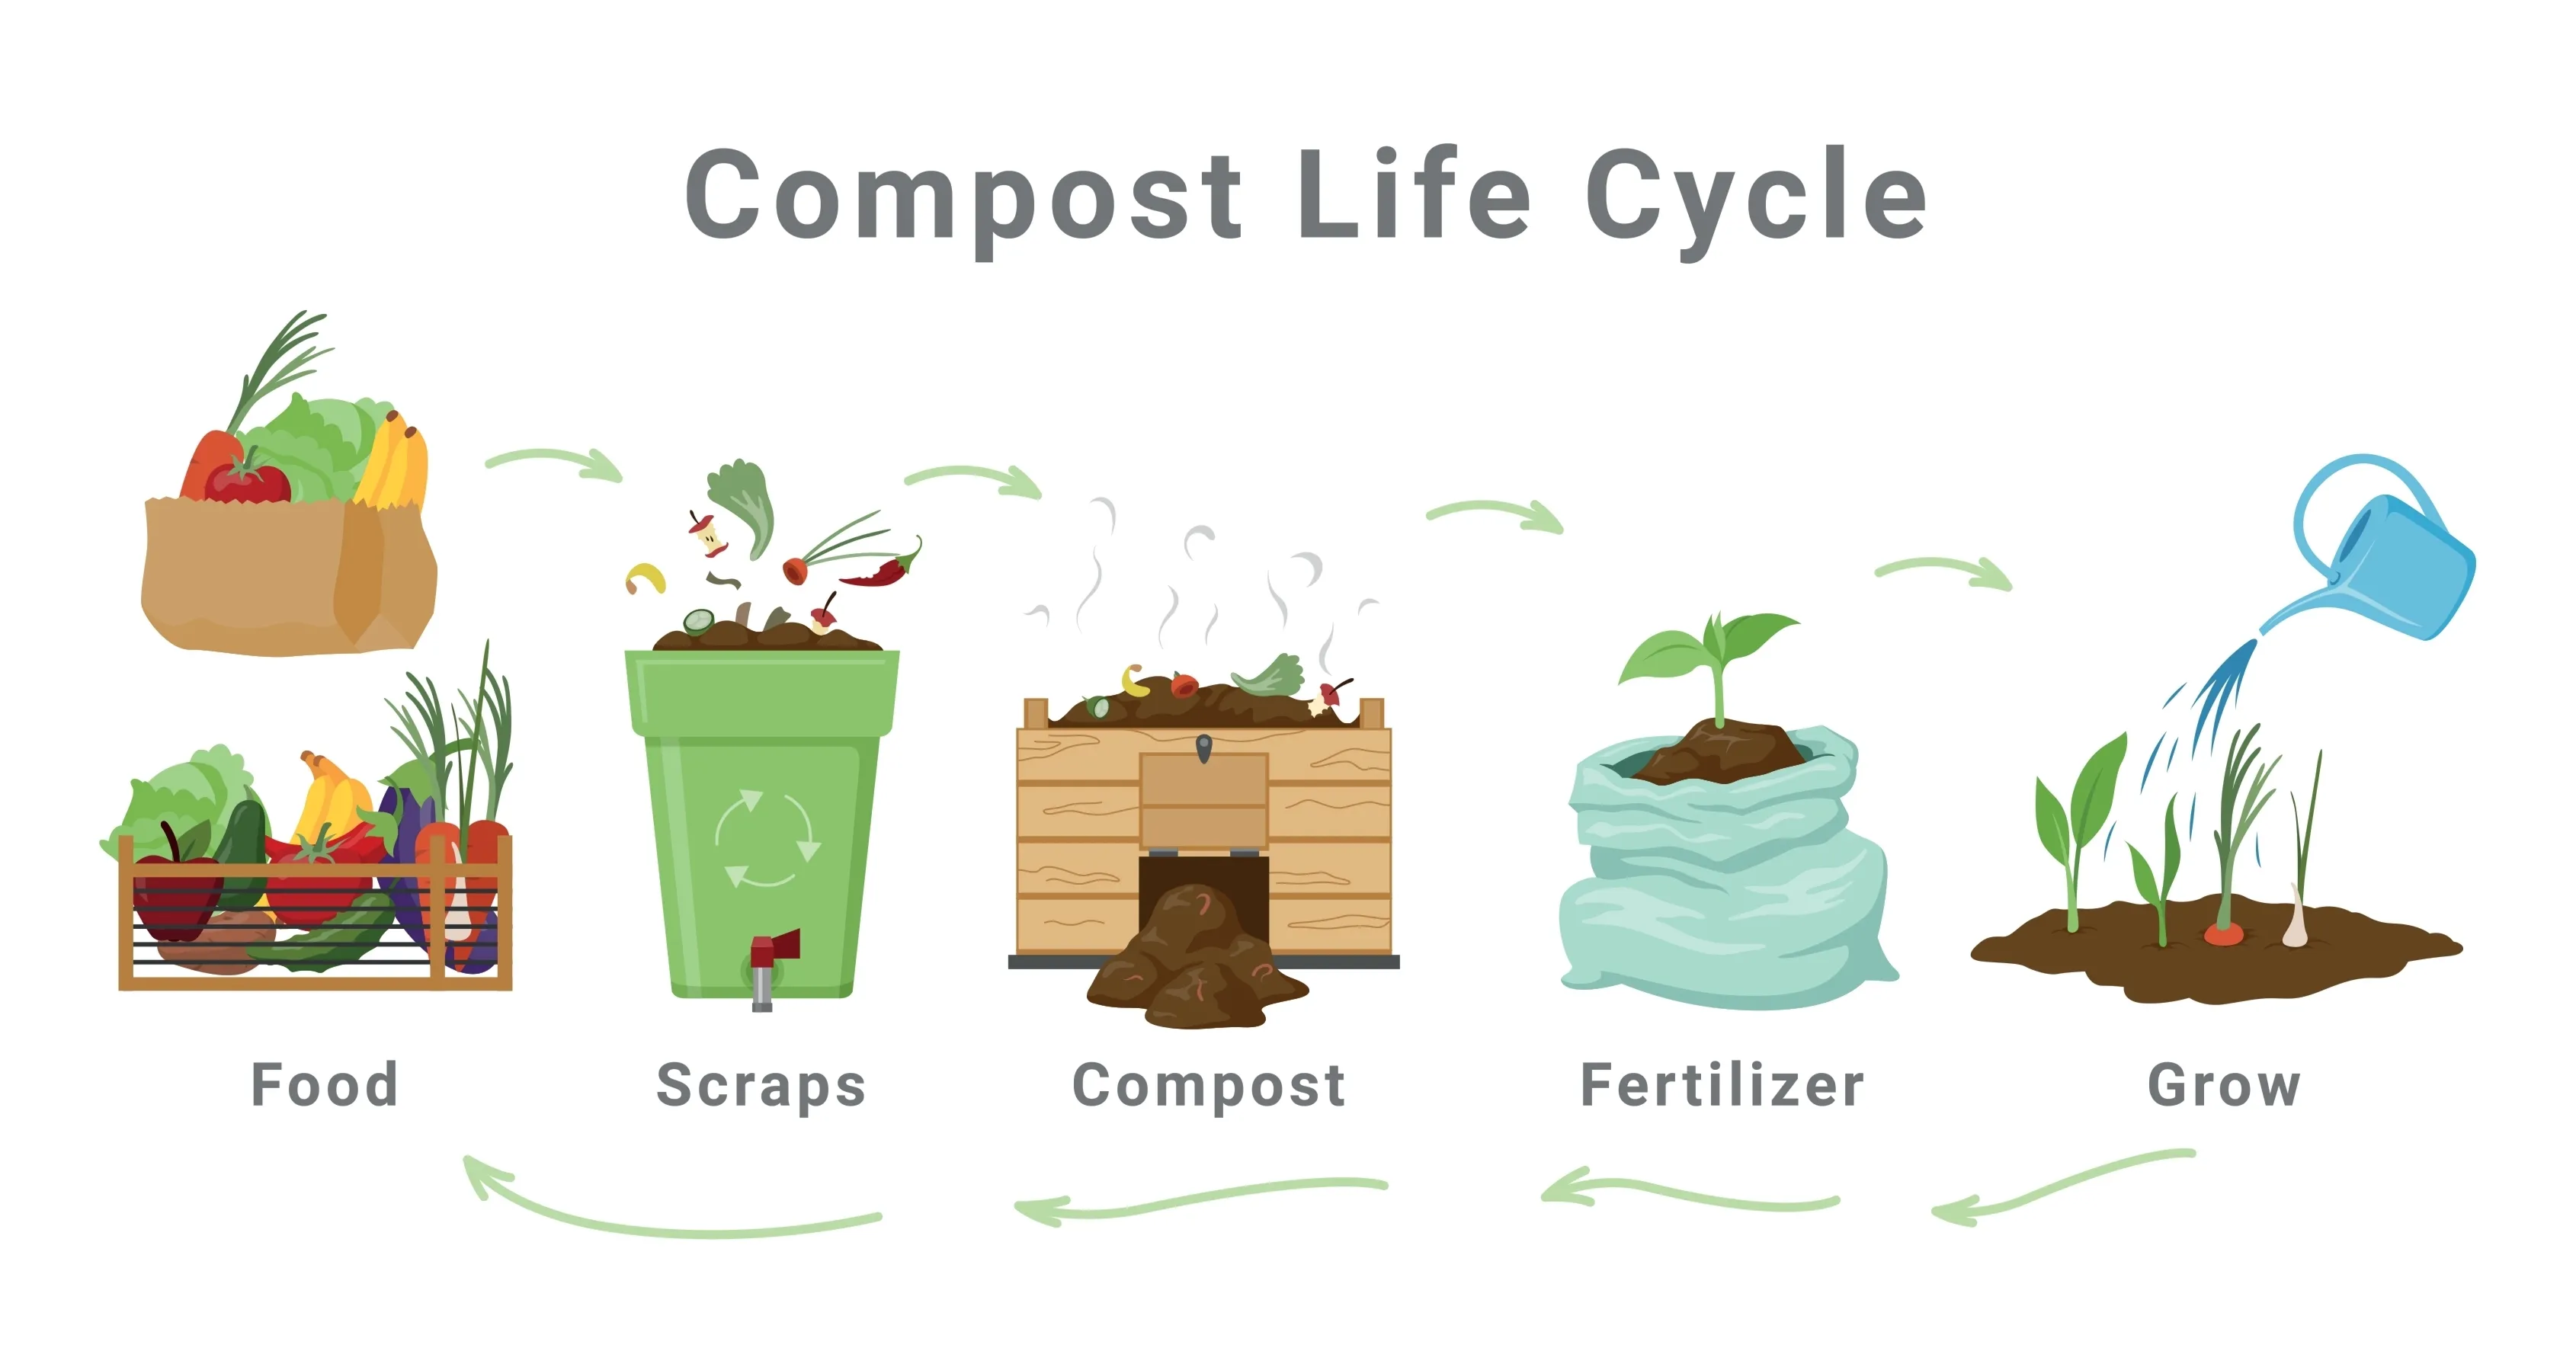
Composting: Nature's Own Recycling Process
In the heart of every garden lies the potential for sustainability and growth, not just in the plants that flourish but in the very soil that nurtures them. Composting, a natural process of recycling organic matter into rich soil, stands as a testament to the cycle of life, allowing us to reduce waste, enhance soil quality, and boost plant health. By inviting this process into our gardens, we engage in an age-old practice that benefits the earth and our green spaces alike.
The Foundations of Composting
The essence of composting is transformation. It involves taking what was once considered waste—such as kitchen scraps, lawn clippings, and leaves—and turning it into a valuable resource. This transformation is powered by microorganisms that break down organic material into humus, a nutrient-rich material that improves soil structure, moisture retention, and fertility.
The magic of composting lies in the balance of carbon and nitrogen. Carbon-rich materials, often referred to as "browns," include items like dried leaves, straw, and paper. Nitrogen-rich materials, or "greens," encompass fruit and vegetable scraps, coffee grounds, and fresh lawn clippings. The ideal ratio for a thriving compost pile is approximately 30 parts carbon to 1 part nitrogen. This balance supports the microbial population, enabling them to work efficiently.
Making Compost: Indoor and Outdoor Methods
Composting can be adapted to fit any space, whether you have sprawling gardens or a modest indoor area. Outdoor composting is common, utilizing bins, piles, or tumblers to contain and manage the compost. This method benefits from direct contact with the earth, allowing worms and other beneficial organisms to aid in decomposition.
For those with limited outdoor space, indoor composting offers a viable alternative. Using a special compost bin designed to control odor and manage waste, you can compost kitchen scraps year-round. Bokashi composting, which involves fermenting organic matter before adding it to soil or an outdoor compost pile, is another effective indoor method.
Optimizing Your Compost Pile
Temperature and moisture are critical factors in the composting process. A healthy compost pile should maintain a temperature between 55-65°C (130-150°F) to encourage rapid decomposition while killing weed seeds and pathogens. Turning the pile regularly helps distribute air and heat evenly.
Moisture is equally important. Your compost should feel like a wrung-out sponge—moist but not sopping wet. Adjusting the balance of greens and browns can help manage moisture levels. Too dry, and the microbes slow down; too wet, and the pile becomes anaerobic, leading to unpleasant odors.
From Pile to Plant: Using Your Compost
The culmination of your composting efforts is a dark, crumbly humus that can be worked into garden beds, spread as mulch, or used as potting soil. Incorporating compost into your garden improves soil structure, providing plants with essential nutrients and enhancing overall soil health. Compost also encourages beneficial microbial activity, which can deter pests and diseases.
Composting is more than just a technique for waste reduction—it’s a fundamental component of holistic gardening, reinforcing the connection between our activities and the health of the planet. By transforming organic waste into valuable compost, we not only enrich our gardens but also contribute to a more sustainable world. Whether you're nurturing a lush landscape or cultivating crops in raised beds, incorporating compost into your gardening practices promises a healthier, more vibrant garden ecosystem.
Happy composting! May your garden thrive with the goodness of nature’s own recycling process.
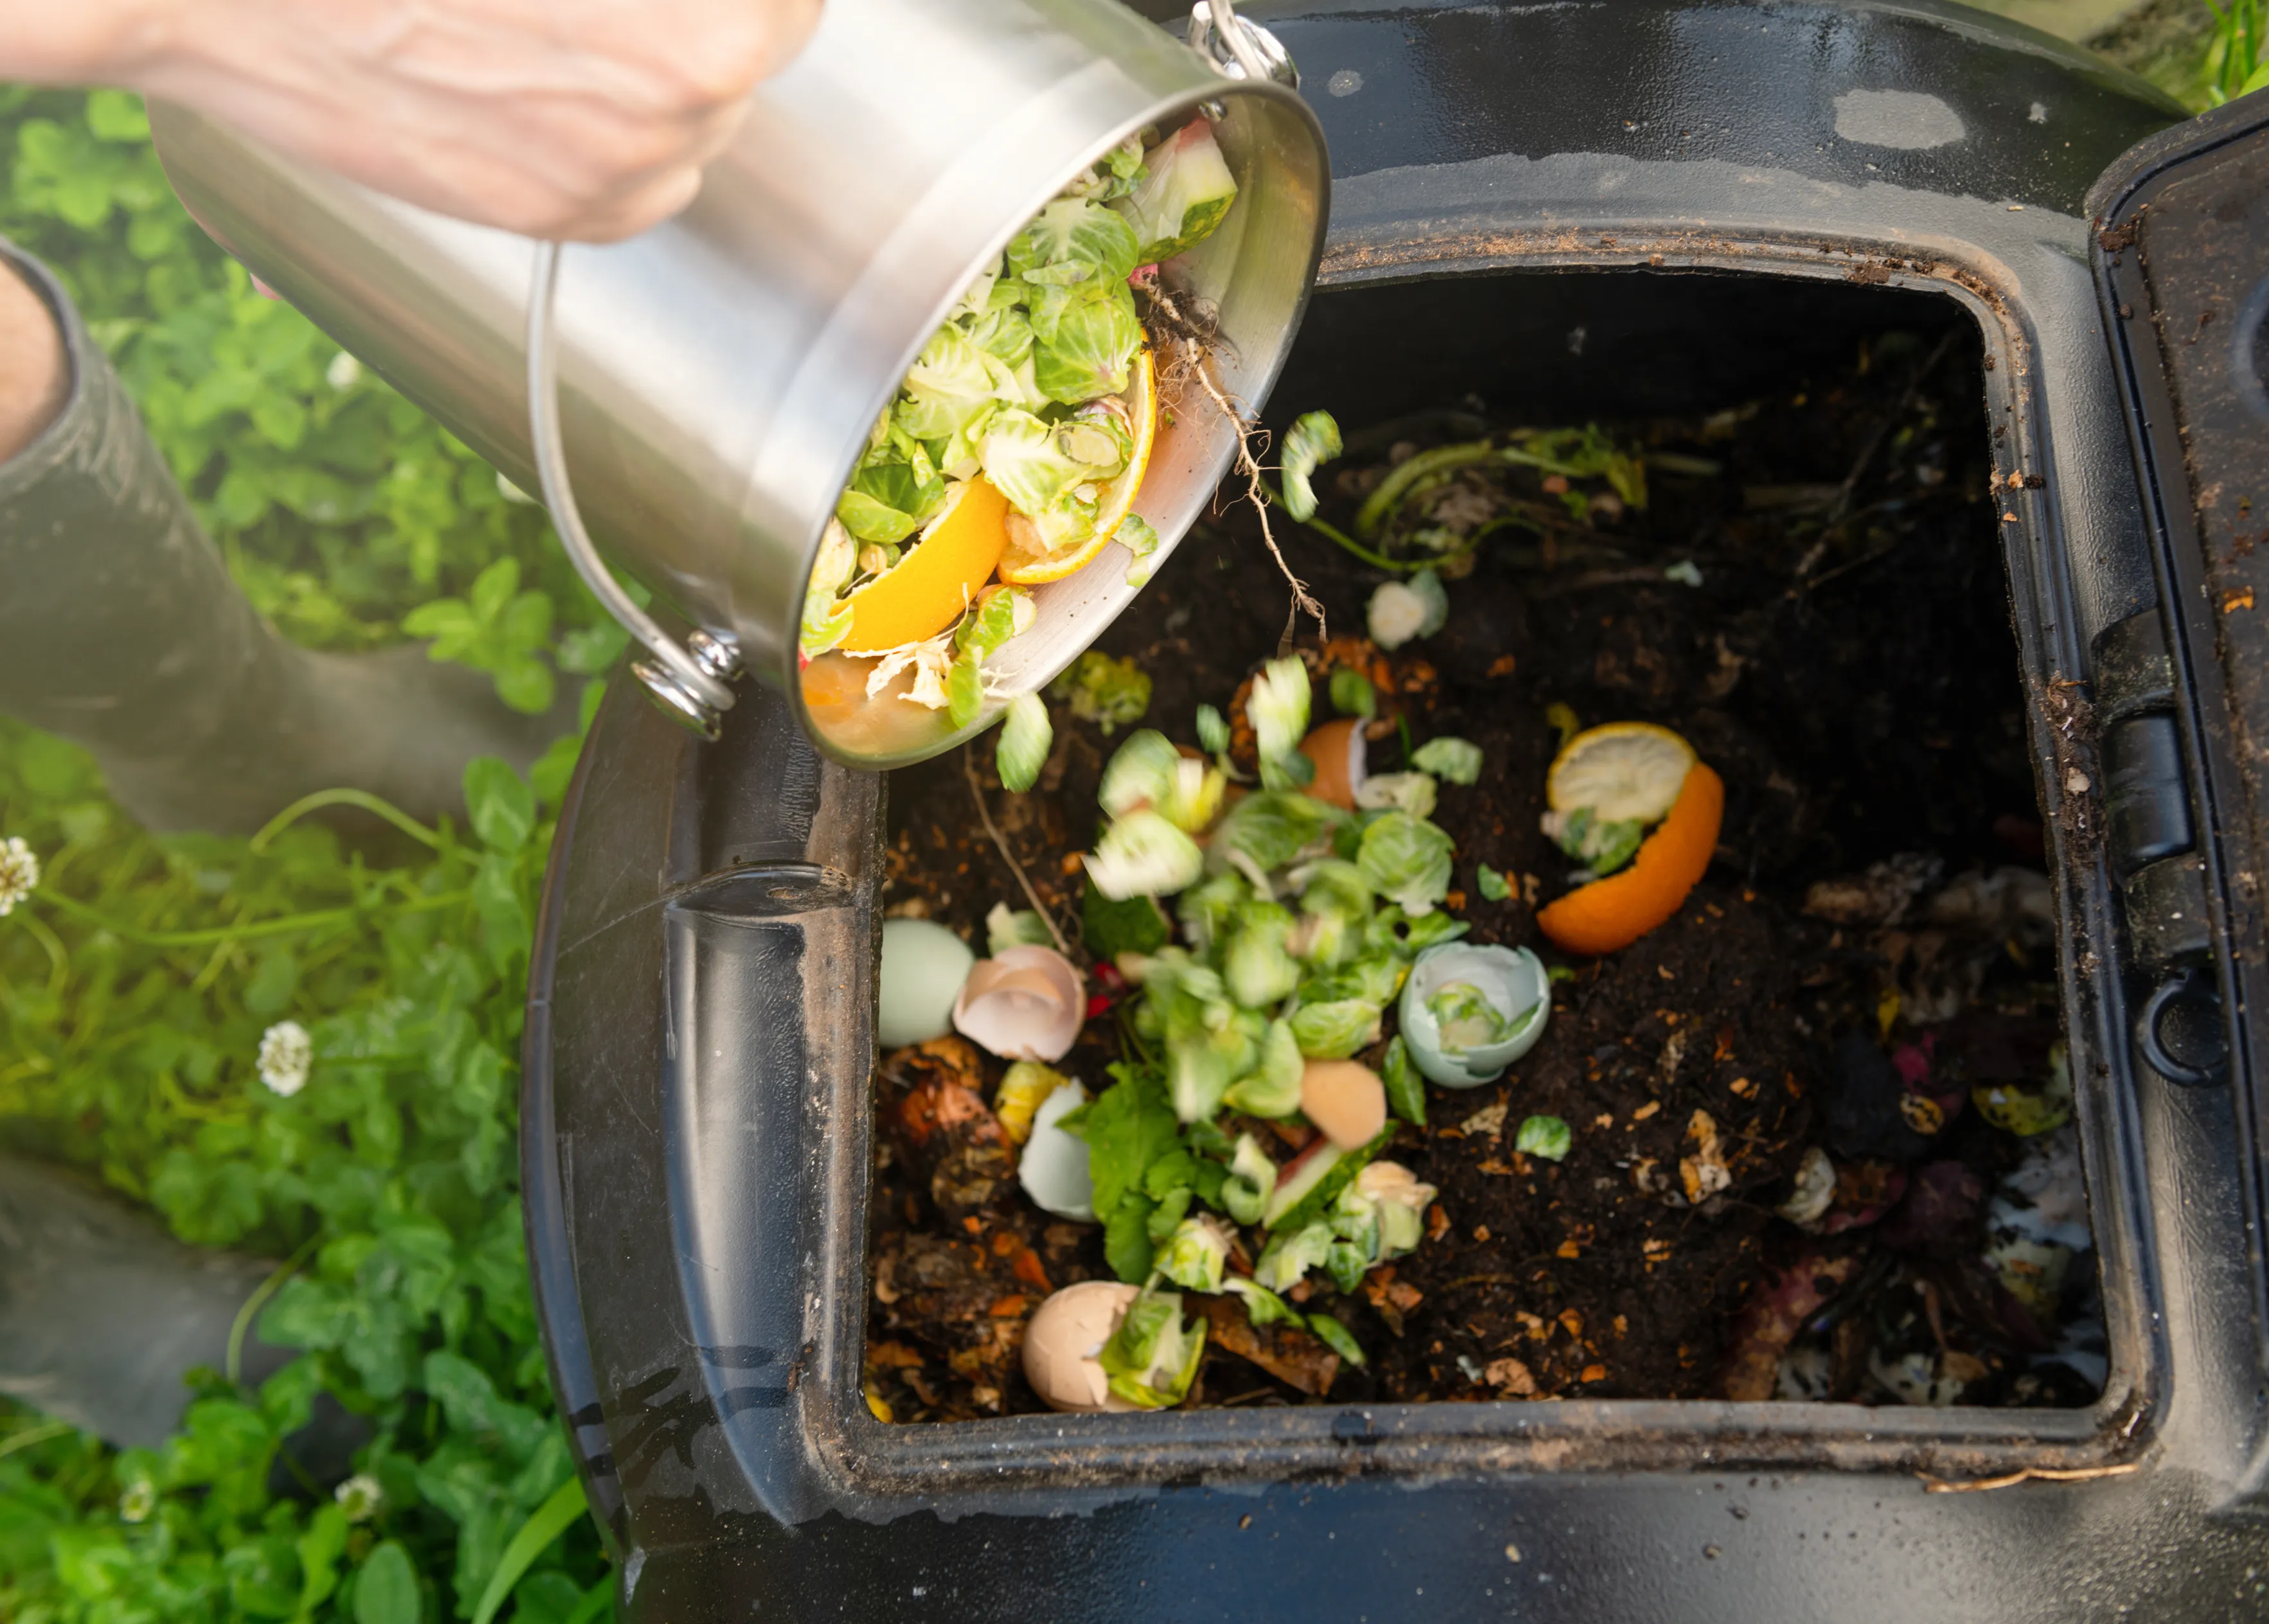
Layers of rotting compost in plastic composter bin in garden
The Importance of Layering
Think of layering as the secret ingredient to successful composting. Starting with a layer of browns for aeration, followed by a generous helping of greens, and a sprinkle of soil in between, creates the perfect environment for microorganisms to do their work, breaking down the material into compost.
The Art of Composting Layering: A Guide for Thriving UK Gardens
Venture into the world of composting, and you'll find yourself amidst an age-old practice that significantly contributes to the health and fertility of your garden soil. Particularly for us UK gardeners, nurturing soil through effective composting methods such as layering is not just beneficial; it's essential. The unpredictable British weather can challenge even the most resilient plants, making nutrient-rich soil a key ally in your gardening endeavours.
Why Layering?
Layering in composting is akin to crafting a gourmet meal for your garden. It involves alternating layers of 'green' and 'brown' materials, providing a balanced diet that fuels decomposition. This method encourages the development of beneficial microbes and creates an environment that transforms organic waste into compost gold.
Understanding Greens and Browns
- Green Layers: These are your nitrogen-rich materials. Think of them as the protein in your soil's diet. Kitchen scraps (excluding meat and dairy products), grass clippings, coffee grounds, and fresh plant matter fall into this category. These materials kickstart the composting process by feeding the microorganisms that break down organic matter.
- Brown Layers: Brown materials supply carbon, acting as the carbohydrates in your compost's meal plan. Dried leaves, straw, shredded paper, and wood chips are excellent brown materials. They help add structure to the pile, allowing air to flow and keeping the compost well-aerated.
Ideal Ratios for Success
Finding the perfect balance between green and brown materials is crucial. A general rule of thumb is to aim for a 3:1 ratio of browns to greens. This ratio ensures that your compost pile decomposes efficiently without unpleasant odors. Too much green, and your compost will be wet and smelly; too much brown, and decomposition slows dramatically.
Key Elements of Layering
- Start with Browns: Begin your compost pile with a thick layer of brown materials to enhance drainage and aeration.
- Add a Layer of Greens: Follow with a layer of green materials. This is where the microbial action heats up, quite literally.
- Moisture Management: Your compost should be moist, but not soggy. Water your pile lightly as you add new layers, aiming for the dampness of a wrung-out sponge.
- Oxygen is Essential: Turn your compost pile regularly to introduce oxygen, which fuels the breakdown of materials. A well-aerated pile decomposes more efficiently and controls odors.
- Repeat and Maintain: Continue adding alternating layers of greens and browns, maintaining moisture and turning the pile. Over time, these layers will transform into dark, crumbly compost.
Thriving Plants in Nutrient-Rich Soil
Compost enriched soil is particularly beneficial for a wide range of plants, enhancing growth, resilience, and yield. In the UK’s varied climate, nutrient-rich soil is especially valuable for:
- Vegetables: From leafy greens to root vegetables, nutrient-packed soil supports healthier, more bountiful crops.
- Flowering Plants: Compost improves soil structure, which is ideal for flowers, encouraging vibrant blooms and strong growth.
- Herbs: Rich soil promotes aromatic and healthy herbs, perfect for culinary use or medicinal purposes.
Composting through layering is more than just a gardening technique; it's a commitment to enriching the earth beneath our feet, creating a sustainable environment for plants to thrive. Whether you're cultivating a vegetable patch, a flower garden, or a herb haven, integrating layering into your composting routine promises a greener, more bountiful garden. Now, with your compost heap ready and the soil teeming with life, the canvas of your UK garden awaits your creativity and care. Happy gardening!
Building Your First Compost Heap
What Materials to Start With
Initiating your compost pile is as easy as layering your kitchen and garden waste. Begin with coarse, dry materials like small branches to aid airflow. Then, alternate between your greens and browns, keeping in mind the ideal balance to encourage decomposition.
Creating a Successful Compost Heap: A Comprehensive Guide for UK Gardeners
Welcome, green-thumbed enthusiasts, to the wonderful world of composting—a practice where waste isn't just waste, but a golden opportunity to enrich your garden. Composting is a pivotal habit for any gardener, offering an array of benefits that transform your garden into a flourishing paradise. It not only reduces kitchen and garden waste but also improves soil health, structure, and fertility, encouraging vibrant plant growth.
Materials Required for a Medium-Sized Compost Heap
To start, you'll need a mix of green (nitrogen-rich) and brown (carbon-rich) materials. For a medium-sized compost heap, which is ideal for most gardens, gather the following:
- Green Materials: Vegetable peels, fruit waste, coffee grounds, grass clippings, and garden prunings.
- Brown Materials: Dry leaves, straw, shredded newspaper, cardboard, and wood chips.
- A Compost Bin: While not strictly necessary, a compost bin can help maintain neatness and concentrate heat, speeding up the composting process.
- Water: To maintain adequate moisture levels within the heap.
Balancing Nitrogen and Carbon
The secret to a thriving compost heap lies in balancing your greens and browns—the nitrogen and carbon. Aim for a ratio of roughly 3 parts brown to 1 part green. This balance ensures a steady, odor-free decomposition, providing an ideal environment for the microorganisms at work.
Step by Step Guide to Composting
- Setting Up Your Heap
-
- Choose a spot on bare earth to allow worms and other beneficial organisms to aerate the compost.
- Start with a layer of coarse brown material (like twigs) to improve drainage and airflow at the bottom.
- Layering Your Materials
-
- Add materials in alternating layers of greens and browns. If possible, chop or shred large pieces to speed up the decomposition process.
- After each addition of green materials, add a layer of browns to keep things balanced.
- Maintaining Moisture and Aeration
-
- The compost heap should be moist, but not wet. Sprinkle water over layers as you build the heap if materials are dry.
- Turn your compost heap every 4-6 weeks to introduce oxygen, crucial for composting and to prevent odors.
- Managing Heat
-
- A healthy compost pile will heat up in the center; this is a good sign! It means decomposition is happening effectively.
- Monitor the temperature (it can reach up to 60°C) but don’t worry if your pile isn’t very hot; composting will still occur, just at a slower pace.
- Time Frame
-
- Depending on the balance of materials, moisture, and turning frequency, your compost could be ready in as little as 3-6 months.
- During colder months, the process might slow down, extending the timeline.
- Recognizing Ready Compost
-
- Finished compost is dark, crumbly, and smells earthy. You shouldn’t be able to recognize any of the original materials.
- If your compost looks ready but you’re not sure, test it by planting a few seeds in a small amount. If they grow happily, your compost is good to go.
- Applying Compost to Your Garden
-
- Spread compost on your garden beds, around trees, or mix it with potting soil.
- A layer of 2-5 cm of compost is sufficient to enrich the soil and support plant growth.
Additional Tips
- Positioning: A sunny spot can speed up the composting process, but anywhere in your garden with good drainage will do.
- Size Matters: Keep your pile manageable; a 1m x 1m x 1m heap is ideal for balancing warmth and aeration.
- Odor Control: If you notice a bad smell, add more browns to absorb excess moisture and reduce odor.
By adopting these practices, you'll not only contribute to a greener planet but also witness the remarkable transformation of your garden. Rich, fertile soil leads to robust plant growth, making your gardening efforts truly rewarding. Happy composting!
The Do's and Don'ts of Composting
Do add fruit and veggie scraps, coffee grounds, eggshells, and yard waste. Don't include meat, dairy, diseased plants, or pet waste, as these can attract pests and cause odours.
The Essential Do's and Don'ts of Composting: A Guide for the Eco-Conscious Gardener
In today's eco-conscious world, composting has emerged not just as a gardening trend but as a vital practice for sustainable living. By converting organic waste into nutrient-rich soil, composting plays a crucial role in reducing landfill waste, cutting down methane emissions, and nourishing our gardens naturally. But to harness its full potential, it's essential to understand the do's and don'ts of this environmentally-friendly process.
The Vital Do's of Composting
1. Incorporating a Variety of Organic Waste Materials: Your compost pile thrives on diversity. Kitchen scraps like vegetable peels, fruit waste, coffee grounds, and eggshells; garden debris such as leaves, grass clippings, and plant prunings; and even certain household items like shredded newspaper, cardboard, and pure wool or cotton rags are all excellent additions.
2. Balancing Browns and Greens: For a healthy composting process, maintaining the right ratio of brown (carbon-rich) and green (nitrogen-rich) materials is crucial. Aim for about 3 parts brown to 1 part green. This balance ensures optimal decomposition, minimizes odors, and speeds up the composting process.
3. Turning the Pile Regularly: Oxygen is a critical component of composting, aiding in the breakdown of organic matter and preventing foul odors. By turning your compost pile every few weeks, you introduce air into the system, promoting efficient decomposition.
The Critical Don'ts of Composting
1. Avoiding Meat Scraps and Dairy Products: While most organic matter decomposes, adding meat, bones, fish scraps, or dairy products can attract pests and produce unpleasant odors. These materials also tend to decompose more slowly, disrupting the overall balance of your compost pile.
2. Steering Clear of Pesticide-Treated Waste: Plants treated with chemical pesticides or herbicides can harm the beneficial microorganisms in your compost. These chemicals might also linger in the finished compost, potentially affecting the health of your garden plants.
3. Excluding Non-Compostable Materials: Not everything biodegradable is suitable for composting. Materials like plastics, even if labeled "biodegradable," synthetic fibers, or coated paper, do not break down easily and can contaminate your compost with toxins and microplastics.
The Unmatched Benefits of Composting
Composting offers a plethora of benefits for both our gardens and the environment. By transforming waste into a resource, we can significantly reduce the volume of garbage sent to landfills, thereby lowering greenhouse gas emissions. The end product of composting is a dark, crumbly soil conditioner, rich in nutrients and beneficial microorganisms, perfect for enhancing plant growth, improving soil structure, and retaining moisture.
Furthermore, composting encourages a deeper connection with the cycles of nature, fostering an appreciation for the value of organic matter. In an age where sustainability is paramount, adopting composting practices not only reduces our ecological footprint but also contributes to a healthier planet.
In conclusion, while composting is an accessible and beneficial activity, understanding the do's and don'ts is essential for success. By following these guidelines, gardeners can create vibrant, fertile gardens that support a more sustainable and waste-conscious lifestyle. Happy composting!
Basic Steps to Building and Maintaining Your Heap
Water your heap to keep it moist, but be cautious not to overwater. Turn it every few weeks to aerate the pile, speeding up the composting process. In time, your compost will transform into dark, crumbly soil that smells like a forest floor.

Troubleshooting Common Issues
Identifying and Solving Smell Problems
A healthy compost pile should not stink. If you encounter unpleasant odours, check your balance of greens and browns, and turn the pile to introduce air.
Navigating the Nose: Solving Smell Problems in Your Compost Pile
Ah, the sweet scent of a well-tended garden, where every bloom and leaf seems to whisper stories of growth and renewal. Among the chorus of these green tales is the humble compost pile, an unsung hero of the garden's vitality. But what happens when your compost pile starts telling a less pleasant story, one that wrinkles noses and furrows brows? Fear not, for even the stinkiest of compost issues can be resolved with a bit of know-how and elbow grease.
The Balance of Nature: The Key to Compost Harmony
At its heart, composting is a tale of balance and transformation, turning kitchen scraps and garden trimmings into nutrient-rich gold. This alchemy requires a delicate equilibrium between 'greens' (nitrogen-rich materials) and 'browns' (carbon-rich materials), air, and moisture. When balanced, this process is nearly odorless, as microorganisms busily convert waste into compost. However, when this balance tips, odors can arise, signaling it's time for intervention.
Common Culprits Behind Compost Odors
- Excess Greens: Too many kitchen scraps and not enough browns can lead to a smelly, anaerobic mess. This imbalance often results in a putrid smell.
- Lack of Browns: Browns not only add carbon but also structure, allowing air to flow freely and keeping the pile oxygenated.
- Poor Airflow: A compacted or overly wet pile can suffocate, slowing down decomposition and causing unpleasant smells.
Restoring Scent-sational Balance: Practical Solutions
- Add More Browns: If your compost smells like rotten eggs, it's time to introduce more browns. Dry leaves, straw, shredded newspaper, or sawdust can help absorb excess moisture and reintroduce carbon into the mix.
- Turn and Aerate: Regularly turning your compost pile reintroduces oxygen, kickstarts decomposition, and can quickly eliminate bad odors. Tools like compost aerators or a simple garden fork can make this task easier.
- Adjust Moisture Levels: Your compost should feel like a wrung-out sponge—moist but not dripping. If it's too wet, add more browns. If it's too dry, a sprinkle of water as you turn the pile can do wonders.
- Monitor Temperature: A healthy compost pile will generate heat. If it's cold and smelly, it might need more greens to heat up. Conversely, if it's too hot, turning the pile to cool it down and prevent anaerobic pockets can solve the issue.
Preventive Measures and Troubleshooting Tips
- Layering: When adding new material, layer your greens with browns to prevent matting and encourage airflow.
- Temperature Checks: Use a compost thermometer to keep an eye on your pile's temperature. It can help you gauge the health of your compost and act accordingly.
- Moisture Monitoring: If unsure about moisture levels, the squeeze test (grabbing a handful and squeezing) never fails. Adjust with water or browns as needed.
- Regular Inspection: A quick check every week can help catch and correct imbalances before they become problematic.
Should your compost still struggle after these adjustments, consider starting a new pile and using the troubled batch as a base layer. This allows you to correct past mistakes while not wasting any materials.
Remember, composting, much like gardening itself, is a practice of patience and learning. Each challenge is an opportunity to grow and understand the intricate dance of nature a little better. With these tips in hand, may your compost heap transform from a source of concern to a fountain of fertility, enriching your garden and delighting your senses once again. Happy composting!
Managing Pests in Your Compost
Pests are attracted to specific materials in your compost. By avoiding meat and dairy and properly covering your compost, you can keep unwelcome critters at bay.
Gardening in the UK offers a delightful palette of experiences, from the first blossoms of spring to the lush growth of summer. However, managing pests in your compost is a chapter every gardener must face to maintain this idyllic garden narrative. Fear not, as with a sprinkle of know-how and a dash of diligence, you can keep your compost rich and thriving, turning the page on pests without harming the environment.
Building Your Storybook Compost
1. The Plot Thickens with the Right Ingredients: Avoid adding meat, dairy, and oily foods to your compost. These materials are like sending an open invitation to pests. Stick to plant-based scraps, yard waste, and appropriate brown materials to avoid attracting unwanted guests.
2. A Twist in the Plot with Natural Repellents: Certain additions act as natural deterrents for pests. For instance, crushed eggshells not only add calcium but also deter slugs and snails. Similarly, sprinkling a thin layer of coffee grounds can repel ants and other small insects, enriching your compost with nitrogen in the process.
3. Crafting a Barrier: Like any good fortress, your compost needs defenses. Physical barriers, such as a securely fitting lid or a compost bin with fine mesh sides, can prevent pests from infiltrating. If using an open pile, covering new additions with a layer of browns (such as straw or leaves) can mask the scent from attracting critters.
4. The Heroic Act of Turning: Regularly turning your compost not only aerates and speeds up the decomposition process but also disturbs flies looking to lay eggs and deters rodents by disrupting their nesting plans.
5. Inviting Allies to the Garden: Encouraging beneficial wildlife can be a game-changer. Birds, hedgehogs, and even certain insects can help control pest populations. Consider installing a bird feeder or a small pond to invite these allies into your garden.
6. The Magic of Neem: Neem oil, derived from the neem tree, is celebrated for its pest-repelling properties. A light misting over your compost can deter various pests while being safe for beneficial insects and the environment. Remember, a little goes a long way; use sparingly and diluted according to package instructions.
7. The Enchanted Circle of Companion Planting: Planting strong-scented herbs like mint, lavender, or citronella around your compost area can provide a natural barrier against pests. These plants serve a dual purpose, enhancing your garden's aroma and beauty while protecting your compost.
In the tale of your garden, managing pests in your compost is but one chapter among many. By incorporating these tips, you not only ensure the success of your composting efforts but also contribute to the larger story of ecological gardening. Pests, after all, have their role to play in the ecosystem, but with thoughtful strategies, we can keep them from becoming antagonists in our gardening saga. May your garden continue to be a place of harmony, growth, and green abundance.

Using Your Compost
How to Know When Your Compost is Ready
Your compost is ready to use when it's dark, crumbly, and earthy-smelling. This transformation usually takes a few months to a year, depending on your composting setup and materials.
Ah, the magical process of transforming kitchen scraps and garden waste into compost—a gardener’s gold! It’s a tale of patience and diligence, culminating in the rewarding moment when you can enrich your garden beds with this nutrient-rich material. But how do you know when your compost is ready to play its starring role in your garden? Allow me to guide you through this exciting chapter.
Is Your Compost Ready for the Limelight?
- The Look: Mature compost resembles dark, crumbly topsoil, a stark transformation from the scraps you started with.
- The Smell: Ready compost smells earthy and pleasant, shedding any raw or unpleasant odors it may have had during its decomposition saga.
- The Touch: It should feel like moist soil, not too wet or dry. If it clumps together or feels spongy, it might need more time.
Crafting Quality Compost: A Step-by-Step Guide
- Choosing the Right Cast: Your compost heap thrives on a balanced diet of greens (nitrogen-rich materials like vegetable scraps and grass clippings) and browns (carbon-rich materials like dried leaves and cardboard). Aim for a ratio of about 3 parts browns to 1 part greens.
- Avoiding the Villains: Meat, dairy, and oily foods are a no-go—they attract pests and can disrupt the composting process. Likewise, avoid composting diseased plants or those treated with chemical pesticides.
Best Practices for Starring Compost
- Turn the Spotlight Regularly: Aerating your pile by turning it every few weeks encourages decomposition and prevents odors.
- Keep It Hydrated: Like all stars, your compost needs proper hydration—not too wet, not too dry. Aim for the moisture level of a wrung-out sponge.
- Temperature Check: A warm or hot compost pile indicates that decomposition is happening. Once it cools, it may be nearing readiness.
Storing Your Compost
Once deemed ready, if not using immediately, store your compost in a covered area to maintain its moisture and prevent it from being compacted by rain.
The Grand Debut: Applying Your Compost in the Garden
- Preparing the Stage: Loosen the top layer of soil in your garden beds.
- Application: Spread a layer of compost about 2-4 inches thick atop the soil. For new plantings, mix the compost into the planting holes or rows. For established plants, use it as a top dressing around the base.
- Encore Performance: Compost can be applied 2-3 times during the growing season to support plant health and productivity.
Encore! Monitoring Results for Healthy Yields
After applying compost, monitor your plants for signs of improved health and vigor:
- Enhanced Growth: Look for stronger stems and more robust foliage.
- Improved Flowering and Fruiting: More blooms and higher yields are telltale signs your compost is working its magic.
- Soil Structure: Over time, compost improves soil aeration, drainage, and nutrient retention.
Final Curtain Call
In terms of timing, compost typically takes 3-6 months to mature, depending on factors like material balance, turning frequency, and climate. Some gardeners opt for a longer cure time, letting their compost mature for an additional month or two before use to ensure stability and maximum benefit.
Remember, every garden's narrative is unique, and through trial, observation, and adjustment, you'll find the perfect role for compost in yours. Here's to the enriching tale of composting—may it bring health and vitality to your garden stage!
Ways to Use Compost in Your Garden
Enrich garden beds, boost your potting soil, use it as mulch, or make “compost tea” for watering plants—the possibilities are endless! Compost not only improves soil structure but also nourishes plant life, promoting a vibrant, healthy garden.

Embark on Your Composting Journey Today
Composting is a powerful tool in reducing household waste and nurturing your garden. It’s a tangible step towards living more sustainably and creating a greener planet for future generations.
We hope this guide inspires you to start your compost heap and explore the endless benefits of composting. Remember, each peel, each leaf, and each handful of compost is a step towards a healthier garden and a healthier world.
We'd love to hear about your composting adventures! Share your stories, tips, and photos with us and join the conversation on eco-friendly gardening practices. Together, we can grow a greener tomorrow.