Starting from Scratch: The Beginner's Guide to Planting this Spring
Are you keen to don your gardening gloves and delve into the world of horticulture this spring? Whether you're dreaming of lush vegetable patches or enviable flowerbeds, laying down roots as a budding gardener has never been more thrilling. In this guide, we'll escort you through every step, ensuring your foray into planting is both fruitful and joyous.
A Journey into Seed Propagation: The Magic of Sowing Seeds
Ah, the magic of sowing seeds! There's nothing quite like witnessing that first sprout breaking through the soil, a testament to life's resilience and the gardener's patience. Seed propagation is a fascinating process, full of wonder and potential. It's an integral part of gardening that requires careful planning, preparation, and timing.
Why Start Seed Preparation Early?
Starting seed preparation early is crucial for several reasons. First, it allows your seeds to establish a robust root system before they confront the harsh outdoor elements. Second, it provides you with a head start on the growing season, enabling you to enjoy your plants' blooms or harvests earlier. Finally, early preparation increases your chances of success by giving you ample time to troubleshoot any issues that may come up.
Examples of Different Seeding Times
Different plants require different seeding times. For instance, the hardy sweet pea (Lathyrus odoratus) is best sown in late winter or early spring, as it prefers cooler temperatures to germinate. On the other hand, tomatoes (Solanum lycopersicum) are warm-season crops that need to be started indoors 6-8 weeks before the last spring frost date.
Preparing the Soil for Seed Sowing
Preparing the soil for seed sowing is a science and an art. The first step involves removing any debris and breaking up large clumps of soil. Next, enrich the soil with organic matter like compost or well-rotted manure. This enhances the soil's fertility and improves its structure, promoting optimal seed growth. See Our Soil Guide Here.
When to Sow Seeds
The ideal time to sow seeds depends on the type of plant and its specific needs. Generally, most seeds are sown in early spring when the soil has warmed up but before the heat of summer sets in. However, some seeds, like those of the hardy annuals, can be sown in autumn to enable them to germinate the following spring.
Maximising Germination Rate
To maximise the germination rate, always use fresh seeds and ensure they're sown at the correct depth - typically two to three times the diameter of the seed. Maintain a consistent temperature and moisture level in the soil, as fluctuations can hinder germination.
Challenges and Best Practices
Gardeners often encounter challenges when sowing seeds, such as inconsistent germination, seedling diseases, and pests. To overcome these, use sterile seed starting mix to prevent diseases, cover your seed trays with a plastic dome to maintain humidity, and monitor your seedlings regularly for any signs of distress.
Remember, patience is key! Some seeds take longer to germinate than others, so don't fret if you don't see immediate results. The joy of gardening comes not only from the final product but also from the journey of nurturing life from a tiny seed. So, grab those gardening gloves and let's get sowing!
"Growth is a process, one that requires patience, persistence, and a heart willing to learn through trial and triumph."—Hilton Carter, plant connoisseur.
Essential Tools and Materials
To embark on this verdant voyage, you'll need a toolkit as fundamental as the humble spade. Secure yourself quality seeds, nutrient-rich soil, apt containers, a trusty watering can, and a spot that basks in the generous sunlight. These are the bread and butter of gardening—the foundations upon which all green thumbs are built.
As we find ourselves in the heart of February, it's time to start thinking about sowing seeds for the upcoming season. Whether you're a seasoned green thumb or a budding horticulturist, this comprehensive list will arm you with the essential tools and supplies you need to get your indoor seed sowing off to a flying start, ready to transplant outside when the weather warms up.
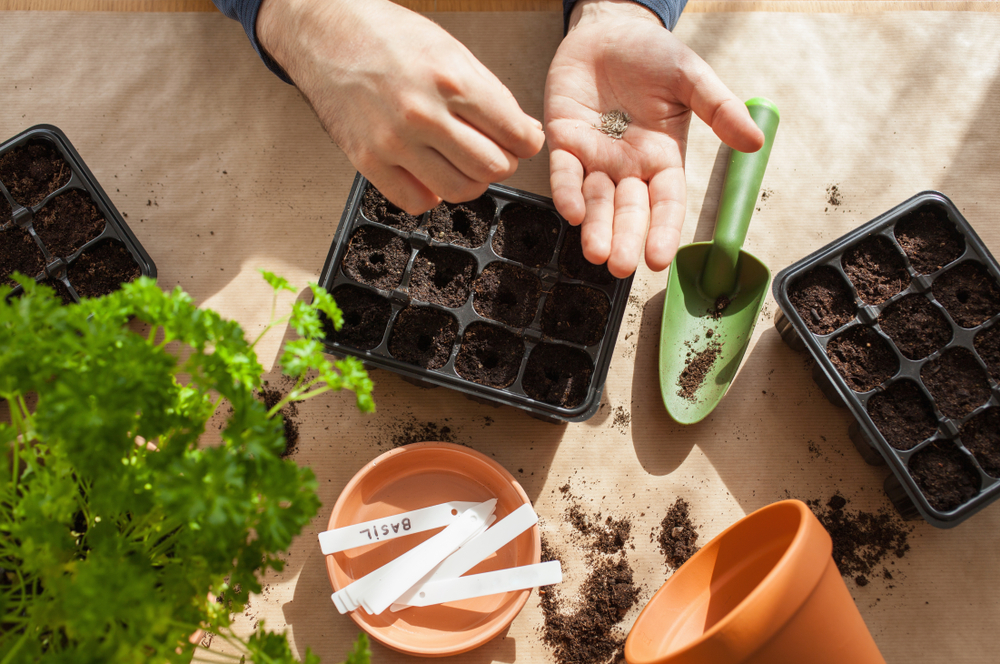
Indoor Sowing Essentials
- Seed Trays or Pots: Choose from a variety of options such as plastic trays, peat pots, or biodegradable pots. These should be deep enough to allow for root growth and have drainage holes to prevent waterlogging. Buy your Garden Seed Trays and Pots Here
- Seed Compost: A fine-grade, nutrient-rich compost is key. You'll need approximately 20 litres for a standard-sized seed tray. Buy your Garden Seed Compost Here
- Seeds: The quantity and type will depend on your garden's size and your personal preferences. However, a general rule of thumb is to have 2-3 times the number of seeds as the plants you want, to account for some not germinating. For February, consider chillies, aubergines, and begonias which are perfect to start indoors this month.
- Propagator: A heated propagator can help maintain an ideal temperature for germination.
- watering can: A small one with a rose attachment is perfect for gently watering seeds without displacing them.
Outdoor Transplanting Tools
- Trowel: This tool is ideal for digging individual holes for each plant. Find a New Trowel Here
- Garden Fork: Useful for preparing the planting area by turning and loosening the soil. Find a New Garden Fork Here
- Mulch and Fertilizer: Organic mulch helps retain soil moisture, while a slow-release fertilizer (around 2kg for a 10 sq meter area) provides essential nutrients.
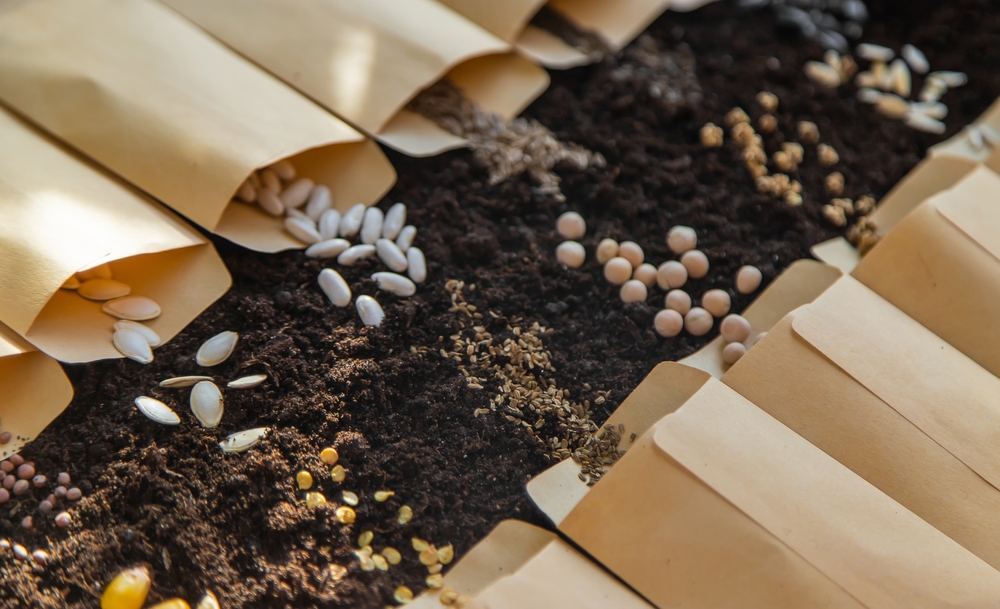
Seed Selection
Choosing the right seeds is akin to selecting the right companions for a grand adventure. Opt for varieties that are hearty and forgiving, such as marigolds or cherry tomatoes, which can withstand a little beginner's uncertainty. When perusing seed packets, look for growth time, ideal conditions, and care instructions. Understanding these clues is crucial for a rewarding planting season.
Planting Process
Once you have your treasure trove of seeds, it's time to tuck them into their beds. Prepare your soil with love, ensuring it's loose and fertile. Then comes the key question of depth—your seed packet will advise how deep to plant. As for spacing, you want to avoid a crowd—a bit of elbow room does wonders for growth.
Sowing in February: A Green Thumb's Guide for UK Gardeners
As the frosty veil of winter starts to lift, February heralds the beginning of a promising gardening season. This month is an exciting time to sow a diverse range of plants, trees, shrubs, and vegetables, setting the stage for a vibrant, productive garden. Here are the top picks that you can start sowing in February:
Vegetables
- Tomatoes: A favourite for many gardeners, tomato seeds can be started indoors in February. They'll need a sunny spot to thrive.
- Peppers: Both sweet and chilli peppers can be started early indoors where it's warm.
- Eggplant (Aubergine): Start these seeds indoors now and they'll be ready for transplanting when the weather warms up. Buy Here
- Broccoli, Cauliflower, Brussels Sprouts, and Cabbage: These hardy vegetables can be started indoors from seed in February. Buy Here
- Lettuces: A cool-season crop, lettuces can be started indoors now for an early spring harvest. Buy Here
- Broad Beans: Direct sow these hardy legumes outdoors under cloches or in pots indoors. Buy Here
- Kale: Another hardy vegetable, kale can be sown directly into the garden soil. Buy Here
- Beetroot, Carrot, Radish, Peas: These root crops and peas can be sown directly into well-prepared beds later in the month. Buy Here
Flowers and Shrubs
- Sweet Peas: Sow sweet peas indoors and transplant them outdoors when all risk of frost has passed. Buy Here
- Antirrhinum and Chrysanthemum: Start these summer bloomers indoors in February. Buy Here
- Dahlias and Alliums: Dahlia tubers can be started into growth indoors, and allium bulbs can be planted directly into the garden. Buy Here
Indoor Plants
- Pilea, Peperomia, Ivy, Artillery Fern, Button Fern, Baby Tears, and Creeping Fig: These houseplants can be propagated indoors from cuttings or divisions. Buy Here
Trees
- Red Maple and Star Magnolia: While not sown from seed, these trees can be planted as saplings in February. Buy Here
Planting Process
Once you have your treasure trove of seeds, it's time to tuck them into their beds. Prepare your soil with love, ensuring it's loose and fertile. Then comes the key question of depth—your seed packet will advise how deep to plant. As for spacing, you want to avoid a crowd—a bit of elbow room does wonders for growth.
Step 1: Preparing the Soil - The Cradle of Life
Our journey begins with preparing the soil, the cradle that will nurture your seeds into thriving plants. Treat this step as laying out a welcome mat for your seeds. You want your soil to be loose and fertile, creating a cosy, nutrient-rich bed for your seeds to snuggle into.
Break up any large clumps using a garden fork or a tiller, ensuring the soil is fine and crumbly. Enrich it with well-rotted compost or organic matter, infusing it with vital nutrients. This crucial step sets the stage for your seeds to germinate enthusiastically and grow robustly.
Step 2: Digging the Right Depth - The Art of Burial
Now that your soil is prepared, it's time to tuck your seeds into their beds. But how deep should they go? This is where the seed packet comes into play. Consider it your mini instruction manual, offering valuable guidance tailored specifically to your seeds.
As a rule of thumb, most seeds need to be sown at a depth around twice their size. But always refer to your seed packet for the best advice. Remember, burying your seeds too deep might make it difficult for them to break through the soil surface, while planting them too shallow could leave them exposed and vulnerable.
Step 3: Spacing - The Dance of Distance
Next, we move onto spacing. Think of this as choreographing a dance where each plant needs its own space to twirl without bumping into its neighbours. Proper spacing allows for good air circulation, reducing the risk of disease, and ensures each plant has access to the nutrients it needs.
Again, refer to your seed packet for specific spacing instructions. If in doubt, err on the side of caution—giving your plants a bit more elbow room can do wonders for growth.
Step 4: Watering - The Elixir of Life
Finally, it's time to water your newly planted seeds. Water is the elixir of life, sparking the magic of germination. Use a watering can with a rose attachment to gently shower your seeds, ensuring the soil is moist but not waterlogged.
And there you have it! You've successfully embarked on your seed-sowing journey. Now all that's left is to wait, watch, and welcome the exciting signs of new growth. Remember, gardening is a labour of love, requiring patience and persistence. But the rewards are immeasurable, from the joy of the first sprout to the pride of a flourishing garden.
Nurturing Your Plants
You've provided a home and sustenance; now, like a patient gardener, monitor and celebrate each sprout. Doting over your green charges involves staying vigilant to signs of distress. From discolouration to droopy leaves, each symptom is a plant's plea for help.
You've lovingly prepared the soil, sowed your seeds, and now it's time to step back and watch the magic unfold. But remember, your role as a patient gardener doesn't end here; it's just beginning. Nurturing your plants is akin to tending to a symphony of life, where each sprout is a note in the melody of growth.
The Celebration of Sprouting
When those first green shoots push through the earth, it's a moment of pure joy, a testament to your hard work and nature's resilience. Each sprout is a promise of growth, a beacon of potential. It's a daily celebration, watching these tiny seedlings stretch towards the sky, eager to unfurl their leaves and bloom into their full glory.
Vigilance: The Guardian of Growth
But as any seasoned gardener knows, this journey isn't always smooth sailing. Just as a ship's captain must navigate stormy seas, so too must a gardener stay vigilant to signs of distress. Your plants communicate with you, expressing their needs through subtle cues and signals.
Discolouration, for instance, might signal nutrient deficiency, while droopy leaves could indicate overwatering or underwatering. Spots or mould on the leaves might be a sign of disease or pests. Each symptom is a plant's plea for help, a call to action for you, their dedicated caregiver.
Responding with Care
Armed with vigilance and knowledge, you can respond swiftly to these pleas. Adjusting watering levels, amending the soil with nutrients, or introducing organic pesticides can often remedy these issues. Remember, a quick response can make the difference between a thriving plant and a struggling one.
The Rewards of Nurturing
The rewards of this nurturing journey are manifold. Not only will you cultivate a vibrant garden, but you'll also reap the mental health benefits that gardening offers. The act of nurturing plants fosters mindfulness, reduces stress, and enhances wellbeing, making gardening a therapeutic pastime.
So, as you monitor and celebrate each sprout, know that you're not just growing plants; you're also growing a sanctuary of calm, a refuge of beauty, and a testament to your nurturing spirit.
Celebrating Your Green Thumb
As blooms unfurl and shoots soar upwards, take pride in the oasis you've cultivated from mere seeds. This is your handiwork, a testament to care and dedication. And remember, a true gardener’s journey is perpetual—a cycle of learning and loving the craft.
Conclusion
Embrace the gratification that comes from tilling the earth and nurturing life. Let each success embolden you and every misstep be a learned wisdom. Cultivate not just plants, but a lifelong passion—for in the soft soil under the spring sun lies the soul of the garden you will grow.
Now go forth, future guardians of green realms, for your patch of earth awaits and the season of planting is nigh! 🌱