Transforming your garden with lush, green turf is one of the most rewarding projects for any homeowner. While seeding and artificial grass have their advantages, laying natural turf offers a genuine, vibrant lawn that's perfect for everything from family gatherings to a serene spot for relaxation. Whether you're a gardening novice or looking to spruce up your backyard, this guide will walk you through the process of laying turf in just five simple steps.
Introduction: Why Choose Turf?
There are numerous benefits to opting for turf over seeding or artificial grass:
- Immediate Results: Unlike seeding, which can take weeks or even months to establish, turf provides an instant lawn.
- Durability: Natural turf is resilient, recovering well from wear and tear, making it ideal for active households.
- Environmental Benefits: Turf helps improve air quality, reduces heat, and provides a habitat for wildlife.
- Aesthetic Appeal: Nothing beats the lush, natural look of a beautifully laid turf.
Now, let’s dive into the step-by-step process of laying turf in your garden.
Step 1: Prepare the Soil for Turf
Testing and Amending the Soil
Before laying turf, proper soil preparation is crucial to ensure healthy growth. Here’s how you can do it:
- Soil Testing: Start by testing your soil's pH level. Ideally, it should be between 6 and 7. You can purchase a soil testing kit from any garden centre.
- Amend the Soil: Based on your soil test results, you may need to amend the soil. Add lime to raise the pH or sulphur to lower it. Ensure your soil is rich in organic matter by incorporating compost or well-rotted manure.
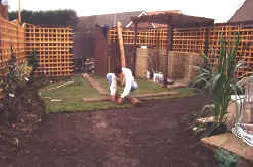
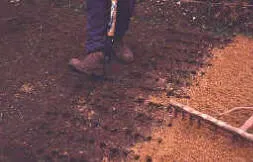
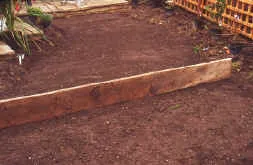
Clearing and Leveling the Area
- Remove Existing Vegetation: Clear away any old grass, weeds, or debris. You can use a spade or a sod cutter for larger areas.
- Level the Ground: Rake the soil to remove stones, ensuring the ground is level. A smooth, even surface is essential for the turf to establish properly.
Step 2: Measuring and Ordering Turf
Accurate Measurements
- Calculate the Area: Measure the length and width of your lawn to calculate the total area. Add an extra 5% to account for cutting and overlapping.
- Order Quality Turf: Purchase high-quality turf from a reputable supplier. This ensures that your turf is free from weeds and pests.
Step 3: Laying the Turf
Step-by-Step Turf Installation
- Start Laying Turf: Begin laying turf along a straight edge, such as a patio or fence line. Place the pieces end-to-end without overlapping.
- Stagger the Joints: Lay the next row in a staggered brick-like pattern to avoid visible seams.
- Trim the Edges: Use a sharp knife or edging tool to trim excess turf along flower beds and paths.
Step 4: Watering and Maintenance
Post-Installation Care
- Water Immediately: Once your turf is laid, water it thoroughly to help the roots establish. Continue watering daily for the first two weeks.
- Mowing: Wait until the turf is well-rooted before your first mow—usually around 3-4 weeks. Adjust your mower to the highest setting and gradually reduce the height over subsequent mows.
- Fertilizing: Apply a balanced fertilizer after the first mowing to promote healthy growth.
Step 5: Maintaining Your Turf
Long-Term Lawn Care
Proper maintenance ensures your lawn remains lush and green:
- Regular Mowing: Keep your lawn at the recommended height for your turf type.
- Watering Schedule: Adjust your watering based on the weather—less frequent but deeper watering encourages deep root growth.
- Weed and Pest Control: Regularly inspect your lawn for weeds and pests, addressing any issues promptly.
Final Thoughts: The Importance of Turf Maintenance
Maintaining your newly laid turf is vital for its longevity and appearance. A well-kept lawn not only enhances your garden's aesthetic appeal but also increases your home's value. Remember, consistency is key. Regular watering, mowing, and fertilizing will keep your turf looking its best throughout the seasons.
Conclusion: Get Started and Share Your Success!
Now that you’re armed with the knowledge to lay turf like a pro, it’s time to get started on your garden transformation. We’d love to hear about your turf laying experiences and see your beautiful lawns! Share your success stories or ask any questions in the comments below.
By following these steps, you'll have a stunning, lush lawn in no time. For more gardening tips and advice, make sure to follow our blog.
 Stack of turf grass for lawn. roll of sod, turf grass roll.
 Gardener applying turf rolls in the backyard
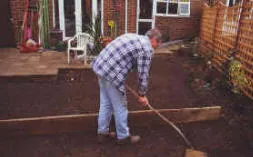
 Worker leveling soil before laying grass sod at backyard