How and When to Prune Azalea Mollis Shrubs
An Overview of growing and maintaining Azalea Mollis Shrubs in the UK
Azalea Mollis shrubs are a beautiful addition to any garden in the UK, providing an abundance of bright pink blooms every spring and vivid evergreen foliage for most of the year. These hardy shrubs can be both easy and rewarding to grow and maintain with proper care, making them suitable for both beginner and experienced gardeners alike.
In this blog post, we will explore how to successfully grow Azalea Mollis Shrubs in the UK environment, including best soil composition and watering frequency. We’ll also discuss how to properly prune these plants each season as well as ideal placement options within your landscape. So whether you’re new to gardening or have years of experience under your belt, follow along as we discuss all things Azalea Mollis!What is an Azalea Mollis Shrub and what are its unique characteristics
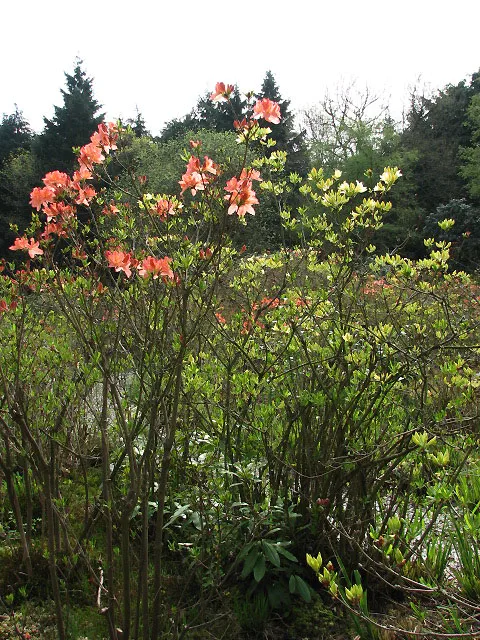
The Azalea Mollis Shrub is a beautiful and hardy flowering bush that can be found in many gardens. This species of azalea has an upright growth habit, which can reach up to 6 feet tall, with light green long and narrow leaves. During the spring season, the Azalea Mollis Shrub produces frilly blooms of white or deep pink flowers, adding a colourful reminder of the warm weather to come. These flowering shrubs are quite resilient to pests and other issues gardeners typically face while gardening. They will also require minimal maintenance during their blooming season by pruning or cutting back dead branches, ensuring they maintain their fullness throughout the year. The Azalea Mollis Shrub is easy to care for and provides a robust - yet delicate - addition to any garden.
An Overview of growing and maintaining Azalea Mollis Shrubs
Ideal growing conditions for your Azalea Mollis Shrub in the UK climate
For gardeners in the UK looking to care for their Azalea Mollis Shrub, it is essential to provide the right environment, otherwise they may struggle to survive and flourish. In terms of sunlight exposure, an area that receives some midday sun but is slightly sheltered from strong afternoon light is ideal. During the warmer months, daily watering with moderate soil moisture is advised and during colder spells a layer of mulch can protect the soil from high temperatures as well as prevent weeds from competing for nutrients. An acidic soil rich in humus will also help the shrub get the best out of its environment. With these conditions provided and regular pruning and trimming, your Azalea Mollis Shrub should be a wonderful addition to any garden in the UK climate.
The History of Azalea in the UK

Azaleas, which are members of the Rhododendron family, have a long history in the United Kingdom. These brightly coloured flowers have been used to adorn gardens for hundreds of years, and were first brought to Europe from Asia in the sixteenth century. Azaleas quickly became a popular form of gardening as they are hardy and can survive harsh winters. With the discovery of more varieties throughout the nineteenth century, these gorgeous plants continue to captivate British gardeners with their vibrant blooms. Today, thousands of homes across Britain proudly display azaleas in their gardens and make special care to ensure that these beautiful flowers can flourish all year round.
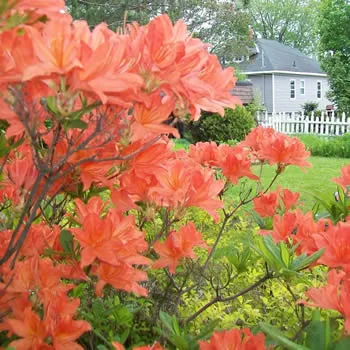
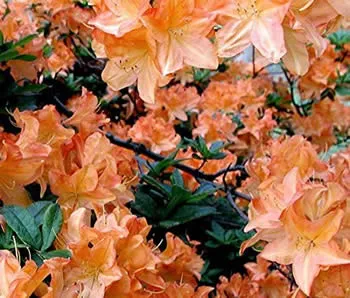
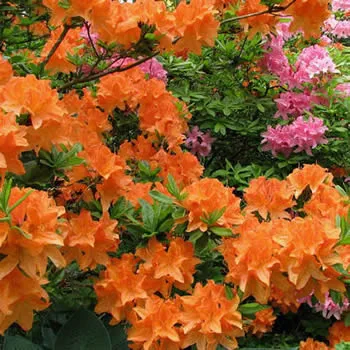
Azalea Mollis, a species of flowering shrub in the Rhododendron genus, has a fascinating history that dates back centuries. Its journey to the United Kingdom (UK) began when seeds from newly discovered deciduous azalea species were sent back to Europe for observation in 1734. Unique Characteristics and Growing Habits Azalea Mollis is known for its vibrant and large blooms, which come in an array of colours, including yellow, orange, and pink. These deciduous azaleas shed their leaves annually and are renowned for their hardiness, tolerating temperatures as low as -10 degrees. Introduction to the UK and Cultural Impact The introduction of Azalea Mollis to the UK marked a significant moment in horticultural history. The hybridization of deciduous azaleas was initiated in the 1820s by a Belgian baker living in Ghent. He started by crossing Rhododendron species, leading to the creation of Azalea Mollis. In the UK, these hybrids quickly gained popularity due to their stunning blooms and adaptability to the country's climate. Their ease of cultivation and the beauty they added to gardens made them a favorite among both amateur gardeners and professional horticulturists. Current Status and Cultivation in the UK Today, Azalea Mollis continues to be a beloved staple in many British gardens. They are typically planted in partially shaded areas with well-drained, acidic soil. Blooming in late spring to early summer, these plants add a burst of colour to gardens at a time when many other plants are just starting to grow. Maintenance, Cultivation, and Uses Azalea Mollis requires minimal maintenance once established. They prefer slightly acidic soil and benefit from a layer of mulch to keep the roots cool and moist. Pruning, if needed, should be done immediately after flowering to ensure buds set for the following year. In modern landscape design, Azalea Mollis is often used in borders for its vivid colour and lush foliage. Its ability to grow in partial shade also makes it an excellent choice for woodland gardens. In conclusion, Azalea Mollis has a rich history, from its origins in Asia to its journey to Europe, and ultimately, its beloved status in the UK. Its vibrant blooms and resilient nature have earned it a permanent place in the hearts of British gardeners, making it a timeless classic in horticulture.Plant care tips to ensure they grow strong and healthy
Gardening is a labor of love that produces a rewarding end result. To ensure that your plants get the best start in life and continue to be strong and healthy, there are some basic rules for plant care you should follow. First, make sure that you're providing your plants with plenty of sunlight as much as possible - this will enable them to photosynthesize, giving them the energy they need for growth.
Additionally, ensure that the soil is well aerated so it can hold enough oxygen for the roots to survive and moisture so their roots have access to water. Regularly add organic matter like compost or fertilizer to replenish nutrients in the soil and give your plants an extra boost. Lastly, remember that plants need at least one inch of water per week (or more if it's very hot outside). With these simple tips, you'll be watching your garden flourish in no time!How much sun and water do they need each day

Gardening can be an incredibly rewarding activity, but it takes a bit of practice to achieve success. Knowing how much sun and water plants need each day is essential for any gardener. Generally speaking, most plants will do best when they receive between six to eight hours of direct sunshine per day, although this varies depending on the type of plant you're growing.
Additionally, it's important to provide sufficient water for your plants, since too little or too much can cause problems. It's good practice to pay close attention to the soil moisture and adjust accordingly - typically this means providing 1-2 inches of water a week during the growing season and reducing watering after the plants have grown or fruited. With the right number of hours in the sun and appropriate watering schedule, you should be able to keep your plants thriving all season long!Pruning techniques for maintaining a beautiful shape and size

Gardening can be an incredibly rewarding and peaceful hobby, but it requires a certain amount of knowledge and expertise. To ensure that your plants stay healthy and looking their best, you should regularly prune them with the appropriate techniques for the species. Weeds can rob nutrients from the soil, and by proactively controlling them you will help prevent damage to your plants' health. If you need guidance on where to start when it comes to pruning, there are many Pruning Guides available online with clear instructions. With just a bit of time invested in researching the proper pruning techniques for maintaining your desired shape and size, you will be rewarded with a beautiful garden throughout the entire growing season.
Common issues to look out for and how to prevent them from occurring

Gardeners must be proactive in order to prevent any common issues from occurring. Yellow leaves and disease are two of the most common issues that can occur, which may come from pests, fungus, or improper soil care. Pests can be managed through the purchase of beneficial bugs, such as ladybugs and praying mantises, and also with other preventative measures like row covers. Fungus growth can be prevented by avoiding watering plants at night, employing mulch for soil cover and consistent pruning. Soil care is also very important to preventing poor health in plants; replenishing nutrients with natural fertilizers is recommended to keep it nurtured. By following these preventive measures, gardeners will be able to maintain a healthy garden that is free from any common issues.
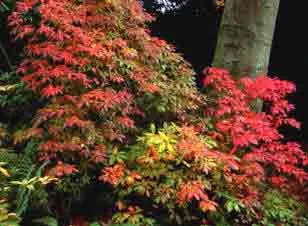
Azalea leaves are known for their bright, vibrant colours, but if your plant’s foliage is beginning to turn yellow, it could be a sign of a larger problem. Here is an overview of the causes and cures for yellowing azalea leaves:
What Causes Yellowing Leaves?
The most common cause of yellowing azalea leaves is incorrect fertilization. Too much nitrogen can cause excessive growth which results in the foliage turning yellow as the plant struggles to sustain its abundant new growth. Similarly, too much potassium can lead to discolouration as it can interfere with photosynthesis processes. Additionally, over-watering or under- watering can also result in yellowed foliage due to nutrient deficiencies or lack of access to oxygen in the soil.
How To Cure It:
The first step is to assess the situation and determine what might be causing your azalea’s yellowed leaves. If you suspect that fertilizer is at fault, reduce the amount you are using and make sure that any nutrient spikes caused by high concentrations of nitrogen or potassium have not occurred. If necessary, flush out your soil with water if too much fertilizer has been applied. In addition, check that you are providing your plants with adequate watering; look out for signs of wilting or dryness and adjust accordingly. Finally, make sure there is good air circulation around your plants since this will help them breathe easier and prevent any fungal diseases from taking hold!
In summary, improper fertilization is often the culprit when it comes to yellowing azalea leaves. By assessing your plant’s needs and adjusting accordingly you should be able to restore its lush green colour soon enough!
Comprehensive Report on Diseases and Pests Affecting Azalea Mollis in the UK
Azalea Mollis, a popular deciduous azalea, is renowned for its vibrant, large blooms and hardy nature. It thrives in slightly acidic, well-drained soil and partial shade. However, like all plants, it can be susceptible to certain diseases and pests.
Diseases-
1. Powdery Mildew
- Signs and Symptoms: This fungal disease manifests as white or grey powdery spots on the leaves, stems, and flowers.
- Detection and Treatment: Early detection is essential. Prune and dispose of infected parts, and apply a fungicide if necessary.
-
2. Leaf Gall
- Signs and Symptoms: Leaf gall causes the formation of fleshy, irregularly shaped galls on the leaves.
- Detection and Treatment: Infected leaves should be removed and destroyed before the galls open and release spores.
-
3. Phytophthora Root Rot
- Signs and Symptoms: This soil-borne disease causes wilting, yellowing of leaves, and root decay.
- Detection and Treatment: Affected plants should be removed and destroyed. Improve soil drainage to prevent recurrence.
-
1. Vine Weevils
- Signs and Symptoms: Notched leaves are a sign of adult vine weevil feeding. Larvae feed on roots, causing wilting.
- Detection and Treatment: Inspect plants regularly. Use biological control methods or pesticides where appropriate.
-
2. Azalea Lace Bugs
- Signs and Symptoms: Leaves show stippling, bleaching, or a grey, bluish-silver colour.
- Detection and Treatment: Regular inspection is key. Use insecticidal soap or horticultural oil to control infestations.
-
3. Azalea Caterpillars
- Signs and Symptoms: Defoliation of the plants, presence of black and yellow caterpillars.
- Detection and Treatment: Handpick caterpillars or use Bacillus thuringiensis (Bt) for larger infestations.
- Regular inspection of plants can help detect diseases and pests early.
- Maintain good sanitation in the garden by removing fallen leaves and debris.
- Ensure proper watering and drainage to avoid creating a conducive environment for diseases.
- Encourage beneficial insects as they can help control pest populations.
In conclusion, while Azalea Mollis is susceptible to certain diseases and pests, with proper care and management, it remains a hardy and rewarding plant to grow.
What is the Preferred Propagation Method

When it comes to gardening and other plant-based activities, propagation is an essential step. Propagation refers to the process of creating new plants from existing ones, often involving splitting off sections of the original or creating cuttings that can be potted in separate soil. Generally, the preferred method of propagation is taking stem or root cuttings, as this gives the most reliable results while being relatively straightforward compared to grafting or tissue culture techniques. Taking stem or root cuttings requires basic knowledge in terms of timing and technique but provides a great way to produce identical clones of your favourite plants.
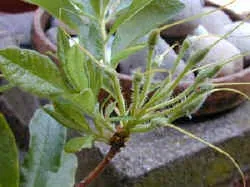
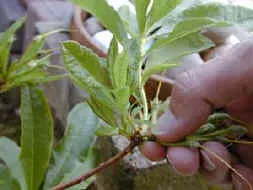
Propagating Azaleas shrubs using semi-hardwood cuttings is a great way to expand your gardens. Here’s a step-by-step guide on how to do it:
- Select the right cuttings – look for healthy stems that have grown in the last few months, as these will be young enough for successful propagation.
- Make sure to use sharp, sterilized pruning shears – this will prevent any infections or diseases from spreading to the cuttings.
- Take the cuttings when they are actively growing – choose stems with at least two leaves and make sure that the node you’re cutting from is at least three inches long and has just started to become woody.
- Prepare the soil - Start by filling a pot or container with a light yet well draining substrate such as sand or vermiculite that has been mixed with composted material like peat moss or coir fiber.
- Plant your cuttings – insert your cutting approximately one third of its length deep into the soil and press down lightly around it to form contact with the substrate and provide stability for your cuttings.
- Water your plants - Make sure to water them gently but thoroughly and keep them consistently moist throughout their rooting period without letting them get too wet otherwise they may rot!
- Place in bright, indirect light – Avoid strong direct sunlight which can cause damage, instead provide soft diffused light either in front of a shaded window or under grow lights if necessary.
- Cover with plastic - Covering your container with clear plastic wrap will help create an insulated environment while also increasing humidity levels which aids in root growth over time; don’t forget to open up once a week or so for air circulation!

Maintain regular watering schedules - In order for your Azaleas shrubs to establish their roots properly, it is important to keep the soil consistently moist without overwatering otherwise this can lead to Root Rot; aim for about twice a week depending on temperature and sunlight exposure levels!
Growing Azalea Mollis from Seed: A Comprehensive Guide

To grow Azalea Mollis from seed, you will need:
- Azalea Mollis seeds
- Seed trays or pots
- Seed compost
- Perlite or vermiculite
- Plastic bag or propagator
- Fungicide (optional)
These can be found in most garden centres or online.
Planting Conditions- 1. Soil: Azalea Mollis prefers well-drained, acidic soil. Use seed compost mixed with some perlite or vermiculite to ensure good drainage.
- 2. Temperature: Maintain a temperature of around 20°C (68°F) for optimal germination.
- 3. Sunlight: While the seeds are germinating, they should be kept in a location that receives bright, indirect light.
- Prepare the seed tray: Fill the seed tray or pots with the compost mix and water it well.
- Sow the seeds: Sprinkle the seeds on top of the compost. Do not cover them as they need light to germinate.
- Cover the tray: Place the tray in a plastic bag or propagator to maintain humidity.
- Wait for germination: This can take 3-6 weeks. Keep the compost moist but not waterlogged.
- Transplant the seedlings: Once they are large enough to handle, transplant them into individual pots.
- 1. Watering: Keep the soil consistently moist but avoid overwatering to prevent root rot.
- 2. Fertilizing: Once the seedlings have established, apply a slow-release fertilizer formulated for acid-loving plants.
- 3. Pest control: Monitor the plants regularly for signs of pests or diseases and treat accordingly.
Once the seedlings have grown a strong root system (usually by the following autumn), they can be transplanted into their permanent location in the garden. Choose a spot that gets partial shade and has well-drained, acidic soil.
In conclusion, growing Azalea Mollis from seed requires patience and care, but the reward of vibrant, large blooms is well worth the effort.
What is the best Fertilizer to use and How much

Gardening can be a rewarding activity, but one of the most important factors for success is selecting the right fertilizer. Different types of plants require different nutrients, so it's important to select a fertilizer that contains the specific ratios in order to maximize plant health. The amount and frequency of application also matters; too much fertilizer can burn or damage plants and applying it too infrequently will not yield optimal results. Generally speaking, a balanced 10-10-10 fertilizer should provide good results and should be applied every 6 to 8 weeks when there is sufficient soil moisture. Exact application requirements may vary based on soil type and specific plant needs, so research should be done in order to determine the best solution for your particular garden situation.
How to grow in Pots and Containers

Gardening in pots and containers is an exquisite way to get outdoors and express your creativity. It's a wonderful opportunity for those who have limited space to learn the fundamentals of gardening and care for plants from start to finish, as the process can be done on a much smaller scale. Begin by picking out appropriate sized pots for your plants and making sure there are drainage holes so that excess water can escape; then select good quality potting soil and your desired plants! When it comes to watering, using a spray bottle or watering can will make it much easier to disperse the water evenly throughout the pot without overcrowding. Finally, fertilizers may be added seasonally in order to give the plant nourishment. Container gardening just requires some patience and dedication, but with persistent effort you'll see the results in no time at all!
Planting an Azalea in a pot is a great way to bring a splash of colour to your outdoor living space. Here’s a step-by-step guide on how to do it:
- Select the right pot - When selecting your pot make sure that you have at least twelve inches of depth and the sides are gently sloping for optimal drainage; other requirements include good aeration, recessed holes and striking looks!
- Use quality soil - Fill your container with quality Azalea soil, which should be well drained but still retain moisture evenly throughout.
- Plant your Azalea – pick out a spot near the edge of the pot where you can sink your plant down comfortably as this will provide enough space for its roots to spread out properly.
- Water regularly - Azaleas need consistent dampness so water them fairly often, especially during hot summer months when they may require more attention; be mindful not to overwater or let them dry out too much because this can cause stunted growth or even death!
- Place in partial shade - Place the pot in partial shade as full sun can burn their leaves; when choosing a location, factor in protection from wind as well since heavy winds can cause damage which leads to weakened plants over time!
- Feed occasionally - Add an all-purpose fertilizer with nitrogen and phosphorus every few weeks during their first growing season and then taper off as they start to mature and become established; if possible, use organic fertilizers such as fish emulsion or compost tea for maximum nutrient uptake!
Fertilize sparingly – Azaleas don’t have very deep root systems so overfertilizing can lead to nutrient accumulation in their shallow soils which causes salt burns on their leaves that can inhibit further growth; use only half of what’s recommended on the packaging!
Other popular varieties of Azalea
Azalea is a highly coveted plant for gardening projects, and many varieties of this beautiful shrub exist. Some popular types include Cumberland, Gumpo White, rosebud, and George Lindley taber. The majestic Cumberland azalea has a light yellow hue with red edging on the blooms while Gumpo white adds large vivid clusters of flowers in shades of white and pink. Rosebud azalea offers gorgeous hot pink blooms to contrast with the deep green foliage. Finally, George Lindley Taber is notable for having fragrant and bright yellow petals that pair well with a range of other flower colours. No matter which variety you choose to nurture in your garden, each type of Azalea will bring beauty and vibrancy to your outdoor space.
The Azalea shrub is a classic garden favorite, known for its hardiness and wide variety of colours. Here are some of the different varieties of Azalea shrubs and a brief overview of their characteristics:
• The Kurume Azalea is an evergreen shrub that produces brilliant pink, white or red flowers in early spring; it’s a low-maintenance flower that can tolerate low light levels and occasional dryness, making it an ideal choice for those with limited gardening experience.
• The Satsuki Azalea is also an evergreen shrub that thrives in moist well-drained soil; it produces showy white, pink or purple blooms in late spring or summer and has glossy dark green foliage that makes it a great addition to any landscape.
• The Knaphill Azalea is a semi-evergreen shrub with large showy flowers ranging from apricot to magenta in colour; it’s relatively easy to maintain but does require regular watering during hot weather as well as plenty of sunlight to thrive.
• The Ghent Azalea is a deciduous variety with attractive bell-shaped flowers in shades of yellow, orange, pink or red; this plant prefers to be grown in acidic soil types and requires frequent pruning for optimal growth.
No matter which type you choose, these lovely plants have the potential to make your outdoor living space come alive!
Azalea Mollis is an exquisite and eye-catching shrub ideal for anyone looking to inject a splash of colour into their outdoor areas. Not only does it have delicate and beautiful blooms, but it's also fairly easy to care for if you properly consider the UK climate, sun exposure and water requirements. The history of this plant stretches back hundreds of years, beginning in Asia before being imported all over the world. There are also numerous other varieties of azaleas that offer different colours and shapes, so you're sure to find one that ticks all the boxes! With proper care and maintenance, your Azalea Mollis can be a perennial addition to your garden for years to come. So if you’re looking for an attractive addition that’ll complete the look of your garden then look no further than an Azalea Mollis - it could prove to be one of your most rewarding gardening endeavors yet!
How and When to Prune the Azalea Mollis Shrub in the UK

Gardening is a fun and rewarding hobby. Caring for plants adds beauty to your home or workspace, while providing happiness through the opportunity to witness the cycle of life up close. If you’re lucky enough to have an Azalea Mollis Shrub growing in your garden, then preparing it properly for seasonal success requires careful planning. Pruning can be tricky with this evergreen shrub if done at incorrect times — especially in temperamental UK weather — so following this workflow guide will help you get started on learning how and when to prune your beautiful Azalea Molli Shrub!
What is Azalea Mollis and What are the Benefits of Pruning It

Azalea Mollis is a species of flowering shrubs that has been popular in gardening for many years. It produces clusters of large, showy pink or white blooms throughout the spring and summer months. Pruning, an important part of caring for the shrub, promotes abundant blooming and encourages healthier bush growth. Keep in mind when pruning to wait until late winter or early spring as cutting off any new shoots during the hotter months can put unnecessary stress on the plant. Properly managed pruning also aids in controlling its eventual size while helping it to keep a neat shape. In short, if done correctly, regular pruning can be a great way to keep your azalea mollis looking its best!
Best Time to Prune Azalea Mollis in the UK

Gardening can be a rewarding hobby, but timing is key when pruning particular plants such as the Azalea Mollis shrub. In the United Kingdom, early spring before flowering or late summer after blooming are the best times to prune an Azalea Mollis. This will help promote strong, healthy growth and ensure that the branches are full of vibrant colours over the course of its blooming period. Pruning at any other time may leave your plant vulnerable to disease or undernourished. So if you're a proud owner of an Azalea Mollis, remember: Early spring or late summer are prime times for pruning your shrub!
Essential Tools For Pruning Azalea Mollis

Gardening may be a pleasant pastime, but to achieve optimum results it requires the right tools. When it comes to pruning an azalea mollis shrub, reliable gardening shears are essential. Not just any shears will do either — they have to have a sharp cutting edge and appropriate length-width ratio in order to properly shape the plant. To make life simpler, it's also useful to have a pair of bypass pruners that come with comfortable handles and durable high-carbon steel blades. Don't forget to include some rubbing alcohol for sterilizing your shears — this will prevent you from transferring disease from one plant to another as you work. With these essentials in your toolkit, you'll be ready to tackle any pruning job like a pro!
How to Select Where and How Much to Prune on the Plant
Gardening is an incredibly rewarding experience, and it all starts with selecting the right plants for the job. Azalea mollis shrub is definitely up to the task! However, to truly maximize its potential and get the absolute best out of this beautiful flowering plant, one needs to do some careful pruning sections. Everything from what part of the plant needs trimming to how much should be pruned can seem daunting at first, but following a few simple steps can make sure your azalea mollis remains healthy and in its full beauty for years. To make sure your garden keeps blooming strong, use proper pruning tools to trim off dead branches and leaves that may block sunlight from getting to new growths as well as cutting a few stems off parts that are overgrown or too thick. This can help control the shape of azalea mollis while encouraging healthier growth overall. Following these basic steps will guarantee a thriving garden full of azaleas!
Pruning your azalea mollis shrub can help maintain its shape and promote healthy growth. Here’s a step-by-step guide on how to do it correctly:
- Choose the right tools – Pruning shears or sharp garden scissors will give you the best results when pruning an azalea mollis shrub. Make sure that the cutting blades are sharp so that you don't damage the plant as you trim.
- Know when to prune – Ideally, azaleas should be pruned twice yearly; once in late winter before new growth begins, and again in midsummer after flowering has finished.
- Identify dead or diseased branches – Take a close look at your shrub for any dead or diseased branches and remove them first with scissors or shears.
- Begin shaping your shrub – Start from the base of each branch tip and make small angle cuts at 45 degrees towards outward facing buds or leaves (known as ‘heading back’). This helps maintain a natural shape while encouraging further growth in the right direction.
- Remove any damaged wood - If you notice any broken branches, use sharp garden scissors or shears to cut them away cleanly along the trunk line of your azalea mollis to avoid damaging healthy surrounding wood.
- Use multiple cuts - It’s usually best to make several shallow cuts along each branch rather than one deep cut as this helps promote even growth rather than unsightly scars left by heavy pruning practices.
- Finish up – Finally, stand back from your shrub and take a look at its overall shape before completing any necessary touches using appropriate cutting techniques such as thinning out old growth near the base of each branch, if needed, for a more natural appearance to your masterpiece!
Hard Pruning a Mature Azalea Mollis: A Step-by-Step Guide

Best Time to Prune The best time to hard prune an Azalea Mollis is in early spring, just before new growth starts but after the threat of frost has passed.
Required Tools You'll need sharp, clean pruning shears or loppers for larger branches, and gardening gloves to protect your hands.
Steps to Prune- 1. Assess the Plant: Before you start, take some time to assess the plant. Identify any dead, diseased, or damaged branches that will need to be removed.
- 2. Start Pruning: Begin pruning from the base of the plant. Remove about one-third of the branches, cutting them back to within 6 inches of the ground.
- 3. Prune Selectively: For the remaining branches, cut back to a height of 1-2 feet. Make sure to make the cuts above a bud to encourage branching.
- 4. Shape the Plant: Once the initial pruning is done, step back and look at the plant. Trim any branches that are out of shape or spoiling the overall form of the plant.
- 5. Clean Up: After pruning, clean up the area around the plant. Remove and dispose of the pruned branches to prevent any potential disease spread.
Recovery and Maintenance After hard pruning, the Azalea Mollis may take a couple of years to return to its full blooming glory. During this time, ensure it receives adequate water and nutrients. Consider applying a slow-release, acid-formulated fertilizer after pruning to support recovery.
Precautions and Tips- Disinfect Your Tools: Always disinfect your pruning tools before and after use to prevent the spread of diseases.
- Avoid Late Pruning: Avoid pruning late in the season, as this can stimulate new growth that may not harden off before winter.
- Patience is Key: Remember, hard pruning is a drastic measure and recovery will take time. The plant may not bloom the first year after pruning, but with proper care, it will return to its full beauty.
In conclusion, hard pruning an Azalea Mollis can rejuvenate an old plant and bring back its lush, vibrant blooms. With patience and proper care, your hard-pruned azalea will be a garden highlight once again.
Overview of Shaping an Azalea Mollis for Maximum Impact
Shaping an Azalea Mollis for maximum impact is something that any gardener can take on. There are several steps involved, from choosing the shape you want to achieving it through pruning. The first step is to view a reputable pruning guide to familiarize yourself with the various cutting techniques and decide which shape will fit best with your garden design. Next, identify any branches that need to be cut and focus on removing dead or heavily damaged ones first to reduce stress on the plant.
Lastly, use sharp sheers or loppers and make clean cuts at a desired angle in order to properly shape the shrub. With diligence, patience and some creative vision, you can achieve beautiful results while creating an effective piece of art in your backyard!
Finishing Tips for Caring for Your Newly Pruned Azalea Mollis
Now that you've pruned and shaped your Azalea Mollis shrub, there are a few finishing touches to ensure it remains healthy and grows in the desired fashion. Be sure to mulch around the base of the plant and water deeply but infrequently-- it's important not to over-water or else you risk Root Rot. You can also enrich the soil with a slow-release fertilizer or compost; this will help promote lush, vibrant blooms in the coming seasons. Lastly, keep an eye on any pests or fungal growths that can sometimes manifest after pruning. With just a little bit of extra care now, you'll be admiring your handiwork in no time!
Pruning an Azalea Mollis Shrub, though it may seem daunting at first, is relatively straightforward once you understand the basics. During best bloom conditions – April to May, in most cases – take caution when pruning Azalea Mollis back, as you'll need to make sure not to over-prune and damage the plants. The key to a successful prune lies in appropriate selection of where and how much to prune, while selecting essential tools that are both safe and precise. When executing your plan on shaping your Azalea Mollis for maximum impact with strategic practices such as deadheading and judicious fertilizer application, doing so just twice a season gives your shrub ample time to recover. Finally, proper aftercare is just as important as the process itself: if you remain mindful of the plant’s needs during the post-prune period and beyond, you will continually enjoy lush blooms that promise excellence in aesthetics coupled with long-term durability for many years to come.
How to Prune Climbing Vines
List by Variety
- How to Prune Actinidia
- How to Prune Akebia
- How to Prune Bougainvillea
- How to Prune Campsis
- How to Prune Celastrus
- How to Prune Chilean Glory Vine
- How to Prune Clematis Armandii
- How to Prune Clematis Montana
- How to Prune Climbing Rose
- How to Prune Hedera GoldHeart
- How to Prune Honeysuckle
- How to Prune Hydrangea Petiolaris
- How to Prune Ivy
- How to Prune Japanese Wisteria
- How to Prune Morning Glory
- How to Prune Parthenocissus
- How to Prune Persian Ivy Hedera Colchica
- How to Prune Schisandra
- How to Prune Star Jasmine
- How to Prune Sweet Peas
- How to Prune True Jasmine
- How to Prune Virginia Creeper
- How to Prune Wisteria
How to Prune Hedges
List by Variety
- How to Prune an Arborvitae Hedge
- How to Prune a Barberry Hedge
- How to Prune a Beech Hedge
- How to Prune a Boxwood Hedge
- How to Prune a Butterfly Bush Hedge
- How to Prune a Cotoneaster Hedge
- How to Prune an English Lavender Hedge
- How to Prune an Escallonia Hedge
- How to Prune an Euonymus-Hedge
- How to Prune a Firethorn Hedge
- How to Prune a Forsythia Hedge
- How to Prune a Griselinia Hedge
- How to Prune a Hawthorn Hedge
- How to Prune a Holly Hedge
- How to Prune a Hornbeam Hedge
- How to Prune a Juniper Hedge
- How to Prune a Laurel Hedge
- How to Prune a Leylandii Hedge
- How to Prune a Lilac Hedge
- How to Prune a Maple Leaf Viburnum Hedge
- How to Prune a Photinia Hedge
- How to Prune a Pink Ramanus Rose Hedge
- How to Prune a Privet Hedge
- How to Prune a Pyracantha Hedge
- How to Prune a Spirea Hedge
- How to Prune a Thuja Hedge
- How to Prune a Viburnum Hedge
- How to Prune a Western Red Cedar Hedge
- How to Prune a Yew Hedge
How to Prune Shrubs
List by Variety
- How to Prune an Abelia Shrub
- How to Prune an Abutilon
- How to Prune an Acer / Japanese-Maple
- How to Prune an Amelanchiers
- How to Prune an Apple-Tree
- How to Prune an Arbovitae Shrub
- How to Prune an Arbutus
- How to Prune an Aucuba
- How to Prune a Azalea Mollis
- How to Prune Azaleas
- How to Prune a Bay Tree Shrub
- How to Prune a Berberis Darwinii
- How to Prune Berberis Deciduous Types
- How to Prune a Boxwood Shrubs
- How to Prune a Brachyglottis Senecio
- How to Prune a Buddleia Alternifolia
- How to Prune Buddleias Butterfly Bushes
- How to Prune a Buddleja Globosa
- How to Prune a Callicarpa
- How to Prune a Camellia
- How to Prune a Caryopteris
- How to Prune a Catalpa Bignonioides Aurea
- How to Prune Ceanothus Deciduous Types
- How to Prune Ceanothus Evergreen Types
- How to Prune a Ceratostigma
- How to Prune a Chaenomeles
- How to Prune a Choisya
- How to Prune a Cistus
- How to Prune a Clematis
- How to Prune a Cornus
- How to Prune a Cotinus Royal Purple
- How to Prune a Cytisus Scoparius
- How to Prune a Exochorda x Macrantha
- How to Prune a Forsythia
- How to Prune a Hebe
- How to Prune a Hydrangeas
- How to Prune Juniper Shrubs
- How to Prune a Lavatera
- How to Prune Lilac Bushes
- How to Prune a Mugo Pine
- How to Prune Rose Bushes
- How to Prune Ribes
- How to Prune Spirea Shrubs
- How to Prune Viburnum Shrubs
- How to Prune a Weigela
- How to Prune a Yew
How to Prune Trees
List by Variety
- How to Prune a Apple Tree
- How to Prune a Apricot Tree
- How to Prune a Ash Tree
- How to Prune a Birch Tree
- How to Prune a Cherry Tree
- How to Prune a Elm Tree
- How to Prune a Fig Tree
- How to Prune a Grape Tree
- How to Prune a Hickory Tree
- How to Prune a Maple Tree
- How to Prune a Oak Tree
- How to Prune an Olive Tree
- How to Prune a Peach Tree
- How to Prune a Pear Tree
- How to Prune a Plum Tree
- How to Prune a Poplar Tree
- How to Prune a Walnut Tree
Gallery


Michael Carter
Vestibulum ante ipsum primis in faucibus orci luctus et ultrices posuere cubilia curae; Donec vel erat in nulla efficitur tempor non ut nisl. Integer venenatis eros ut dui viverra fermentum.
Sophie Wilson
Nam ut turpis hendrerit, varius nunc vel, elementum dui. Morbi vulputate dolor sit amet scelerisque egestas. Vestibulum eleifend nunc ut bibendum fermentum.
Alex Morgan
Cras non velit nec purus tempor rhoncus. Sed non mauris vitae erat consequat auctor eu in elit. Class aptent taciti sociosqu ad litora torquent per conubia nostra.