How and When to Prune an Ash Tree | The Complete Guide to Ash Trees
A Complete Guide to Planting and Caring for an Ash Tree in the UK
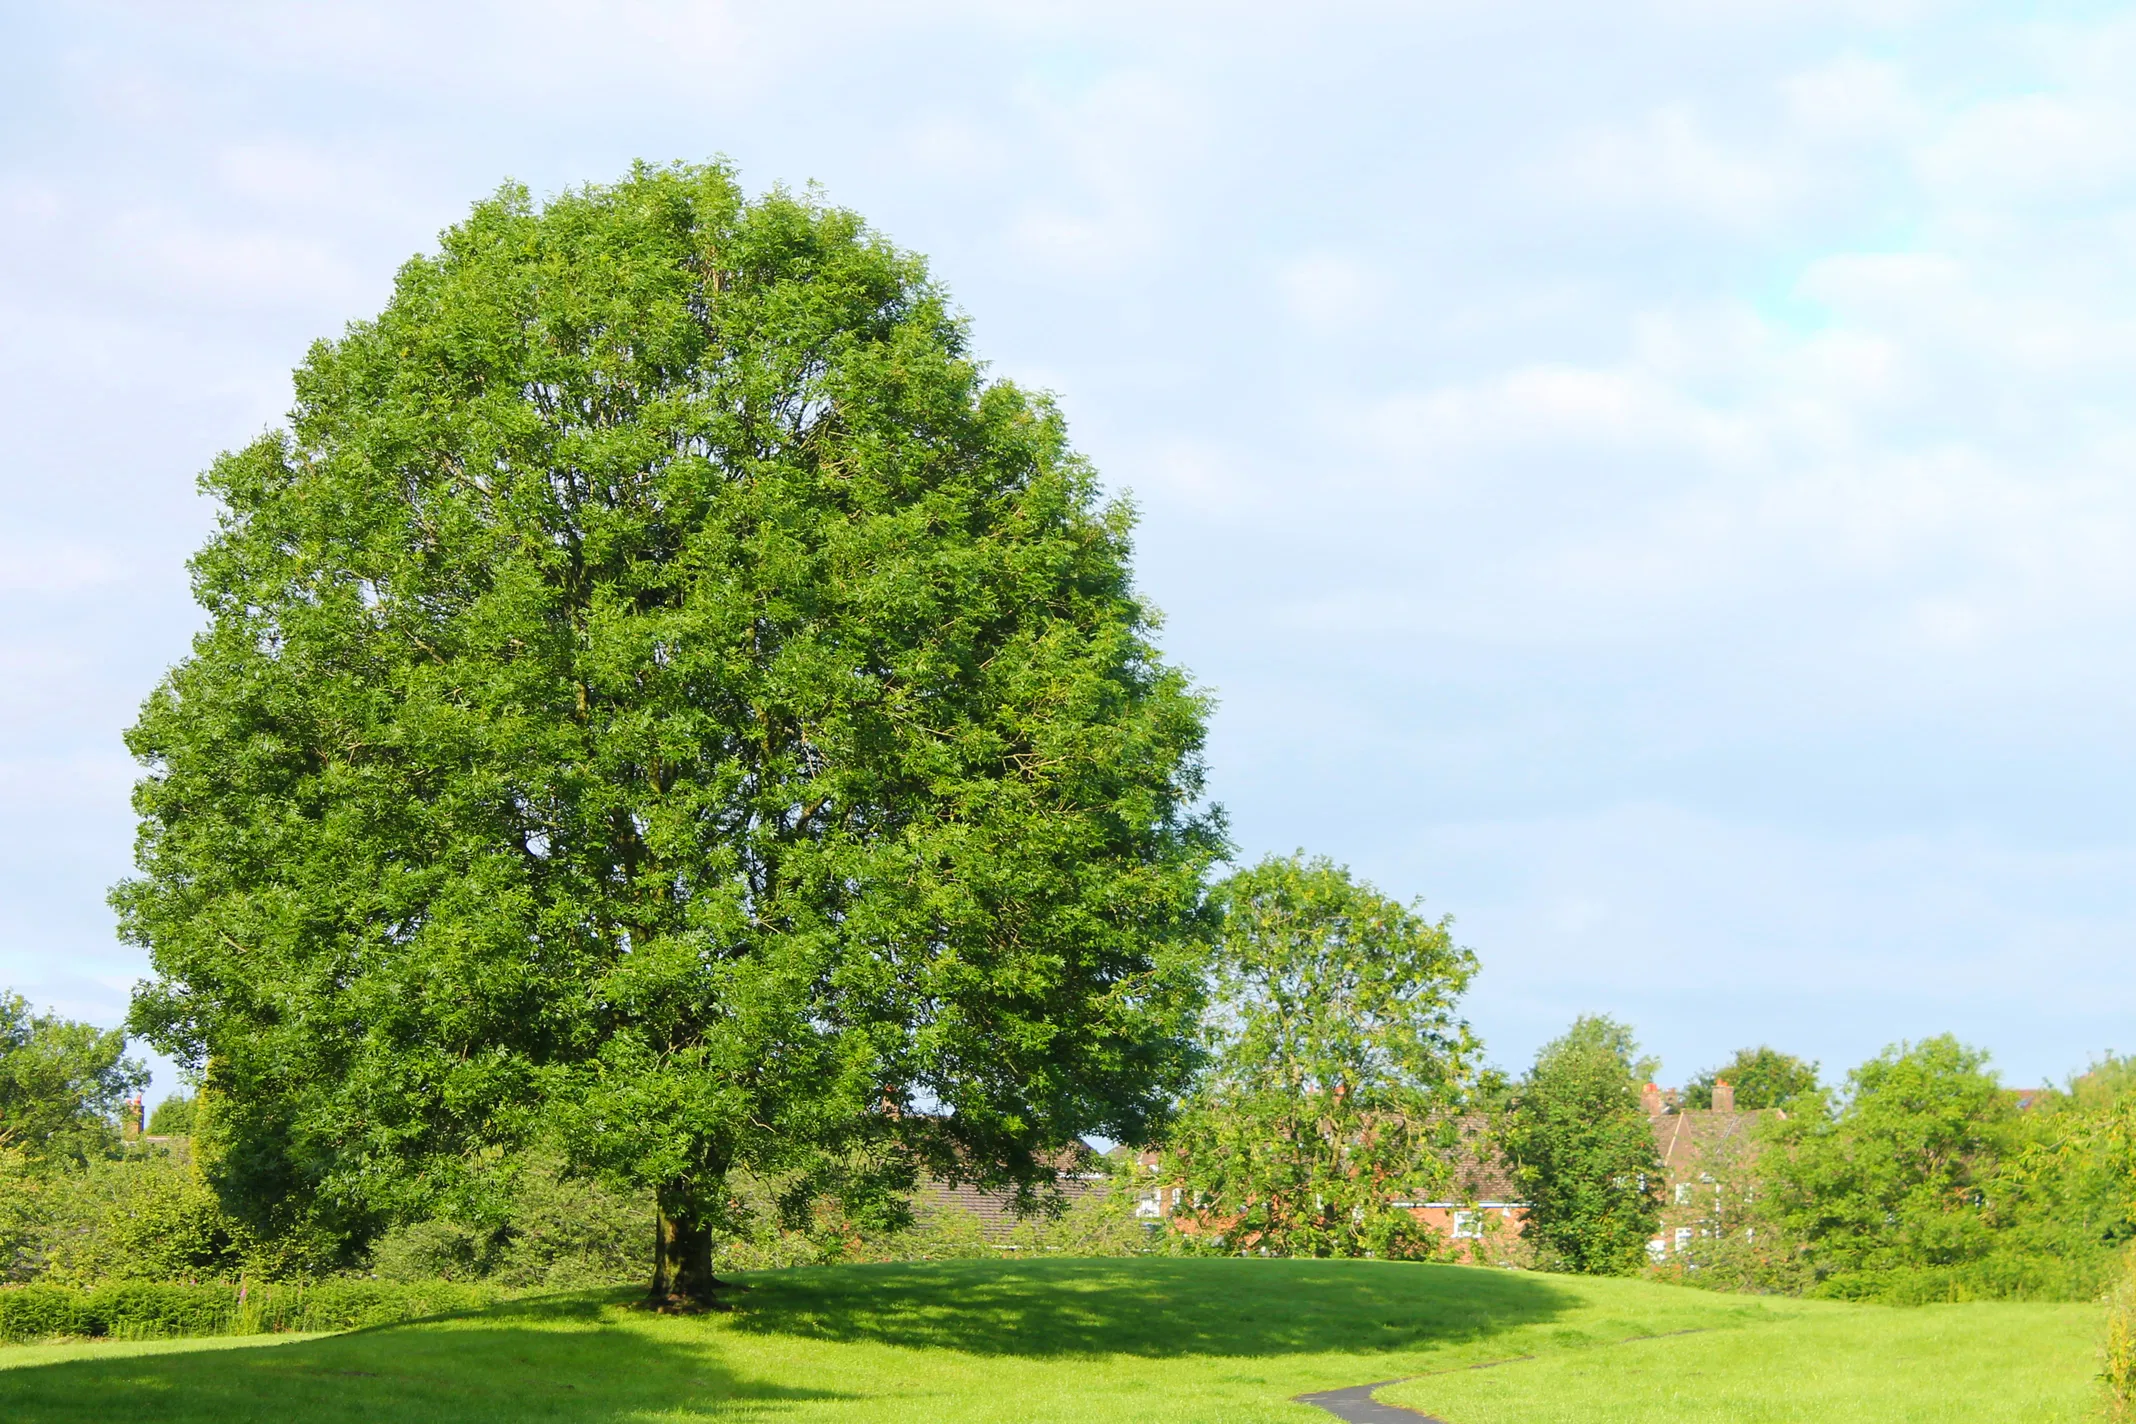
 Ash (Fraxinus excelsior) in rural Derbyshire countryside in the UK.
For passionate gardeners looking to add a unique accent to their outdoor areas, nothing comes close to the beauty and majestic presence of an ash tree. Having been a central part of British landscaping since ancient times, curiously shaped ash trees are often recognised by their lush foliage and towering stature. But if you're thinking of planting an ash tree in your UK garden this season, you'll need more than just gardening know-how—you'll need a comprehensive guide on how best to plant and care for these trees! In today's post we'll go through everything you need to know about planning and maintaining your own beautiful ash tree. Read on with us as we give you all the details necessary for guaranteeing success!
Overview of the Ash tree and its benefits in the UK
The Ash tree, also known as Fraxinus excelsior, is a common sight throughout the UK. It is widely regarded as an important species for its ecological and economic benefits. The tree is considered one of the best hardwoods for firewood due to its high calorific value and low moisture content. Additionally, it is used in the production of furniture and tools due to its strength and durability. The Ash tree also supports a diverse range of wildlife, including several butterfly species which rely on its leaves as a primary food source. Unfortunately, the Ash tree is currently threatened by a disease known as ash dieback, which is having a detrimental impact on its population. However, there are efforts to combat this disease and ensure that the benefits of the Ash tree are preserved for future generations.
Introducing the Ash Tree - Facts and Figures

The Ash Tree is a stunning species that can be found in various parts of the world. It's characterized by its tall and slender build, with branches that boast shiny, green leaves that further add to its overall aesthetic appeal. Did you know that some of the oldest Ash Trees can be found in the UK, with some being over 400 years old? These trees are truly a sight to behold, and are highly valued for their wood, which is commonly used in the manufacturing of sporting equipment such as hockey sticks and baseball bats. What's more, the Ash Tree is also significant in history, as it is believed to have been the wood used to create the infamous Trojan horse from Greek mythology. Whether you're an avid nature lover or simply curious about the world around you, there's no denying the fascinating facts and figures surrounding the Ash Tree.
The History of the Ash Tree in the UK
 green ash tree branches as a background, green ash tree leaves close-up, green ash tree leaves close-up
The ash tree has played a significant role in the history of the United Kingdom for over a thousand years. It has been used for building ships, creating weapons, and even to make sports equipment like tennis rackets.
However, the ash tree has also had a cultural significance in the UK, with Norse mythology considering it as the Tree of Life and the England cricket team carrying a sprig of ash from a specific tree on their tours abroad. Unfortunately, the ash tree is now facing a serious threat due to the fungal disease known as ash dieback, causing major concern for conserving this iconic tree species. Despite this, the ash tree remains an integral part of the UK's heritage and will undoubtedly continue to be celebrated throughout the country.
The Ash tree, scientifically known as Fraxinus excelsior, has a rich history in the UK. It is a large tree native to the UK and can be found across much of mainland Europe. In Britain, the Ash is the second most abundant tree species in small woodland patches after the native oak species, the third most abundant in larger areas of forest, and the most common hedgerow tree species.
The common English name "ash" traces back to Old English æsc, which relates to the Proto-Indo-European for the tree. Both words are also used to mean "spear" in their respective languages, highlighting the wood's historical use for shafts.
The Ash tree has strong links with the Vikings but also holds a place in British folklore. In Gaelic, it is called uinnseann (pronounced ooshin). Yggdrasil, the World Tree in Viking mythology, was believed to be an Ash tree. This World Tree grew on an island surrounded by the ocean, in the depths of which the World Serpent lay.
In the late 18th century onwards, the weeping ash was considered one of Britain's most desirable trees. The Ash tree was referred to as the 'Tree of Life' in Viking mythology and is still regarded today in Britain as a healing tree. Its hardwood has long made it the symbol of powerful solidity and immortality.
Its tough wood has been favoured by craftsman for centuries and is known to absorb shocks without splintering, making it ideal for tool handles, sports equipment, and furniture.
However, the Ash tree's presence in the UK is under threat due to a disease called Ash dieback, which could kill up to 95% of ash trees across the UK.
Understanding Variations of Species of Ash Tree ideal for UK Conditions
 Calm fall season. Ash-tree leaves on sunny beautiful nature autumn background.
Ash trees are a beautiful and important part of the UK's landscape. However, in recent years, the devastating effects of the ash dieback disease have caused widespread concern amongst conservationists and the public alike. It is therefore imperative to understand the variations of species of ash trees that are best suited to the UK's unique conditions. By focusing on the specific types of ash trees that thrive in our environment, we can ensure the longevity of our natural world and protect these magnificent trees for generations to come. With a deeper understanding of the diverse range of ash tree species available, we can take proactive measures to ensure that our countryside remains rich in biodiversity and beauty.
- European Ash (Fraxinus excelsior): This is the most common type of ash tree across the UK. It can reach 35m high when fully grown and has a lifespan of up to 400 years. The bark is pale brown to grey and fissures as the tree ages. The leaves are pinnate (like a feather) with 3-6 opposite pairs of light green, oval leaflets. It requires well-drained soil and a cool atmosphere for optimal growth.
- Narrow-Leaved Ash (Fraxinus angustifolia): This species is less common but still found in the UK. It prefers warmer climates and is often found near water. It has narrow, willow-like leaves and can grow up to 25m tall.
- Manna Ash (Fraxinus ornus): Also known as Flowering Ash, Manna Ash is native to southern Europe and southwest Asia but was introduced to Britain before 1700. It has a very limited distribution and grows best in well-drained, fertile soils.
- Green Ash (Fraxinus pennsylvanica): Native to North America, Green Ash has been successfully introduced to the UK. It's a fast-growing tree that can reach up to 20m and thrives in full sunlight. It's known for its resistance to disease and pests, making it a popular choice for urban and suburban plantings.
- White Ash (Fraxinus americana): Another North American native, White Ash is a large, fast-growing tree that can reach 24m. It has a straight trunk and dense canopy, providing a good amount of shade. It prefers moist, rich, deep soil and full sun.
Please note that due to the current threat of Ash Dieback disease, planting new Ash trees is not recommended until disease-resistant strains become available
The best time to plant an Ash tree in the UK
 Avenue of Ash Trees in Autumn
Planting an Ash tree in the UK can be a rewarding experience for those who enjoy gardening. Experts agree that the best time to plant an Ash tree is during the dormant season, which falls between late autumn and early spring. During this time, the tree is less likely to suffer from transplant shock and is better equipped to establish sturdy roots. However, it's important to avoid planting during periods of extreme weather conditions, such as hot and dry summers or bitterly cold winters. By following these guidelines, you'll be well on your way to growing a healthy and thriving Ash tree for years to come.
Transplant shock is a term that refers to a number of stresses occurring in recently transplanted trees and shrubs. This stress can manifest as slowed growth, yellowing leaves, leaf drop, wilting, or even the death of the plant.
The primary cause of transplant shock is damage to the plant's root system during the transplanting process. Roots are responsible for absorbing water and nutrients from the soil. When a plant is moved, many of these roots are disturbed or destroyed, making it difficult for the plant to support itself in its new location.
Transplant shock can be minimized or even avoided by taking care when digging up and handling the plant, ensuring the new hole is adequately prepared, keeping the plant well-watered after transplanting, and avoiding unnecessary stress like immediate full sun exposure or heavy fertilization.
It's also important to remember that recovery from transplant shock takes time. Many plants will start to recover after a few weeks, but some may take several months or even years to fully recover and start growing vigorously again. Patience and consistent care are key to helping your plant bounce back from transplant shock.
Choosing the Right Location to Plant Out your Ash Tree
 Green leaves of mountain ash
Planting an ash tree is a wonderful addition to any garden, providing shade, visual appeal and a habitat for wildlife. Though before you can enjoy the beauty of your Ash tree, it's important to find the perfect spot to plant it in. A space where it can thrive and grow to its full potential. Consider the amount of direct sunlight the tree will receive in any given area, as well as the space available for its root system to expand.
Additionally, take note of the surrounding soil condition, as an ash tree requires well-drained, nutrient-rich soil in order to grow and develop properly. With thoughtful consideration and research, you can find the perfect spot for your ash tree to flourish for years to come.
Preparing the Soil for Planting a Ash Tree
 autumnal golden foliage of ash-tree
Preparing the soil for planting an ash tree is an important step in ensuring its healthy growth and overall success. The first thing you want to do is clear the area of any debris, such as rocks, weeds or other plants that could compete with the ash tree for nutrients. Then, loosen the soil and dig a hole deep enough to accommodate the entire root system. Adding compost or other organic matter to the soil will help to enrich it and promote healthy growth. It's also important to ensure that the soil is properly drained, as ash trees don't do well in waterlogged soil. Taking the time to properly prepare the soil will help your ash tree thrive and become a beautiful addition to your landscape.
Preparing the soil is a crucial step before planting an ash tree to ensure it has the best possible start in its new home. Here's how you can do it:
- 1. Test the Soil: Ash trees prefer slightly acidic to neutral pH levels (around 6.0-7.5). You can get a soil testing kit from a garden centre or online to check your soil's pH level. If it's too acidic, you can add lime to increase the pH; if it's too alkaline, you can use sulphur to decrease the pH.
- 2. Clear the Area: Remove any weeds, grass, or other plants from the area where you plan to plant the tree. These could compete with the young tree for nutrients and water.
- 3. Improve the Soil: Ash trees like well-drained soil rich in organic matter. If your soil is heavy clay or sandy, you can improve its texture and nutrient content by adding organic matter such as compost, well-rotted manure, or leaf mould. This will help the soil retain moisture but drain well.
- 4. Dig a Hole: The hole should be roughly twice as wide as the root ball of your ash tree but no deeper. Loosen the soil at the bottom and sides of the hole with a garden fork. This will make it easier for the tree's roots to spread out and establish themselves.
- 5. Add Fertiliser: Add a slow-release granular fertiliser to the planting hole according to the package instructions. This will give the tree a good supply of nutrients as it begins to grow.
Remember, each tree and location may have specific needs, so always monitor your tree closely and adjust your care routine as needed. And note that due to the current threat of Ash Dieback disease, planting new Ash trees is not currently recommended until disease-resistant strains become available.
Step-by-Step Guide on How to Plant an Ash Tree in the UK
 Autumn landscape photography, mountain ash in full beauty, illuminated by the colors of autumn. A tree with fruits in the form of a bunch of orange-red berries, as well as the most berries
Planting a tree can be a rewarding and fulfilling experience, especially when it grows into a sturdy and thriving part of your outdoor environment. If you're looking for a tree to plant in the UK, the ash tree is a great option to consider. Known for its majestic look and resilience against pests, the ash tree is a staple in many gardens across the country. To successfully plant an ash tree, you'll need to complete a series of steps, including selecting the right location, preparing the soil, digging the hole, and carefully planting the tree. By following these steps, you'll be on your way to fostering a new and thriving addition to your garden.
Planting an Ash tree is a rewarding experience, and with the right care and conditions, your tree will thrive. However, due to the current threat of Ash Dieback disease, it's important to note that planting new Ash trees is not currently recommended until disease-resistant strains become available. But once they are, here's a step-by-step guide to help you through the process:
- Step 1: Choose the Right Time The best time to plant an ash tree is during the dormant season, from late autumn to early spring.
- Step 2: Select the Location Ash trees need full sun to partial shade and well-drained soil. They're large trees, so ensure there is enough space for the tree to grow without obstruction.
- Step 3: Prepare the Soil Ash trees prefer slightly acidic to neutral pH levels. Add organic matter to the planting area to improve the soil structure and nutrient content.
- Step 4: Dig the Planting Hole The hole should be twice as wide and just as deep as the root ball of the ash tree. This allows the roots to spread out easily.
- Step 5: Place the Tree Place the tree in the hole, ensuring that the top of the root ball is level with the soil surface. Adjust the depth of the hole if necessary.
- Step 6: Backfill the Hole Fill the hole halfway with the original soil or a mix of original soil and compost. Water thoroughly, then fill the rest of the hole, firming the soil gently around the base of the tree.
- Step 7: Water the Tree Water the tree thoroughly after planting. Make sure the soil stays moist, but not waterlogged.
- Step 8: Mulch Around the Tree Apply a layer of organic mulch around the tree, but not touching the trunk, to help conserve moisture and suppress weeds.
- Step 9: Care for Your Tree In the first few years, protect the tree from severe weather and pests. Water during dry periods and prune any dead or diseased branches.
Remember, always source your trees from reputable nurseries to ensure they are disease-free. Happy planting!
Tips for Caring for Your Newly Planted Ash Tree
 Sorbus aucuparia. Red leaves of a mountain ash against the blue sky
Planting a new tree is always an exciting moment, but it also comes with its own set of responsibilities. If you have recently planted an ash tree, you want to make sure it is cared for so that it can thrive and grow into a healthy tree. Here are some tips to help you care for your newly planted ash tree: First, water it regularly, especially during the hottest months. Mulching around the tree can also help retain moisture and regulate the soil temperature. Second, keep an eye out for pests or diseases that can harm the tree's growth. Finally, prune the tree once a year to help shape it and remove any unwanted branches. With proper care, your newly planted ash tree will reward you with its beauty for many years to come.
Caring for your newly-planted ash tree involves several steps to ensure its healthy growth and longevity. Here are some tips:
- 1. Watering: For the first few weeks after planting, water your ash tree thoroughly and frequently to establish its root system. Once established, watering can be reduced to once a week, or more often during dry periods.
- 2. Mulching: Apply a 2 to 3-inch layer of organic mulch around the base of the tree. This helps retain soil moisture, control weeds, and regulate soil temperature.
- 3. Pruning: In the early years, prune only dead, damaged, or diseased branches. As the tree matures, you may need to prune it to maintain its shape and structure.
- 4. Fertilizing: Ash trees typically don't require heavy fertilization. However, an annual application of an all-purpose tree fertilizer can help maintain healthy growth.
- 5. Pest and Disease Control: Regularly inspect your tree for signs of pests or diseases. If you notice any issues, consult with a local arborist or extension service for treatment recommendations.
- 6. Protection: Young trees can be vulnerable to wildlife damage or harsh weather conditions. Consider using a tree guard or similar protection if necessary.
Remember that each tree is unique and may have specific needs depending on its health, age, and the local environment. Always monitor your tree closely and adjust your care routine as needed.
What is the Best Fertilizer Feed for a Ash Tree and When to Apply it?
 green ash tree branches and leaves
Ash trees are a beautiful addition to any garden, but keeping them healthy requires some effort. One of the most important aspects of care is fertilization. The best fertilizer feed for an ash tree is one that is specifically formulated for trees and shrubs, and has a balanced ratio of nitrogen, phosphorus, and potassium. This will provide the necessary nutrients for strong root growth, a healthy crown, and overall tree vigor. When it comes to application, the best time to fertilize an ash tree is in early spring, just as the buds are breaking. This gives the tree a boost, helping it to grow strong and healthy throughout the growing season. By following these simple tips, you can enjoy the beauty and benefits of a thriving ash tree for years to come.
Based on the search results, the TreeHelp Premium Fertilizer for Ash has been specially formulated for use on ash trees. This product promotes long-term vitality through robust root development and provides slow-release Nitrogen that continues feeding over time. You can find this product on Amazon.
Ash trees should be fertilized once or twice a year. However, not just any fertilizer will do. Ash trees have evolved in very specific forest conditions and are susceptible to insects and disease. For a stressed ash tree, it's important to note that fertilization is not a cure-all solution and could sometimes even exacerbate the problem.
For newly planted ash trees, SavATree's exclusive seaweed biostimulant ArborKelp® can be beneficial. It aids in tree establishment, promotes root growth, and increases tolerance to environmental stressors.
In terms of organic fertilizers, manure can also be used with good results. The material should be worked into open soil at a rate of one bushel per 1″ of trunk diameter.
It's recommended to use fertilizers that are high in nitrogen, phosphorus, and potassium (NPK) for maintaining healthy tree growth. A slow-release 10-10-10 option, which contains equal parts of nitrogen, phosphorus, and potassium, is considered the best choice for a Texas ash tree.
Young mountain ash trees under four years of age should be fed once per year, and mature trees five years of age and older should be fertilized every other year.
Please remember that these are general guidelines and the specific needs of your tree may vary based on its health, age, and local soil conditions. Always consult with a local arborist or extension service if you're unsure.
A Comprehensive Guide to Fertilizing an Ash Tree
 Ash seeds among green foliage. European ash.
Ash trees are a popular choice amongst homeowners for their beauty and shade. However, to keep them healthy and thriving, it is essential to fertilize them regularly. Fertilizing an ash tree can be tricky, and specific factors should be considered, such as the tree's age, soil type, and surrounding environment. A comprehensive guide to fertilizing an ash tree will provide you with the knowledge to choose the right fertilizer, schedule the application correctly, and ensure the correct amount is used. This guide will help you keep your ash tree healthy, lush, and free of pests. With the right nutrients, your ash tree will continue to be a beautiful addition to your yard for years to come.
A Comprehensive Guide to Fertilizing an Ash Tree
Ash trees are known for their hardy nature and beautiful foliage, but to keep them at their best, a proper fertilizing routine is crucial. This comprehensive guide will walk you through the steps needed to properly fertilize your ash tree.
- Understanding the Needs of Your Ash Tree Before you begin fertilizing, it's important to understand what your ash tree needs. Generally, ash trees prefer slightly acidic to neutral soil and benefit from a balanced fertilizer that provides equal parts nitrogen, phosphorus, and potassium (known as a 10-10-10 fertilizer).
- When to Fertilize The ideal time to fertilize your ash tree is in late winter or early spring before new growth begins. This timing gives the tree a nutrient boost just as it's starting to put out new leaves.
- Choosing the Right Fertilizer A slow-release granular fertilizer is a great choice for ash trees. Look for a product with a balanced NPK ratio like 10-10-10. This means it contains 10% nitrogen, 10% phosphorous, and 10% potassium, which are all essential nutrients for your tree.
- Measure the Area: You'll need to know the diameter of your tree's drip line (the area under the outermost branches) to determine how much fertilizer to use.
- Apply the Fertilizer: Scatter the granules evenly under the tree, starting a foot from the trunk and going out to the drip line. Avoid letting the fertilizer touch the trunk, as it can burn the bark.
- Water Thoroughly: After applying the fertilizer, water the area thoroughly. This helps to carry the nutrients down into the root zone where they can be absorbed by the tree.
- Repeat Annually: For best results, repeat this process each year in late winter or early spring.
Over-fertilization can be harmful. Always follow the package instructions for the correct amount to use. If your ash tree is showing signs of nutrient deficiency (such as yellowing leaves), consider having your soil tested. This can help you determine if any specific nutrients are lacking.
Remember, fertilizing is just one part of ash tree care. Regular watering, mulching, and pruning will also keep your tree healthy.
Remember, each ash tree is unique and may have specific needs depending on its health, age, and local soil conditions. Always monitor your tree closely and adjust your care routine as needed. And please note that due to the current threat of Ash Dieback disease, planting new Ash trees is not currently recommended until disease-resistant strains become available.
Potential Problems When Growing an Ash Tree in the UK and Solutions
 Emerald Ash Borer Side View
Growing an ash tree in the UK can be challenging, as there are a number of potential problems that can arise. One major issue facing ash trees is the threat of ash dieback, a disease caused by the fungus Hymenoscyphus fraxineus. This can lead to the death of the tree, making it important to carefully monitor any ash trees for signs of infection and seek professional advice if necessary. Additionally, ash trees can be vulnerable to a number of pests, including the emerald ash borer and the ash leafcurl aphid. Proper maintenance and care, such as regular pruning and the use of insecticides, can help prevent these problems from taking hold. With the right knowledge and attention, it is possible to successfully grow and care for ash trees in the UK.
Growing an Ash tree in the UK presents several potential challenges, primarily due to disease and pest threats. Here are some of the key problems you might encounter:
- 1. Ash Dieback (Hymenoscyphus fraxineus): This is a serious disease that's causing widespread damage to Ash trees across the UK. It's caused by a fungus and can lead to leaf loss, crown dieback, and bark lesions. In many cases, it can be lethal for the tree.
- 2. Emerald Ash Borer: While this insect is not currently present in the UK, it has caused significant damage in North America and is moving west from Russia towards Europe. The larvae feed on the inner bark of ash trees, disrupting their ability to transport water and nutrients.
- 3. Low Diversity: A study found issues including low levels of deadwood, low numbers of “ancient” trees, and insufficient diversity in ages and species of trees. This lack of diversity can make forests more susceptible to disease outbreaks.
- 4. Other Pests and Diseases: Apart from Ash Dieback and Emerald Ash Borer, Ash trees can also be affected by other pests and diseases, such as the Ash Bark Beetle and Ash Rust.
- 5. Environmental Stress: Factors like storm damage, nutrient issues, or water or root stress can also cause problems for Ash trees.
Given these challenges, it's generally not recommended to plant new Ash trees in the UK until disease-resistant varieties become available. Instead, consider planting alternative species that can provide similar benefits to Ash but are less susceptible to these problems.
How Fast do Ash Trees Grow
 Dead tree due to the ravage of the emerald ash borer. Furrows of larvae under the bark.
Ash trees are a common sight in North America, with their majestic presence and leafy canopies providing shade and beauty in parks and gardens. Many people wonder just how fast these trees grow, and the answer may surprise you. Ash trees can grow anywhere from 1-2 feet per year, depending on several factors including soil quality, temperature, and overall growing conditions. While this may seem slow compared to other trees, over time ash trees can reach impressive heights of up to 80 feet or more, providing a long-lasting legacy for generations to come. So next time you see an ash tree, take a moment to appreciate the time and effort it took for it to reach its impressive size.
Growing a Ash Tree From Seed
 Small tunnels of bark beetles in the dry branch of a pine tree. Destroyed branch by forest pests.
Growing an ash tree from seed can be a rewarding and enjoyable experience. Ash trees are known for their beautiful foliage and the way they contrast so strikingly with other trees in the area. In order to start growing an ash tree from seed, you will need to first gather the proper materials. It is important to obtain good quality ash tree seeds and soil that provides the appropriate nutrients. Once you have created the perfect environment for your ash tree seed, it is likely to take several months to see the first signs of growth. With patience and care, you will eventually be rewarded with a flourishing ash tree that will provide shade and beauty for many years to come.
Step-by-Step Guide on How to Grow an Ash Tree from Seed

Growing an ash tree from seed can be a rewarding experience for any nature lover. However, it does require some patience and dedication. First, start by collecting ash seeds from a healthy tree in the autumn months. Clean the seeds and soak them in water for a few days. Next, prepare a pot with well-drained soil and plant the seeds about an inch deep. Water the pot regularly and keep it in a warm and bright area. Wait patiently for about six weeks for the seed to germinate. Once the ash tree seedlings have grown to a few inches tall, transplant them to a larger pot or out in the garden. With the right care and attention, your ash tree will flourish and grow into a beautiful addition to any green space.
A Comprehensive Step-by-Step Guide on How to Grow an Ash Tree from Seed
Growing an ash tree from seed can be a rewarding experience, but it requires patience and care. Here's a step-by-step guide to help you through the process.
Note: Due to the current threat of Ash Dieback disease, planting new Ash trees is not currently recommended in many regions until disease-resistant strains become available. Always check local guidelines before proceeding.
-
Step 1: Collect and Prepare the Seeds
Ash trees produce seeds in late summer or early autumn. Look for fully ripened seeds, which should be dry and brown.
- Remove the seeds from the tree and soak them in water overnight.
- After soaking, mix the seeds with moist sand and store them in a sealed container in the refrigerator. This process, known as stratification, mimics the natural winter conditions that ash seeds need to germinate. Stratify the seeds for approximately 30-60 days.
-
Step 2: Sow the Seeds
- After stratification, sow the seeds in a pot filled with seed compost. Plant the seeds about 2-3cm deep.
- Water the compost thoroughly and place the pot in a sunny spot.
- Keep the compost moist but not waterlogged. The seeds should germinate in 2-3 weeks.
-
Step 3: Care for the Seedlings
- Once the seedlings are about 15cm tall, they can be transplanted to larger pots or directly into the ground.
- Choose a location with full sun to partial shade and well-drained soil.
- Dig a hole twice as wide and the same depth as the root ball. Place the tree in the hole, making sure the top of the root ball is level with the soil surface. Backfill the hole and firm the soil around the base of the tree.
-
Step 4: Establishing the Tree
- Water the tree thoroughly after planting and regularly thereafter, especially during dry periods.
- Apply a layer of mulch around the base of the tree to conserve moisture and suppress weeds.
- Monitor the tree for any signs of pests or diseases and treat as necessary.
- Prune the tree only to remove dead, damaged, or diseased branches for the first few years.
Remember, each ash tree is unique and may have specific needs depending on its health, age, and local soil and weather conditions. Always monitor your tree closely and adjust your care routine as needed.
How to Propagate a Ash Tree

Ash trees are among the most popular trees in gardens and parks, but they can be expensive to purchase. If you're one of those gardeners who love ash trees but don't want to spend too much money, there is a cost-effective solution: propagating them yourself. Propagating ash trees is not as complicated as you might think, and with a few simple steps, you can have new ash trees growing in your garden in no time. Some of the most common methods of propagating ash trees include using cuttings, seeds, and suckers. While each method has its own merits, the first step is to choose the right time of the year to do it. With a little patience and care, you can have beautiful ash trees grown from your own cuttings, seeds, or suckers.
Step-by-Step Guide on How to Propagate an Ash Tree Using the Cutting Method
 Rowan berries, Mountain ash (Sorbus) tree with ripe berry
If you're looking to propagate an ash tree, the cutting method may be just what you need. This method involves cutting a piece of the tree off, applying rooting hormone, and placing it in soil. But, before you get started, there are some key things to keep in mind. First, make sure you choose the right time of year to take the cutting. Second, pick a healthy branch that is at least six inches long and has a diameter of about a quarter of an inch. With these preparations done, you can begin the exciting process of creating a whole new ash tree from a simple cutting! With some patience and care, you'll soon have a flourishing plant to enjoy for years to come.
Propagating an ash tree using the cutting method can be a rewarding process. Here's a step-by-step guide to help you:
- Step 1: Choose the Right Time The best time to take cuttings is in late spring or early summer when the tree's growth is most vigorous.
- Step 2: Select the Cutting Choose a healthy branch that's about one year old and has a diameter of about 1/4 to 1/2 inch. The cutting should be about 6-10 inches long, and the cut should be made at a 45-degree angle just below a bud.
- Step 3: Prepare the Cutting Remove all the leaves and buds from the bottom half of the cutting. This will help direct the plant's energy towards root development.
- Step 4: Apply Rooting Hormone Dip the cut end of the cutting into a rooting hormone. This will stimulate root growth once the cutting is planted.
- Step 5: Plant the Cutting Fill a pot with a mixture of equal parts peat moss and perlite, which will provide good drainage. Make a hole in the soil with a pencil, then place the cutting into the hole, ensuring the section with the rooting hormone is well buried. Firm the soil around the base of the cutting.
- Step 6: Care for the Cutting Water the cutting thoroughly, then cover the pot with a plastic bag to create a humid environment. Place the pot in a warm, bright location, but out of direct sunlight.
- Step 7: Wait for Root Development It may take several weeks or even a few months for roots to develop. You'll know roots have formed when new growth starts to appear. At this point, you can remove the plastic bag and start to acclimate the plant to less humid conditions.
- Step 8: Transplant the New Tree Once the cutting has developed a good root system, it can be transplanted into a larger pot or directly into the ground.
Remember, patience is key when propagating trees from cuttings. Not every cutting will take, so it's a good idea to start with several cuttings to increase your chances of success.
The Common Diseases and Pests which Affect the Ash Tree

Ash trees are an integral part of our ecosystem, providing shade, beauty, and even carbon sequestration. Unfortunately, these trees are under attack from several common diseases and pests that threaten their survival. One of the biggest threats is the emerald ash borer, a tiny insect that bores into the bark of the tree, destroying the inner layers and ultimately killing the tree. Other pests like the ash sawfly and ash leaf roller can also cause significant damage to the tree by feeding on the foliage and reducing the tree's ability to produce energy through photosynthesis. Diseases like ash dieback and Verticillium Wilt can also cause serious harm, leading to the death of the tree or making it more susceptible to other pests. Given the importance of ash trees in our environment, these diseases and pests must be managed and mitigated to ensure the continued health and vitality of these beloved trees.
Ash trees, like any plant species, can be susceptible to various diseases and pests. Here are some of the most common ones:
- 1. Ash Dieback (Hymenoscyphus fraxineus): Also known as Chalara dieback, this disease is caused by a fungus and can lead to leaf loss, crown dieback, and bark lesions. It's considered one of the most serious threats to ash trees, particularly in Europe.
- 2. Emerald Ash Borer (Agrilus planipennis): This is an invasive beetle native to northeastern Asia that feeds on the tissues under the bark of ash trees, disrupting their ability to transport water and nutrients. It's been responsible for the death of millions of ash trees in North America and poses a potential threat to ash trees in Europe.
- 3. Verticillium Wilt: A soil-borne fungal disease that causes wilting, yellowing, and curling of the leaves, often leading to tree death.
- 4. Ash Anthracnose (Hymenoscyphus fraxineus): This fungal disease causes dark, water-soaked lesions on leaves, petioles, and twigs, premature leaf drop, and twig dieback.
- 5. Ash Yellows: A disease caused by a bacteria-like organism known as a Phytoplasma. Symptoms include yellowing or browning of leaves, slow growth, and decline in tree health over several years.
- 6. Ash Rust (Puccinia sparganioides): A fungal disease that causes orange spots on leaves and can lead to early leaf drop.
- 7. Other Pests: Several insects and mites can also attack ash trees, causing stress, discoloration, or deformation. These include the ash flower gall mite and the ash bark beetle.
Remember, the best defense against diseases and pests is to keep your tree healthy with proper watering, fertilizing, and pruning practices. If you suspect your tree is diseased or infested, it's best to consult with a local arborist or extension service for diagnosis and treatment options.
A Complete Guide to Pruning a Ash Tree in the UK
Ash (Fraxinus excelsior) in rural Derbyshire countryside in the UK
Pruning an ash tree can be a daunting task, especially if you're not sure where to start. However, with the right tools and techniques, you can successfully prune your ash tree to keep it healthy and looking great. First, assess the tree's overall health and identify any areas that need attention. Then, carefully prune branches and stems to encourage growth and maintain a healthy shape. Remember to avoid over-pruning, as this can damage the tree and leave it vulnerable to disease. With a little time and effort, you can keep your ash tree thriving for years to come.
Why Do we Need to Prune a Ash Tree?
Scenic view of a large Ash tree in a Lancashire park
Ash trees are a remarkable and beautiful addition to any landscape. However, if left unattended, they can grow uncontrollably and become hazards to your property and the surrounding environment. This is where pruning comes in! Pruning is an essential part of ash tree maintenance, as it promotes the tree's health, mitigates potential risks, and enhances its overall appearance. Proper pruning removes dead or diseased limbs, promotes growth, and maintains a healthy structure for the tree. By investing in pruning, you're not only maintaining the beauty of your landscape but also ensuring your ash tree stays healthy and safe for years to come.
When is the Best Time to Prune a Ash Tree?
Calm fall season. Ash-tree leaves on sunny beautiful nature autumn background. Horizontal autumn banner with Ash leaf of yellow color.
Ash trees are a popular choice for a garden or landscape due to their elegant appearance and fantastic canopy coverage. However, pruning can be important to ensure the longevity and health of the tree. So, when is the best time to prune an ash tree? It is recommended to prune an ash tree during the dormant season, between late fall and early spring. During this time, the tree is less affected by the stress of pruning and can easily recover. Additionally, pruning an ash tree during the dormant season allows you to easily identify and remove any dead or diseased branches before spring growth begins. By following these guidelines, you can keep your ash tree looking its best for years to come.
A Step by Step Guide on How to Prune a Ash Tree
Avenue of Ash Trees in Autumn
If you're a proud owner of an ash tree, you know how important it is to maintain its health and beauty. Pruning is an essential part of upkeep, helping to remove deadwood, shape the tree and encourage new growth. But the thought of pruning can be daunting, particularly for beginners. Luckily, pruning an ash tree is not as challenging as it seems. With the right tools and technique, you can keep your tree looking fabulous all year long. Follow our easy step-by-step guide and get ready to give your ash tree the attention it deserves.
A Step-by-Step Guide on How to Prune an Ash Tree
Pruning is an essential part of ash tree maintenance. It helps the tree maintain its shape, promotes healthy growth, and can prevent diseases from spreading. Here's how you can do it:
- 1. Choose the Right Time The best time to prune an ash tree is late winter or early spring before new growth starts but after the worst of the winter cold has passed. This will reduce the risk of disease transmission and the tree will recover faster.
- 2. Prepare Your Tools Ensure your pruning tools are clean and sharp. You'll need a pair of pruning shears for smaller branches, loppers for medium-sized branches, and a pruning saw for larger limbs. To prevent disease spread, disinfect your tools with a solution of one part bleach to nine parts water.
- 3. Identify Which Branches to Prune Look for branches that are dead, diseased, or damaged. These should be your first priority. Also, identify branches that cross or rub against each other, as they can cause damage over time.
- 4. Make Your Cuts When you make your cuts, be sure to cut just outside the branch collar (the swollen area where the branch connects to the trunk) to promote healing. For larger branches, use the three-cut method to avoid tearing the bark: make a notch on the underside of the branch about 15-30cm from the trunk, then cut through the branch slightly further out, before making the final cut just outside the branch collar.
- 5. Thin the Crown If necessary, thin the crown of the tree to allow more light and air circulation. Remove no more than 20% of the crown in a single year, and aim to maintain an even distribution of branches.
- 6. Seal the Wounds While it was once common practice to seal pruning wounds, research has shown that trees heal better when left to seal naturally. So, unless your tree is susceptible to a specific disease that requires sealing, it’s best to leave the wounds open.
- 7. Clean Up and Dispose of Debris Clean up and properly dispose of all debris, especially if you've removed diseased branches. Diseased material should be disposed of off-site to prevent the spread of disease.
Remember, safety first! If the tree is large or the branches to be pruned are high, it may be best to hire a professional arborist.
How Much can I Prune Away a Mature Ash Tree
Green leaves of mountain ash
Mature ash trees add an element of grandeur to any property, but they can become overgrown and require pruning to maintain their health and appearance. The question on many property owners' minds is, how much can I prune away a mature ash tree? The answer lies in the amount of foliage that is removed. While it's important to remove dead, damaged, or diseased branches, removing too many healthy branches can actually harm the tree in the long run. It's best to hire a professional arborist who can assess the tree's health and recommend the appropriate amount of pruning. With the right care, a mature ash tree can continue to thrive for years to come.
Hard pruning, also known as rejuvenation pruning, involves cutting the tree back significantly, often removing a substantial portion of the tree's size. This method is generally used to control the size of the tree, remove old or unproductive wood, and stimulate new growth. However, hard pruning can be stressful for the tree and should only be done under certain circumstances and at the right time.
For mature ash trees, it's generally recommended to limit pruning to the removal of dead, diseased, or damaged wood, and any branches that are crossing or rubbing against each other. If you want to reduce the overall size of the tree, it's better to do it gradually over several years rather than all at once.
If hard pruning is necessary due to specific circumstances (for example, if the tree has become too large for its location), it should be done in late winter or early spring, before new growth starts but after the coldest part of winter has passed. This timing helps to minimize stress and gives the tree a full growing season to recover.
As always, when considering significant pruning, it's a good idea to consult with a professional arborist. They can assess the health and structure of your tree and provide specific advice based on their expertise.
How to avoid Pruning too Much off my Ash Tree
Autumn landscape photography, mountain ash in full beauty, illuminated by the colors of autumn. A tree with fruits in the form of a bunch of orange-red berries, as well as the most berries
Ash trees are a beautiful addition to any garden or backyard, but it can be tricky to know how much pruning is necessary without overdoing it. One of the best ways to avoid pruning too much off your ash tree is to have a plan before you start. Think about the shape and size you want your tree to be and work towards that goal, rather than just cutting off branches here and there. Also, it's important to prune your tree during the dormant season when it's not actively growing. This will promote better growth and help avoid any potential damage to the tree. Remember, a little pruning goes a long way and it's best to take it slow and steady rather than rush in and risk damaging your beautiful ash tree.
How to Care for a Ash Tree after Pruning
Sorbus aucuparia. Red leaves of a mountain ash against the blue sky
Caring for your ash tree after pruning is essential to ensure its continued growth and health. Once you have trimmed away any dead, diseased or damaged branches, you should take care to keep the tree well hydrated by watering it regularly. Additionally, fertilizing the tree will help it develop strong new branches and leaves, and prevent the spread of disease. Regular pruning, at least once a year, will also help keep your ash tree healthy and promote new growth. Remember to use the proper tools for pruning, and to always follow safety precautions when working with trees. With proper care and attention, your ash tree will continue to thrive, providing shade and beauty for years to come.
Caring for an ash tree after pruning involves several steps to ensure the health and recovery of the tree. Here's a step-by-step guide:
- 1. Monitor the Pruned Areas Keep an eye on the areas where you made cuts. They should start to form a callus, or a ring of new bark, around the cut within a few weeks. This is a sign that the tree is healing properly. If you notice any signs of disease or pests, such as fungal growth or insect activity, contact a professional arborist.
- 2. Watering Water your ash tree regularly, especially during dry periods. The tree may require more water than usual as it recovers from pruning. However, be careful not to overwater, as this can lead to Root Rot.
- 3. Mulching Apply a layer of organic mulch around the base of the tree (but not touching the trunk) to help retain soil moisture and regulate soil temperature. This can also help to suppress weeds that might compete with the tree for nutrients.
- 4. Fertilizing A slow-release, balanced fertilizer can help promote recovery and new growth after pruning. However, it's best to wait until a few weeks after pruning to apply fertilizer, as applying it immediately after can stimulate growth that the tree isn't ready to support.
- 5. Regular Inspections Regularly inspect your ash tree for signs of stress or disease. Early detection can make treatment more effective and prevent minor issues from becoming major problems.
Remember, aftercare is just as important as correct pruning techniques in ensuring the health and longevity of your ash tree.
An Overview of Pruning a Ash Tree
green ash tree branches as a background, green ash tree leaves close-up, green ash tree leaves close-up, natural background, sustainable development concept
Maintaining the health and beauty of your ash tree can involve a crucial process known as pruning. Pruning is a horticultural technique that removes specific branches or parts of the tree to promote growth, improve its structure, and prevent disease. While pruning seems like a daunting task for many, the process is relatively simple and can be done by anyone with minimal experience. First, identify the branches that need to be pruned, such as dead, diseased, or damaged ones. Then, make clean cuts with sharp tools to leave the tree in good health and appearance. Pruning a tree is a form of art that requires care and knowledge, but the result is a healthy, vibrant ash tree that will impress any admirer.
In conclusion, the Ash tree is a great species to consider when looking for a tree for your garden in the UK. With proper care, it can grow relatively quickly and for many generations as well as provide a habitat for wildlife. Potential problems can be avoided by taking preventative measures such as diversifying planted trees and being aware of where Ash trees are planted. Additionally, proper pruning techniques are necessary not only to shape the tree but to also promote healthy growth. The steps may seem tedious but taking the time and effort spent on preparing an ash tree for planting or propagating from seeds or cuttings is worth it in the end. With patience and dedication, anyone could have a successful Ash Tree growing in their garden, providing beautiful foliage year round as well as supporting biodiversity in the UK.
How to Prune Climbing Vines
List by Variety
- How to Prune Actinidia
- How to Prune Akebia
- How to Prune Bougainvillea
- How to Prune Campsis
- How to Prune Celastrus
- How to Prune Chilean Glory Vine
- How to Prune Clematis Armandii
- How to Prune Clematis Montana
- How to Prune Climbing Rose
- How to Prune Hedera GoldHeart
- How to Prune Honeysuckle
- How to Prune Hydrangea Petiolaris
- How to Prune Ivy
- How to Prune Japanese Wisteria
- How to Prune Morning Glory
- How to Prune Parthenocissus
- How to Prune Persian Ivy Hedera Colchica
- How to Prune Schisandra
- How to Prune Star Jasmine
- How to Prune Sweet Peas
- How to Prune True Jasmine
- How to Prune Virginia Creeper
- How to Prune Wisteria
How to Prune Hedges
List by Variety
- How to Prune an Arborvitae Hedge
- How to Prune a Barberry Hedge
- How to Prune a Beech Hedge
- How to Prune a Boxwood Hedge
- How to Prune a Butterfly Bush Hedge
- How to Prune a Cotoneaster Hedge
- How to Prune an English Lavender Hedge
- How to Prune an Escallonia Hedge
- How to Prune an Euonymus-Hedge
- How to Prune a Firethorn Hedge
- How to Prune a Forsythia Hedge
- How to Prune a Griselinia Hedge
- How to Prune a Hawthorn Hedge
- How to Prune a Holly Hedge
- How to Prune a Hornbeam Hedge
- How to Prune a Laurel Hedge
- How to Prune a Leylandii Hedge
- How to Prune a Lilac Hedge
- How to Prune a Maple Leaf Viburnum Hedge
- How to Prune a Photinia Hedge
- How to Prune a Pink Ramanus Rose Hedge
- How to Prune a Privet Hedge
- How to Prune a Pyracantha Hedge
- How to Prune a Spirea Hedge
- How to Prune a Thuja Hedge
- How to Prune a Viburnum Hedge
- How to Prune a Western Red Cedar Hedge
- How to Prune a Yew Hedge
How to Prune Shrubs
List by Variety
- How to Prune an Abelia Shrub
- How to Prune an Abutilon
- How to Prune an Acer / Japanese-Maple
- How to Prune an Amelanchiers
- How to Prune an Apple-Tree
- How to Prune an Arbovitae Shrub
- How to Prune an Arbutus
- How to Prune an Aucuba
- How to Prune a Azalea Mollis
- How to Prune Azaleas
- How to Prune a Bay Tree Shrub
- How to Prune a Berberis Darwinii
- How to Prune Berberis Deciduous Types
- How to Prune a Boxwood Shrubs
- How to Prune a Brachyglottis Senecio
- How to Prune a Buddleia Alternifolia
- How to Prune Buddleias Butterfly Bushes
- How to Prune a Buddleja Globosa
- How to Prune a Callicarpa
- How to Prune a Camellia
- How to Prune a Caryopteris
- How to Prune a Catalpa Bignonioides Aurea
- How to Prune Ceanothus Deciduous Types
- How to Prune Ceanothus Evergreen Types
- How to Prune a Ceratostigma
- How to Prune a Chaenomeles
- How to Prune a Choisya
- How to Prune a Cistus
- How to Prune a Clematis
- How to Prune a Cornus
- How to Prune a Cotinus Royal Purple
- How to Prune a Cytisus Scoparius
- How to Prune a Exochorda x Macrantha
- How to Prune a Forsythia
- How to Prune a Hebe
- How to Prune a Hydrangeas
- How to Prune Juniper Shrubs
- How to Prune a Lavatera
- How to Prune Lilac Bushes
- How to Prune a Mugo Pine
- How to Prune Rose Bushes
- How to Prune Spirea Shrubs
- How to Prune Viburnum Shrubs
- How to Prune a Weigela
- How to Prune a Yew
How to Prune Trees
List by Variety
- How to Prune a Apple Tree
- How to Prune a Apricot Tree
- How to Prune a Ash Tree
- How to Prune a Birch Tree
- How to Prune a Cherry Tree
- How to Prune a Elm Tree
- How to Prune a Fig Tree
- How to Prune a Grape Tree
- How to Prune a Hickory Tree
- How to Prune a Maple Tree
- How to Prune a Oak Tree
- How to Prune an Olive Tree
- How to Prune a Peach Tree
- How to Prune a Pear Tree
- How to Prune a Plum Tree
- How to Prune a Poplar Tree
- How to Prune a Walnut Tree
Gallery
Necessitatibus eius consequatur ex aliquid fuga eum quidem sint consectetur velit


Michael Carter
Vestibulum ante ipsum primis in faucibus orci luctus et ultrices posuere cubilia curae; Donec vel erat in nulla efficitur tempor non ut nisl. Integer venenatis eros ut dui viverra fermentum.
Sophie Wilson
Nam ut turpis hendrerit, varius nunc vel, elementum dui. Morbi vulputate dolor sit amet scelerisque egestas. Vestibulum eleifend nunc ut bibendum fermentum.
Alex Morgan
Cras non velit nec purus tempor rhoncus. Sed non mauris vitae erat consequat auctor eu in elit. Class aptent taciti sociosqu ad litora torquent per conubia nostra.