Everything You Need to Know About Pruning A Holly Bush Hedge in the UK
An Overview of a Holly Bush Hedge and its benefits in the UK
A Holly Bush Hedge is a great way to add a touch of greenery to your garden in the UK. Pruning is an important part of keeping your hedge looking its best, and it's important to understand the basics of pruning a Holly Bush Hedge in the UK. Pruning a Holly Bush Hedge in the UK is a relatively simple process, but it's important to understand the basics before you start.
The first step in pruning a Holly Bush Hedge in the UK is to identify the type of hedge you have. Different types of Holly Bush Hedges require different pruning techniques, so it's important to know what type of hedge you have before you start. Once you've identified the type of hedge, you can begin pruning. Pruning a Holly Bush Hedge in the UK involves removing dead or diseased branches, as well as trimming the hedge to the desired shape. It's important to use sharp pruning shears and to make sure that you don't cut too much off the hedge.
Pruning a Holly Bush Hedge in the UK is an important part of keeping your hedge looking its best. Pruning helps to keep the hedge healthy and encourages new growth. It also helps to keep the hedge looking neat and tidy. Pruning a Holly Bush Hedge in the UK is a relatively simple process, but it's important to understand the basics before you start. With the right tools and knowledge, you can keep your hedge looking its best for years to come.
Introducing a Holly Bush Hedge - Facts and Figures
Pruning a Holly Bush Hedge in the UK is a great way to add a touch of beauty and elegance to your garden. The holly bush is a hardy evergreen shrub that can be found in many gardens throughout the UK. It is a popular choice for hedges due to its dense foliage and attractive red berries. Pruning a holly bush hedge is essential to keep it looking neat and tidy, and to ensure it remains healthy. Pruning should be done in late winter or early spring, when the plant is dormant. This will help to promote new growth and encourage the bush to produce more berries. It is important to prune the hedge correctly, as incorrect pruning can damage the plant and reduce its lifespan. When pruning, it is important to remove any dead or diseased branches, as well as any branches that are growing in an undesirable direction. It is also important to trim the hedge to the desired shape and size. Pruning a holly bush hedge in the UK can be a rewarding experience, as it will add a touch of beauty and elegance to your garden.
The History of a Holly Bush Hedge in the UK
The Holly Bush Hedge is a classic feature of the British landscape, with its evergreen foliage providing a beautiful backdrop to gardens and parks throughout the UK. It has a long and storied history, with records of its use in Britain dating back to the 16th century. The Holly Bush Hedge was originally used as a boundary marker, with its dense foliage providing a natural barrier between properties. Over time, it has become a popular choice for gardeners looking to add a touch of greenery to their outdoor spaces. Pruning a Holly Bush Hedge is an important part of keeping it healthy and looking its best. Regular pruning will help to keep the hedge looking neat and tidy, while also encouraging new growth. It is important to prune the hedge at least once a year, preferably in the spring or early summer. This will help to keep the hedge looking its best and ensure that it remains healthy and vibrant.
The Ancient Holly Hedge: A Living History
Imagine a holly bush hedge, planted in the heart of the United Kingdom during the reign of Queen Victoria, in the mid-19th century. This hedge, now well over 150 years old, has been a silent witness to the region's history and a sanctuary for its wildlife.
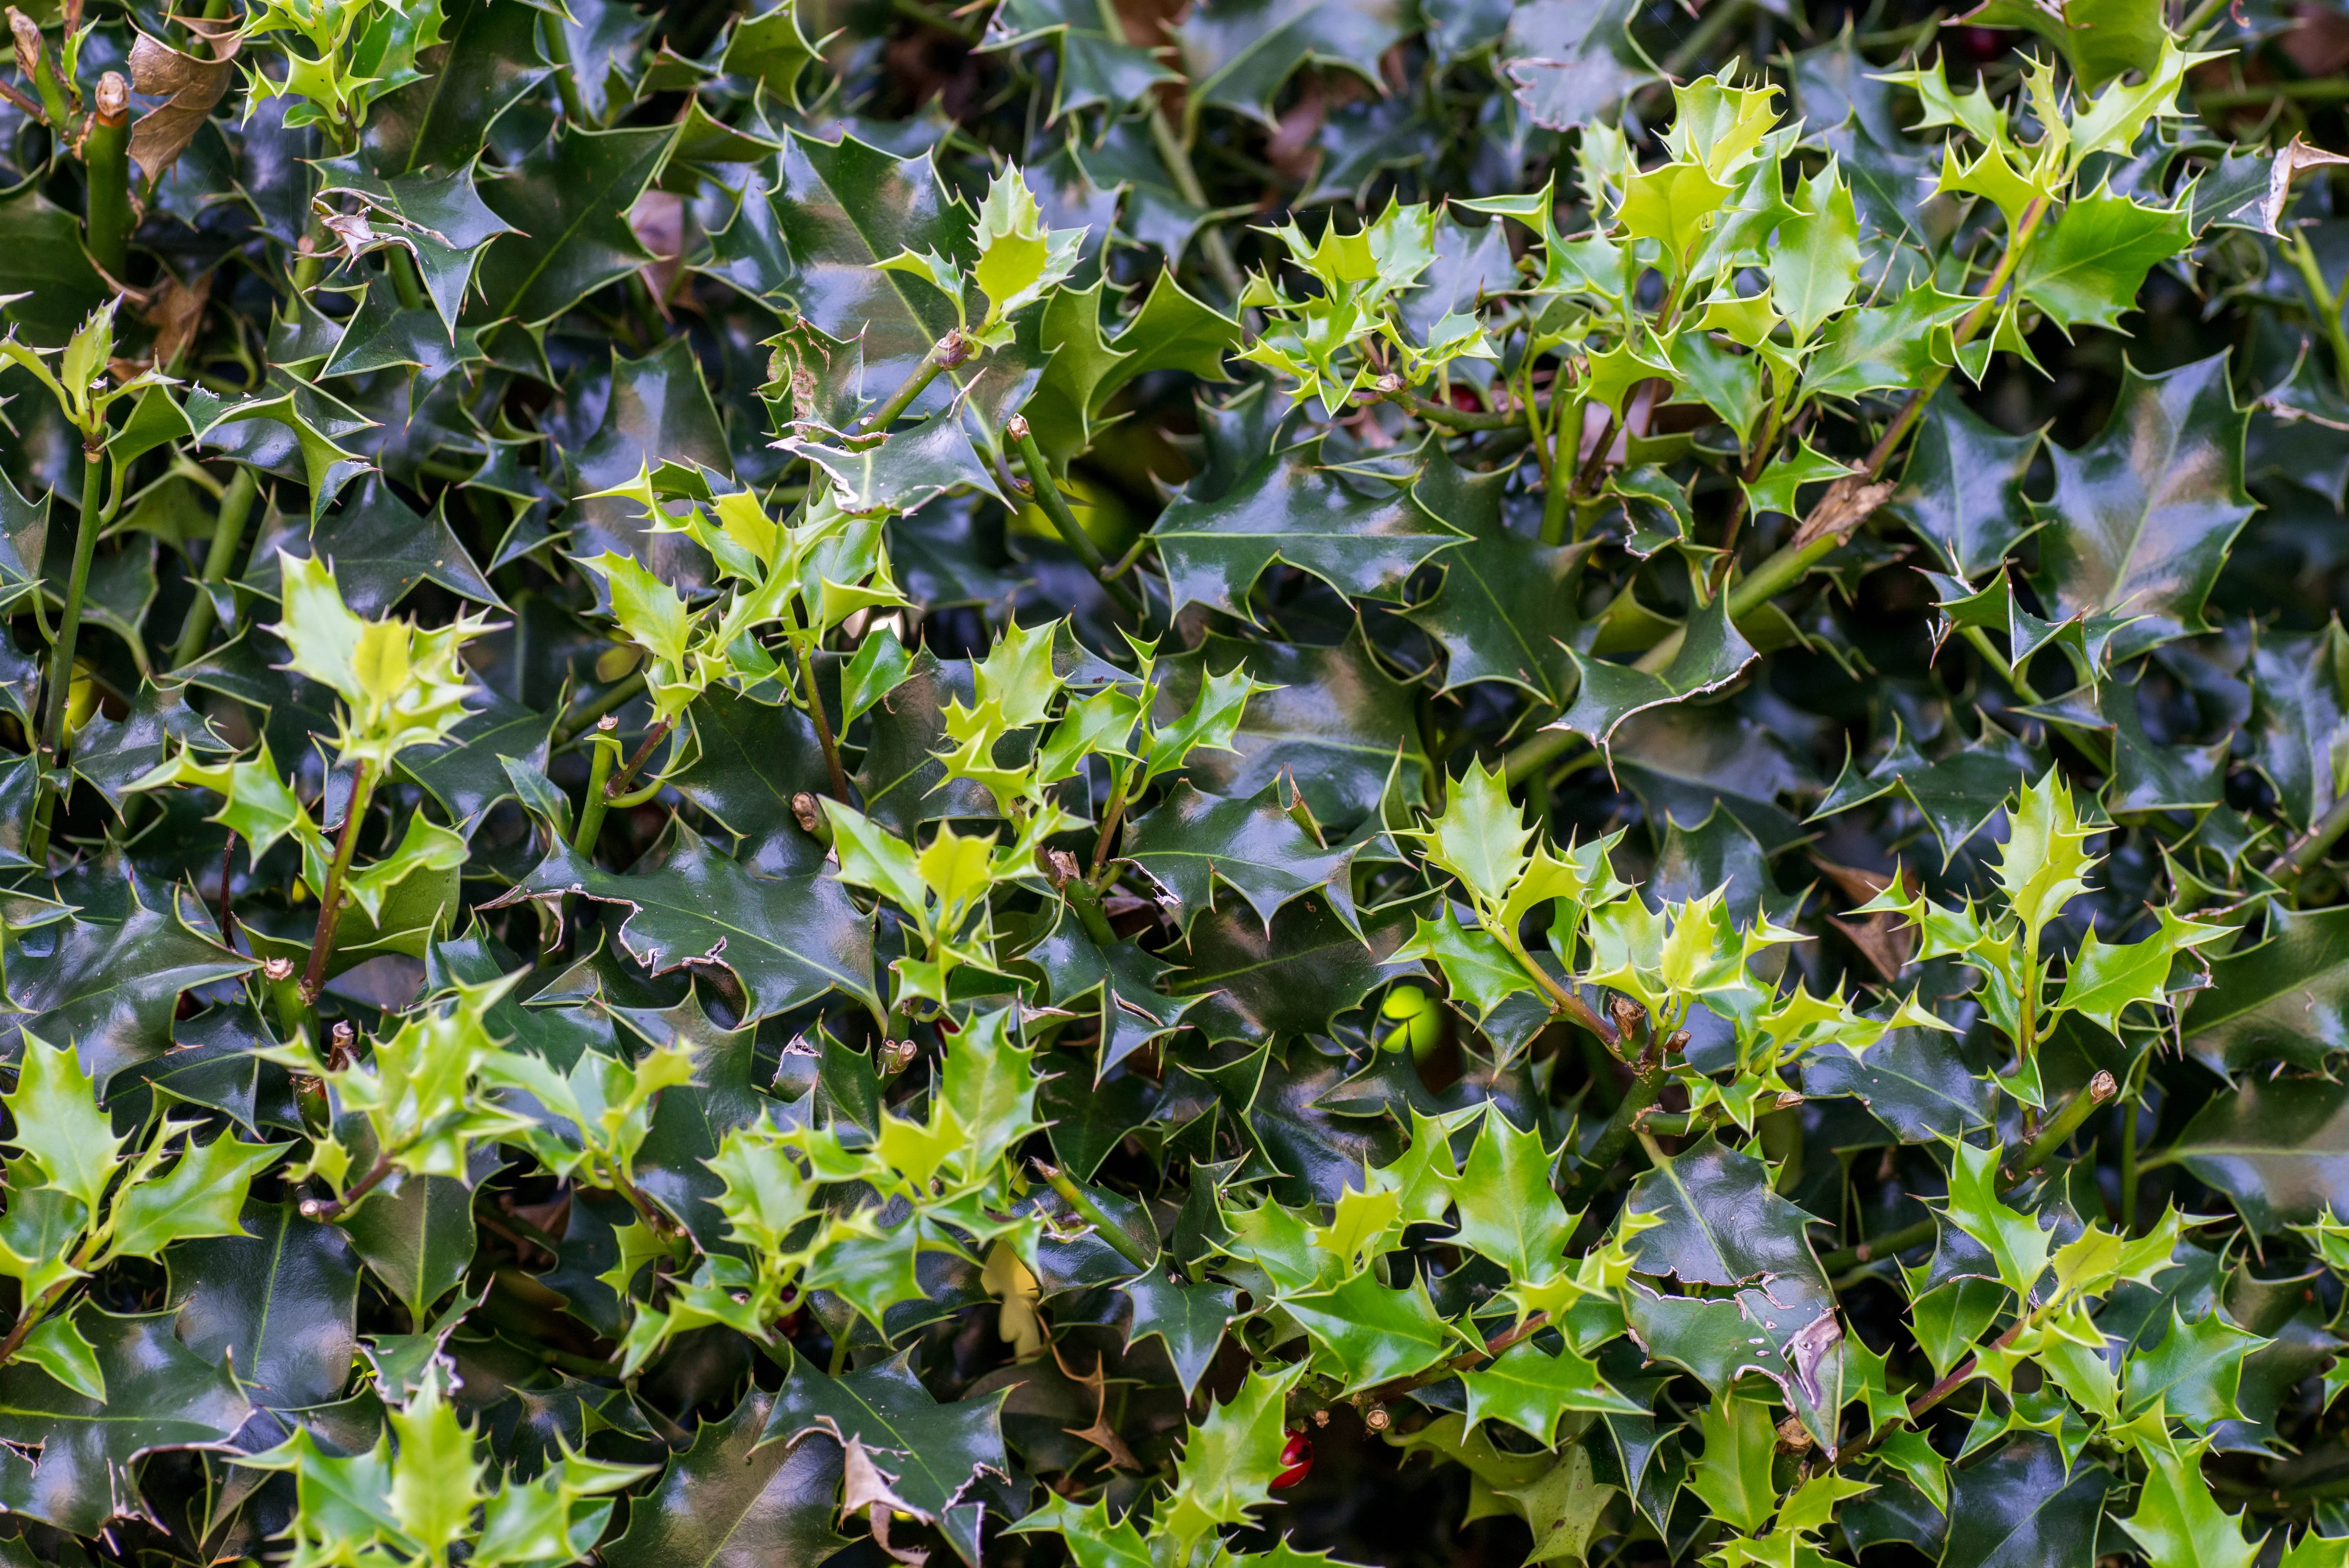
Origins and Physical Features The holly hedge was first planted as part of a grand Victorian garden design, a common trend of that era. The hedge consists of several holly (Ilex aquifolium) plants, known for their glossy, dark green leaves and their striking red berries. Over the years, it has grown to an impressive height of about 15 feet, providing both a visual and a literal barrier to the elements.
Weathering the Seasons Throughout its long life, this holly hedge has weathered countless storms, frosts, and heatwaves. It has seen the coldest British winters and the hottest summers. Yet, the hedge remains resilient, its evergreen leaves a symbol of endurance and survival.
A Sanctuary for Wildlife The holly hedge has been a haven for many species over the years. Its prickly leaves provide shelter for birds from predators, and its berries serve as a vital food source during the harsh winter months. Hedgehogs find refuge at its base, while bees and butterflies are attracted to its white blossoms in spring.
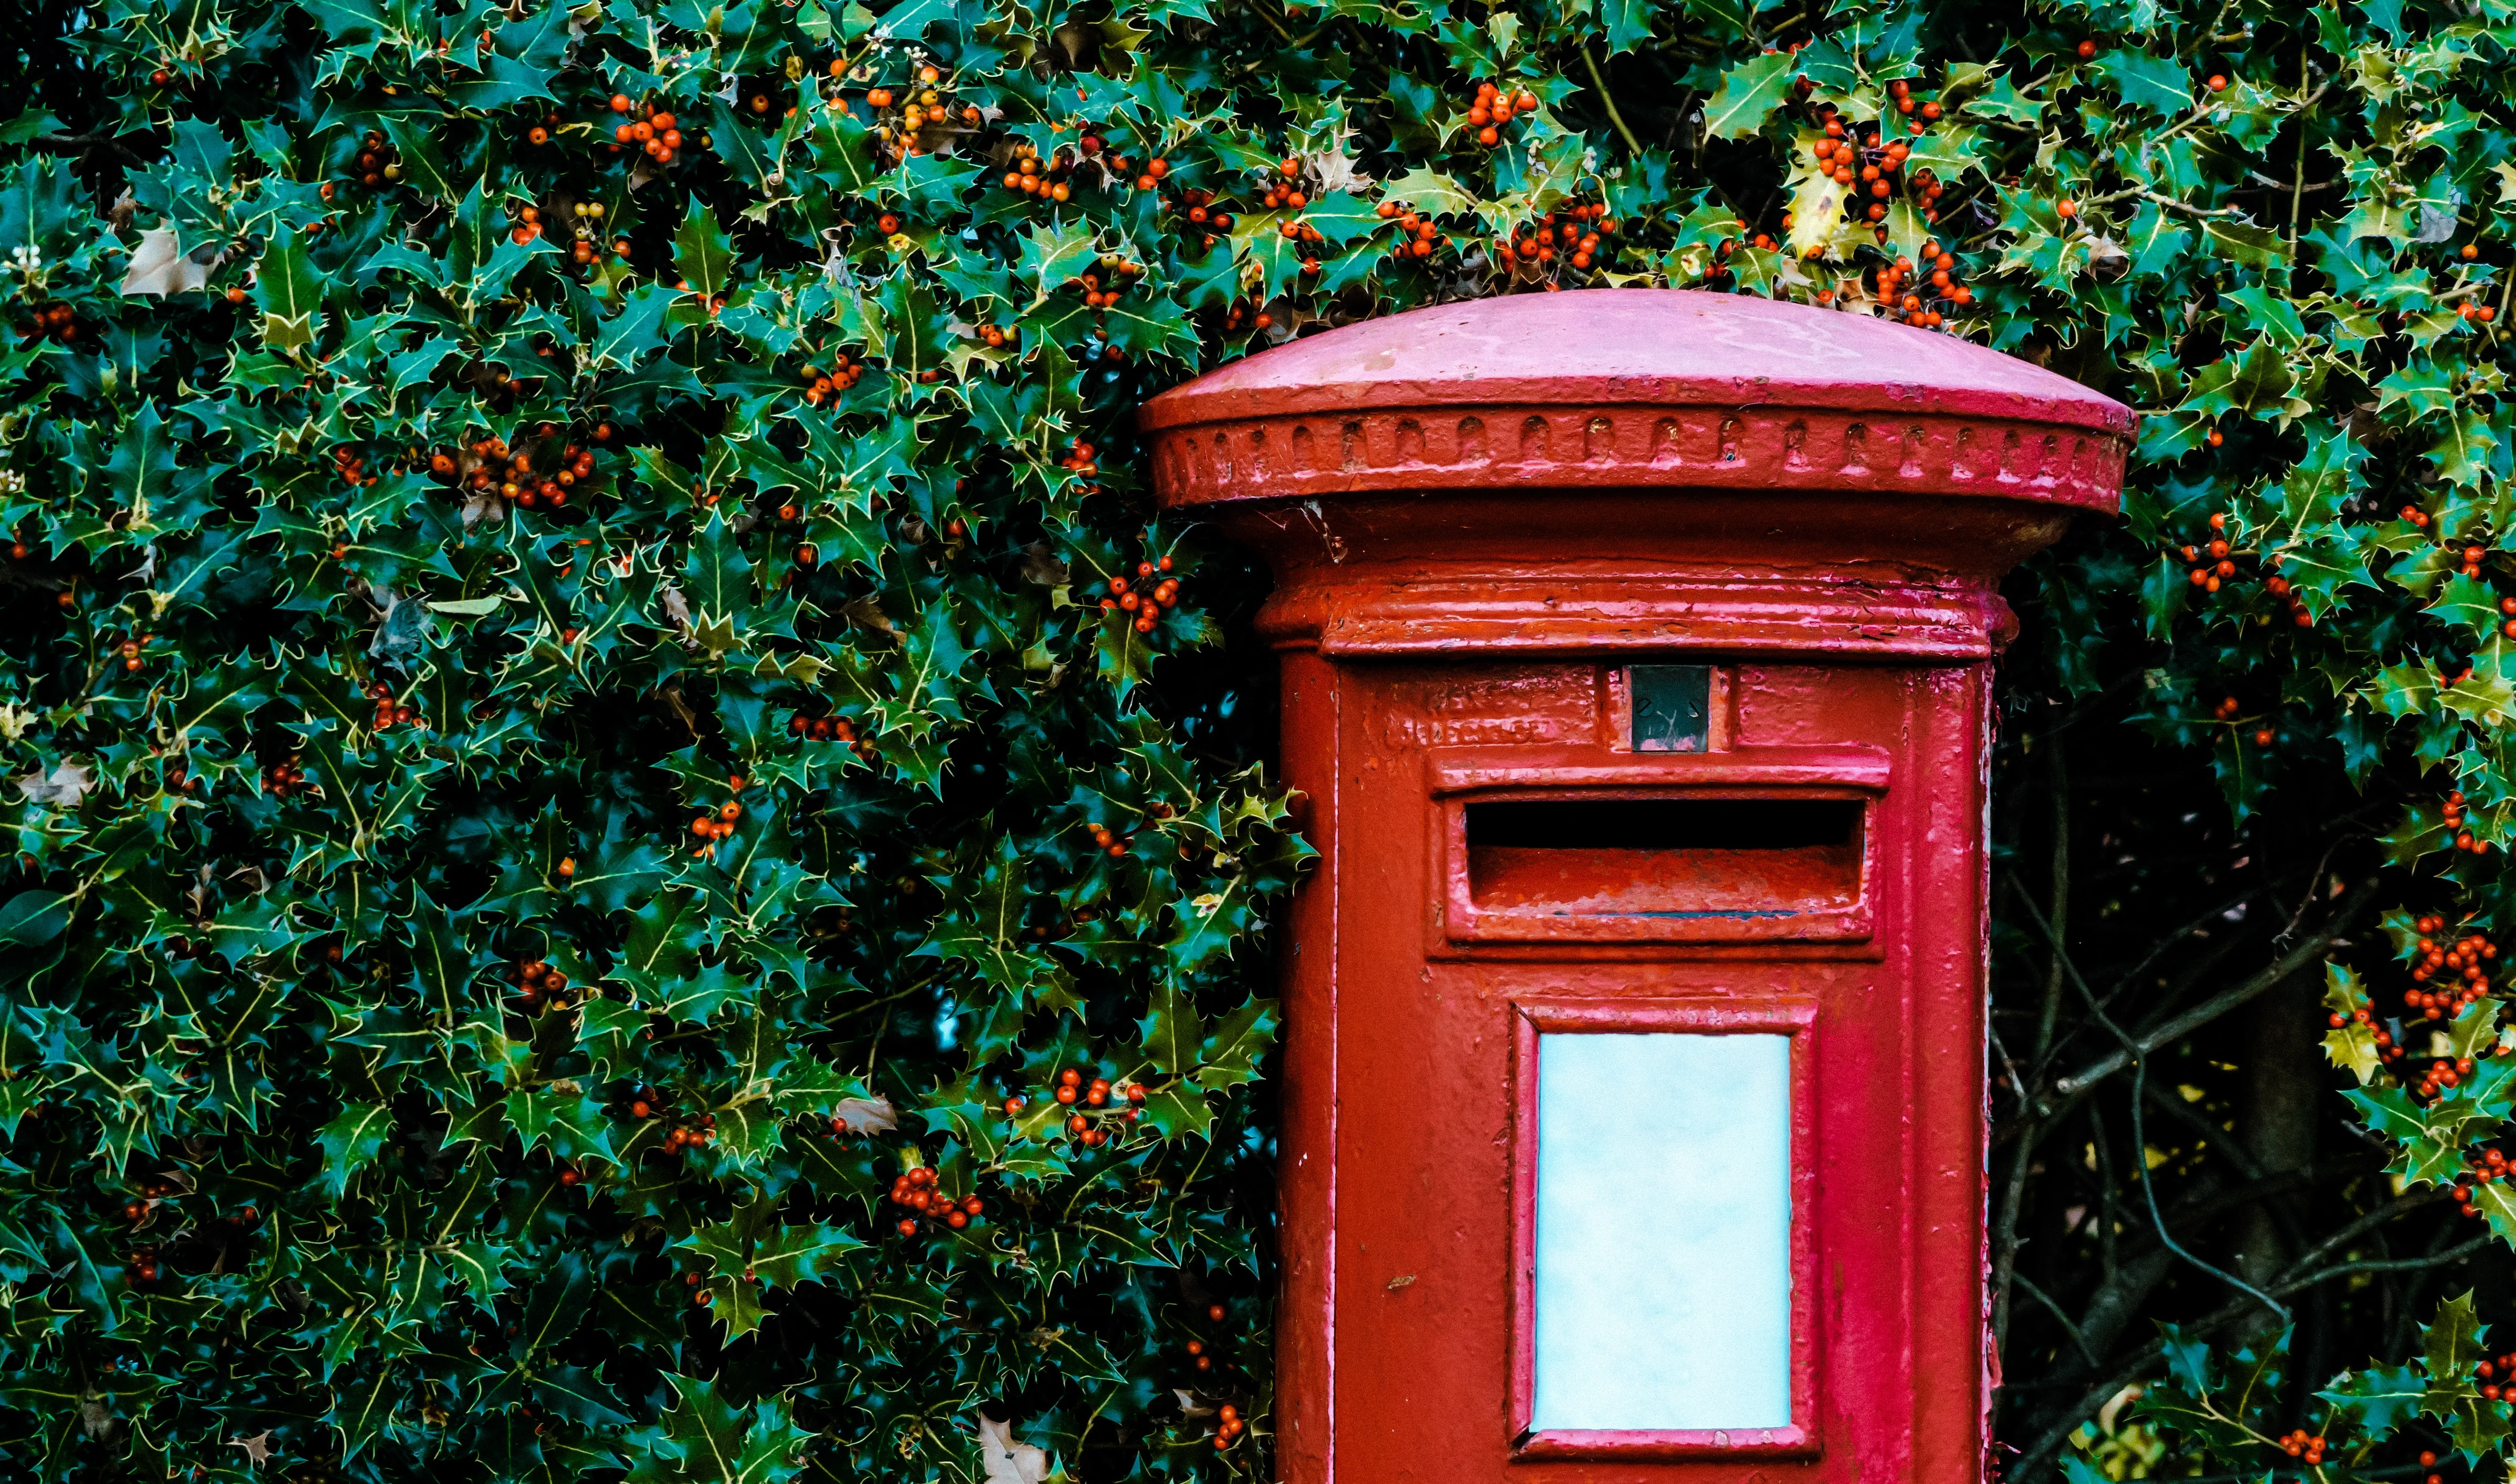
Role in the Community Over the decades, the holly hedge has played a significant role in local traditions and community life. It's been a source of Christmas decorations, with its boughs and berries used to adorn homes during the festive season. Moreover, it has served as a natural boundary marker between properties and has been a beloved landmark on countryside walks.
Notable Events During World War II, the holly hedge survived the bombings that devastated other parts of the country, standing as a symbol of hope and resilience. More recently, it was the backdrop for a community jubilee celebration, adorned with lights and decorations.
Ongoing Significance Today, the holly hedge continues to thrive, reminding us of our connection to the past and our responsibility to the future. Its presence inspires local conservation efforts and serves as a living testament to the rich history of the natural world around us.
In conclusion, this ancient holly hedge is more than just a collection of plants. It's a historical monument, a wildlife sanctuary, and a symbol of the enduring power of nature.
Understanding the Different Variations of Species of a Holly Bush Hedge, ideal for UK Conditions
A Holly Bush Hedge is a great way to add a touch of greenery to your garden, and it's also a great way to add a bit of privacy to your outdoor space. But, before you start planting, it's important to understand the different variations of species of a Holly Bush Hedge, ideal for UK conditions.
The most popular species of Holly Bush Hedge is the English Holly, which is a hardy evergreen shrub that can tolerate a wide range of temperatures and soil types. It's also very easy to prune and maintain, making it a great choice for those looking for a low-maintenance hedge. Another popular species is the Japanese Holly, which is a more compact shrub that can be used to create a more formal look. It's also very tolerant of pruning, so it's a great choice for those looking for a more structured hedge.
No matter which species of Holly Bush Hedge you choose, it's important to remember that regular pruning is essential for keeping your hedge looking its best. Pruning should be done in the late winter or early spring, and it's important to remove any dead or diseased branches. This will help to keep your hedge healthy and looking its best.
Holly Bush Hedge Species for the UK Climate
The United Kingdom's climate is generally temperate, with moderate rainfall throughout the year and temperatures ranging from mild winters to warm summers. Several species of holly (Ilex) thrive in these conditions, making them excellent choices for hedges.-
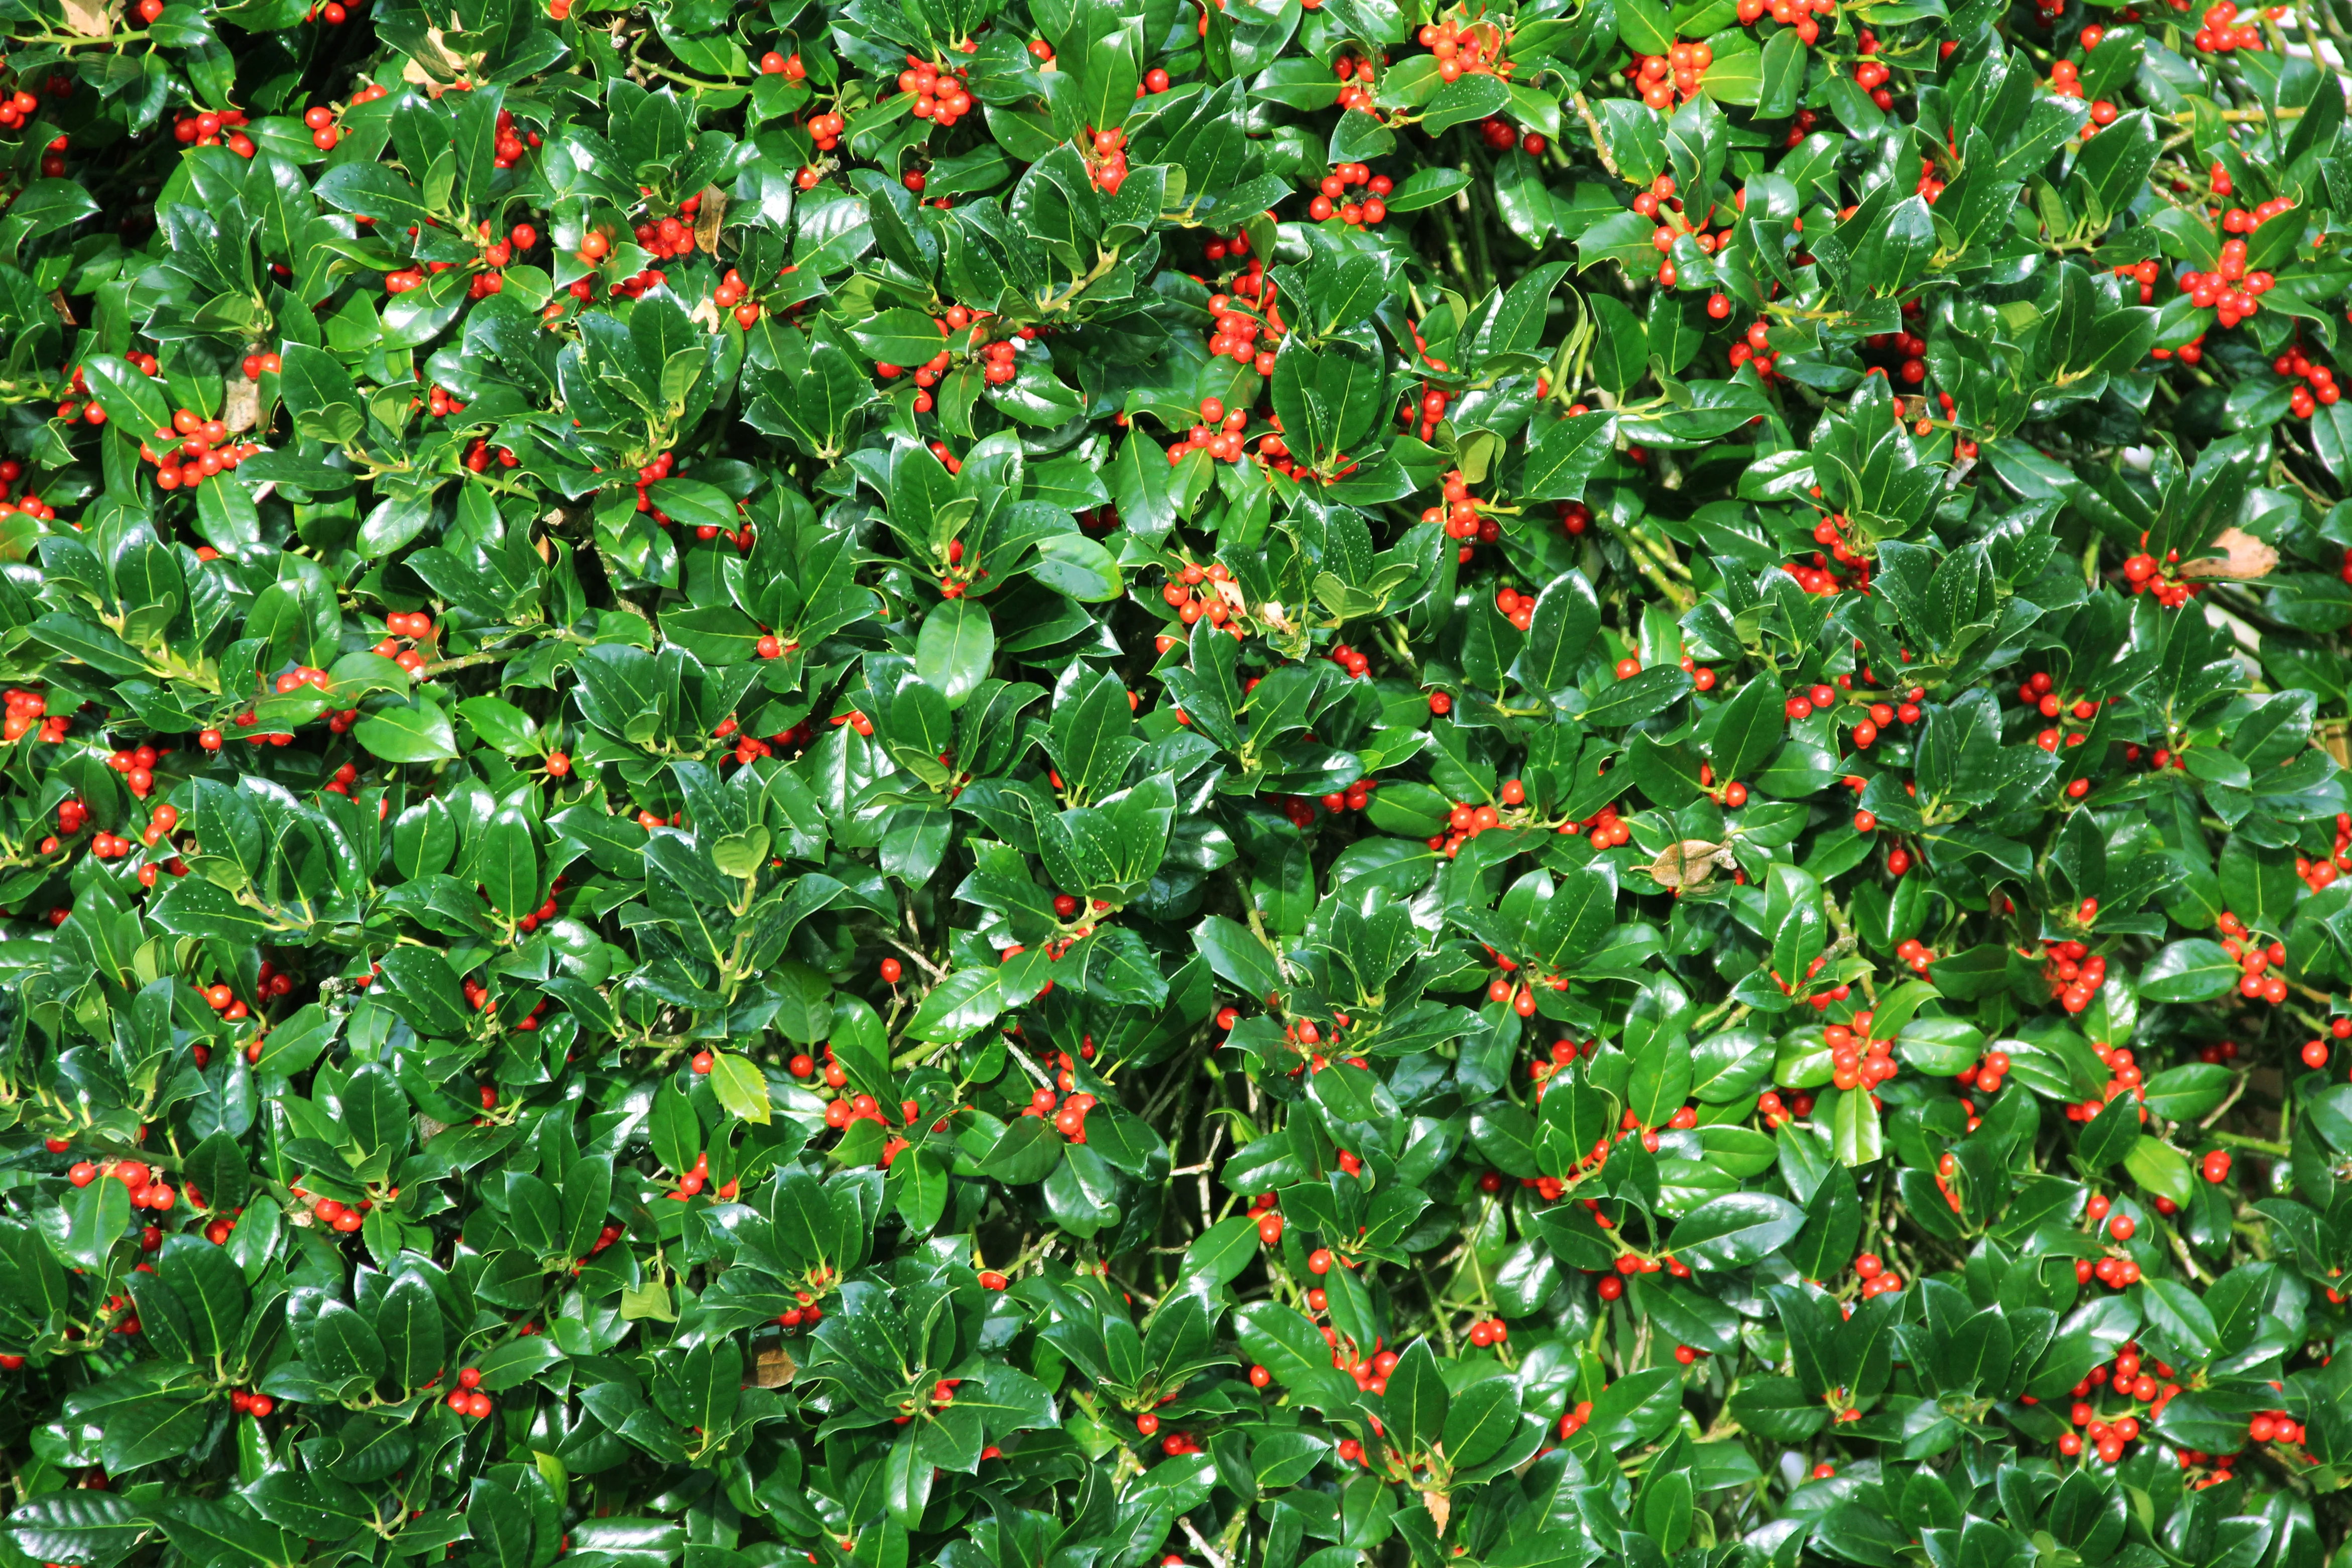
1. English Holly (Ilex aquifolium)
This native species is perhaps the most iconic, with its glossy, dark green leaves and bright red berries. It grows at a moderate rate and can reach heights of up to 15-25 feet. English Holly is a hardy plant that can tolerate heavy pruning, making it ideal for shaping into dense, formal hedges.
Planting and Care: Prefers well-drained soil and full sun to partial shade. It requires regular watering, especially in dry periods. Prune in late winter or early spring.
-
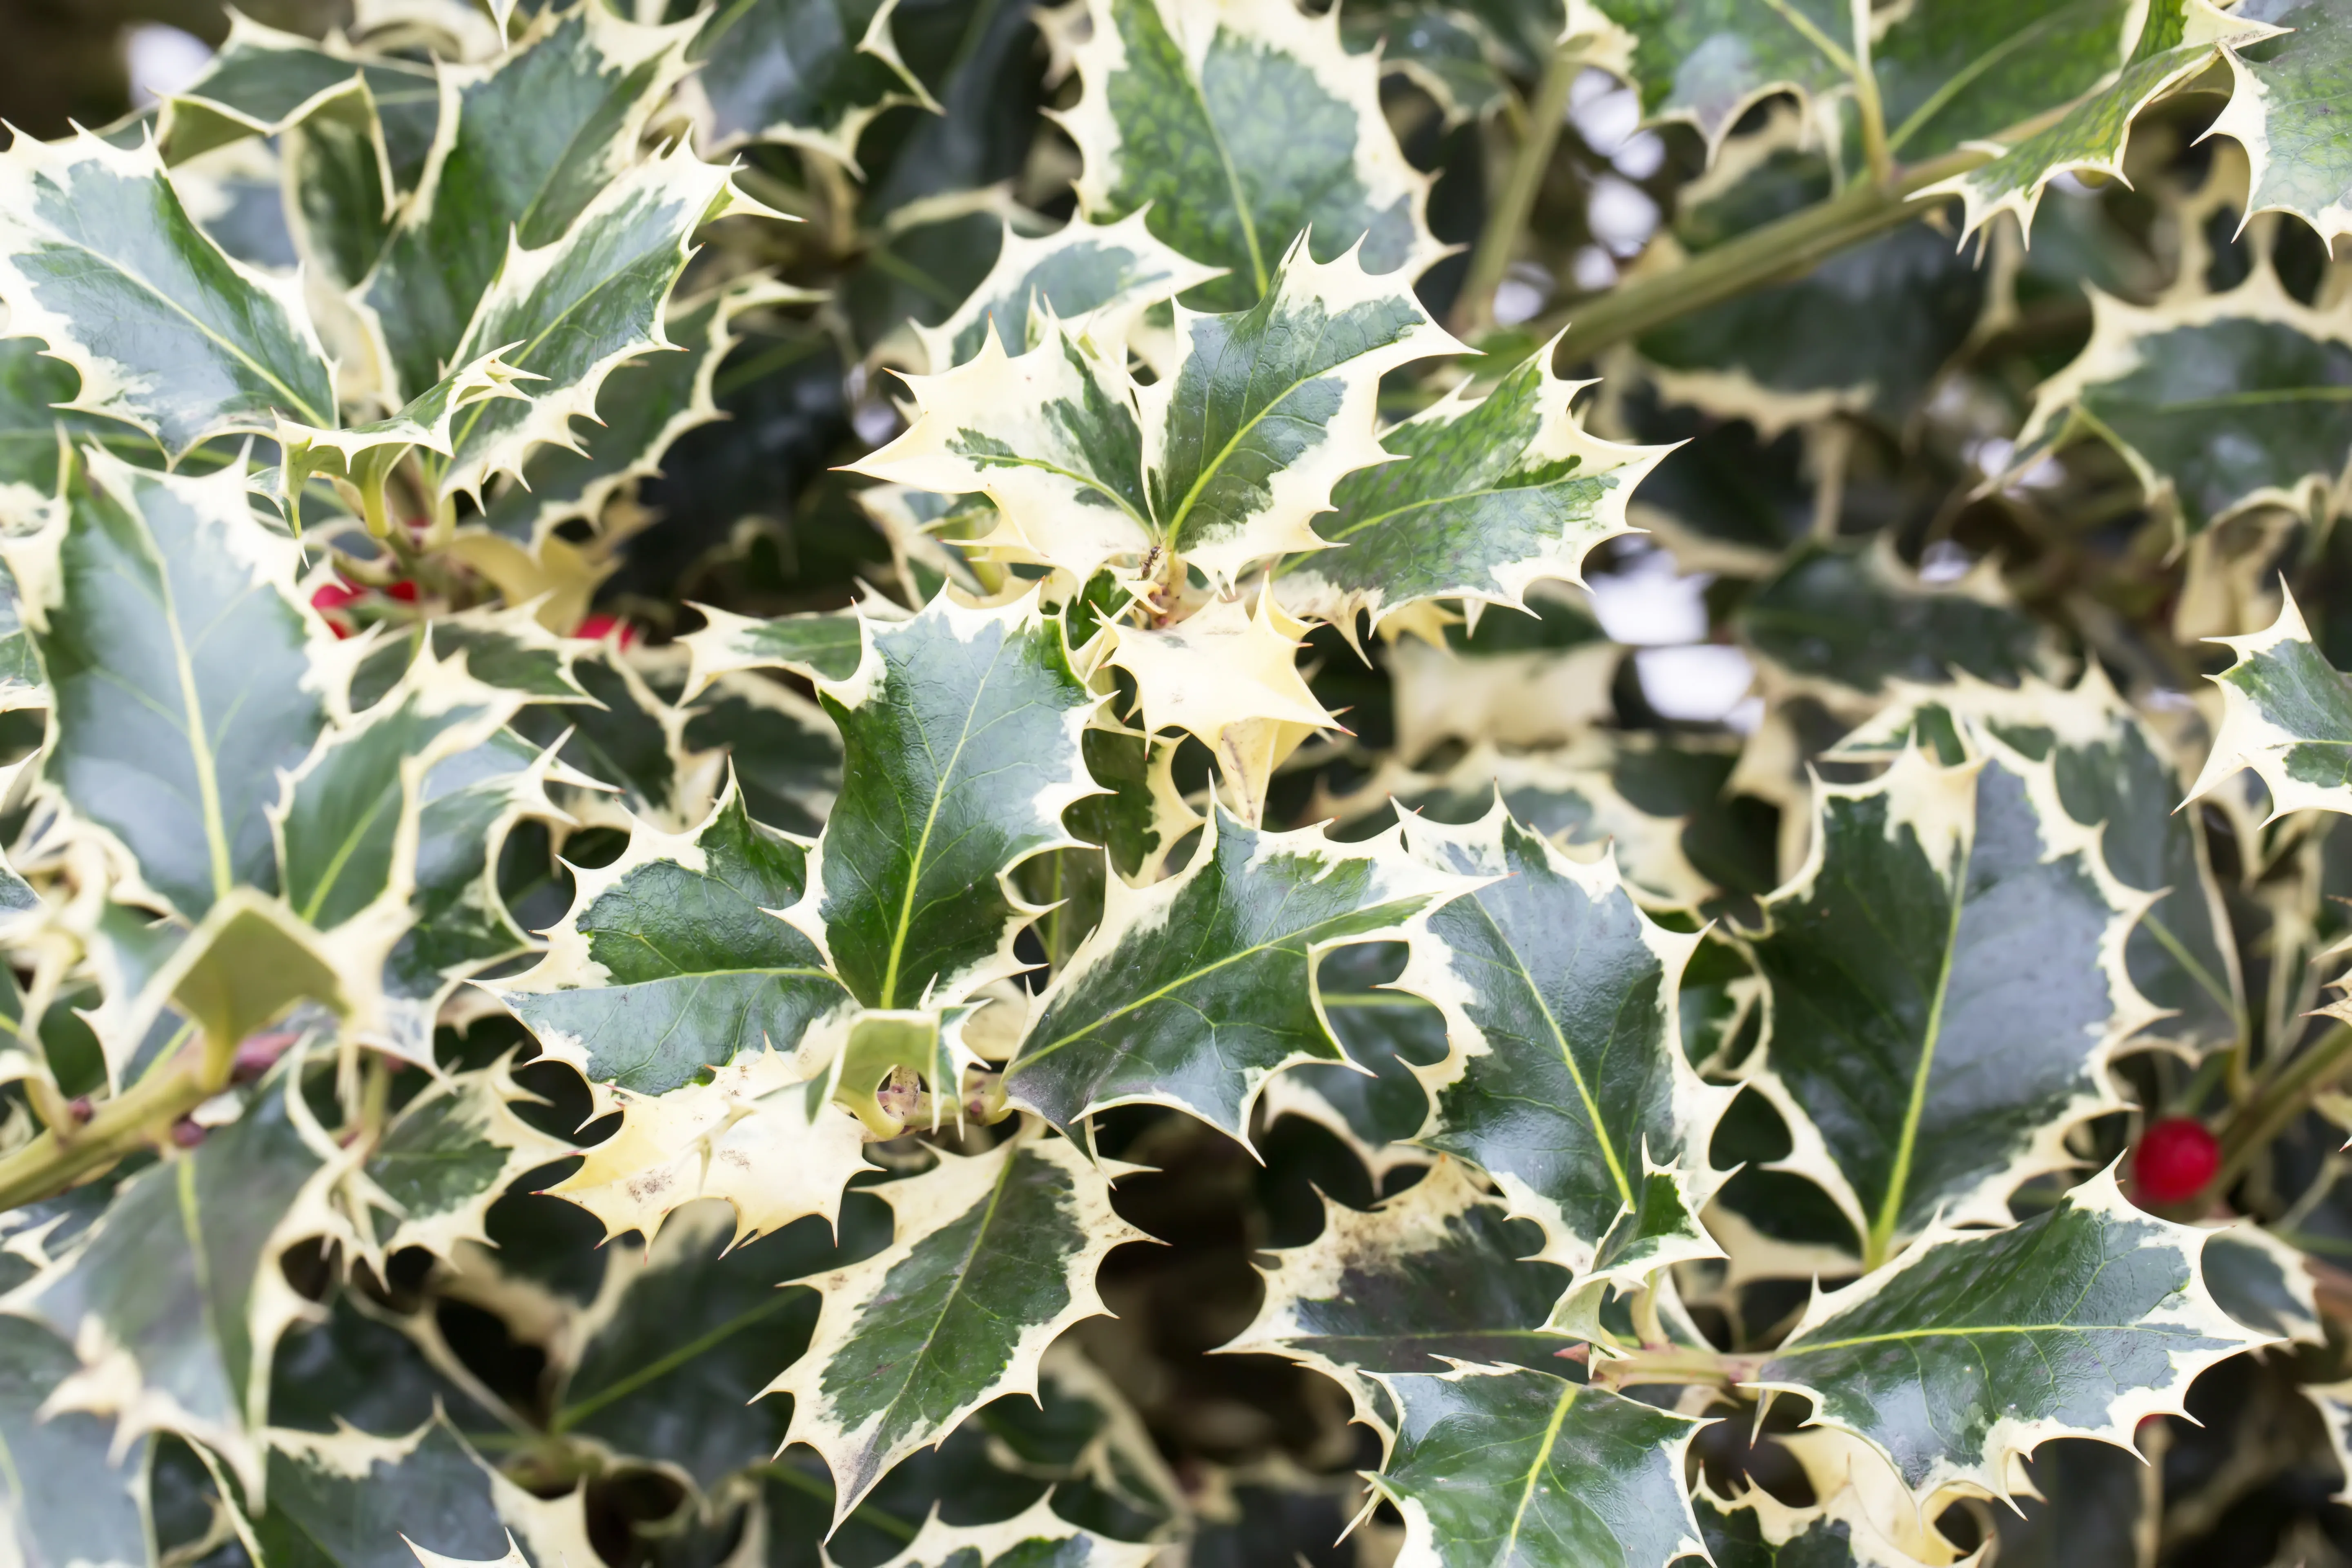
2. Silver Queen Holly (Ilex x altaclerensis 'Silver Queen')
Despite its name, Silver Queen is a male variety, so it does not produce berries. It's known for its attractive silver-margined leaves and can grow up to 20 feet tall.
Planting and Care: Like English Holly, it prefers well-drained soil and full sun to partial shade. Pruning should be done in the spring.
-
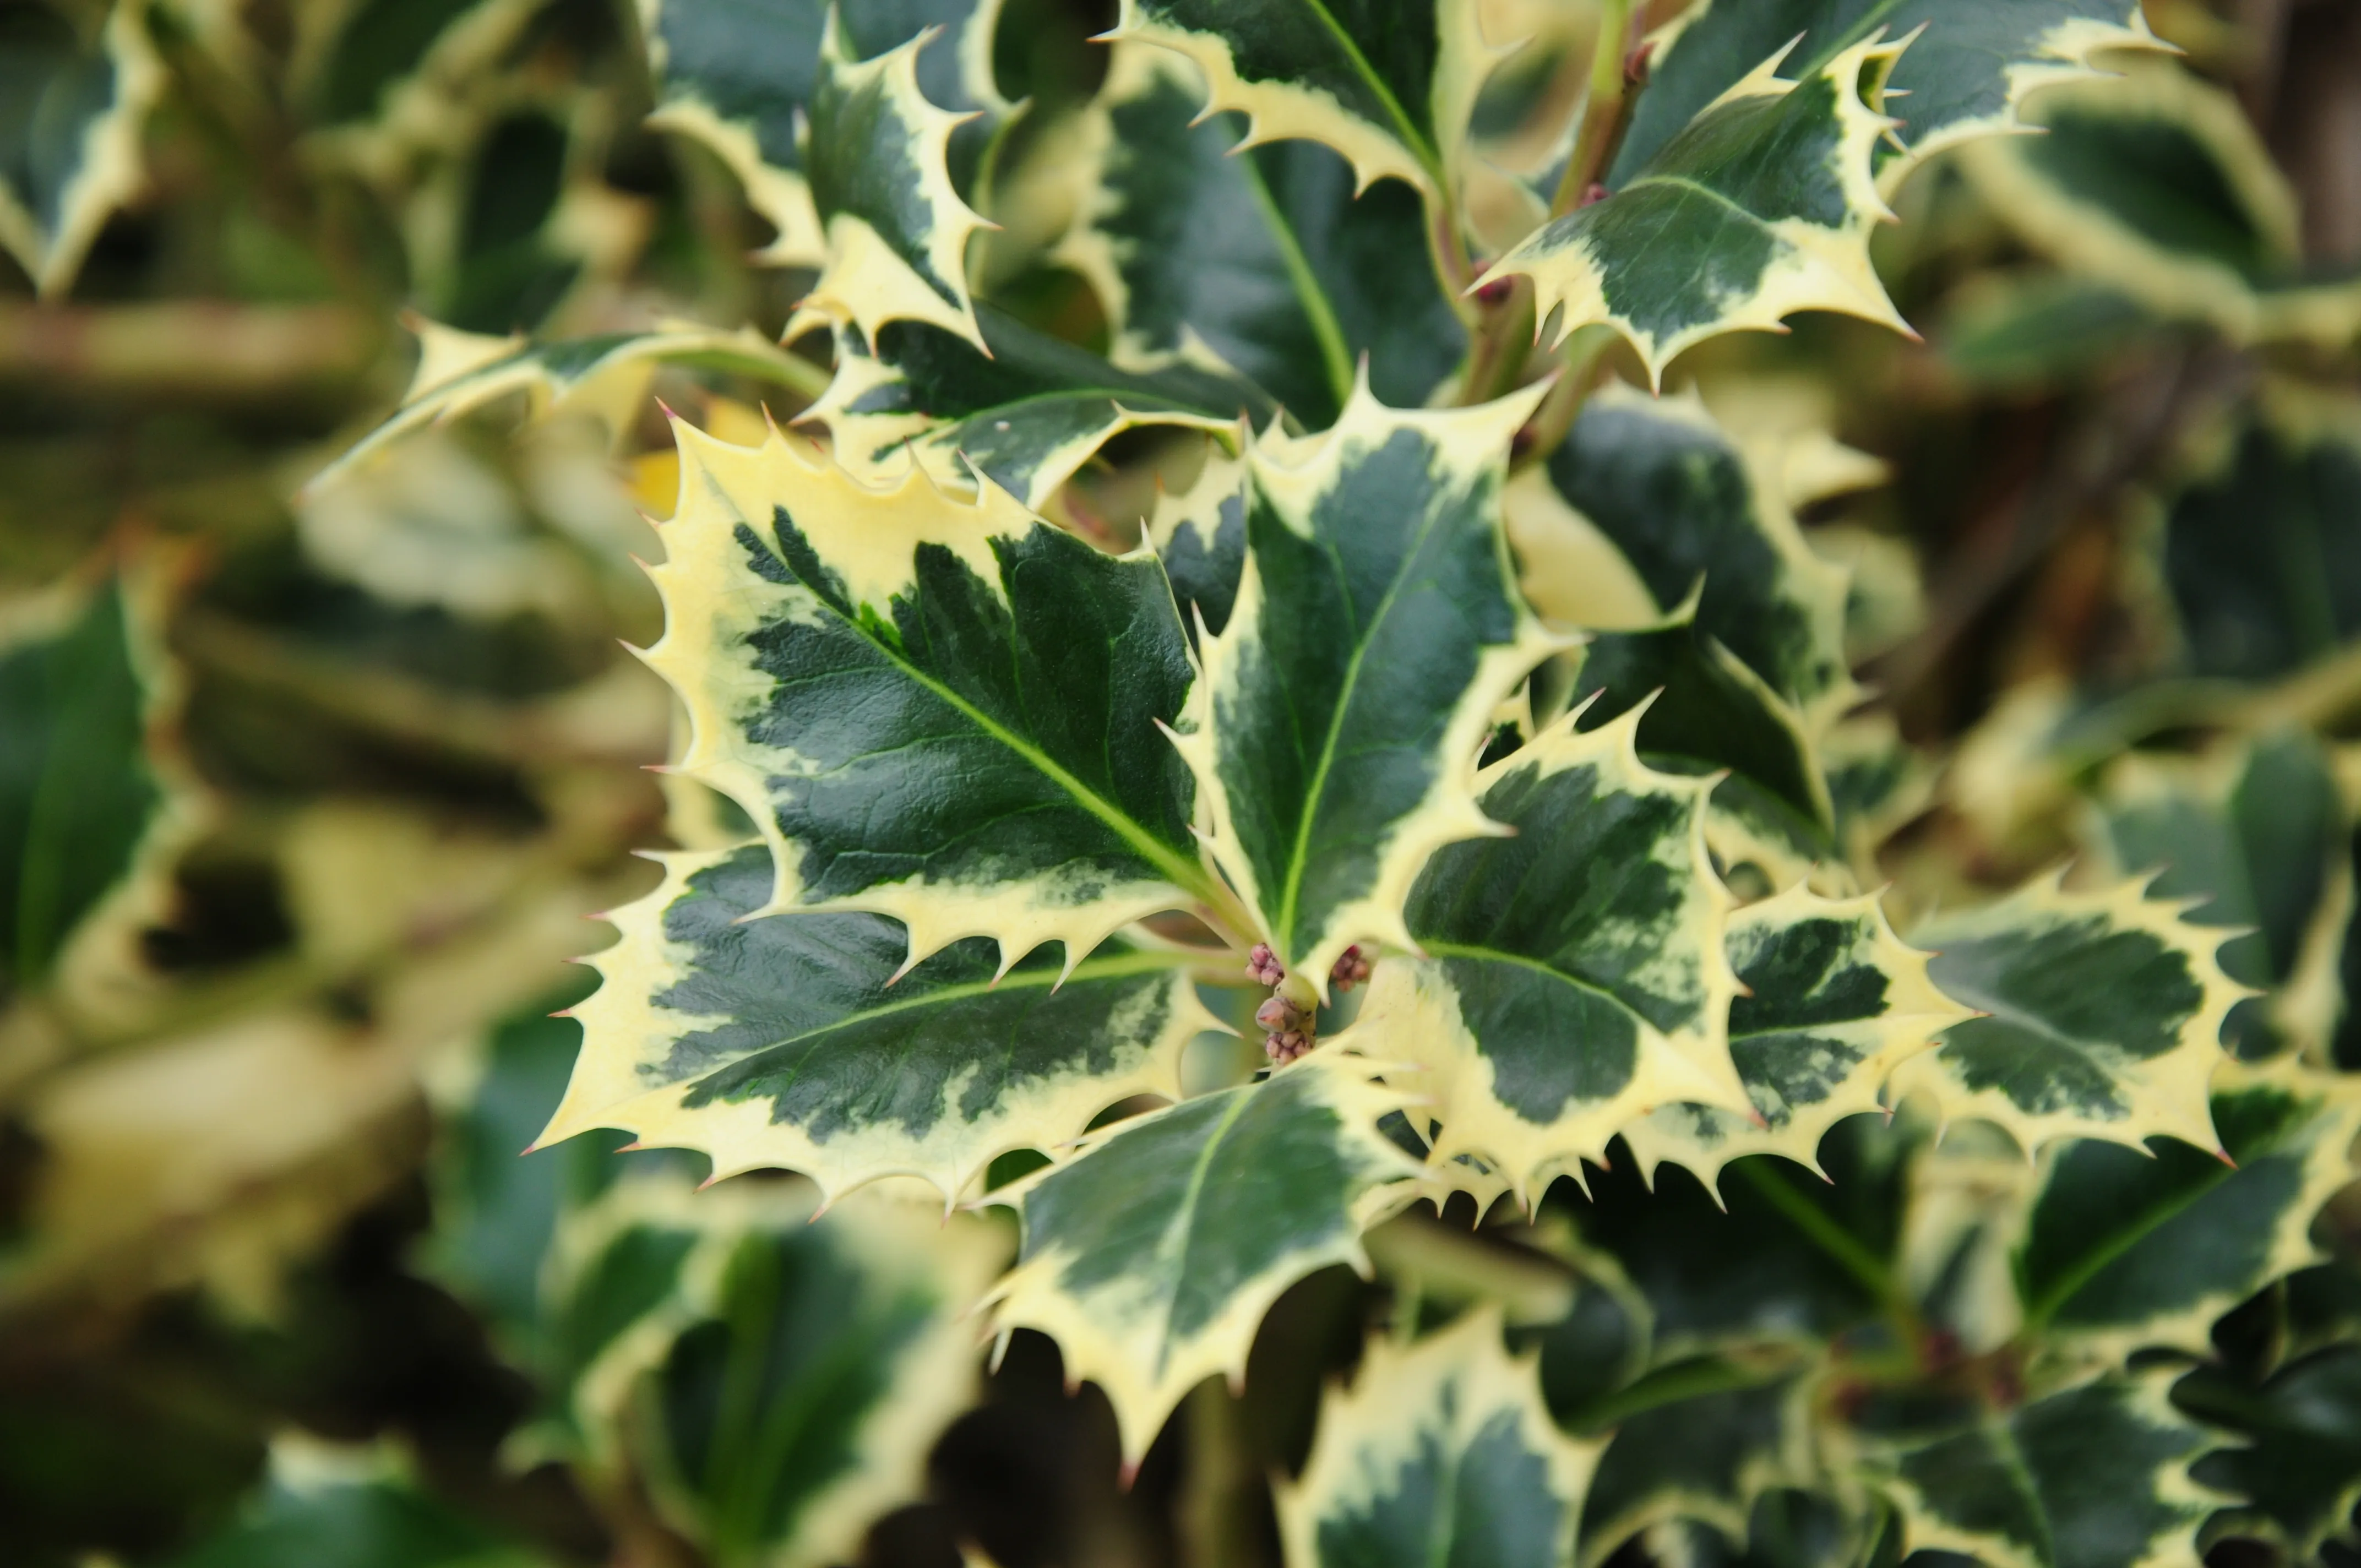
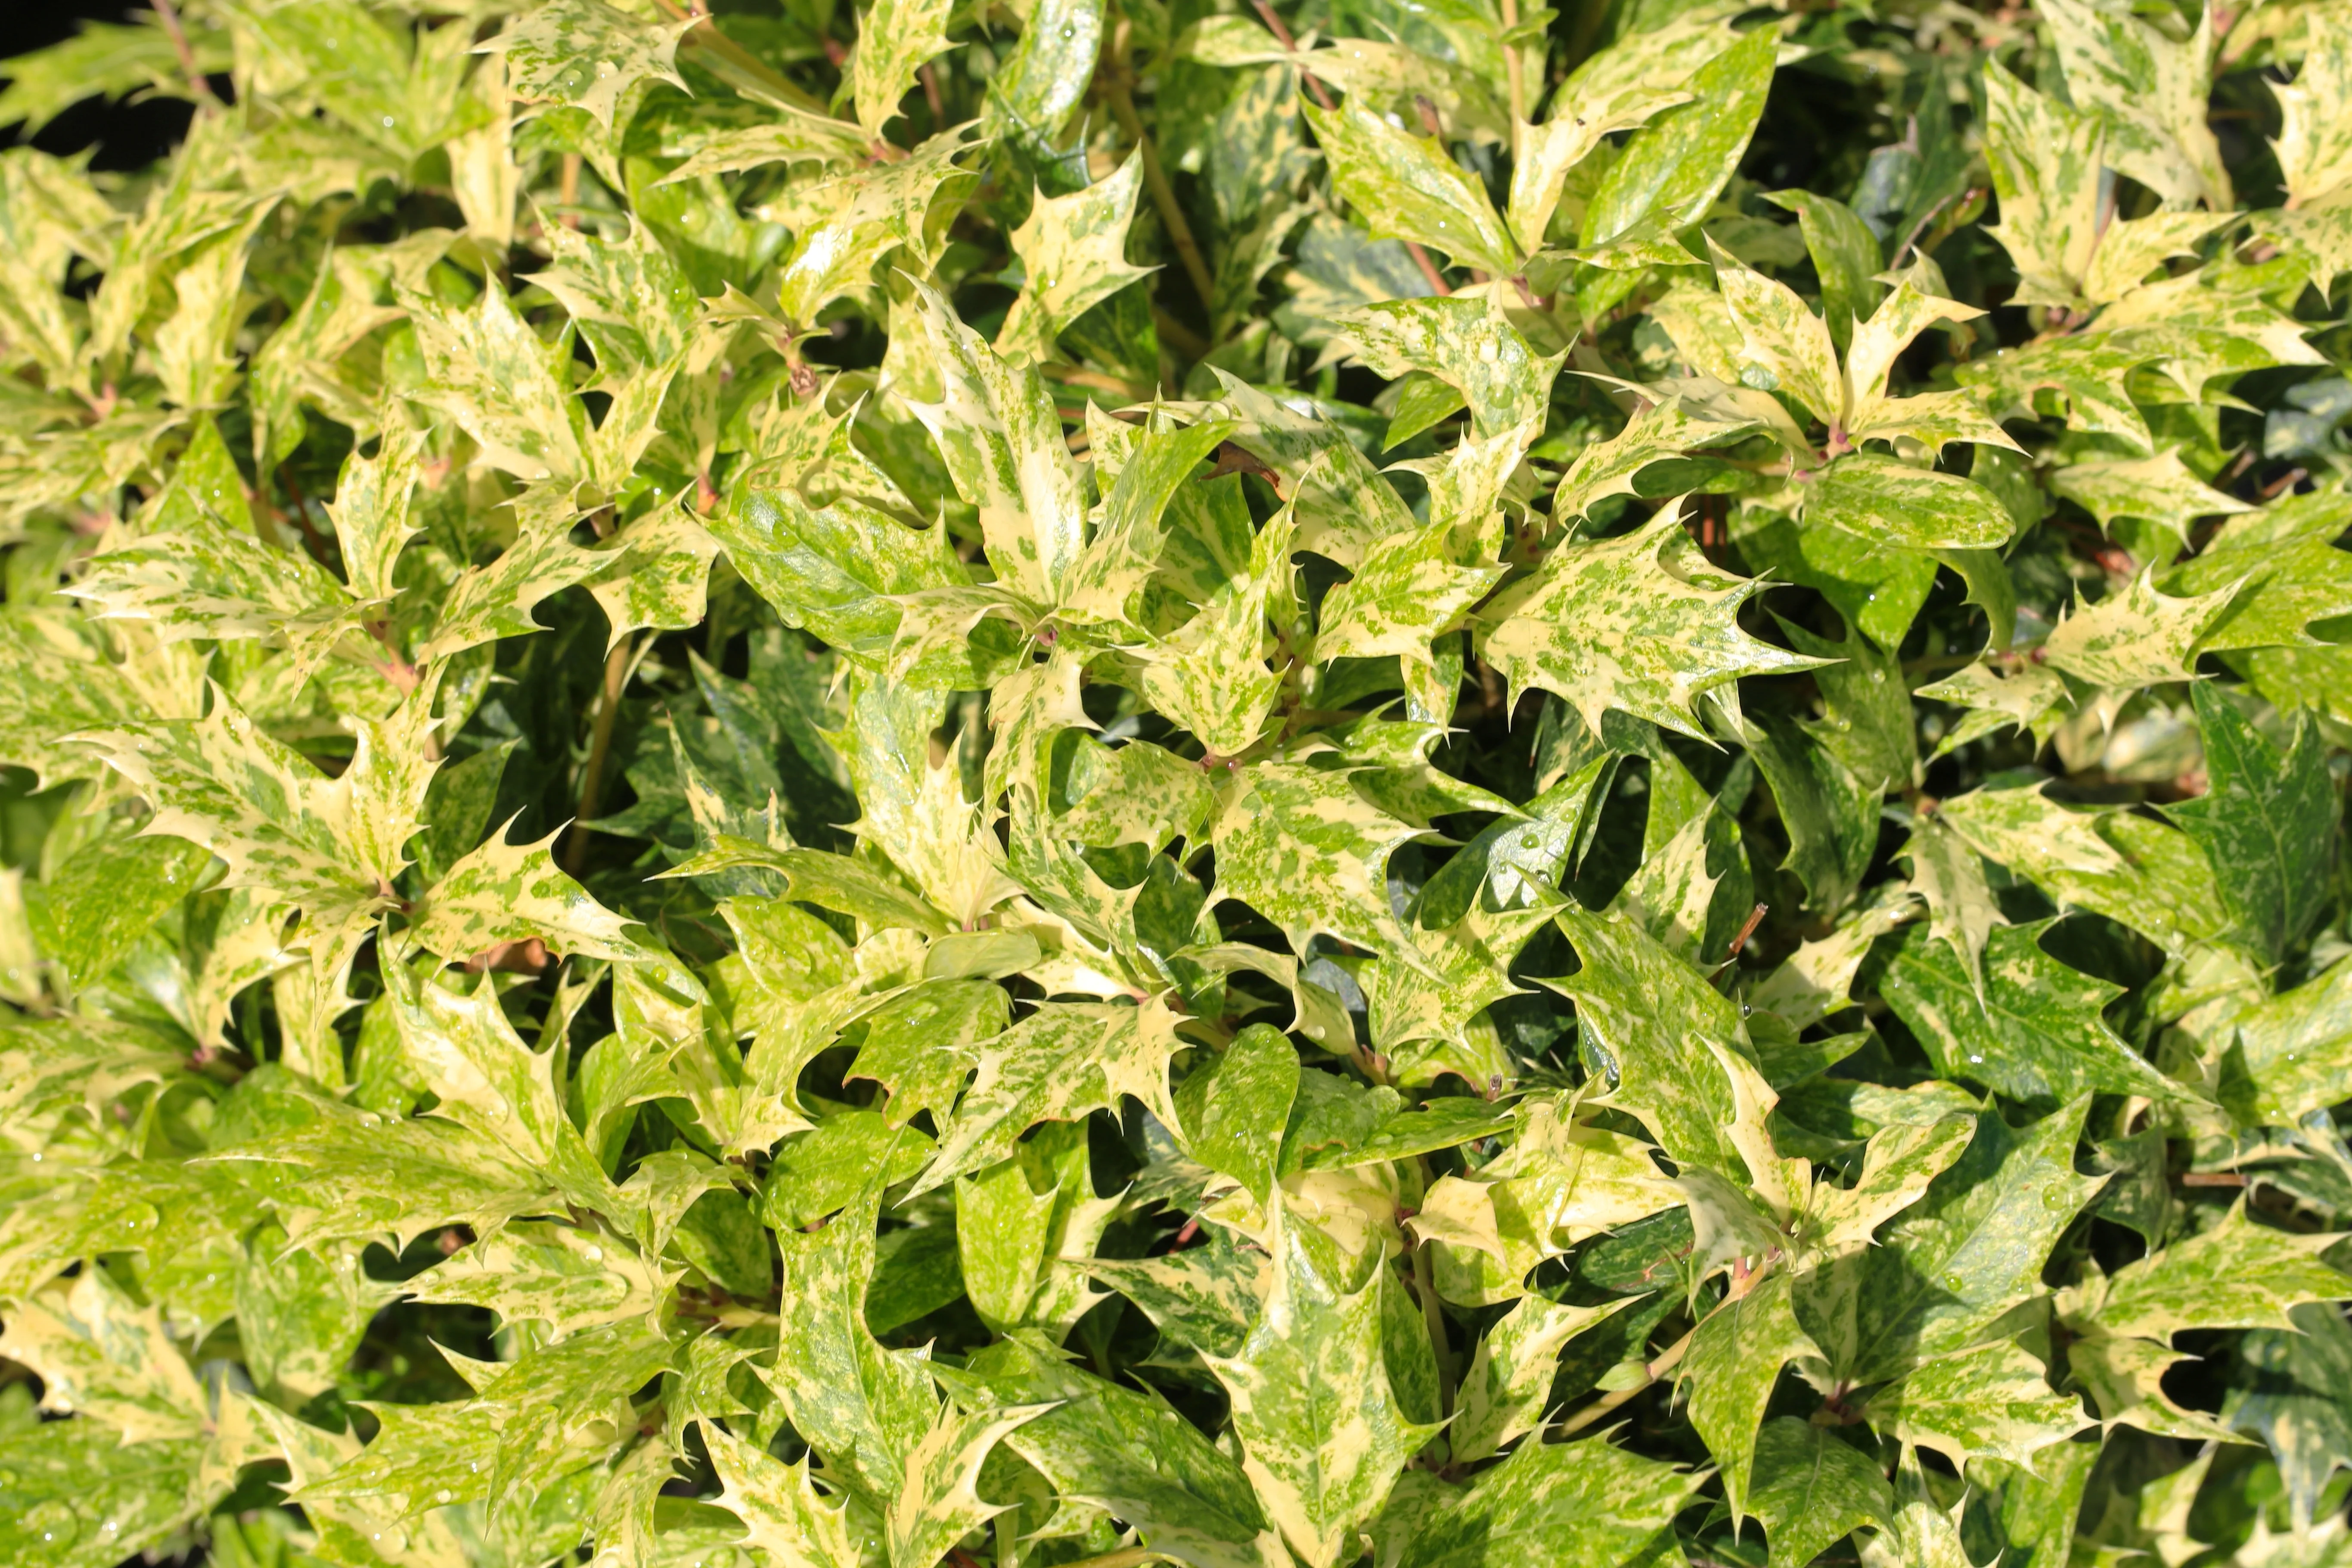
3. Golden King Holly (Ilex x altaclerensis 'Golden King')
Ironically, Golden King is a female variety. It has beautiful golden-edged leaves and produces red berries. It can reach a height of 17 feet.
Planting and Care: This variety enjoys full sun to partial shade and well-drained soil. It is drought-tolerant once established. Prune in late winter or early spring.
-
4. Lawsoniana Holly (Ilex x altaclerensis 'Lawsoniana')
A less common variety, Lawsoniana has large, glossy leaves and produces large, bright red berries. It grows up to 20 feet tall.
Planting and Care: Prefers full sun to partial shade and well-drained soil. Water regularly during dry periods. Prune in spring.
-
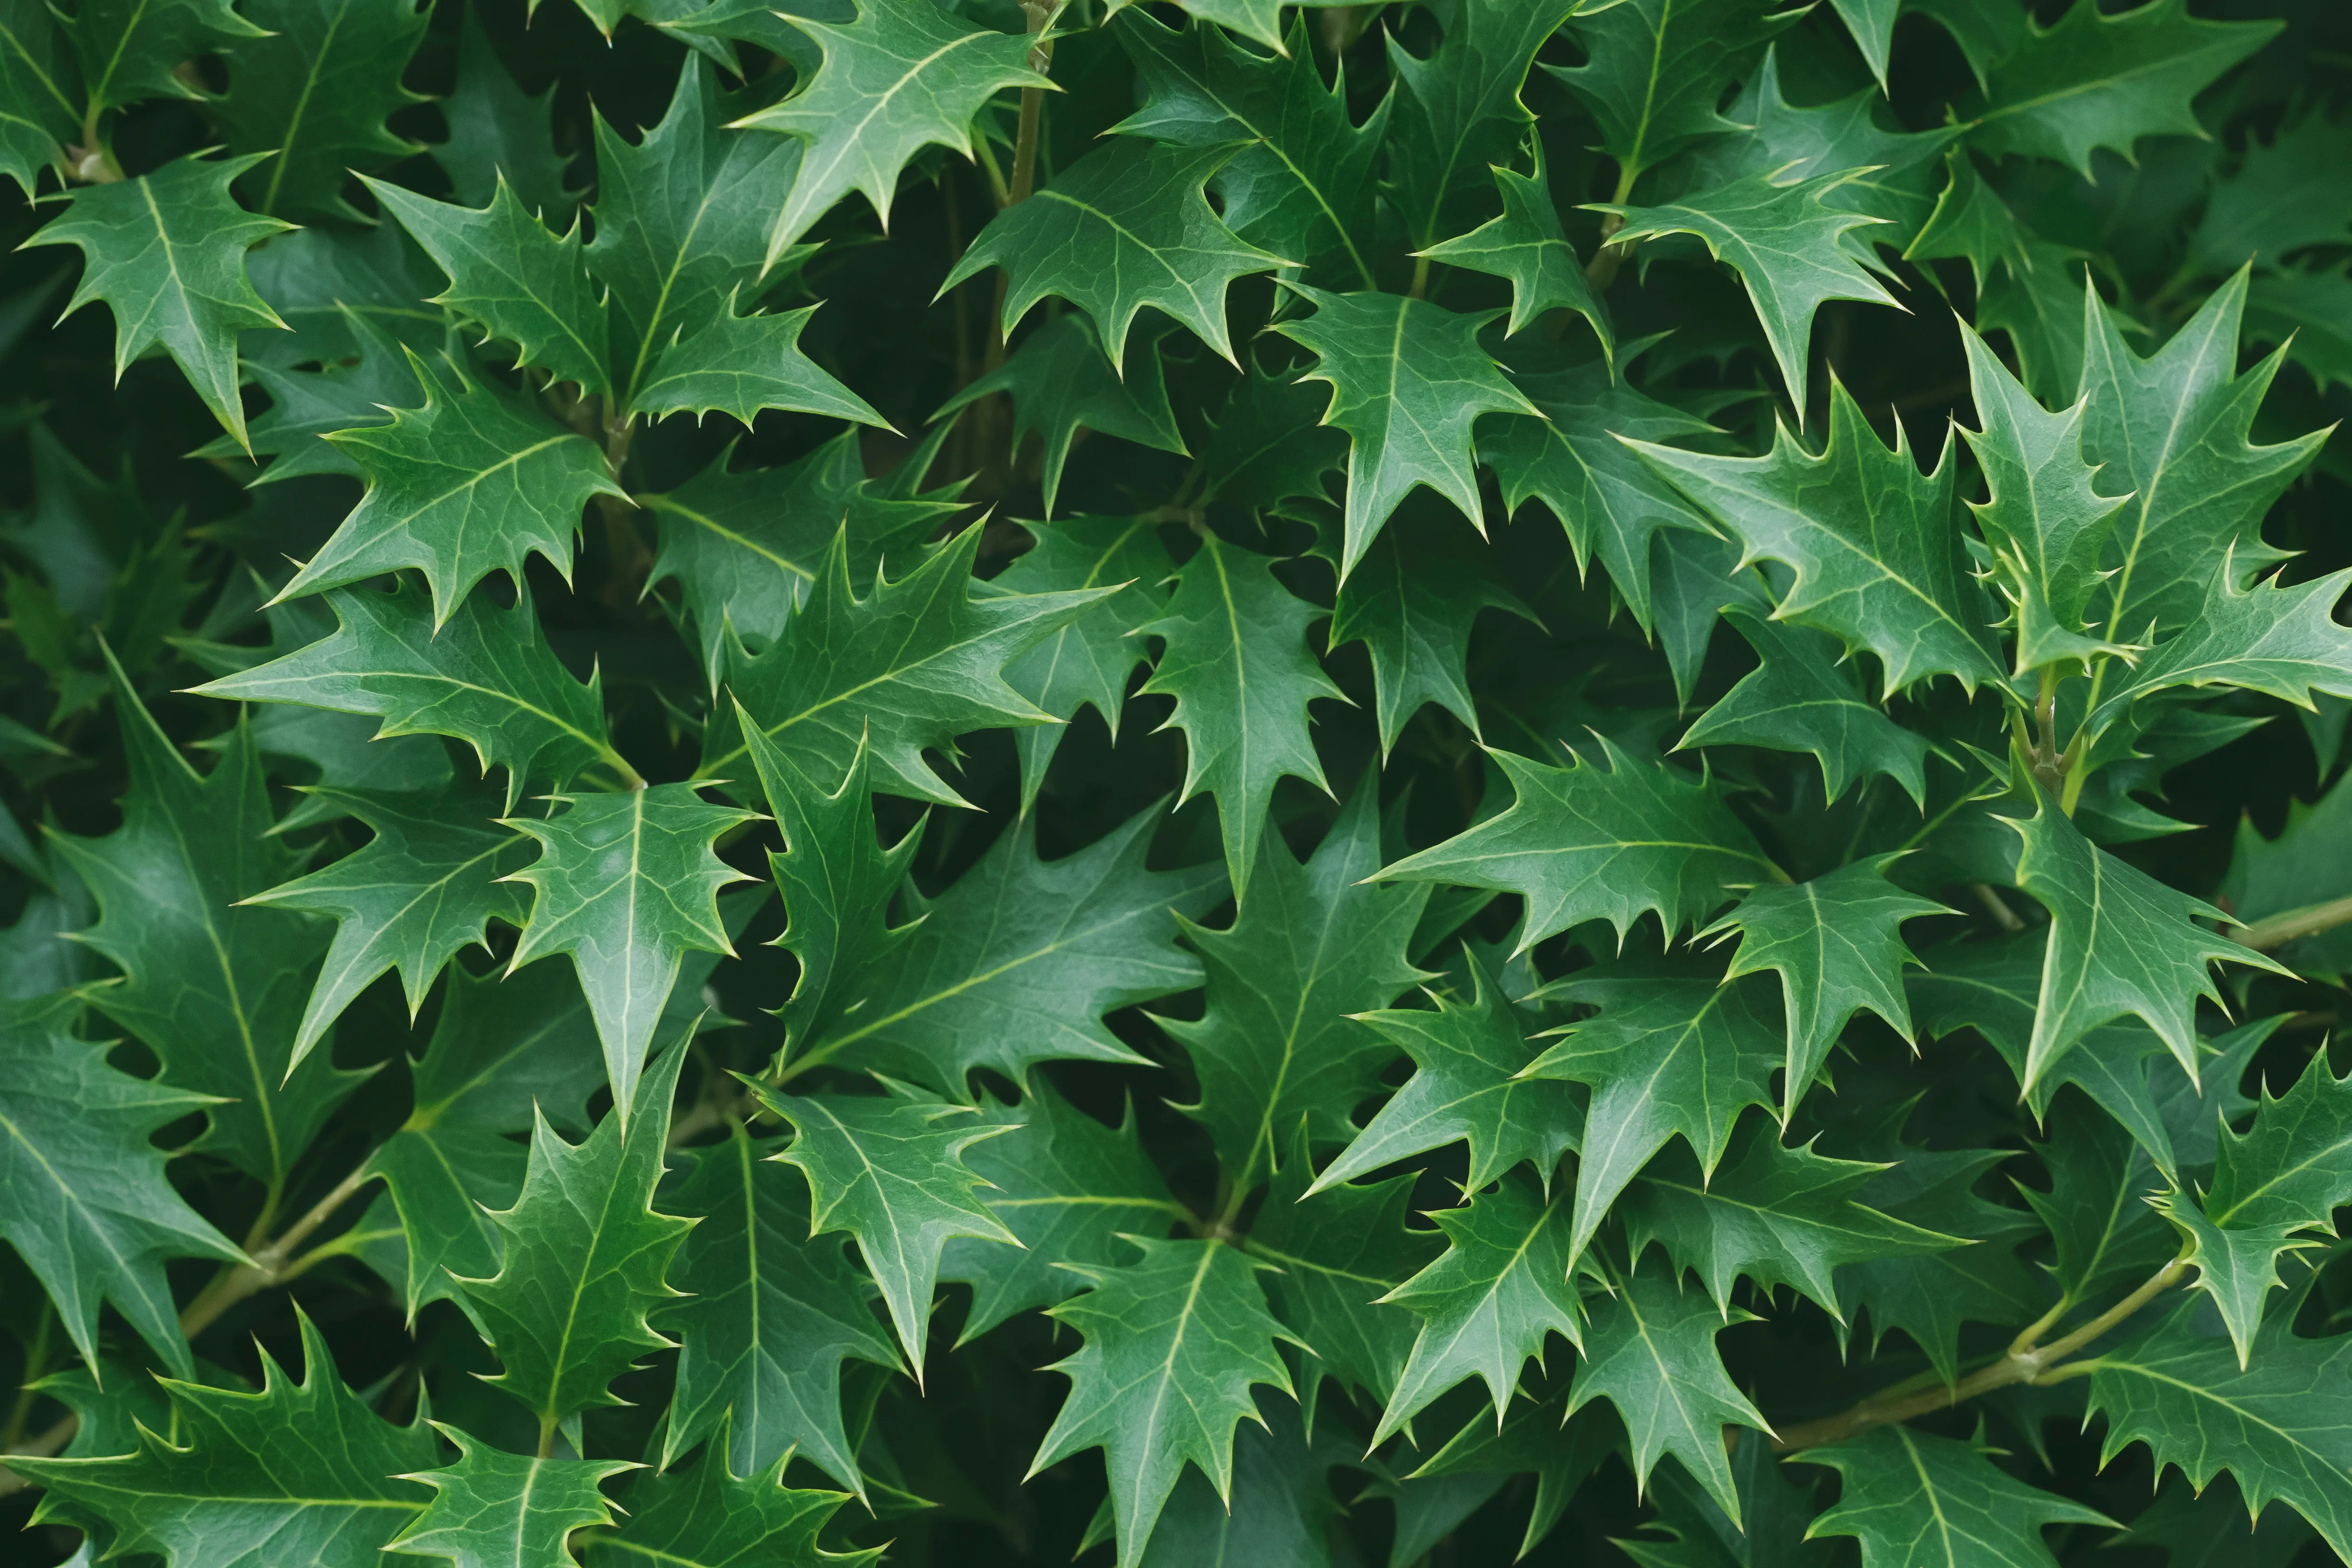
5. Chinese Holly (Ilex cornuta)
This species is known for its unique leaf shape and large red berries. It's a slow grower but can reach heights of 15-25 feet.
Planting and Care: Chinese holly prefers full sun and well-drained soil. It's quite drought-tolerant once established. Pruning should be done in late winter or early spring.
Remember, all hollies are evergreen, so they provide year-round interest and privacy. Most importantly, always ensure the plants are well-watered until they are fully established, and apply a layer of mulch to conserve moisture and suppress weeds.
The Best Time to Plant a Holly Bush Hedge in the UK
A Holly Bush Hedge is a great way to add a touch of greenery to your garden. Not only does it look beautiful, but it also provides a natural barrier to keep out unwanted visitors. But when is the best time to plant a Holly Bush Hedge in the UK?
The best time to plant a Holly Bush Hedge in the UK is during the spring months. This is when the soil is warm and moist, making it easier for the roots to take hold. It's also important to make sure that the soil is well-drained, as holly bushes don't like to be waterlogged. Once planted, it's important to prune the hedge regularly to keep it looking neat and tidy. Pruning should be done in late summer or early autumn, when the hedge is in its dormant state. This will help to keep the hedge healthy and encourage new growth.
Choosing the Right Location to Plant Out your a Holly Bush Hedge
When it comes to planting a holly bush hedge, the location you choose is key. It's important to consider the amount of sunlight the area receives, as holly bushes prefer full sun or partial shade. If you're planting in a shady area, you may need to supplement the light with artificial lighting.
Additionally, you should make sure the soil is well-draining and rich in organic matter. If the soil is too sandy or clay-like, you may need to amend it with compost or other organic material. Finally, you should consider the size of the hedge you want to create and the amount of space you have available. This will help you determine how many holly bushes you need to plant and how far apart they should be spaced. With the right location and proper care, your holly bush hedge will thrive and provide you with years of beauty and privacy.
Preparing the Soil for Planting the an Holly Bush Hedge
Creating a holly bush hedge is a great way to add a touch of greenery to your garden. Before you can start planting, however, you need to make sure the soil is ready. Preparing the soil for planting a holly bush hedge is an important step in ensuring your hedge will thrive.
The first step is to make sure the soil is well-draining. If the soil is too wet, the roots of the holly bush hedge will not be able to get the oxygen they need to grow. To test the drainage, dig a hole about 10 cm deep and fill it with water. If the water drains away within an hour, the soil is suitable for planting.
Next, you need to make sure the soil is rich in nutrients. Adding compost or manure to the soil will help to provide the holly bush hedge with the nutrients it needs to grow. You can also add a slow-release fertilizer to the soil to ensure the hedge has a steady supply of nutrients.
Finally, you need to make sure the soil is loose and easy to work with. If the soil is too compacted, it will be difficult for the roots of the holly bush hedge to spread and take hold. To loosen the soil, use a garden fork to turn it over and break up any clumps.
By following these steps, you can ensure that the soil is ready for planting a holly bush hedge. With the right preparation, your hedge will be sure to thrive.
The Step-by-Step Guide on How to Plant a Holly Bush Hedge in the UK
Creating a holly bush hedge in the UK is a great way to add a touch of beauty and privacy to your garden. Pruning a holly bush hedge is an important part of keeping it looking its best. Here is a step-by-step guide on how to prune a holly bush hedge in the UK.
First, you will need to decide on the desired shape of your holly bush hedge. This will determine how much pruning you will need to do. Once you have decided on the shape, you can begin pruning. Start by removing any dead or diseased branches, as well as any branches that are growing in an undesirable direction. This will help to keep your holly bush hedge looking neat and tidy.
Next, you will need to trim the sides of the hedge. This will help to keep the hedge looking even and symmetrical. Make sure to use sharp shears when trimming the sides of the hedge, as this will help to ensure a clean cut. You should also be sure to trim the top of the hedge, as this will help to keep it from becoming too tall.
Finally, you will need to fertilize your holly bush hedge. This will help to ensure that it stays healthy and strong. Be sure to use a fertilizer that is specifically designed for holly bushes, as this will help to ensure that your hedge gets the nutrients it needs.
By following these steps, you can easily create a beautiful holly bush hedge in the UK. With a little bit of care and attention, your hedge will stay looking its best for years to come.
How to Plant a Holly Bush Hedge in the UK: A Comprehensive Guide
-
Step 1: Choose the Right Species
As previously mentioned, several holly species are suitable for the UK climate, including English Holly (Ilex aquifolium), Silver Queen Holly (Ilex x altaclerensis 'Silver Queen'), and Golden King Holly (Ilex x altaclerensis 'Golden King'). Select the one that best suits your garden's conditions and aesthetic preferences. -
Step 2: Ideal Planting Season
The best time to plant a holly bush hedge in the UK is during the dormant season, from late autumn to early spring. This allows the plants to establish their root systems before the growing season starts. -
Step 3: Prepare the Soil
Holly bushes prefer well-drained soil. Prepare the ground by removing any weeds or grass and loosening the soil with a garden fork. If your soil is heavy clay, consider improving it with some organic matter such as compost or well-rotted manure to enhance its structure and drainage. -
Step 4: Dig the Trench
Dig a trench that's wide and deep enough to comfortably accommodate the roots of your holly plants. The trench should be about twice the width and the same depth as the root ball of the plants. -
Step 5: Plant the Holly Bushes
Place the holly bushes in the trench, ensuring that they are spaced correctly. Smaller varieties should be planted 2-3 feet apart, while larger ones need 4-6 feet of spacing. Make sure that the top of the root ball is level with the soil surface.Backfill the trench with the excavated soil, firming it gently around the roots to eliminate air pockets. Water thoroughly after planting.
-
Step 6: Aftercare
Water the newly planted holly bushes regularly, especially during dry periods. A layer of mulch around the base of the plants can help conserve moisture and suppress weeds. -
Step 7: Fertilization
Holly bushes benefit from a balanced granular or liquid fertilizer applied in early spring and again in late summer. However, avoid over-fertilization as this can lead to excessive soft growth that's prone to pest and disease problems. -
Step 8: Pruning
Prune your holly hedge in late winter or early spring to maintain its shape and promote dense growth. Remember to wear protective gloves to protect your hands from the prickly leaves!
With these steps, you should be well on your way to growing a successful holly bush hedge in the UK.
How Far apart must a Holly Bush be Planted to make a hedge?
For a dense holly hedge, bushes should be planted approximately 2-3 feet apart. This allows enough room for the plants to grow and spread, while also ensuring the hedge will be thick and provide good coverage. If you're aiming for a taller hedge, you might want to increase the spacing slightly to allow for more growth.
Remember, the exact spacing can depend on the specific variety of holly you're planting, as some types may naturally grow larger than others. Always check the plant label or ask at your garden center if you're unsure.
Tips for Caring for Your Newly Planted a Holly Bush Hedge
When it comes to caring for a newly planted holly bush hedge, there are a few key tips to keep in mind. Pruning is an important part of keeping your holly bush hedge looking its best. Pruning should be done in the late winter or early spring, before the new growth begins. This will help to keep the hedge looking neat and tidy. When pruning, it is important to remove any dead or diseased branches, as well as any branches that are growing in an undesirable direction.
Additionally, it is important to thin out the hedge to allow for more light and air circulation. This will help to keep the hedge healthy and promote new growth. Finally, it is important to fertilize the hedge regularly to ensure that it has the nutrients it needs to thrive. With these tips, you can ensure that your holly bush hedge will remain healthy and beautiful for years to come.
What is the Best Fertilizer Feed for a Holly Bush Hedge and When to Apply it?
A Holly Bush Hedge is a great way to add a touch of greenery to your garden. To ensure your hedge looks its best, it's important to fertilize it regularly. The best fertilizer feed for a Holly Bush Hedge is one that is high in nitrogen, phosphorus, and potassium. This will help to promote healthy growth and keep the leaves looking lush and green. It's best to apply the fertilizer in the spring and summer months when the hedge is actively growing. Make sure to spread the fertilizer evenly around the base of the hedge and water it in well. This will help to ensure the fertilizer is absorbed into the soil and reaches the roots of the hedge. With regular fertilizing, your Holly Bush Hedge will stay looking beautiful for years to come.
A Comprehensive Guide to Fertilizing the a Holly Bush Hedge
Pruning and fertilizing a holly bush hedge is essential for keeping it healthy and looking its best. Pruning is the process of removing dead or diseased branches, as well as any branches that are growing in an undesirable direction. This helps to keep the hedge looking neat and tidy, and also encourages new growth. Fertilizing is also important, as it helps to provide the hedge with the nutrients it needs to stay healthy and strong. In the UK, the best time to prune and fertilize a holly bush hedge is in the late spring or early summer. This is when the hedge is most actively growing and can benefit from the extra nutrients.
When fertilizing, it is important to use a fertilizer specifically designed for holly bushes, as this will provide the best results. Additionally, it is important to follow the instructions on the fertilizer package to ensure that the hedge is getting the right amount of nutrients. With proper pruning and fertilizing, a holly bush hedge can remain healthy and beautiful for many years.
How Fast does a Holly Bush Hedge Grow
A Holly Bush Hedge is a great way to add a touch of greenery to your garden. But how fast does it grow? The answer depends on the variety of holly bush you choose, as well as the climate and soil conditions in your area. Generally, holly bushes can grow up to 1-2 feet per year, but some varieties may grow faster or slower depending on the conditions. Pruning is essential to keep your holly bush hedge looking neat and tidy, and to encourage healthy growth. Pruning should be done in late winter or early spring, when the bush is still dormant. Start by removing any dead or diseased branches, then trim the sides of the hedge to create a neat shape. Finally, trim the top of the hedge to the desired height. With regular pruning, your holly bush hedge will stay healthy and look great for years to come.
How to Propagate a Holly Bush Hedge - List the most Common Methods
Propagating a holly bush hedge can be a rewarding task, allowing you to grow more plants from your existing ones. This is a cost-effective way to expand your garden and it also ensures the new plants will have the same characteristics as the parent plant.
Benefits of Propagation Propagation allows you to:- Economically increase your plant collection.
- Preserve the characteristics of a particular plant.
- Share plants with others.
Best Time for Propagation The best time to propagate holly bushes is in late fall or early winter.
Propagation Methods There are several methods to propagate holly bushes, but the most common are:
- Seed Propagation: This method involves planting seeds collected from the holly bush.
- Cuttings: This involves taking a cutting from the parent plant and encouraging it to grow roots.
- Layering: Here, a branch from the parent plant is encouraged to grow roots while still attached to the plant.
- Collect berries from the holly bush in late fall.
- Remove the seeds from the berries and clean them.
- Stratify the seeds by placing them in a bag with moist peat moss and refrigerating for 2-3 months.
- Plant the seeds in a well-draining potting mix and keep the soil moist.
Cuttings
- In late fall, take a cutting from the holly bush that's about 6 inches long.
- Remove the leaves from the lower half of the cutting.
- Dip the cut end into rooting hormone.
- Plant the cutting into a pot filled with well-draining potting mix.
- Keep the soil moist and place the pot in a location with indirect light.
Layering
- Choose a healthy, flexible branch close to the ground.
- Make a small cut on the underside of the branch.
- Bend the branch down to the ground and cover the cut area with soil.
- Secure the branch in place with a piece of wire or a rock.
- The branch should begin to grow roots over several months.
Aftercare Regardless of the propagation method used, it's important to keep the soil moist but not waterlogged. Once the new plants have established, they can be transplanted into their permanent location. Regular watering and feeding with a slow-release fertilizer will help them thrive.
Tips for Success
- Always use sharp, clean tools to prevent the spread of disease.
- Choose healthy, disease-free parent plants for propagation.
- Be patient, as propagation can take time.
With careful attention and care, you can successfully propagate your holly bushes and enjoy the benefits of these beautiful plants in more areas of your garden.
Step-by-Step Guide on How to Propagate a Holly Bush Hedge Using the Layering Method
Propagating a Holly Bush Hedge Using the Layering Method: A Step-by-Step Guide
Layering is a propagation method where you root a stem while it's still attached to the parent plant, ensuring a continuous supply of nutrients. This technique is particularly effective for holly bushes, which can be difficult to propagate from cuttings.
Tools and Materials Needed:- Sharp pruning shears
- Wire or twist ties
- Rooting hormone powder (optional)
- A spade or trowel
- Well-draining soil or compost
- Step 1: Choose the Right Stem Look for a healthy, flexible lower branch that can easily bend to ground level. The best time for layering is late spring or early summer.
- Step 2: Prepare the Stem Make a small upward slanting cut about one-third into the stem at a leaf node. This wound will stimulate root growth. Optionally, you can apply a rooting hormone to the cut to increase the chances of successful rooting.
- Step 3: Secure the Stem Gently bend the wounded part of the stem to the ground. Use a U-shaped wire or twist tie to hold this portion in contact with the soil.
- Step 4: Cover the Wound with Soil Cover the wounded area with well-draining soil or compost, leaving the tip of the stem exposed. To keep the layered section in place, you can put a stone or brick on top.
- Step 5: Care for the Layered Stem Keep the soil around the layered section moist but not waterlogged. The stem should start developing roots at the wound site over several months.
- Step 6: Sever the New Plant Once you see substantial root development—usually by the following spring—you can sever the new plant from the parent stem using sharp pruning shears.
- Step 7: Transplant the New Holly Bush Dig up the new holly bush carefully, trying to preserve as many roots as possible. Transplant it to a new location or a pot filled with well-draining soil. Water thoroughly after transplanting.
Care for your new holly bush as you would any young plant. Water regularly but avoid waterlogging the soil. Position the plant in a location with partial to full sun. Once established, feed with a balanced fertilizer in early spring and late summer.
Remember, propagation by layering is a slow process, but it's often more successful than other methods due to the constant nutrient supply from the parent plant. With patience and care, you'll have a new generation of holly bushes to enhance your garden!
Step-by-Step Guide on How to Grow a Holly Bush Hedge from Seed
Growing a holly bush hedge from seed is a great way to add a beautiful and unique touch to your garden. It is a relatively easy process that can be done in a few simple steps.
The first step is to purchase holly bush seeds from a reputable nursery or online store. Make sure to read the instructions carefully and follow them to the letter. Once you have the seeds, you will need to prepare the soil for planting. This involves adding compost and other organic matter to the soil to ensure it is rich and fertile.
Once the soil is ready, you can begin planting the holly bush seeds. Plant the seeds about an inch deep and cover them with soil. Water the area regularly and keep the soil moist. The holly bush seeds should germinate within a few weeks.
Once the holly bush seedlings have grown to a few inches tall, you can begin to prune them into a hedge. Prune the holly bush hedge regularly to keep it looking neat and tidy. You can also add fertilizer to the soil to help the holly bush hedge grow faster and stronger.
With a bit of patience and care, you can have a beautiful holly bush hedge in your garden in no time. It is a great way to add a unique touch to your garden and will provide you with years of enjoyment.
Growing Holly Bush Hedges from Seeds: A Comprehensive Guide
Growing holly bushes from seeds can be a rewarding experience. However, it requires patience and careful attention to detail. Here's a step-by-step guide to help you through the process:
-
Step 1: Selecting the Best Holly Seeds
Choose seeds from healthy, mature holly bushes. The best time to collect seeds is in autumn when the berries are ripe. Remember that only female holly plants produce berries. -
Step 2: Preparing the Seeds
Holly seeds need to undergo stratification—a process of simulating winter conditions—to germinate successfully. After removing the seeds from the berries, mix them with damp peat moss and place them inside a sealed plastic bag. Store this in the refrigerator for around 3-4 months. -
Step 3: Soil Preparation
Holly bushes prefer slightly acidic, well-drained soil. Prepare a seed tray or pots with a mix of equal parts peat moss, sand, and perlite. This combination will ensure good drainage and provide the right acidity level. -
Step 4: Planting the Seeds
After stratification, plant the seeds about 1/4 inch deep into the prepared soil. Place the seed tray in a location that receives indirect sunlight. -
Step 5: Watering and Light Exposure
Keep the soil consistently moist but not waterlogged. Covering the seed tray with clear plastic can help maintain humidity levels. Holly seeds need light to germinate, so ensure they receive bright but indirect light. -
Step 6: Care and Maintenance
Once the seedlings have sprouted (which may take several months), move them to a brighter location but avoid direct sunlight. When the seedlings have developed their second set of leaves, transplant them into individual pots filled with a mix of peat moss and garden soil. -
Step 7: Fertilization and Pruning
Fertilize the young plants in early spring and late summer with a balanced granular or liquid fertilizer. Begin pruning when the plants are about two years old to promote bushy growth. -
Step 8: Pest Management
Monitor your plants for signs of pests such as holly leaf miner and scale insects. Use an appropriate pesticide if necessary, following the manufacturer's instructions. -
Step 9: Transplanting Holly Bushes
If your holly bushes have outgrown their pots, they can be transplanted into the garden. The best time for transplanting is in early spring or late autumn.
Remember that growing holly bushes from seeds is a long-term project—the plants may take several years to reach a size suitable for planting out as a hedge. But with patience and care, you can look forward to a beautiful, home-grown holly hedge!
Step-by-Step Guide on How to Propagate a Holly Bush Hedge Using the Cutting Method
Propagating a holly bush hedge using the cutting method is a great way to create a beautiful and lush hedge in your garden. The cutting method is a simple and cost-effective way to propagate a holly bush hedge, and it can be done in just a few steps.
First, you will need to select a healthy holly bush to use as the source of your cuttings. Make sure to select a bush that is free of disease and pests. Once you have selected your bush, you will need to take cuttings from it. Cuttings should be about 4-6 inches long and should include at least two sets of leaves.
Next, you will need to prepare the soil for your cuttings. The soil should be well-draining and should be mixed with some compost or fertilizer to provide the cuttings with the nutrients they need to grow. Once the soil is ready, you can plant the cuttings about 2-3 inches deep. Make sure to water the cuttings regularly and keep the soil moist.
Finally, you will need to wait for the cuttings to take root and begin to grow. This can take anywhere from a few weeks to a few months, depending on the conditions. Once the cuttings have taken root, you can transplant them into their permanent location and begin to shape your holly bush hedge. With regular pruning and care, your holly bush hedge will soon be a beautiful addition to your garden.
Propagating a Holly Bush Hedge Using Cuttings: A Step-by-Step Guide
Propagating holly bushes using cuttings is a cost-effective method that allows you to produce new plants from existing ones. This process ensures the new plants will be genetically identical to the parent plant, preserving the characteristics you love.
Safety Precautions: Always wear gloves when handling holly bushes as their leaves can be prickly. Use sharp, clean tools to prevent disease transmission.
Tools and Materials Needed:- Sharp secateurs or knife
- Rooting hormone powder
- Potting mix or well-draining soil
- Pots
- Clear plastic bag or cover
- Gloves
Steps to Propagate Holly Bushes from Cuttings:
- Step 1: Select the Right Stem Choose a healthy, vigorous holly bush. The best cuttings are taken from mature, but still young and flexible stems, ideally in late summer or early autumn. Look for a stem that's about pencil-thickness and has several leaf nodes (the points where leaves attach).
- Step 2: Make the Cut Cut a piece of stem about 4-6 inches long. Make the cut just below a leaf node, as this is where most of the plant’s natural rooting hormones are concentrated.
- Step 3: Prepare the Cutting Remove the leaves from the lower half of the cutting. Also, trim any large leaves on the upper half to reduce water loss.
- Step 4: Apply Rooting Hormone Dip the cut end of the stem into rooting hormone powder. This step is not essential but can increase the chances of successful root development.
- Step 5: Plant the Cutting Fill a pot with a well-draining potting mix or a blend of peat and perlite. Make a hole in the center with a pencil, then insert the coated end of the cutting. Firm the soil gently around the stem.
- Step 6: Create a Humid Environment Place the pot in a clear plastic bag or cover it with a plastic dome to maintain high humidity, which is crucial for root development.
- Step 7: Position and Care for the Cutting Put the pot in a warm place with bright, indirect light. Keep the soil slightly moist but not waterlogged. Rooting may take several weeks to months, depending on the holly variety.
Once the cuttings have rooted, gradually acclimate them to lower humidity levels by opening the plastic bag or lifting the cover. When they've adjusted, repot them into individual pots filled with regular potting soil.
Keep your new holly bushes in a sheltered location with partial sunlight and water regularly. Once they are well-established and showing new growth, they can be planted out in the garden.
Remember, patience is key when propagating holly bushes from cuttings. Not every cutting will take, but don't be discouraged—keep trying, and you'll likely end up with some beautiful new additions to your garden!
Potential Problems When Growing a Holly Bush Hedge in the UK and Solutions
Growing a holly bush hedge in the UK can be a rewarding experience, but it is important to be aware of the potential problems that can arise. The UK climate can be harsh and unpredictable, and this can cause issues with the health of your hedge. Pruning is essential to keep your hedge looking neat and tidy, but it is important to do it correctly. If you prune too much, you can damage the hedge and cause it to become unhealthy. Fertilizing is also important to ensure your hedge is getting the nutrients it needs to stay healthy. Finally, pest control is essential to keep your hedge free from pests and diseases. Taking the time to properly care for your holly bush hedge will ensure it remains healthy and beautiful for years to come.
The Common Diseases and Pests which Affect a Holly Bush Hedge
A Holly Bush Hedge is a popular choice for many UK gardens, providing a beautiful evergreen backdrop to any outdoor space. However, it is important to be aware of the common diseases and pests which can affect a Holly Bush Hedge. These can range from fungal diseases such as Phytophthora Root Rot, to pests such as the holly leaf miner. It is important to be aware of these issues and take steps to prevent them from occurring. Regular pruning and monitoring of the hedge can help to reduce the risk of disease and pest infestation.
Additionally, using a fungicide or insecticide can help to protect the hedge from any potential damage. Taking these steps can help to ensure that your Holly Bush Hedge remains healthy and beautiful for many years to come.
Managing Common Diseases and Pests in Holly Bush Hedges: A Comprehensive Guide
Holly bush hedges are generally hardy, but they can sometimes fall victim to various diseases and pests. Here's a guide to identifying, treating, and preventing these issues.
Diseases Affecting Holly Bushes- 1. Leaf Spot Leaf Spot is caused by various fungi and can lead to yellow or brown spots on the leaves. It can be managed by removing and disposing of affected leaves and ensuring good air circulation around the plant. Fungicides can help in severe cases.
- 2. Phytophthora Root Rot This disease causes wilting, yellowing leaves, and stunted growth. It thrives in poorly drained soils, so ensure your holly bushes are planted in well-draining locations. Infected plants should be removed and destroyed to prevent the disease from spreading.
- 3. Holly Leaf Miner These small flies lay eggs on holly leaves, and the larvae tunnel through the leaves, causing browning and curling. Prune and dispose of infested leaves in winter or early spring before the adults emerge.
- 4. scale insects scale insects can cause yellowing leaves and reduced vigor. Infestations can be treated with horticultural oil sprays.
- 5. Spider Mites Spider Mites cause yellow stippling on leaves. They thrive in hot, dry conditions, so regular watering can help deter them. In severe cases, miticides may be necessary.
- Regular Inspection**: Check your holly bushes regularly for signs of disease or pests.
- Proper Watering**: Overwatering can lead to fungal diseases, while underwatering can stress the plant and make it more susceptible to pests and diseases.
- Pruning**: Regular pruning helps improve air circulation, reducing the risk of fungal diseases. It also allows you to spot and remove any diseased or pest-infested branches early.
- Use of Pesticides and Fungicides**: Apply these treatments only when necessary, and always follow the manufacturer's instructions. Treatments are often most effective in late winter or early spring before pests or diseases have had a chance to establish.
Consider using natural predators like ladybugs and Lacewing larvae to control pests like scale insects and Spider Mites. Compost tea, neem oil, and garlic sprays can be effective natural alternatives to chemical fungicides and pesticides.
Remember, prevention is better than cure. By providing optimal growing conditions and regular care, you can keep your holly bush hedges healthy and vibrant.
A Complete Guide to Pruning a Holly Bush Hedge in the UK
A Holly Bush Hedge is a great way to add a touch of beauty and privacy to your garden. Pruning a Holly Bush Hedge is an important part of keeping it looking its best. Pruning a Holly Bush Hedge in the UK can be a bit tricky, but with the right knowledge and tools, it can be done with ease.
The first step in pruning a Holly Bush Hedge is to identify the type of Holly Bush Hedge you have. There are several varieties of Holly Bush Hedge, and each one requires different pruning techniques. Once you have identified the type of Holly Bush Hedge you have, you can begin to prune it.
When pruning a Holly Bush Hedge, it is important to use the right tools. Pruning shears, loppers, and hedge trimmers are all essential tools for pruning a Holly Bush Hedge. It is also important to use sharp tools to ensure a clean cut.
It is also important to prune your Holly Bush Hedge at the right time. Pruning should be done in late winter or early spring, when the plant is dormant. This will help ensure that the plant has enough time to recover before the growing season begins.
Finally, it is important to prune your Holly Bush Hedge correctly. Pruning should be done in a way that encourages new growth and maintains the shape of the hedge. Pruning should be done in a way that removes dead or diseased branches, while leaving healthy branches intact.
Pruning a Holly Bush Hedge in the UK can be a bit tricky, but with the right knowledge and tools, it can be done with ease. With the right pruning techniques, you can keep your Holly Bush Hedge looking its best for years to come.
Why Do we Need to Prune a Holly Bush Hedge?
A Holly Bush Hedge is a popular choice for many UK gardens, providing a beautiful and evergreen backdrop to any outdoor space. But why do we need to prune a Holly Bush Hedge? Pruning is an important part of maintaining a healthy and attractive hedge, and there are several reasons why it should be done.
Firstly, pruning helps to keep the hedge looking neat and tidy. By removing any dead or diseased branches, you can ensure that the hedge looks its best. Pruning also helps to encourage new growth, which can help to keep the hedge looking full and lush. Additionally, pruning can help to reduce the risk of pests and diseases, as it helps to keep the hedge healthy and strong. Finally, pruning can help to keep the hedge at a manageable size. By removing any overgrown branches, you can ensure that the hedge does not become too large or unruly. Pruning can also help to keep the hedge at a consistent height, which can help to create a neat and uniform look.
Overall, pruning is an important part of maintaining a healthy and attractive Holly Bush Hedge. By following these simple tips, you can ensure that your hedge looks its best and remains healthy for years to come.
When is the Best Time to Prune a Holly Bush Hedge?
Pruning a holly bush hedge is an important part of keeping it healthy and looking its best. The best time to prune a holly bush hedge in the UK is during the late winter or early spring, when the plant is dormant. This is the time when the hedge will be at its weakest, so it is important to be careful not to damage the branches. Pruning during this time will also help to encourage new growth in the spring. It is important to remember that holly bushes are slow-growing, so it is best to prune them only when necessary. If you prune too much, you may end up with a hedge that is too thin and sparse.
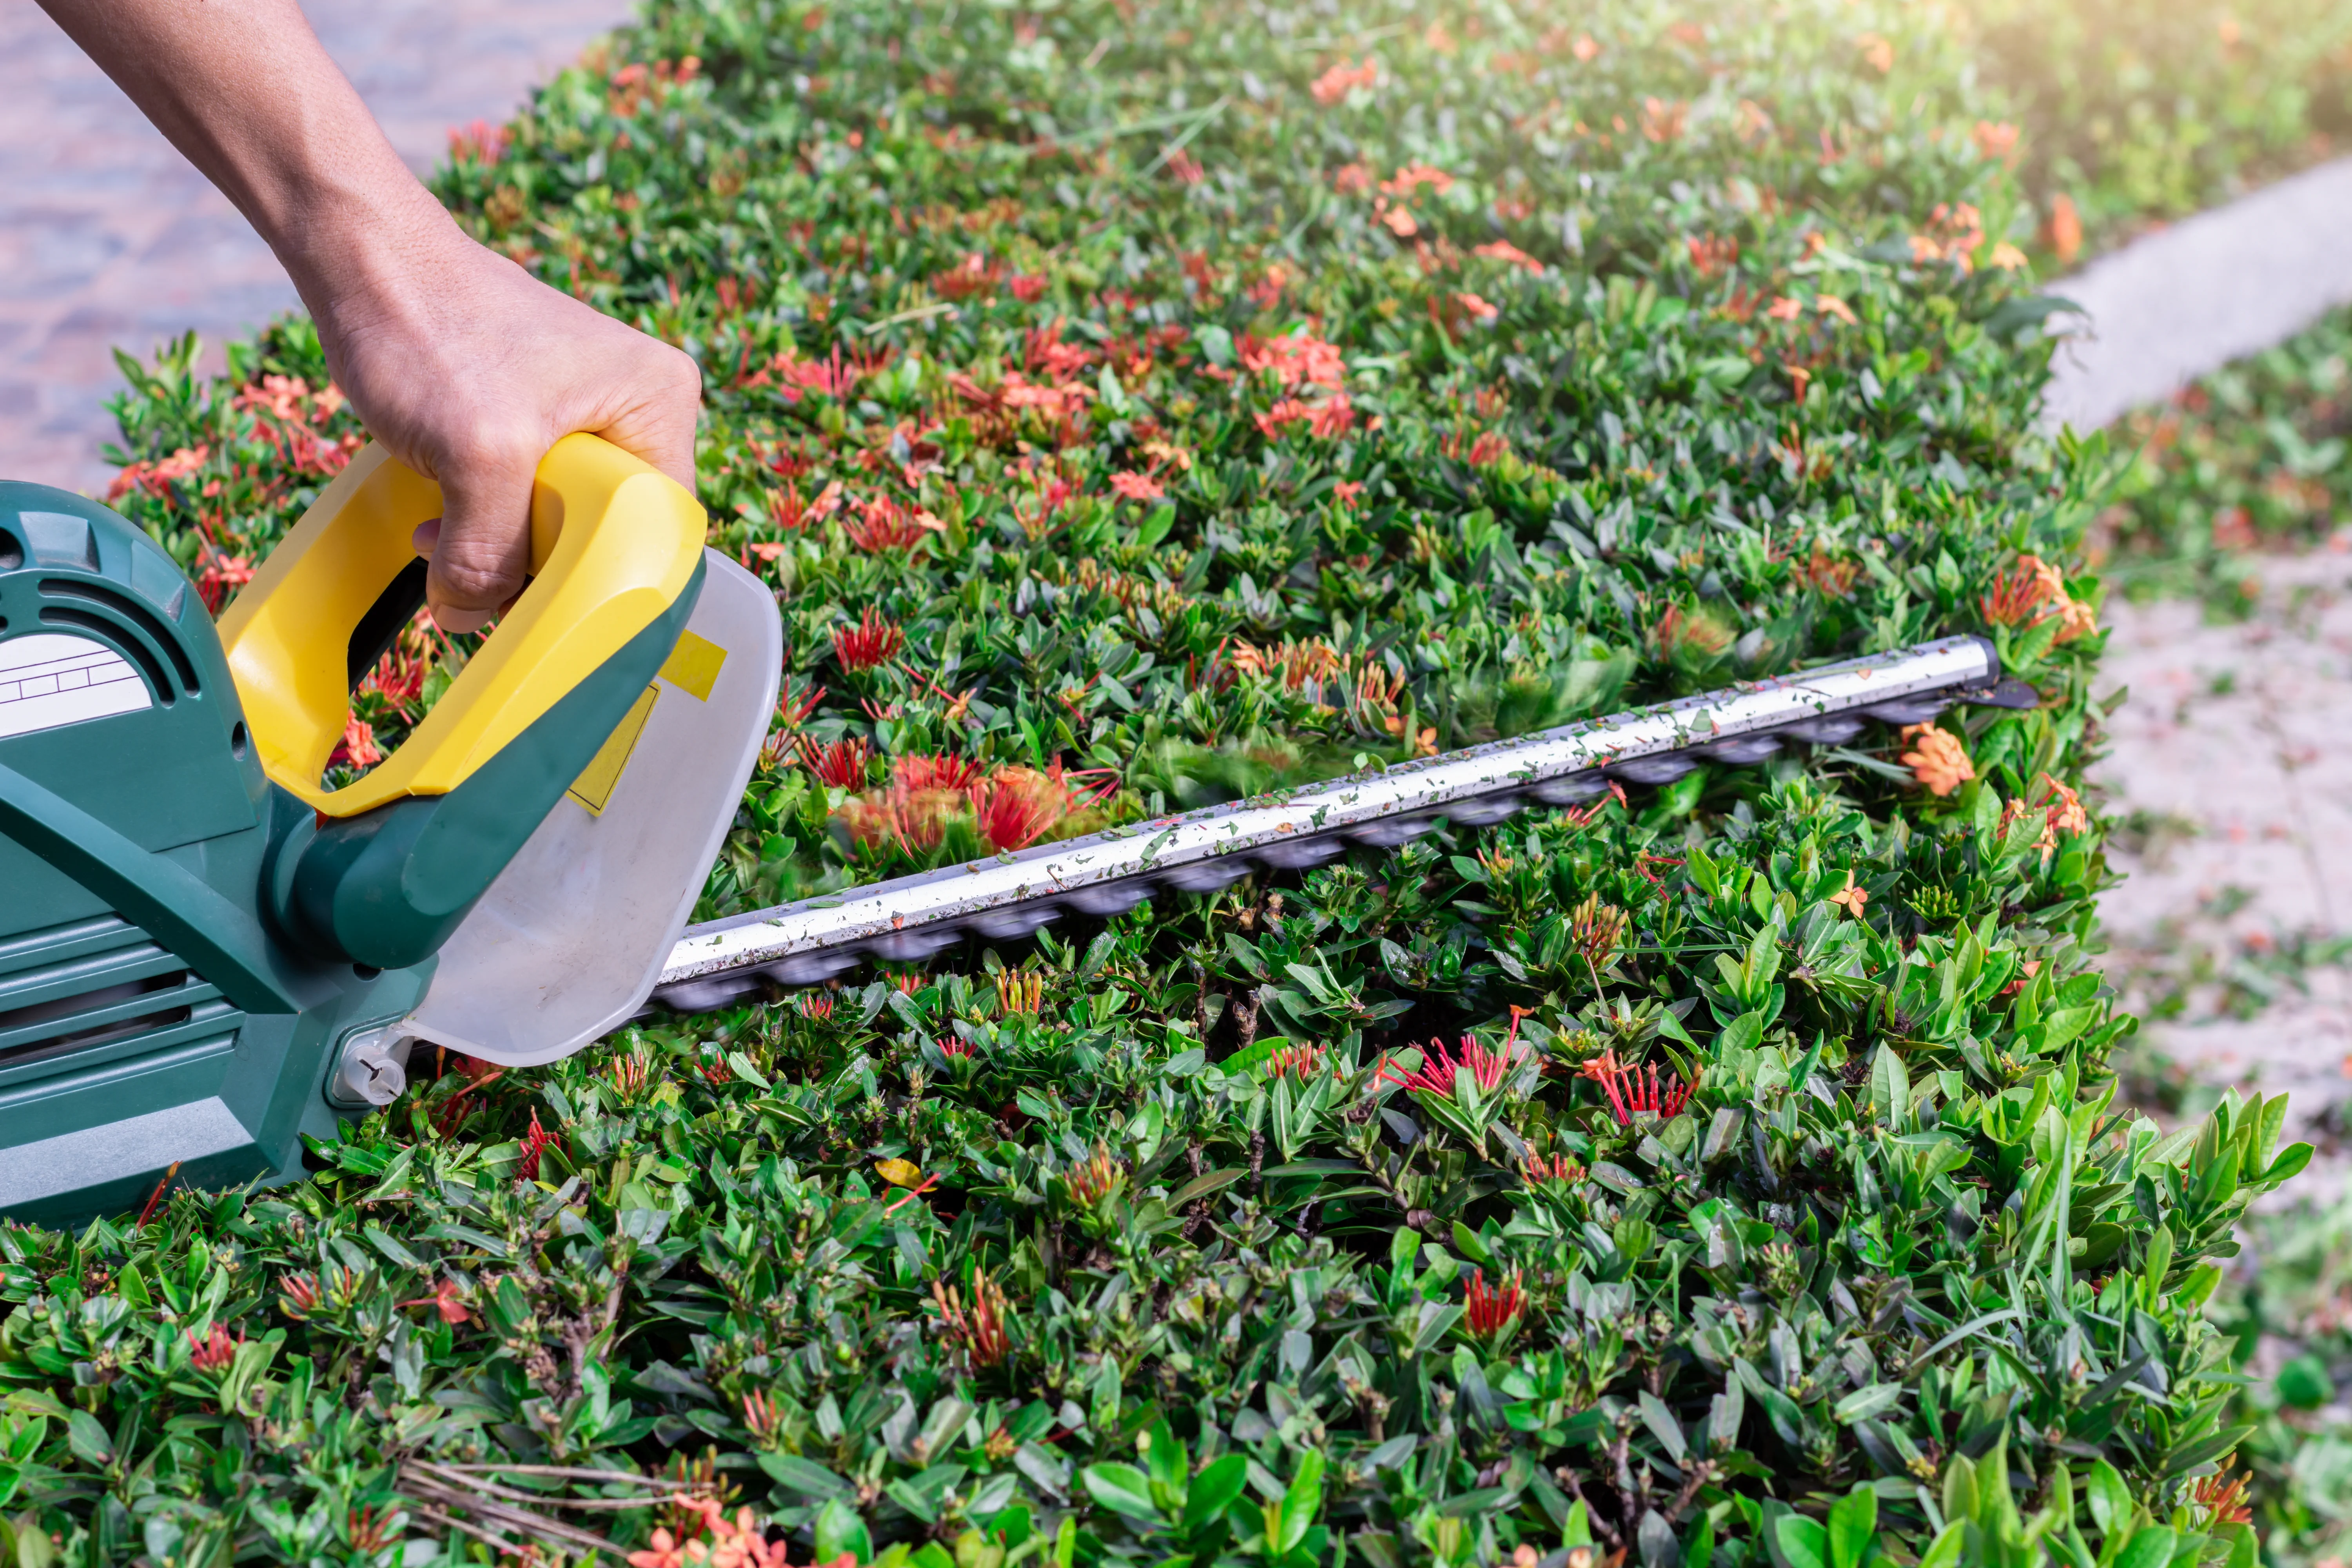
Tools Required for Pruning a Holly Bush Hedge
Pruning a holly bush hedge is a great way to keep your garden looking neat and tidy. To ensure that your hedge looks its best, you'll need the right tools for the job. Pruning shears are the most important tool for pruning a holly bush hedge. They are designed to cut through branches up to 1/2 inch thick and can be used to trim the sides of the hedge. Loppers are also useful for pruning a holly bush hedge. They are designed to cut through branches up to 2 inches thick and can be used to trim the top of the hedge. Finally, a pruning saw is essential for pruning a holly bush hedge. It is designed to cut through branches up to 4 inches thick and can be used to remove any dead or diseased branches. With the right tools, you can easily keep your holly bush hedge looking its best.
Techniques for an Effective Trim of a Holly Bush Hedge
Pruning a Holly Bush Hedge is an important part of keeping it healthy and looking its best. It is important to understand the techniques for an effective trim of a Holly Bush Hedge in order to ensure that it remains healthy and attractive. The first step is to identify the type of Holly Bush Hedge you have. Different types of Holly Bush Hedges require different pruning techniques. Once you have identified the type of Holly Bush Hedge, you can begin to prune it.
When pruning a Holly Bush Hedge, it is important to use sharp, clean pruning shears. This will help to ensure that the cuts are clean and even. It is also important to prune the hedge in a way that will promote healthy growth. This means pruning the hedge in a way that will encourage new growth and discourage overgrowth. Pruning the hedge in a way that will promote healthy growth will also help to keep the hedge looking neat and attractive. Finally, it is important to prune the hedge regularly in order to keep it healthy and looking its best.
Managing Thorny Branches of a Holly Bush Hedge
Pruning a holly bush hedge is an important part of keeping it healthy and looking its best. Pruning helps to keep the hedge in shape, encourages new growth, and prevents the hedge from becoming overgrown. When pruning a holly bush hedge, it is important to be aware of the thorny branches that can be present. These branches can be difficult to manage and can cause injury if not handled properly. To ensure safety, it is important to wear protective gloves and long sleeves when pruning a holly bush hedge.
Additionally, it is important to use sharp pruning shears to ensure a clean cut and to avoid damaging the branches. Pruning should be done in the late winter or early spring, when the hedge is dormant. This will help to ensure that the hedge is not damaged by the cold weather. Pruning should be done in a systematic manner, starting at the top of the hedge and working down. This will help to ensure that the hedge is even and symmetrical. Finally, it is important to remove any dead or diseased branches to help keep the hedge healthy. With proper pruning, a holly bush hedge can be a beautiful addition to any garden.
A Step by Step Guide on How to Prune a Holly Bush Hedge
Pruning a Holly Bush Hedge in the UK is a great way to keep your garden looking neat and tidy. It's important to prune your hedge regularly to ensure it remains healthy and grows in the desired shape. Pruning a Holly Bush Hedge is a relatively simple process, but it's important to follow the correct steps to ensure the best results.
The first step is to identify the type of Holly Bush Hedge you have. Different types of Holly Bush Hedge require different pruning techniques, so it's important to know what type of hedge you have before you start pruning. Once you've identified the type of hedge, you can begin pruning. Start by trimming the sides of the hedge to create a neat, even shape. Make sure to use sharp pruning shears and cut at an angle to ensure the best results.
Next, trim the top of the hedge to create a flat surface. This will help to keep the hedge looking neat and tidy. Finally, remove any dead or diseased branches to ensure the health of the hedge. Once you've finished pruning, it's important to fertilize the hedge to ensure it remains healthy and grows in the desired shape.
By following these steps, you can easily prune a Holly Bush Hedge in the UK and keep your garden looking neat and tidy. With regular pruning and fertilizing, you can ensure your hedge remains healthy and grows in the desired shape.
Pruning Holly Bushes: A Comprehensive Guide
Pruning helps maintain the health and shape of your holly bushes. Here's a step-by-step guide to help you through the process.
Tools Needed:- Sharp pruning shears
- Loppers for larger branches
- Gloves to protect your hands from prickly leaves
- Safety glasses to protect your eyes from flying debris
- Step 1: Choose the Right Time The best time to prune holly bushes is late winter or early spring before new growth starts. However, if you're growing holly for the berries, prune in late winter to avoid removing the berry-producing branches.
- Step 2: Safety First Before you start, put on your gloves and safety glasses to protect yourself from injury.
- Step 3: Start with Dead or Diseased Branches First, remove any dead, diseased, or damaged branches. Make your cut at the base of the branch, but be careful not to cut into the collar (the swollen area where the branch joins the trunk) as this could harm the plant.
- Step 4: Thin Out the Bush Remove some of the older, larger branches to allow light and air to penetrate the bush's interior. This can help prevent disease and encourage more vigorous growth.
- Step 5: Shape the Bush Holly bushes can be left natural or shaped into a formal hedge. If shaping, remember to make the top narrower than the base so that sunlight can reach the lower branches.
- Step 6: Make Clean Cuts Always make your cuts at a slight angle to prevent water from collecting on the cut surface. This can help prevent disease.
- Step 7: Clean Up After pruning, clean up all cut branches and leaves from around the base of the bush. This helps keep the area tidy and prevents the spread of disease.
Water your holly bush well after pruning to help it recover from the stress. You can also apply a balanced fertilizer to promote new growth.
Remember, less is often more when it comes to pruning. It's better to make a few thoughtful cuts than to over-prune your holly bush. Happy pruning!
How Much can I Prune Away a Mature a Holly Bush Hedge
Pruning a mature holly bush hedge is a great way to keep it looking neat and tidy. It's important to understand the best time of year to prune, as well as the techniques and tools you'll need to get the job done. In the UK, the best time to prune a holly bush hedge is in late winter or early spring, when the plant is dormant. This will help to ensure that the hedge remains healthy and vigorous. When pruning, it's important to use sharp, clean tools to avoid damaging the plant. You should also be careful not to prune away too much of the hedge, as this can cause it to become thin and sparse. Aim to remove no more than one-third of the total height of the hedge, and no more than one-third of the total width. This will help to keep the hedge looking full and lush.
How to Hard Prune a Mature a Holly Bush Hedge
Pruning a holly bush hedge is an important part of keeping it healthy and looking its best. Pruning a mature holly bush hedge can be a daunting task, but with the right knowledge and tools, it can be done with ease. Hard pruning a mature holly bush hedge is a great way to keep it looking neat and tidy, while also encouraging new growth.
When hard pruning a mature holly bush hedge, it is important to use sharp, clean pruning shears. Start by removing any dead or diseased branches, then trim back the remaining branches to the desired shape and size. Be sure to leave enough foliage to ensure the hedge remains healthy and vibrant. When pruning, it is important to make sure that the cuts are clean and even, as this will help the hedge to heal quickly and evenly.
Once the pruning is complete, it is important to fertilize the hedge to encourage new growth. This will help to keep the hedge looking lush and healthy. With proper care and maintenance, a mature holly bush hedge can remain beautiful and vibrant for many years to come.
Hard Pruning a Mature Holly Bush Hedge: A Step-by-Step Guide
Hard pruning, or rejuvenation pruning, can bring new life to overgrown, mature holly bushes. Here's how to do it.
Tools and Materials Needed:- Sharp pruning shears
- Loppers for larger branches
- A pruning saw for the thickest branches
- Gloves and safety glasses
- Step 1: Choose the Right Time The best time for hard pruning holly bushes is late winter or early spring before new growth starts. This gives the plant a full growing season to recover.
- Step 2: Safety First Always wear gloves and safety glasses when pruning to protect yourself from injury.
- Step 3: Plan Your Cuts Before you begin cutting, take a moment to assess your holly bush. Identify the oldest, thickest branches - these will be your primary targets.
- Step 4: Make Your Cuts Using your shears, loppers, or saw as appropriate, cut the oldest branches back to about 6 inches above ground level. Make your cuts at a slight angle to help water runoff.
- Step 5: Thin Out the Bush Remove about one-third of the remaining branches, focusing on those that are crossing, rubbing against each other, or growing inwards.
- Step 6: Shape the Bush Trim the remaining branches to define the shape of your holly bush. Try to create a slightly tapered shape, wider at the base than the top, to ensure all parts of the bush receive sunlight.
- Step 7: Clean Up Collect all cut branches and leaves and dispose of them properly. Composting is a great option if available.
- Over Pruning: Avoid removing more than one-third of the bush in a single year. If your holly is severely overgrown, spread the hard pruning over two or three years.
- Ignoring Safety: Always wear gloves and safety glasses when pruning. Holly leaves can be sharp, and branches can spring back unexpectedly when cut.
- Not Sharpening Tools: Sharp tools make cleaner cuts, which helps the plant heal faster and reduces the risk of disease.
Remember, hard pruning can seem drastic, but it's often the best way to rejuvenate an old, overgrown holly bush. With patience and care, your holly should bounce back with renewed vigor.
How to Care for a Holly Bush Hedge after Pruning
Pruning a Holly Bush Hedge is an important part of keeping it healthy and looking its best. Pruning helps to keep the hedge in shape, encourages new growth, and helps to keep the hedge looking neat and tidy. In the UK, the best time to prune a Holly Bush Hedge is in late winter or early spring, before the new growth begins. This will help to ensure that the hedge is not damaged by the cold weather.
When pruning a Holly Bush Hedge, it is important to use sharp, clean tools to ensure that the cuts are clean and precise. It is also important to remove any dead or diseased branches, as well as any branches that are growing in an undesirable direction. After pruning, it is important to care for the hedge properly. This includes watering the hedge regularly, fertilizing it, and mulching around the base of the hedge to help retain moisture. With proper care, a Holly Bush Hedge can remain healthy and attractive for many years.
How to avoid Pruning too Much off my a Holly Bush Hedge
Pruning a holly bush hedge is an important part of keeping it healthy and looking its best. However, it is important to be careful not to prune too much off the hedge, as this can cause damage and even kill the plant. Here are some tips to help you avoid pruning too much off your holly bush hedge in the UK. First, it is important to understand the growth cycle of a holly bush hedge.
In the UK, holly bushes typically grow in the spring and summer months, and then go dormant in the winter. Pruning should be done in the late winter or early spring, before the new growth begins. This will help ensure that the hedge is not pruned too much, as the new growth will help fill in any gaps. Second, it is important to use the right tools when pruning a holly bush hedge. Pruning shears should be used to trim the hedge, as they are designed to cut through the thick branches without damaging the plant. It is also important to use sharp shears, as dull shears can cause damage to the hedge. Finally, it is important to be aware of the size of the hedge when pruning. If the hedge is too large, it can be difficult to prune without taking too much off. It is best to prune the hedge in small sections, so that you can be sure not to take too much off.
By following these tips, you can ensure that you do not prune too much off your holly bush hedge in the UK. With proper pruning, your hedge will remain healthy and look its best for years to come.
An Overview of Pruning a Holly Bush Hedge
Pruning a Holly Bush Hedge is an important part of keeping it healthy and looking its best. In the UK, pruning is typically done in late winter or early spring, when the bush is still dormant. This is the best time to prune, as it allows the bush to heal and regrow quickly. When pruning, it is important to remove any dead or diseased branches, as well as any branches that are growing in an undesirable direction.
Additionally, it is important to thin out the bush, removing any branches that are too close together. This will help to ensure that the bush receives enough sunlight and air circulation. Finally, it is important to shape the bush, removing any branches that are too long or too short. With proper pruning, a Holly Bush Hedge can remain healthy and attractive for many years.
In conclusion, a Holly Bush Hedge is a great addition to any garden in the UK. It is important to choose the right type of Holly Bush, the right location, and the right time to plant it. Additionally, it is important to understand how far apart to plant the bushes, how fast they grow, and how to propagate them. It is also important to be aware of the common diseases and pests that can affect a Holly Bush Hedge, and why pruning is necessary. Finally, it is important to understand the best time to prune, how much to prune, and how to care for the hedge after pruning. By following these steps, you can ensure that your Holly Bush Hedge will remain healthy and beautiful for years to come.
Frequently Asked Questions About the Holly Bush
FAQ Questions and Answers:
- Q: What's the best type of Holly Bush Hedge to grow? A: The best type of Holly Bush Hedge to grow is the English Holly (Ilex aquifolium). This species is native to the UK and is well-suited to the climate. It is also very hardy and can tolerate a wide range of soil types.
- Q: What is the best time to plant a Holly Bush Hedge in the UK? A: The best time to plant a Holly Bush Hedge in the UK is in the spring or autumn. Planting in the spring will give the hedge a head start in the growing season, while planting in the autumn will give the hedge time to establish its roots before the winter.
- Q: How far apart must a Holly Bush be planted to make a hedge? A: Generally, for smaller varieties of holly bushes, you should plant them 2-3 feet apart. For larger varieties, a spacing of 4-6 feet is recommended1. This allows each plant enough space to grow and spread, while also ensuring that the hedge will be dense and provide good coverage. If you want your hedge to fill in more quickly, you can plant the bushes slightly closer together, but this may require more frequent pruning to prevent the plants from becoming overcrowded as they grow.
- Q: How fast does a Holly Bush Hedge grow? A: A Holly Bush Hedge can grow up to 1 metre per year, depending on the conditions. It is important to ensure that the hedge is planted in an area with plenty of sunlight and well-drained soil.
- Q: How to propagate a Holly Bush Hedge - list the most common methods? A: The most common methods of propagating a Holly Bush Hedge are by cuttings, layering, and division. Cuttings are taken from the parent plant and planted in soil, while layering involves bending a branch of the parent plant to the ground and covering it with soil. Division involves splitting the parent plant into two or more sections and planting them separately.
- Q: What are the common diseases and pests which affect a Holly Bush Hedge? A: Common diseases and pests which affect a Holly Bush Hedge include Aphids, scale insects, and Powdery Mildew. It is important to monitor the hedge for signs of these pests and diseases and take appropriate action if necessary.
- Q: Why do we need to prune a Holly Bush Hedge? A: Pruning a Holly Bush Hedge is important to maintain its shape and size, as well as to promote healthy growth. Pruning also helps to remove dead or diseased branches, which can help to prevent the spread of disease.
- Q: When is the best time to prune a Holly Bush Hedge? A: The best time to prune a Holly Bush Hedge is in late winter or early spring, when the hedge is dormant. This will help to avoid damaging new growth and ensure that the hedge remains healthy.
- Q: How much should be pruned from a Holly Bush Hedge? A: Generally, only the tip of each branch should be pruned, with no more than 1/3 of the total length being removed. It is important to avoid cutting into old wood, as this can prevent new growth from forming. Additionally, it is important to remove any dead or diseased branches regardless of their location on the hedge.
- Q: How do I care for a Holly Bush Hedge after pruning? A: After pruning, it is important to water the hedge deeply and regularly. It is also beneficial to add a layer of mulch around the base of the hedge to help retain moisture and suppress weeds. Fertilizing with a balanced fertilizer can also help promote healthy growth. Finally, continue to monitor for pests and diseases and take appropriate action if necessary
How to Prune Climbing Vines
List by Variety
- How to Prune Actinidia
- How to Prune Akebia
- How to Prune Bougainvillea
- How to Prune Campsis
- How to Prune Celastrus
- How to Prune Chilean Glory Vine
- How to Prune Clematis Armandii
- How to Prune Clematis Montana
- How to Prune Climbing Rose
- How to Prune Hedera GoldHeart
- How to Prune Honeysuckle
- How to Prune Hydrangea Petiolaris
- How to Prune Ivy
- How to Prune Japanese Wisteria
- How to Prune Morning Glory
- How to Prune Parthenocissus
- How to Prune Persian Ivy Hedera Colchica
- How to Prune Schisandra
- How to Prune Star Jasmine
- How to Prune Sweet Peas
- How to Prune True Jasmine
- How to Prune Virginia Creeper
- How to Prune Wisteria
How to Prune Hedges
List by Variety
- How to Prune an Arborvitae Hedge
- How to Prune a Barberry Hedge
- How to Prune a Beech Hedge
- How to Prune a Boxwood Hedge
- How to Prune a Butterfly Bush Hedge
- How to Prune a Cotoneaster Hedge
- How to Prune an English Lavender Hedge
- How to Prune an Escallonia Hedge
- How to Prune an Euonymus-Hedge
- How to Prune a Firethorn Hedge
- How to Prune a Forsythia Hedge
- How to Prune a Griselinia Hedge
- How to Prune a Hawthorn Hedge
- How to Prune a Holly Hedge
- How to Prune a Hornbeam Hedge
- How to Prune a Laurel Hedge
- How to Prune a Leylandii Hedge
- How to Prune a Lilac Hedge
- How to Prune a Maple Leaf Viburnum Hedge
- How to Prune a Photinia Hedge
- How to Prune a Pink Ramanus Rose Hedge
- How to Prune a Privet Hedge
- How to Prune a Pyracantha Hedge
- How to Prune a Spirea Hedge
- How to Prune a Thuja Hedge
- How to Prune a Viburnum Hedge
- How to Prune a Western Red Cedar Hedge
- How to Prune a Yew Hedge
How to Prune Shrubs
List by Variety
- How to Prune an Abelia Shrub
- How to Prune an Abutilon
- How to Prune an Acer / Japanese-Maple
- How to Prune an Amelanchiers
- How to Prune an Apple-Tree
- How to Prune an Arbovitae Shrub
- How to Prune an Arbutus
- How to Prune an Aucuba
- How to Prune a Azalea Mollis
- How to Prune Azaleas
- How to Prune a Bay Tree Shrub
- How to Prune a Berberis Darwinii
- How to Prune Berberis Deciduous Types
- How to Prune a Boxwood Shrubs
- How to Prune a Brachyglottis Senecio
- How to Prune a Buddleia Alternifolia
- How to Prune Buddleias Butterfly Bushes
- How to Prune a Buddleja Globosa
- How to Prune a Callicarpa
- How to Prune a Camellia
- How to Prune a Caryopteris
- How to Prune a Catalpa Bignonioides Aurea
- How to Prune Ceanothus Deciduous Types
- How to Prune Ceanothus Evergreen Types
- How to Prune a Ceratostigma
- How to Prune a Chaenomeles
- How to Prune a Choisya
- How to Prune a Cistus
- How to Prune a Clematis
- How to Prune a Cornus
- How to Prune a Cotinus Royal Purple
- How to Prune a Cytisus Scoparius
- How to Prune a Exochorda x Macrantha
- How to Prune a Forsythia
- How to Prune a Hebe
- How to Prune a Hydrangeas
- How to Prune Juniper Shrubs
- How to Prune a Lavatera
- How to Prune Lilac Bushes
- How to Prune a Mugo Pine
- How to Prune Rose Bushes
- How to Prune Spirea Shrubs
- How to Prune Viburnum Shrubs
- How to Prune a Weigela
- How to Prune a Yew
How to Prune Trees
List by Variety
- How to Prune a Apple Tree
- How to Prune a Apricot Tree
- How to Prune a Ash Tree
- How to Prune a Birch Tree
- How to Prune a Cherry Tree
- How to Prune a Elm Tree
- How to Prune a Fig Tree
- How to Prune a Grape Tree
- How to Prune a Hickory Tree
- How to Prune a Maple Tree
- How to Prune a Oak Tree
- How to Prune an Olive Tree
- How to Prune a Peach Tree
- How to Prune a Pear Tree
- How to Prune a Plum Tree
- How to Prune a Poplar Tree
- How to Prune a Walnut Tree
Gallery


Michael Carter
Vestibulum ante ipsum primis in faucibus orci luctus et ultrices posuere cubilia curae; Donec vel erat in nulla efficitur tempor non ut nisl. Integer venenatis eros ut dui viverra fermentum.
Sophie Wilson
Nam ut turpis hendrerit, varius nunc vel, elementum dui. Morbi vulputate dolor sit amet scelerisque egestas. Vestibulum eleifend nunc ut bibendum fermentum.
Alex Morgan
Cras non velit nec purus tempor rhoncus. Sed non mauris vitae erat consequat auctor eu in elit. Class aptent taciti sociosqu ad litora torquent per conubia nostra.