How and When to Prune A Boxwood Hedge
A Complete Guide to Growing and Planting a Boxwood Hedge in the UK

Are you looking to add a touch of character and privacy to your garden? A boxwood hedge can provide an attractive, traditional border that will keep your outdoor space secluded and secure. But before you dive right in, it’s important to know the ins-and-outs of growing and planting this classic garden feature. Don’t worry – our complete guide to boxwood hedges has everything you need to ensure success! Learn all about soil preparation, choosing the right variety for your climate, proper maintenance techniques and more — so get started on becoming an expert grower today!
The history of the boxwood hedge in the UK
The history of the boxwood hedge in the UK dates back to ancient times, with its presence and cultivation deeply rooted in the country's gardening and landscaping traditions. Boxwood, also known as Buxus sempervirens, is a versatile evergreen shrub native to Europe, including the British Isles. Its dense foliage and ability to withstand frequent pruning have made it a popular choice for formal gardens and hedging.
Roman Influence
The Romans were among the first to introduce the concept of formal gardening to Britain around 43 AD. They valued boxwood for its aesthetic appeal and ease of shaping, using it extensively in their villa gardens. Roman gardens often featured intricately designed knot gardens, parterres, and topiaries, with boxwood playing a prominent role in these designs.Medieval Monastic Gardens
During the medieval period, monastic gardens became an essential part of religious life in Britain. These gardens were not only a source of food and medicinal herbs but also a place for contemplation and spiritual reflection. Boxwood hedges were commonly used to create enclosed garden spaces, providing a sense of order and separation between different areas of the garden.Tudor and Elizabethan Gardens
The Tudor and Elizabethan periods saw a resurgence of interest in formal gardens, with boxwood hedges playing a significant role in their design. Knot gardens, which had been popular during Roman times, made a comeback during this era. These intricate designs, often created using boxwood, were considered a symbol of prestige and wealth. The popularity of boxwood hedges continued to grow during the reign of Elizabeth I, with many grand estates featuring elaborate boxwood parterres and topiaries.18th and 19th Century Landscape Movement
The 18th and 19th centuries saw a shift away from formal gardens towards more naturalistic landscape designs, influenced by renowned landscape architects such as Capability Brown and Humphry Repton. Despite this change in style, boxwood hedges remained popular, often used to create borders and define garden spaces within these larger landscapes.Victorian Gardens
During the Victorian era, the interest in formal gardening and elaborate topiaries was revived. Boxwood hedges were once again in high demand, with many Victorian gardens featuring intricate designs and maze-like parterres. The introduction of new boxwood varieties, such as Buxus microphylla and Buxus sempervirens 'Suffruticosa,' expanded the possibilities for creative garden designs.Modern British Gardens
Today, boxwood hedges continue to be a staple in British gardens, valued for their versatility, low maintenance, and evergreen nature. They can be found in both traditional and contemporary garden designs, serving various purposes from privacy screens to decorative elements. The long-standing history of the boxwood hedge in the UK is a testament to its enduring appeal and adaptability, ensuring its continued popularity in gardens across the country.The Benefits of Planting a Boxwood Hedge
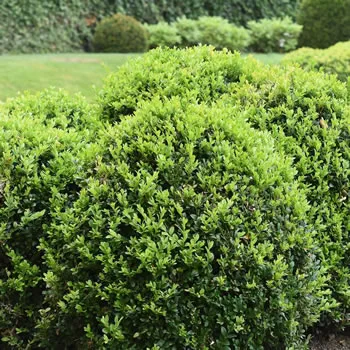
For gardening enthusiasts, planting a boxwood hedge can be a great way to elevate their outdoor space. Boxwood hedges are low maintenance and versatile, making them an ideal addition to any garden. The beauty of these hedges lies in their dense foliage and compact form, providing both privacy and an attractive visual appeal. Apart from their aesthetics, boxwood hedges also serve as natural boundaries, separating different parts of your garden or outdoor space. With a bit of care, these hedges can grow over time, adding value and a sense of completion to your garden. Overall, planting a boxwood hedge can provide a simple and effective way to enhance your home's curb appeal while also offering multiple practical benefits for you and your garden. A boxwood hedge is a popular choice for landscaping and garden design due to its numerous benefits. Here are some of the advantages of planting a boxwood hedge:
- Aesthetics: Boxwood hedges have a dense, compact growth habit and small, glossy leaves, making them visually appealing. They can be easily shaped into various forms, such as spheres, cones, or intricate topiaries, adding elegance and sophistication to your garden.
- Privacy: A well-maintained boxwood hedge can provide privacy by creating a natural barrier between you and your neighbors or passersby. They can also help hide unsightly views or create a more intimate outdoor space.
- Windbreak: Boxwood hedges serve as effective windbreaks, reducing wind speed and providing shelter for more delicate plants in your garden.
- Noise reduction: The dense foliage of a boxwood hedge can help absorb and reduce noise from nearby roads or neighboring properties, creating a more peaceful environment.
- Erosion control: Boxwood hedges, with their extensive root systems, can help prevent soil erosion on slopes or embankments.
- Wildlife habitat: Boxwood hedges offer shelter and nesting sites for birds and other small creatures, promoting biodiversity in your garden.
- Low maintenance: Boxwoods are relatively low maintenance plants, requiring only occasional pruning and minimal water once established. They are also resistant to most pests and diseases.
- Evergreen: As an evergreen plant, boxwood hedges retain their leaves year-round, providing continuous visual interest and maintaining their function as a privacy screen even during winter months.
- Adaptability: Boxwoods can tolerate a wide range of soil types and growing conditions, making them suitable for various locations.
- Increases property value: A well-maintained boxwood hedge can enhance the overall appearance of your property, potentially increasing its value and curb appeal.
What You Need to Know Before Planting a Boxwood Hedge

Before planting a boxwood hedge, there are several crucial things you need to consider. Firstly, you need to choose the right location. Boxwoods thrive in areas with partial to full shade and well-draining soil. Secondly, you need to decide on the spacing and size of your hedge. This will depend on the variety of boxwood you choose and your desired overall height and width. Remember, boxwoods grow slowly, so patience is key when creating a hedge. Lastly, proper maintenance is vital for the health and longevity of your hedge. Regular watering, pruning, and fertilizing will help your boxwoods thrive and create a beautiful, long-lasting hedge. By knowing these important factors, you'll be on your way to creating a stunning boxwood hedge that will enhance the beauty of your outdoor space for years to come.
Before planting a boxwood hedge, there are several factors to consider in order to ensure the health and success of your plants. Here's a list of essential points to keep in mind:
- Climate: Boxwoods are hardy plants, but they do have some limitations when it comes to extreme temperatures. Make sure the variety you choose is suitable for your region's climate, taking into account factors such as winter temperatures and frost susceptibility.
- Sunlight: While boxwoods can tolerate partial shade, they thrive best in areas with full to partial sun. Ensure your planting site receives adequate sunlight for optimal growth.
- Soil: Boxwoods prefer well-draining soil with a pH between 6.0 and 7.0. Before planting, test your soil's pH and amend it if necessary. Additionally, check for proper drainage by digging a hole and filling it with water; if the water drains within a few hours, the site should be suitable for planting.
- Spacing: Consider the mature size of the boxwood variety you've chosen and space your plants accordingly. Proper spacing is crucial for air circulation, which helps prevent diseases and encourages healthy growth.
- Planting time: The best time to plant boxwoods is during the cooler months, either in early spring or late fall. This allows the plants to establish their root systems before the heat of summer or the harshness of winter sets in.
- Watering: Newly planted boxwoods require regular watering until they become established, typically within the first two years. After that, they are relatively drought-tolerant but may still need supplemental water during prolonged dry periods.
- Fertilizing: Boxwoods benefit from an annual application of balanced, slow-release fertilizer, typically in the spring. Avoid using high-nitrogen fertilizers, as this can encourage excessive growth and make the plants more susceptible to disease.
- Pruning: Regular pruning is essential for maintaining the shape and health of your boxwood hedge. Prune lightly throughout the growing season, focusing on removing any dead or diseased branches and shaping the plants as desired. Avoid heavy pruning in late fall, as this can leave the plants vulnerable to winter damage.
- Pest and disease control: Boxwoods are generally resilient plants, but they can be susceptible to certain pests and diseases, such as boxwood blight and Root Rot. Monitor your plants regularly for signs of these issues and take prompt action if you notice any problems.
- Variety selection: There are numerous boxwood varieties available, each with its own growth habits, mature sizes, and climate preferences. Research the different options and choose a variety that best suits your needs and garden conditions.
By considering these factors before planting a boxwood hedge, you'll set yourself up for success and enjoy a beautiful, healthy addition to your landscape for years to come.
How to Choose the Right Variety of Boxwood

Boxwood is a popular shrub that can add charm and elegance to your garden. With so many varieties available in the market, selecting the right one can be challenging. However, by considering a few factors, you can make an informed decision.
First, think about the purpose of planting the shrub. Do you want to use it as a border or a hedge? Once you have determined the purpose, consider the growth pattern, height, and width of the plant. It's also crucial to check the hardiness zone of your area and choose a variety that can thrive in the specific climate. By doing so, you can ensure that your boxwood will not only look great but also thrive for years to come, adding a touch of green magic to your garden.
As a gardening expert, I've compiled a list of the best boxwood varieties for creating a luscious and beautiful hedge. Each variety has its unique characteristics, advantages, and potential drawbacks. Consider factors such as size, location, maintenance level, and visual aesthetics when choosing the right boxwood variety for your hedge.
Buxus sempervirens 'Suffruticosa' (Dwarf English Boxwood)
- Size: 2-3 feet tall and wide
- Location: Outdoor
- Maintenance: Low to moderate
- Visual Aesthetics: Dense, compact growth with small, dark green leaves
Pros:
- Slow-growing, making it ideal for low hedges and borders
- Retains its rich green color throughout the year
- Tolerant of heavy pruning and shaping
Cons:
- Susceptible to boxwood blight and Root Rot; ensure proper air circulation and avoid overwatering
Tips:
- Plant in well-draining soil and provide adequate sunlight to prevent diseases.
Buxus sempervirens 'Rotundifolia' (Round-leaved Boxwood)
- Size: 5-6 feet tall and wide
- Location: Outdoor
- Maintenance: Moderate
- Visual Aesthetics: Large, rounded leaves with a glossy, dark green surface
Pros:
- Fast-growing, making it suitable for taller hedges and screens
- Resistant to Leaf Miners, a common boxwood pest
Cons:
- Less tolerant of heavy pruning; requires regular, light trimming to maintain shape
Tips:
- Prune early in the growing season to encourage bushy growth and avoid cutting into old wood.
Buxus microphylla 'Faulkner' (Faulkner Boxwood)
- Size: 3-4 feet tall and wide
- Location: Outdoor
- Maintenance: Low to moderate
- Visual Aesthetics: Small, oval-shaped leaves with a bright green color
Pros:
- Good cold-hardiness, making it suitable for colder climates
- Retains its vibrant leaf color throughout the year
Cons:
- Susceptible to boxwood blight and Root Rot; ensure proper air circulation and avoid overwatering
Tips:
- Plant in well-draining soil and provide adequate sunlight to prevent diseases.
Buxus microphylla 'Winter Gem' (Winter Gem Boxwood)
- Size: 4-5 feet tall and wide
- Location: Outdoor
- Maintenance: Moderate
- Visual Aesthetics: Small, glossy leaves with a dark green color that turns bronze in winter
Pros:
- Excellent cold-hardiness, making it suitable for colder climates
- Adaptable to different soil types and pH levels
Cons:
- Requires regular pruning to maintain shape and density
Tips:
- Prune in early spring before new growth starts, and maintain a slightly wider base to ensure even sunlight exposure.
Buxus sempervirens 'Graham Blandy' (Graham Blandy Boxwood)
- Size: 8-10 feet tall and 1-2 feet wide
- Location: Outdoor
- Maintenance: Moderate
- Visual Aesthetics: Narrow, columnar growth with small, dark green leaves
Pros:
- Unique upright growth habit, making it ideal for narrow spaces and vertical accents
- Drought-tolerant once established
Cons:
- Slow-growing, which might require more time to achieve the desired height
Tips:
- Provide support during the initial growth stages to ensure a straight, upright form.
Each boxwood variety has its unique characteristics, advantages, and potential drawbacks. Consider factors such as size, location, maintenance level, and visual aesthetics when choosing the right boxwood variety for your hedge. By understanding the pros and cons of each variety, you can make an informed decision and create a stunning boxwood hedge that complements your garden's design.
Preparing the Soil for Your Boxwood Hedge
Preparing the soil for your hedge may seem like a daunting task, but it's an essential step in promoting healthy growth and a flourishing garden. One of the first things to consider is the soil type - does it drain well or retain too much moisture? Testing the soil's pH levels can also help determine if any amendments are necessary to create an optimal growing environment. Another crucial aspect is removing any weeds, rocks, or debris that may impede the hedge's growth. It's important to remember that healthy soil equals healthy plants, so take the time to properly prepare and nurture your soil before planting your hedge.
As a gardening expert, I'm happy to provide a step-by-step guide on preparing the soil before planting a boxwood hedge. Follow these steps to create the perfect planting environment for your new hedge:
-
Step 1: Site Selection
Choose a location that meets the following criteria:
- Full to partial sun exposure (at least 4-6 hours of sunlight daily)
- Well-draining soil
- Sufficient space for the mature size of the boxwood variety you've chosen
-
Step 2: Soil Testing
Test your soil's pH and nutrient levels using a soil test kit available at garden centers or online. Boxwoods prefer a slightly acidic to neutral soil pH between 6.0 and 7.0. The test results will also indicate if any nutrients are lacking in the soil.
-
Step 3: Soil Amendment
Based on your soil test results, amend the soil as needed:
- If the soil pH is too acidic (below 6.0), add lime to raise it.
- If the soil pH is too alkaline (above 7.0), add sulfur or peat moss to lower it.
- For nutrient deficiencies, incorporate organic matter such as compost, well-rotted manure, or leaf mold into the soil to improve its fertility and structure.
-
Step 4: Preparing the Planting Area
- Remove any weeds, grass, or debris from the planting area.
- Using a garden fork or tiller, loosen the soil to a depth of 12-18 inches.
- Mix in any necessary soil amendments based on your soil test results.
- Rake the area smooth and level, ensuring that it maintains a slight slope away from any structures for proper drainage.
-
Step 5: Digging the Trench
Dig a trench along the planting area, making it slightly wider and deeper than the root balls of your boxwood plants. Space the trench according to the specific variety's mature width to ensure proper air circulation and growth.
-
Step 6: Adding Organic Fertilizer
Add a balanced, slow-release organic fertilizer to the bottom of the trench, following the manufacturer's recommended application rate. This will provide essential nutrients to your boxwoods during their initial establishment phase.
-
Step 7: Planting and Watering
Plant your boxwoods in the prepared trench, ensuring that the top of the root ball is level with the surrounding soil surface. Backfill the trench with the amended soil, gently firming it around the roots to eliminate air pockets. Water the plants thoroughly to settle the soil and establish good root-to-soil contact.
-
Step 8: Mulching
Apply a 2-3 inch layer of organic mulch, such as shredded bark or pine needles, around the base of the plants. Keep the mulch a few inches away from the stems to prevent potential rot or pest issues. Mulching helps retain soil moisture, suppress weeds, and regulate soil temperature.
-
Step 9: Ongoing Care
Water your newly planted boxwood hedge regularly during the first two years, providing about 1 inch of water per week. After that, they become more drought-tolerant but may still need supplemental water during prolonged dry periods. Fertilize annually in early spring with a balanced, slow-release fertilizer, following the manufacturer's instructions.
By following this step-by-step guide on preparing the soil before planting a boxwood hedge, you'll create the perfect environment for your new plants to thrive. With proper site selection, soil preparation, and ongoing care, your boxwood hedge will grow into a beautiful, healthy addition to your landscape.
Planting and Maintaining Your Boxwood Hedge

Hedges can be a wonderful addition to any garden, providing both a decorative backdrop and privacy. However, planting and maintaining them can seem daunting. Fortunately, with a little bit of knowledge and preparation, you can ensure that your hedges thrive all year round. When planting your hedge, make sure to space each plant evenly apart and dig holes deep enough to accommodate the root balls. Water deeply and regularly for the first year to encourage root growth. Once established, prune your hedge annually to keep it looking tidy and promote healthy growth. By following these simple steps, you'll have an eye-catching and vibrant hedge that enhances your outdoor space for years to come.
We recommend using a slow-release granular fertilizer with a balanced N-P-K composition (such as 10-10-10 or 14-14-14) when planting a boxwood hedge. This type of fertilizer ensures that the boxwood receives essential nutrients over an extended period, promoting strong root growth and overall plant health.
Boxwoods thrive in well-draining soil with a pH level between 6.0 and 7.0, which is slightly acidic to neutral. Before planting your boxwood hedge, it's crucial to perform a soil test to determine the existing pH level and nutrient content. If the soil is too acidic or alkaline, you may need to amend it with lime or sulfur to reach the desired pH range.
The level of shade and sun the hedge will receive can also impact its growth. Boxwoods can tolerate partial shade but grow best in full sun, receiving at least six hours of sunlight daily. Ensure your hedge is planted in a location that meets these light requirements for optimal growth.
The specific nutrient requirements of boxwood plants include nitrogen (N) for foliage growth, phosphorus (P) for root development, and potassium (K) for overall plant health and disease resistance. A balanced N-P-K fertilizer provides these essential nutrients in equal proportions, ensuring the boxwood hedge receives adequate nourishment.
To apply the fertilizer to your boxwood hedge, follow these steps:
- Measure the length of your hedge and calculate the amount of fertilizer needed based on the product label recommendations. Typically, 1 to 2 pounds of fertilizer per 100 linear feet is sufficient.
- Apply fertilizer at the time of planting by mixing it into the backfill soil. This ensures that the nutrients are available to the roots immediately, promoting strong root establishment.
- After planting, apply the fertilizer annually in early spring, before new growth begins. Sprinkle the granules evenly over the soil surface, extending slightly beyond the drip line of the hedge. Avoid placing the fertilizer directly against the trunk or stems, as this can cause damage.
- Water the hedge thoroughly after applying the fertilizer, allowing the nutrients to dissolve and reach the root zone.
By using a slow-release granular fertilizer with a balanced N-P-K composition, you provide your boxwood hedge with the essential nutrients it needs for optimal growth. Regularly monitor the health of your hedge and adjust your fertilization practices as needed based on soil tests and visual observations of plant growth and vigor.
Common Problems and Tips for Keeping Your Boxwood Hedge Healthy

Hedges can be a beautiful, natural addition to any garden or property, but they require care to stay healthy and visually appealing. One common issue that arises is the presence of pests such as Spider Mites or Aphids, which can damage the leaves and sap the energy from the hedge. To prevent this, it is important to regularly inspect your hedge and remove any pests immediately using organic methods or insecticidal soap.
Additionally, regular pruning and trimming can help keep your hedge in shape and encourage healthy growth. It is best to consult with a professional landscaper for advice on the best pruning techniques for your particular hedge species. With a little effort and attention, you can keep your hedge thriving and looking its best for years to come.
Here is an in-depth list of the most common diseases and pests that affect the health of boxwood hedges, along with their symptoms, causes, risk factors, preventive measures, and treatments.
-
1. Root Rot (Phytophthora and Pythium species)
- Symptoms: Yellowing leaves, wilted foliage, and branch dieback. The roots may appear black and rotten.
- Causes: Fungal pathogens that thrive in poorly-drained, waterlogged soils.
- Risk factors: Overwatering, planting in poorly-drained soils, or using contaminated tools.
- Preventive measures: Plant boxwoods in well-draining soil and avoid overwatering. Sterilize tools before use.
- Treatments: Remove and dispose of affected plants. Apply fungicides labeled for Root Rot control as a soil drench, following the manufacturer's instructions.
-
2. Leaf Spot (Volutella blight and Macrophoma blight)
- Symptoms: Small, circular brown spots on leaves, which may lead to leaf drop and twig dieback.
- Causes: Fungal pathogens that infect leaves, especially during wet conditions.
- Risk factors: High humidity, poor air circulation, and excessive moisture on leaves.
- Preventive measures: Space plants adequately for proper air circulation, and water at the base of the plant to keep foliage dry.
- Treatments: Prune and dispose of infected plant parts. Apply fungicides labeled for Leaf Spot control, following the manufacturer's instructions.
-
3. Boxwood Decline (a complex of fungal pathogens)
- Symptoms: Yellowing and thinning of foliage, premature leaf drop, and branch dieback.
- Causes: A combination of fungal pathogens, including Fusarium, Cylindrocladium, and Phytophthora species.
- Risk factors: Environmental stress, improper planting, and inadequate care.
- Preventive measures: Plant healthy, disease-free boxwoods in well-draining soil. Maintain proper care, including fertilization and pruning.
- Treatments: Prune and dispose of infected plant parts. Apply fungicides labeled for boxwood decline control, following the manufacturer's instructions.
-
4. Boxwood Leafminer (Monarthropalpus flavus)
- Symptoms: Blister-like bumps on leaves, leaf discoloration, and premature leaf drop.
- Causes: Larvae of the boxwood leafminer fly feed on the leaf tissue, creating blisters.
- Risk factors: Over-fertilization with nitrogen-rich fertilizers, which promotes tender leaf growth.
- Preventive measures: Use slow-release, balanced fertilizers. Monitor for adult flies in early spring and prune infested leaves.
- Treatments: Apply insecticides labeled for boxwood leafminer control during the larval stage, following the manufacturer's instructions.
-
5. Boxwood Psyllid (Psylla buxi)
- Symptoms: Cupping and curling of new leaves, stunted growth, and honeydew production.
- Causes: Nymphs of the boxwood psyllid feed on new growth, causing leaf distortion.
- Risk factors: Planting susceptible boxwood varieties and not monitoring for pests.
- Preventive measures: Select resistant boxwood varieties and monitor for psyllids in early spring.
- Treatments: Apply insecticides labeled for boxwood psyllid control during the nymph stage, following the manufacturer's instructions.
In summary, maintaining the health of your boxwood hedge involves proper planting, pruning, and fertilization techniques, as well as adequate watering and drainage. Regularly monitor your hedge for signs of diseases and pests, and take prompt action to address any issues. Use appropriate insecticides and fungicides as needed, always following the manufacturer's instructions for application and safety precautions.
What time of year do you plant Buxus hedges?
Planting season for Buxus hedges can depend on various factors, such as location and climate. However, there are some general guidelines to follow. It is recommended to plant Buxus hedges during the cooler months of the year, such as autumn or early spring. This will allow the plants to establish their roots before the harsher weather arrives. Planting during the warmer months can stress the plant and potentially harm its growth.
Additionally, it is essential to choose healthy plants and prepare the soil before planting. With proper care and attention, Buxus hedges can create a beautiful and functional addition to any garden or landscape.
How long does a boxwood hedge take to establish?
When starting a garden, the type of plant you choose can have a significant impact on the overall look and feel of the space. Boxwood hedges are often a popular choice for gardeners due to their classic look and versatility. If you're wondering how long it takes for box hedges to establish, the answer can vary based on a few factors. The overall health and size of the hedge when planted, the growing conditions, and the care provided all play a role in the time it takes for the hedge to establish.
Generally, it can take between 2-3 years for box hedges to fully establish and mature. However, with proper care and attention, you can help your hedge grow and flourish at a quicker rate. Despite the time it takes, the results are well worth the wait, as a beautiful, established box hedge can add a touch of elegance to any garden.
How far apart do you plant boxwood hedges?

Box hedges can be a stunning addition to any garden or landscape, but it's important to plant them the right way. The spacing of your box hedges will depend on the size and shape you're going for, as well as the types of plants you're working with. As a general rule of thumb, box hedges should be spaced about 2 to 3 feet apart. This will give them enough room to grow properly, while still maintaining a compact and neat appearance. Of course, you can always adjust the spacing to accommodate your specific needs and preferences. With the right care and attention, your box hedges will thrive and become a beautiful and eye-catching feature of your outdoor space.
In conclusion, planting a boxwood hedge is an excellent way to add beauty and practicality to your garden. Regardless of what type of boxwood you prefer, it’s important to understand the essentials before you start planting. Preparing the soil with necessary fertilizers and other materials will allow for healthy growing conditions.
Remember that full-sun varieties require up to six hours of direct sun while part-shade varieties need only two to four hours of mild sunlight a day. Plant your hedge late in the winter or early in springtime and be sure not to overcrowd them when you plant. Regularly maintenance such as shearing and pruning is also necessary to keep a thriving boxwood hedge healthy. With all these tips in mind, you should be ready to tackle this gardening project and enjoy a beautiful living fence around your outdoor oasis!
A Complete Guide on How to Prune a Boxwood Hedge in the UK

If you've been struggling to figure out the best way to prune a boxwood hedge in your UK garden, then you're in luck - because this guide is going to cover everything you need! From the ideal time of year, tools required and top tips for successful pruning, we'll make sure that by the end of this post, you’ll be a pro at maintaining those boxwood hedges. Pruning allows for better air circulation and light exposure which helps keep boxwoods healthy. We'll show you how easy it can be to enjoy having well-shaped and wonderful fragrant hedging all year around. Let's get started!
Understand the Basics - What is a Boxwood Hedge and Why Should You Prune it in the UK
Boxwood hedges are a popular choice for gardeners in the UK, and for good reason. These evergreen shrubs offer year-round appeal with their dense, glossy leaves and ability to stay green throughout the winter. But in order to maintain their elegant appearance, it's important to keep them regularly pruned. Pruning your boxwood hedge not only enhances its aesthetic appeal, but it also helps to keep the plants healthy by removing any dead or diseased wood. Whether used as a boundary marker or a decorative element in your garden, a well-pruned boxwood hedge is sure to make a statement. So, it's time to grab those shears and get to work!
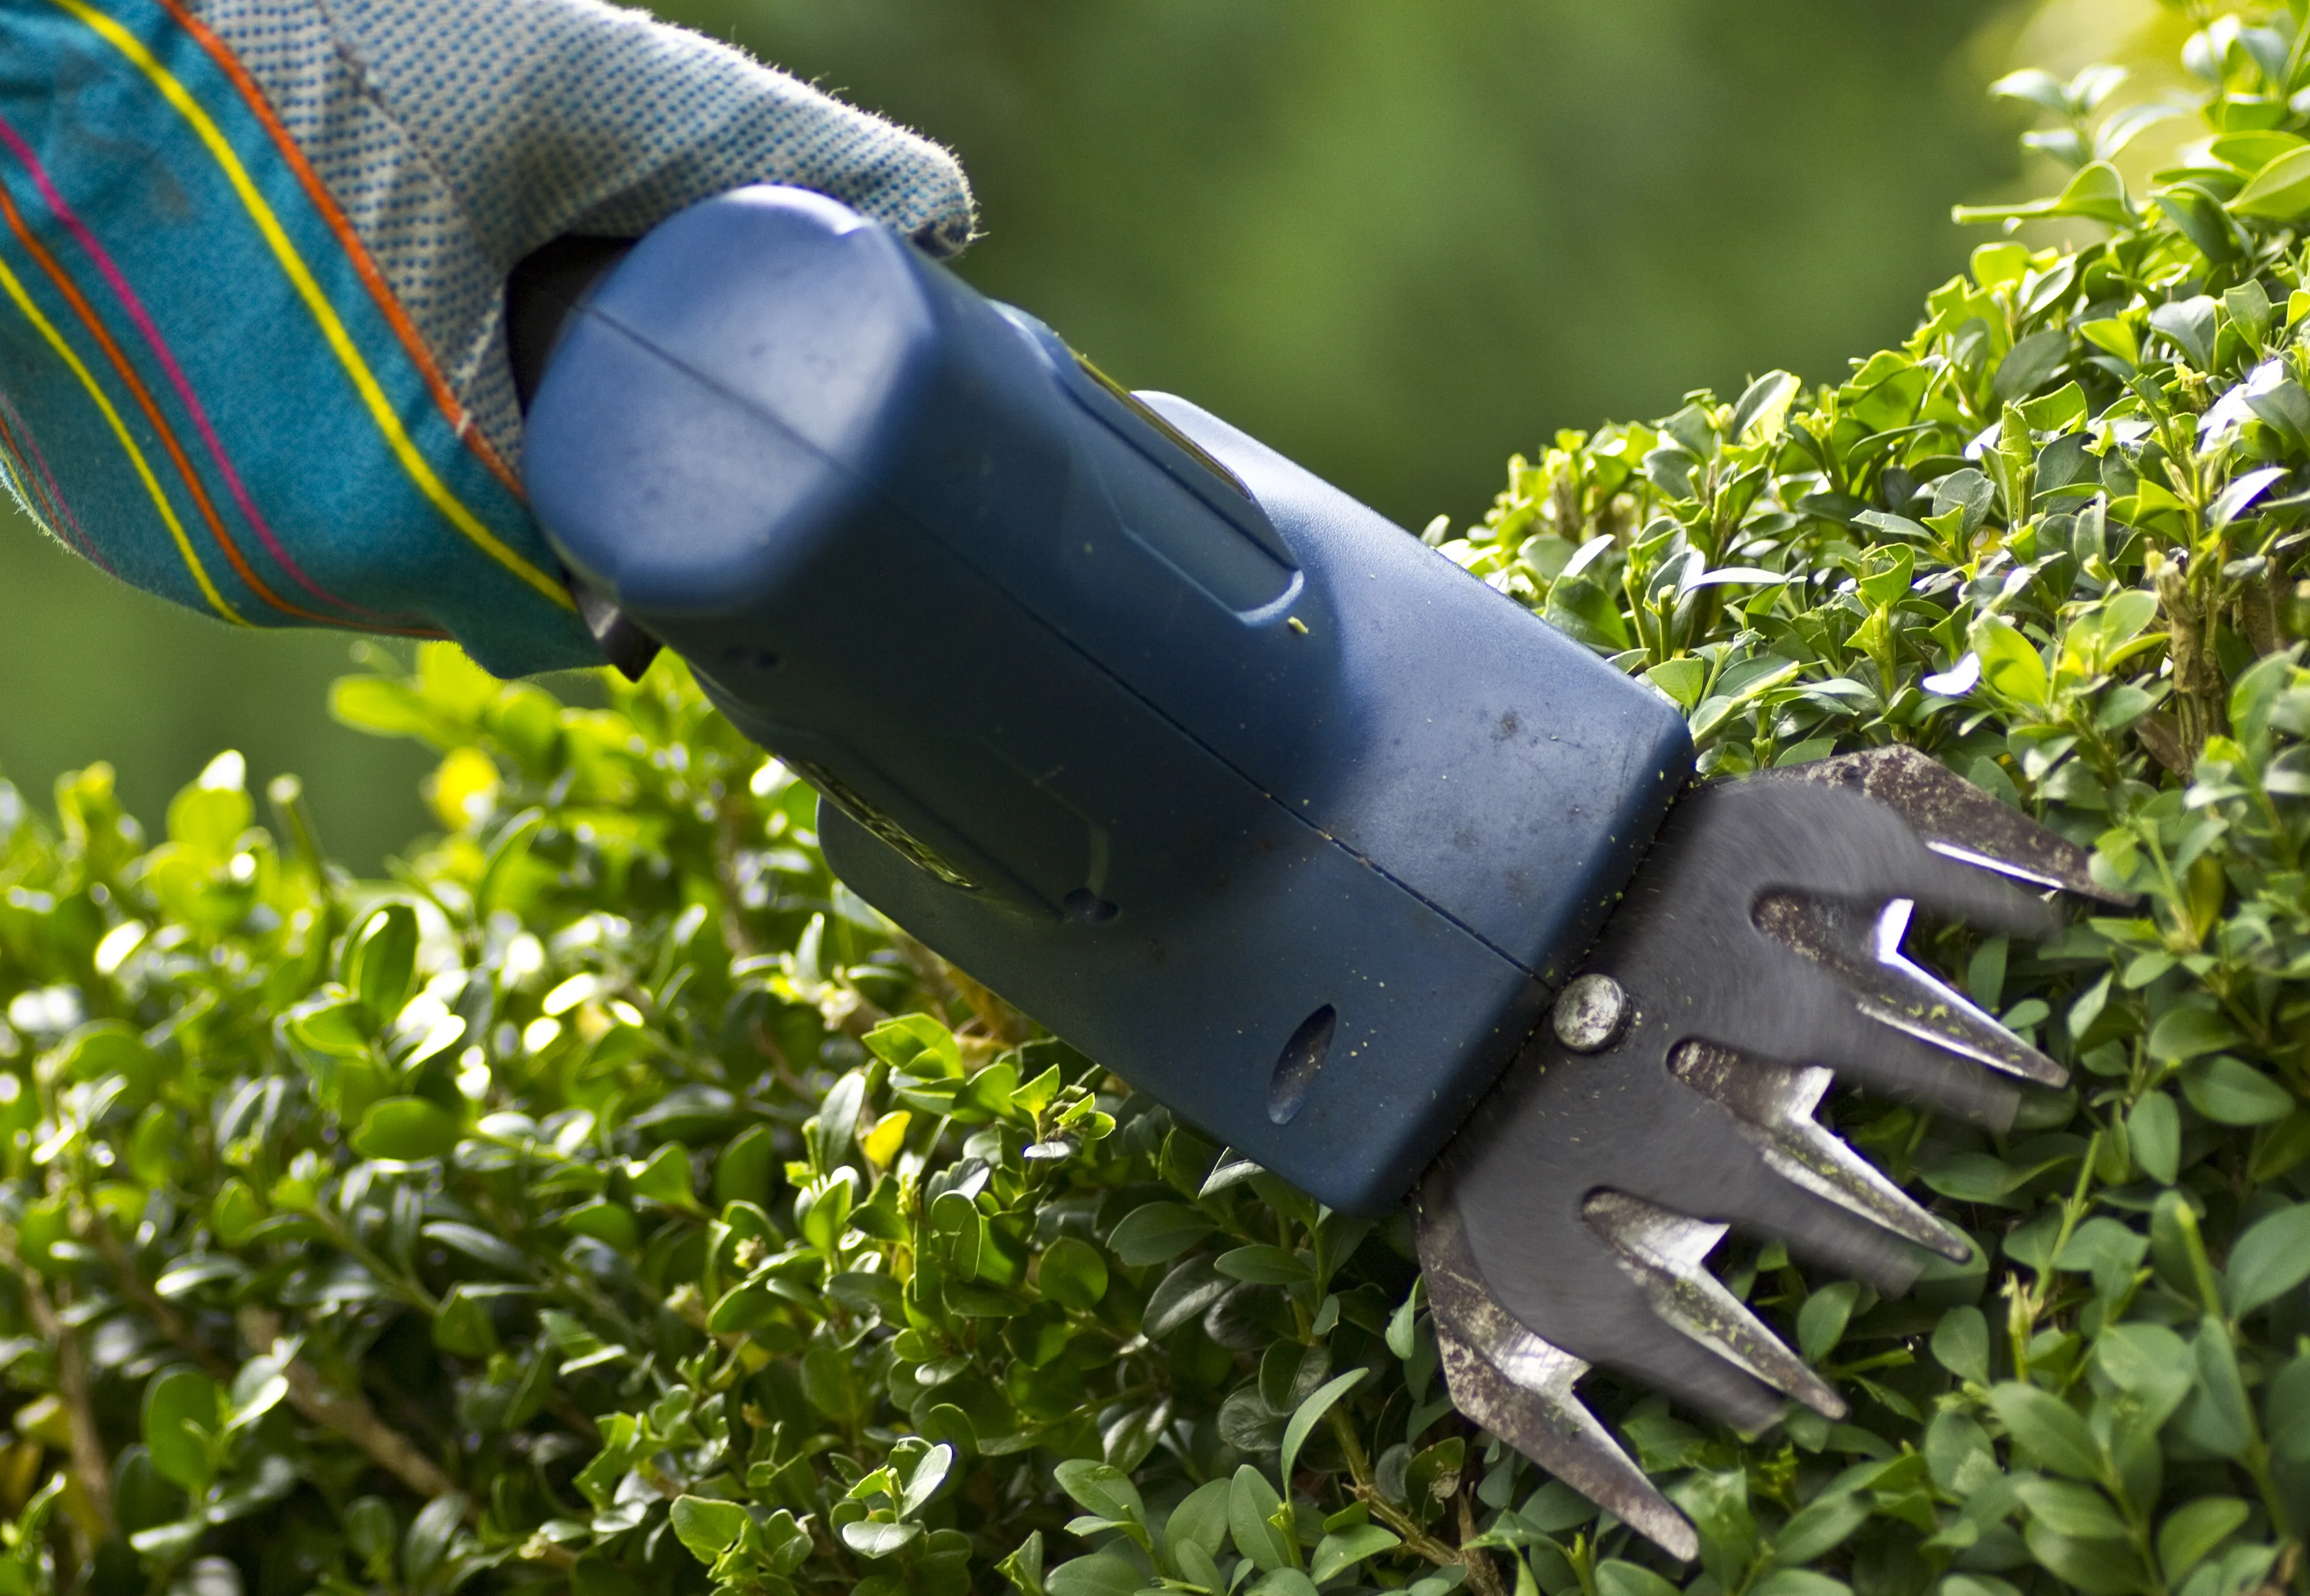
Choose the Right Tools for Pruning - Secateurs, Hedge Shears, Lopping Shears

When it comes to pruning, choosing the right tools can make all the difference. Secateurs, hedge shears, and lopping shears each have their own unique strengths for different types of pruning jobs. Secateurs, also known as pruning shears, are great for precise cuts on smaller branches and stems. Hedge shears, on the other hand, are designed for trimming and shaping hedges and bushes with thicker branches. For larger branches, lopping shears are the way to go. These heavy-duty shears have long handles and can effortlessly cut through branches up to two inches thick. With the right tools in hand, your pruning tasks will be a breeze and your plants will thank you for it.
Prepare Before Pruning - Consider the Shape and Size of Your Hedge and Measure Carefully
Before you grab your pruning shears, take a moment to consider the shape and size of your hedge. Every hedge has its own unique needs, so it's important to tailor your pruning approach accordingly. Take the time to measure your hedge carefully, too - this will help you achieve an even and balanced finish. By preparing properly before pruning, you'll be able to create a beautiful and healthy hedge that you can be proud of. So take a deep breath and get ready to give your hedge the care and attention it deserves!
Pruning Tips to Follow - Cutting at an Angle, Selecting Good Branches to Cut, Taking Care of Thin or Weak areas

Pruning is an essential part of any gardener's routine. When done correctly, it serves as both a maintenance tool and a way to enhance the overall health of your plants. A few key tips can make all the difference in ensuring your pruning efforts are successful.
First, always cut at an angle and avoid flat cuts. This will help promote new growth and prevent water from collecting on the cut area.
Secondly, when selecting branches to cut, look for ones that are diseased, dead, or obstructing growth of other branches.
Finally, pay special attention to thin or weak areas of the plant. These spots can be more prone to damage from weather or pests and may require additional care. By following these guidelines, you can ensure that your pruning efforts are productive and that your plants are both healthy and beautiful.
First, I can explain the importance of cutting at an angle when pruning plants and why it is preferable to flat cuts. Angled cuts provide several benefits that promote plant health, optimal growth, and increased bloom yield.
Why cut at an angle?
- Improved healing: Angled cuts allow for faster healing because they create a smaller surface area for the wound, reducing the risk of infection by pathogens.
- Water runoff: Angled cuts prevent water from pooling on the cut surface, which could lead to rot or fungal diseases.
- Directional growth: Cutting at an angle just above a bud encourages growth in the direction of the bud, helping to shape the plant as desired.
- Aesthetics: Angled cuts tend to be less noticeable and blend more seamlessly with the natural structure of the plant.
Types of plants to prune with angled cuts
Angled cuts are beneficial for most plants, including:
- Deciduous trees and shrubs
- Fruit trees
- Roses and other flowering shrubs
- Perennials
Tools for making angled cuts
Some effective tools for making angled cuts when pruning include:
- Hand pruners (also known as secateurs or pruning shears) for small branches
- Loppers for medium-sized branches
- Pruning saws for larger branches
Safety tips for pruning
To safely perform pruning tasks and prevent injury, follow these guidelines:
- Wear protective gear, such as gloves and safety glasses.
- Use sharp, clean tools to make clean cuts and minimize damage to the plant.
- Cut branches at a 45-degree angle, roughly 1/4 inch above a bud or branch junction.
- Avoid pruning during wet conditions, as this can increase the risk of spreading diseases.
How angled cuts improve plant health and growth
Pruning at an angle can:
- Promote better air circulation and light penetration within the plant, reducing the risk of diseases and encouraging growth.
- Encourage more vigorous and productive growth by removing dead, damaged, or weak branches.
- Increase bloom yield by redirecting energy from unnecessary growth to flower and fruit production.
Helpful tips for garden plant maintenance
- Regularly inspect your plants for signs of pests, diseases, or other issues, and address them promptly.
- Prune during the appropriate season for each plant type to maximize the benefits of pruning.
- Water and fertilize your plants as needed, based on their specific requirements.
By cutting at an angle when pruning plants and following proper maintenance practices, you can ensure the health, growth, and beauty of your garden plants throughout the growing season.
When pruning trees and shrubs, it's essential to select the right branches to cut in order to maintain the health and appearance of the plant. One of the primary goals of pruning is to remove branches that are diseased, dead, or obstructing the growth of other branches. This not only promotes healthy growth but also prevents potential hazards and improves the overall aesthetic of the plant.
Diseased Branches
Diseased branches can be identified by a variety of symptoms, such as discolored leaves, fungal growth, peeling bark, or an overall decline in the health of the branch. Removing these branches is crucial to prevent the spread of disease to other parts of the plant or even to nearby plants. When cutting diseased branches, it's essential to sanitize your pruning tools between cuts to minimize the risk of spreading the disease. Dispose of the removed branches properly, and avoid composting them, as this could introduce pathogens into your compost pile.
Dead Branches
Dead branches can be easily recognized by their brittle, dry, and lifeless appearance. They may have no leaves or foliage, or their leaves might be brown and withered. Dead branches should be removed promptly, as they can pose a hazard if they break off and fall, potentially causing injury or property damage. Additionally, dead branches can attract pests and decay, which can spread to healthy parts of the tree if left unaddressed.
When removing dead branches, make clean cuts close to the trunk or main branch, but avoid cutting into the collar – the raised area where the branch meets the trunk. This allows the tree to heal more effectively and reduces the risk of decay.
Obstructing Branches
Obstructing branches are those that cross over or rub against other branches, impede the growth of nearby branches, or grow in an undesirable direction. These branches can cause structural problems, weaken the plant, or lead to an unbalanced and unattractive appearance. Removing these branches allows the remaining branches to grow more vigorously and maintain a healthier, more visually appealing form.
To effectively remove obstructing branches:
- Identify the branches that are causing problems or have the potential to do so in the future.
- Prioritize removing branches that pose the most significant risk to the plant's health or structure.
- Make clean cuts at a slight angle, just outside the branch collar, to promote faster healing.
In conclusion, when selecting branches to cut, focus on those that are diseased, dead, or obstructing the growth of other branches. This practice not only helps maintain the health and structural integrity of the plant but also contributes to a more beautiful and thriving garden. Regular pruning is an essential aspect of plant care and should be performed with care and attention to detail.
Thirdly, Pruning is an essential gardening practice that helps maintain the health, appearance, and productivity of plants. Paying special attention to thin or weak areas of the plant during pruning is crucial for several reasons:
Promote healthy growth:
Thin or weak areas can be a sign of poor growth, which may result from inadequate sunlight, nutrient deficiencies, or pest infestations. By pruning these areas, you encourage the plant to redirect resources (such as water, nutrients, and energy) to stronger branches, promoting healthier and more robust growth.
Prevent disease and pests:
Weak areas in a plant can be more susceptible to diseases and pests, as they often lack the strength to resist infections or infestations. Pruning these areas helps prevent the spread of pathogens and minimizes the chances of pest attacks, ultimately protecting the overall health of the plant.
Improve air circulation and light penetration:
Thinning out weak areas allows for better air circulation and light penetration within the plant's canopy. This helps prevent the growth of mold, mildew, and other fungal diseases while ensuring that all parts of the plant receive adequate sunlight for photosynthesis.
Enhance structural integrity:
Weak branches and stems are more prone to breakage, especially under the weight of heavy foliage, flowers, or fruit. Pruning these areas not only strengthens the overall structure of the plant but also prevents potential damage to the plant or surrounding property during storms or strong winds.
Aesthetic appeal:
Pruning thin or weak areas can help improve the overall appearance of the plant by creating a more balanced and symmetrical shape. This not only enhances the visual appeal of your garden but can also increase the value of your property.In conclusion, paying special attention to thin or weak areas during pruning is vital for promoting healthy growth, preventing diseases and pests, improving air circulation and light penetration, enhancing the plant's structural integrity, and maintaining aesthetic appeal. Make sure to use sharp, clean tools and follow proper pruning techniques to ensure the best results for your plants.
A Step By Step Guide on How To Prune a Boxwood Hedge

A step-by-step guide on how to properly prune and maintain a boxwood hedge. For this example, let's assume we are pruning a medium-sized hedge in early spring.
-
Step 1: Gather tools and materials
You will need the following tools and materials for pruning a boxwood hedge:
- Hand pruners (for small branches)
- Loppers (for larger branches)
- Hedge shears (for shaping)
- A tarp or large cloth (to collect clippings)
- Gloves and safety glasses (for protection)
-
Step 2: Examine the health of the hedge
Before you begin pruning, inspect your boxwood hedge for signs of disease or pest infestation. Look for discolored leaves, dieback, or unusual growth patterns. If you notice any issues, treat them accordingly before proceeding with pruning.
-
Step 3: Prepare the area
Lay a tarp or large cloth beneath the hedge to collect clippings as you prune. This will make cleanup easier and help prevent the spread of any diseases or pests.
-
Step 4: Prune dead or damaged branches
Using hand pruners or loppers, remove any dead or damaged branches first. Cut back to healthy wood, making clean cuts at a slight angle just above a bud or branch junction.
-
Step 5: Thin out the interior
Boxwood hedges can become dense, reducing airflow and light penetration. To promote better air circulation and light distribution, selectively thin out some of the interior branches. Remove no more than one-third of the total branches to avoid stressing the plant.
-
Step 6: Shape the hedge
Using hedge shears, trim the outer foliage to achieve the desired shape. Boxwood hedges are often maintained in a slightly tapered form, wider at the base and narrower at the top. This shape allows sunlight to reach the lower branches, promoting even growth. Keep the top of the hedge slightly rounded to prevent snow and ice from accumulating in winter.
-
Step 7: Clean up
Gather all the clippings from the tarp or cloth and dispose of them properly. If the hedge showed signs of disease or pests, avoid composting the clippings, as this can spread the issue. Instead, bag the clippings and dispose of them through your local yard waste collection service.
-
Step 8: Follow-up maintenance
After pruning, water the boxwood hedge thoroughly to help it recover. Monitor the hedge for any signs of stress or new growth. In early spring, apply a slow-release, balanced fertilizer (such as 10-10-10) to promote healthy growth. Continue to water and fertilize as needed throughout the growing season.
By following these steps, you can successfully prune and maintain a healthy boxwood hedge that will provide beauty and structure to your landscape for years to come.
Maintenance After Pruning - Feeding Your Boxwood Hedge with Fertilizer and Watering Regularly
After taking the time to trim your boxwood hedge, it's important to keep up with regular maintenance to ensure it continues to thrive. One crucial aspect of this is feeding your hedge with a suitable fertilizer. This will provide your plants with the necessary nutrients to promote healthy growth and vibrant foliage. In addition to feeding your hedge, regular watering is also essential to maintain optimal health. Proper hydration will not only keep your plants looking luscious and green, but it will also help to prevent disease and insects. By incorporating both fertilizer and regular watering into your maintenance routine, you can keep your boxwood hedge looking great for years to come.
Boxwood hedges are popular for their dense, evergreen foliage and adaptability to various growing conditions. To maintain the health and appearance of your boxwood hedge, it is essential to provide proper care with appropriate fertilization and watering. Here's a detailed guide on how and when to feed your boxwood hedge with fertilizer and water regularly.
Fertilizing Your Boxwood Hedge
Boxwoods benefit from regular feeding with balanced, slow-release granular fertilizers. The best time to fertilize boxwoods is in early spring and late fall when the soil temperature is above 40°F (4°C).
- Early Spring Feeding: Apply fertilizer in early spring, around late March or early April, depending on your local climate. This provides the necessary nutrients for new growth and helps the plant recover from winter stress.
- Late Fall Feeding: A second application of fertilizer in late fall, around late October or early November, helps prepare the boxwood for winter and supports root development.
How to Fertilize Boxwood Hedge
- Choose a balanced, slow-release granular fertilizer with an N-P-K ratio of 10-6-4 or 14-14-14. These ratios provide a good balance of nitrogen (N), phosphorus (P), and potassium (K) for healthy growth.
- Follow the manufacturer's recommended application rate, usually about 1/2 to 1 cup of fertilizer per plant, depending on the size of the boxwood.
- Spread the fertilizer evenly around the base of each plant, extending outward to the drip line (the outer edge of the plant's canopy where water drips off the leaves).
- Lightly scratch the fertilizer into the soil surface using a garden fork or rake to help it reach the root zone.
- Water the area thoroughly after applying fertilizer to help dissolve the granules and carry the nutrients to the roots.
Watering Your Boxwood Hedge
Boxwoods have shallow root systems, making them susceptible to drought stress. Therefore, it's essential to water your boxwood hedge regularly, especially during dry periods.
- Frequency: Water your boxwood hedge once or twice a week, depending on the weather and soil conditions. In hot and dry climates, you may need to water more frequently.
- Amount: Provide enough water to moisten the soil to a depth of 6-8 inches (15-20 cm). This ensures that the water reaches the root zone. A slow, deep watering is more beneficial than frequent, shallow watering, as it encourages deeper root growth.
- Method: Use a soaker hose, drip irrigation system, or a watering wand to deliver water directly to the soil around the base of the plants. Avoid overhead watering, as wet foliage can promote fungal diseases.
- Mulching: Apply a 2-3 inch (5-7.5 cm) layer of organic mulch, such as wood chips or shredded bark, around the base of the plants to help conserve moisture, regulate soil temperature, and suppress weeds. Keep the mulch a few inches away from the stems to prevent rot and pest problems.
By following these guidelines for fertilizing and watering your boxwood hedge, you'll help maintain its health and beauty for years to come. Regular care will ensure that your boxwood hedge remains an attractive and functional element in your landscape.
Mulch and compost are both excellent additions to a garden as they can help retain moisture, suppress weeds, and feed the soil with essential nutrients. Here are some different types of mulch and compost that you can use after pruning to ensure healthy growth:
Types of Mulch
- Wood Chips: Wood chips are a common type of mulch and are useful for suppressing weeds and retaining moisture. They also slowly break down over time, releasing nutrients into the soil.
- Pine Needles: Pine needles are acidic and can be used as mulch around acid-loving plants such as azaleas and blueberries. They also decompose slowly, making them a long-lasting option.
- Straw: Straw is an excellent mulch for vegetable gardens, as it is low in nutrients but retains moisture well. It can also help suppress weeds.
- Shredded Leaves: Shredded leaves are a natural and free mulch that many gardeners use in their gardens. They add organic material to the soil as they decompose, and they also help suppress weeds.
Types of Compost
- Kitchen Compost: Kitchen compost is made from food scraps and other organic waste generated in the kitchen. It is an excellent source of nutrients and can be added to garden beds to enrich the soil.
- Manure Compost: Composted animal manure is a rich source of nutrients, making it an excellent addition to garden soil. However, it should be well-composted before use to avoid burning plants.
- Leaf Compost: Leaf compost is created by decomposing leaves and plant matter and can be used on its own or added to garden soil. It is rich in nutrients and also helps improve soil structure.
- Vermicompost: Vermicompost is made from worm castings and is one of the richest sources of plant nutrients. It can be added to garden soil or used as a potting mix for houseplants.
By incorporating different types of mulch and compost into your garden after pruning, you can help promote healthy growth and improve the overall health of your plants. Always choose high-quality, organic materials to ensure the best results.
Wrapping Up – Common Mistakes to Avoid When Pruning a Boxwood Hedge in the UK
Maintaining your boxwood hedge is an important aspect of keeping your garden looking neat and tidy. However, pruning can be tricky and there are some common mistakes that are easy to make. When pruning your boxwood hedge in the UK, it's important to avoid these mistakes to ensure a healthy and beautiful hedge.
Firstly, don't shear your hedge. While it may seem like a time-saver, shearing creates dense outer foliage that can become unsightly and reduce sunlight exposure to the inner branches.
Secondly, make sure to prune at the right time of year. Pruning in the winter when the boxwood is dormant will result in fewer leaves and slower growth.
Finally, avoid drastic pruning. It's best to prune a little at a time rather than cutting back too much at once, which can cause stress to the plant. Follow these tips and your boxwood hedge will be a vibrant addition to your garden for years to come.
Pruning a Boxwood Hedge in the UK can help keep your living space looking great and add additional value to your home. It's important to take into consideration things like the shape and size of your hedge, which tools are going to be most effective for your pruning needs, and how to properly go about trimming in order to get the desired outcome. When done correctly, pruning can help enhance the health of your hedge by removing dead or unhealthy branches.
Additionally, it helps promote vigorous new growth by stimulating new buds and adding structure and style. By following proper techniques for pruning such as cutting at an angle, selecting good branches to cut, taking care of thin or weak areas and feeding with fertilizer regularly, you will ensure you create a nice-looking boxwood hedge that is easy to maintain and thrives well.
Avoiding common mistakes when pruning should also be taken into account in order to make sure you end up with the desired result. With these tips in mind, you should find yourself with a beautiful hedge that adds charm not only to your home but also increases its value as well.
How to Prune Climbing Vines
List by Variety
- How to Prune Actinidia
- How to Prune Akebia
- How to Prune Bougainvillea
- How to Prune Campsis
- How to Prune Celastrus
- How to Prune Chilean Glory Vine
- How to Prune Clematis Armandii
- How to Prune Clematis Montana
- How to Prune Climbing Rose
- How to Prune Hedera GoldHeart
- How to Prune Honeysuckle
- How to Prune Hydrangea Petiolaris
- How to Prune Ivy
- How to Prune Japanese Wisteria
- How to Prune Morning Glory
- How to Prune Parthenocissus
- How to Prune Persian Ivy Hedera Colchica
- How to Prune Schisandra
- How to Prune Star Jasmine
- How to Prune Sweet Peas
- How to Prune True Jasmine
- How to Prune Virginia Creeper
- How to Prune Wisteria
How to Prune Hedges
List by Variety
- How to Prune an Arborvitae Hedge
- How to Prune a Barberry Hedge
- How to Prune a Beech Hedge
- How to Prune a Boxwood Hedge
- How to Prune a Butterfly Bush Hedge
- How to Prune a Cotoneaster Hedge
- How to Prune an English Lavender Hedge
- How to Prune an Escallonia Hedge
- How to Prune an Euonymus-Hedge
- How to Prune a Firethorn Hedge
- How to Prune a Forsythia Hedge
- How to Prune a Griselinia Hedge
- How to Prune a Hawthorn Hedge
- How to Prune a Holly Hedge
- How to Prune a Hornbeam Hedge
- How to Prune a Laurel Hedge
- How to Prune a Leylandii Hedge
- How to Prune a Lilac Hedge
- How to Prune a Maple Leaf Viburnum Hedge
- How to Prune a Photinia Hedge
- How to Prune a Pink Ramanus Rose Hedge
- How to Prune a Privet Hedge
- How to Prune a Pyracantha Hedge
- How to Prune a Spirea Hedge
- How to Prune a Thuja Hedge
- How to Prune a Viburnum Hedge
- How to Prune a Western Red Cedar Hedge
- How to Prune a Yew Hedge
How to Prune Shrubs
List by Variety
- How to Prune an Abelia Shrub
- How to Prune an Abutilon
- How to Prune an Acer / Japanese-Maple
- How to Prune an Amelanchiers
- How to Prune an Apple-Tree
- How to Prune an Arbovitae Shrub
- How to Prune an Arbutus
- How to Prune an Aucuba
- How to Prune a Azalea Mollis
- How to Prune Azaleas
- How to Prune a Bay Tree Shrub
- How to Prune a Berberis Darwinii
- How to Prune Berberis Deciduous Types
- How to Prune a Boxwood Shrubs
- How to Prune a Brachyglottis Senecio
- How to Prune a Buddleia Alternifolia
- How to Prune Buddleias Butterfly Bushes
- How to Prune a Buddleja Globosa
- How to Prune a Callicarpa
- How to Prune a Camellia
- How to Prune a Caryopteris
- How to Prune a Catalpa Bignonioides Aurea
- How to Prune Ceanothus Deciduous Types
- How to Prune Ceanothus Evergreen Types
- How to Prune a Ceratostigma
- How to Prune a Chaenomeles
- How to Prune a Choisya
- How to Prune a Cistus
- How to Prune a Clematis
- How to Prune a Cornus
- How to Prune a Cotinus Royal Purple
- How to Prune a Cytisus Scoparius
- How to Prune a Exochorda x Macrantha
- How to Prune a Forsythia
- How to Prune a Hebe
- How to Prune a Hydrangeas
- How to Prune Juniper Shrubs
- How to Prune a Lavatera
- How to Prune Lilac Bushes
- How to Prune a Mugo Pine
- How to Prune Rose Bushes
- How to Prune Spirea Shrubs
- How to Prune Viburnum Shrubs
- How to Prune a Weigela
- How to Prune a Yew
How to Prune Trees
List by Variety
- How to Prune a Apple Tree
- How to Prune a Apricot Tree
- How to Prune a Ash Tree
- How to Prune a Birch Tree
- How to Prune a Cherry Tree
- How to Prune a Elm Tree
- How to Prune a Fig Tree
- How to Prune a Grape Tree
- How to Prune a Hickory Tree
- How to Prune a Maple Tree
- How to Prune a Oak Tree
- How to Prune an Olive Tree
- How to Prune a Peach Tree
- How to Prune a Pear Tree
- How to Prune a Plum Tree
- How to Prune a Poplar Tree
- How to Prune a Walnut Tree
Gallery


Michael Carter
Vestibulum ante ipsum primis in faucibus orci luctus et ultrices posuere cubilia curae; Donec vel erat in nulla efficitur tempor non ut nisl. Integer venenatis eros ut dui viverra fermentum.
Sophie Wilson
Nam ut turpis hendrerit, varius nunc vel, elementum dui. Morbi vulputate dolor sit amet scelerisque egestas. Vestibulum eleifend nunc ut bibendum fermentum.
Alex Morgan
Cras non velit nec purus tempor rhoncus. Sed non mauris vitae erat consequat auctor eu in elit. Class aptent taciti sociosqu ad litora torquent per conubia nostra.