Everything You Need to Know About A Photinia Hedge in the UK
An Overview of a Photinia Hedge and its benefits in the UK
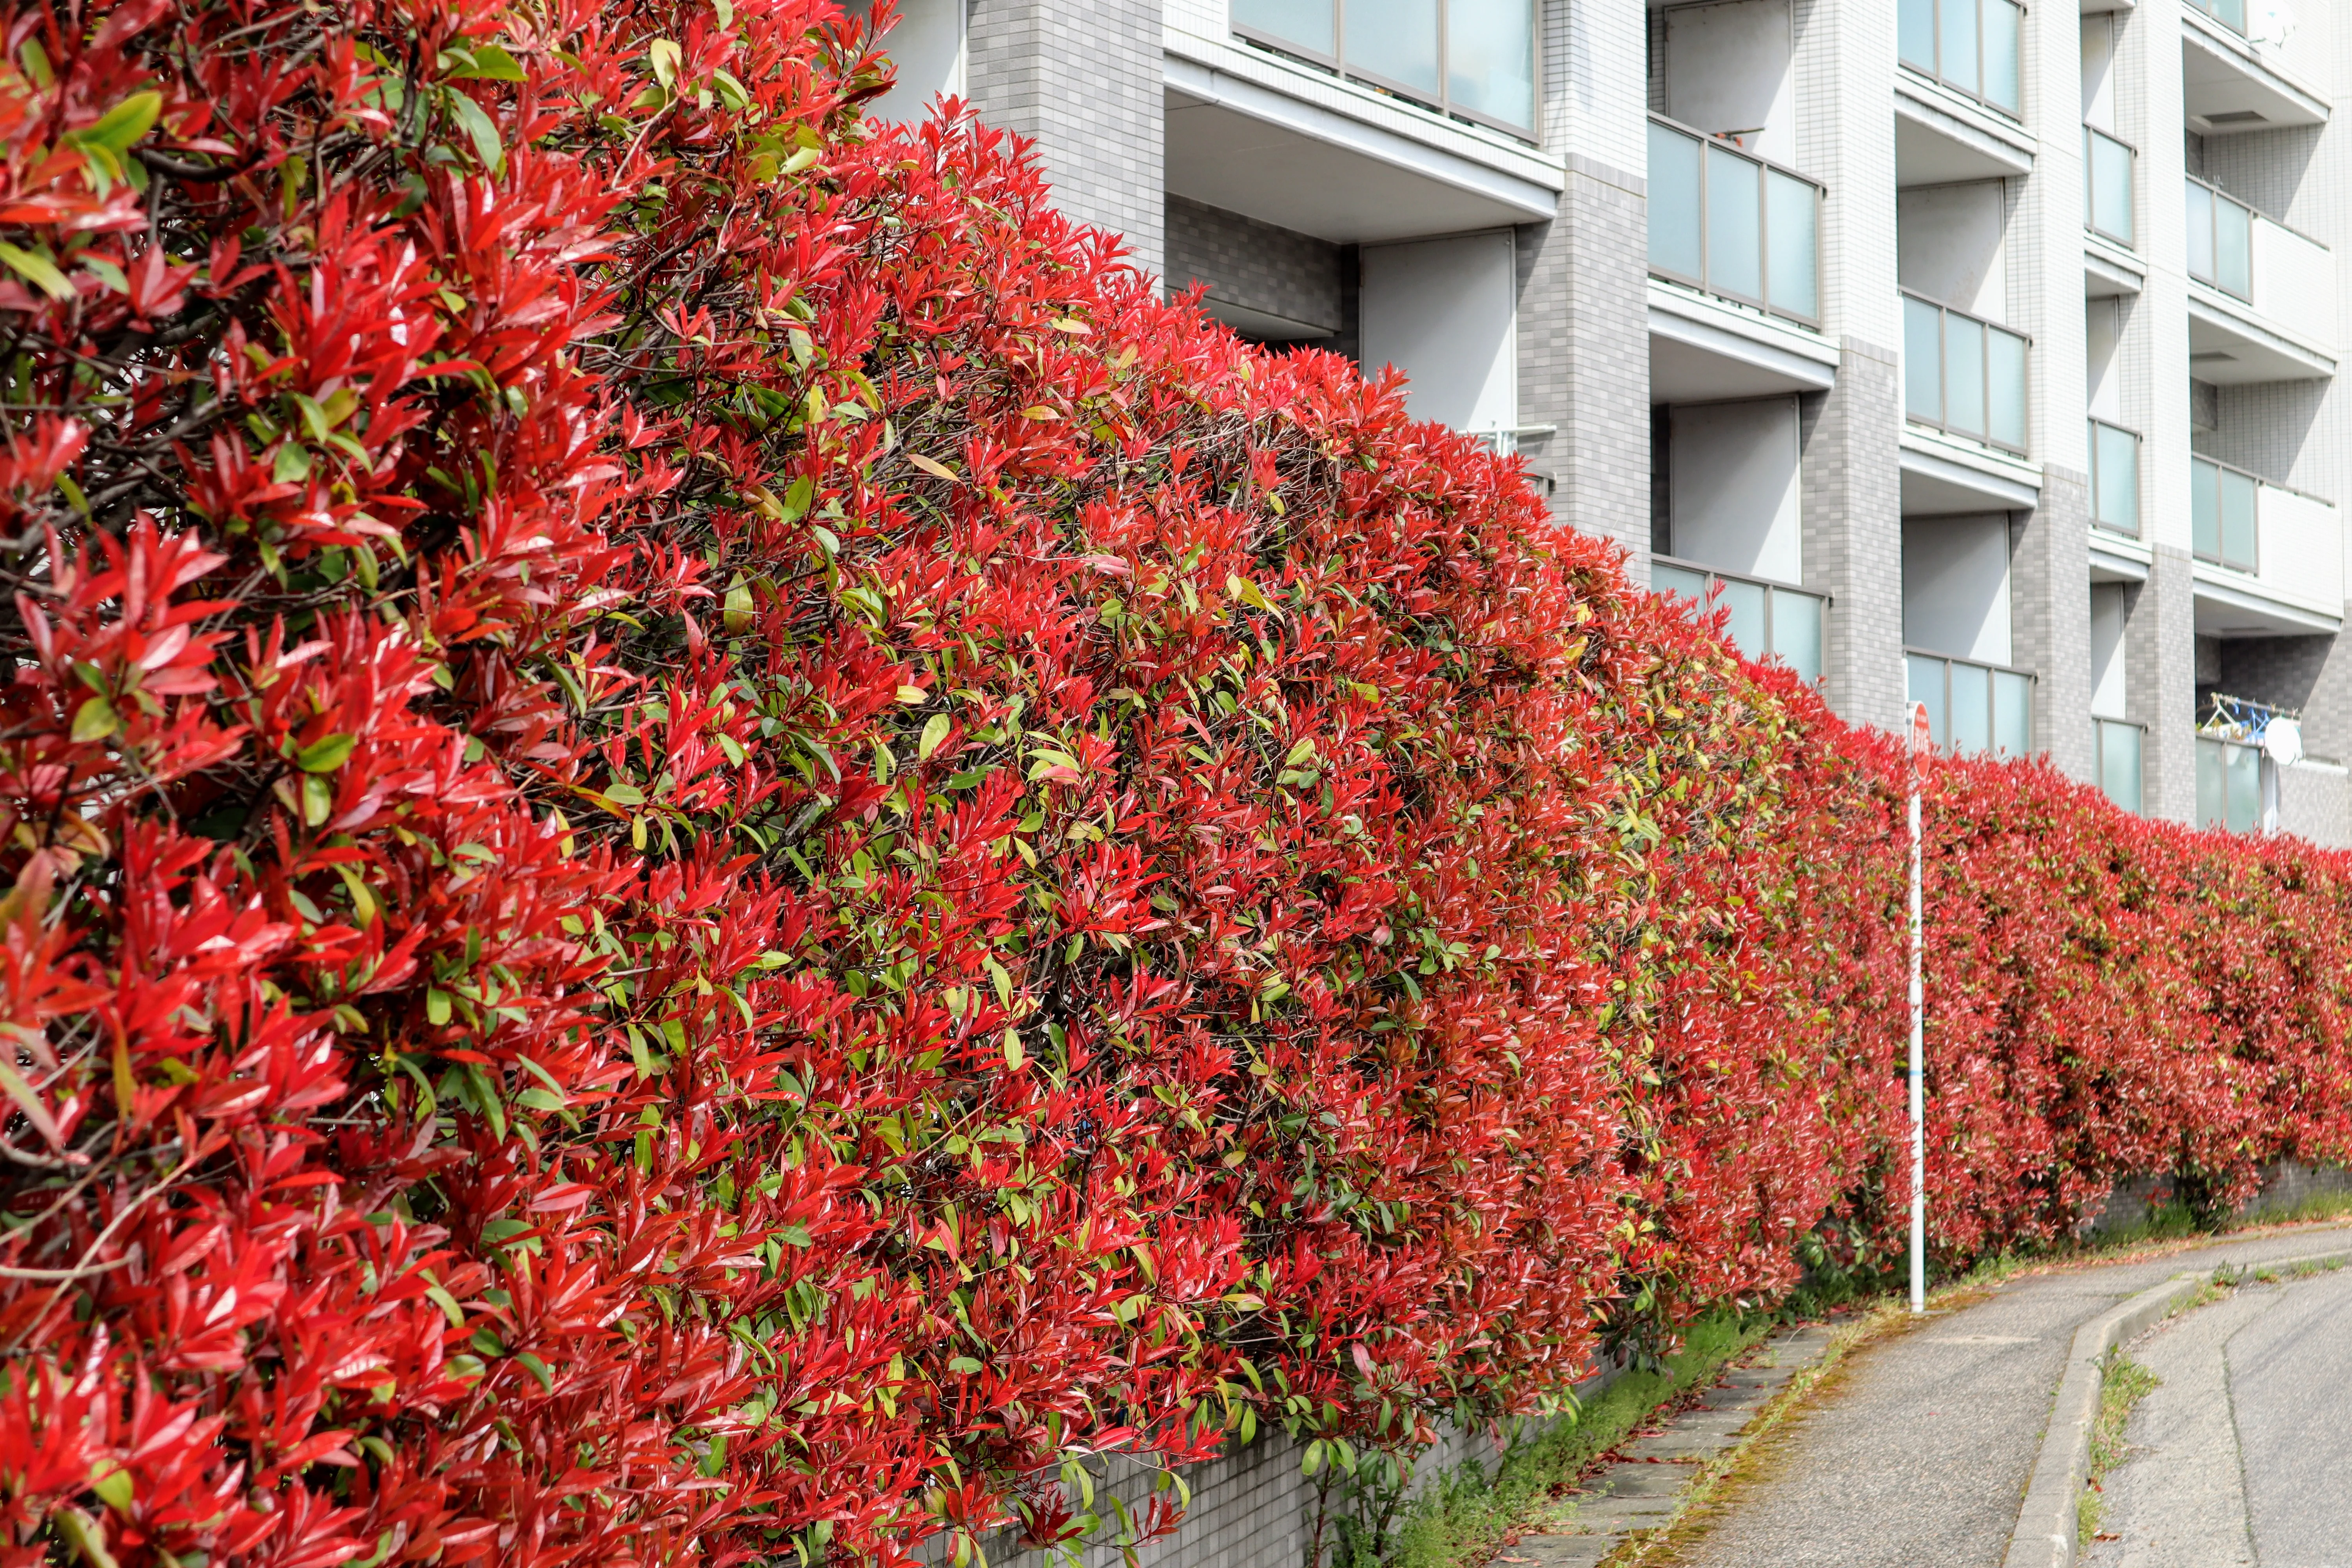
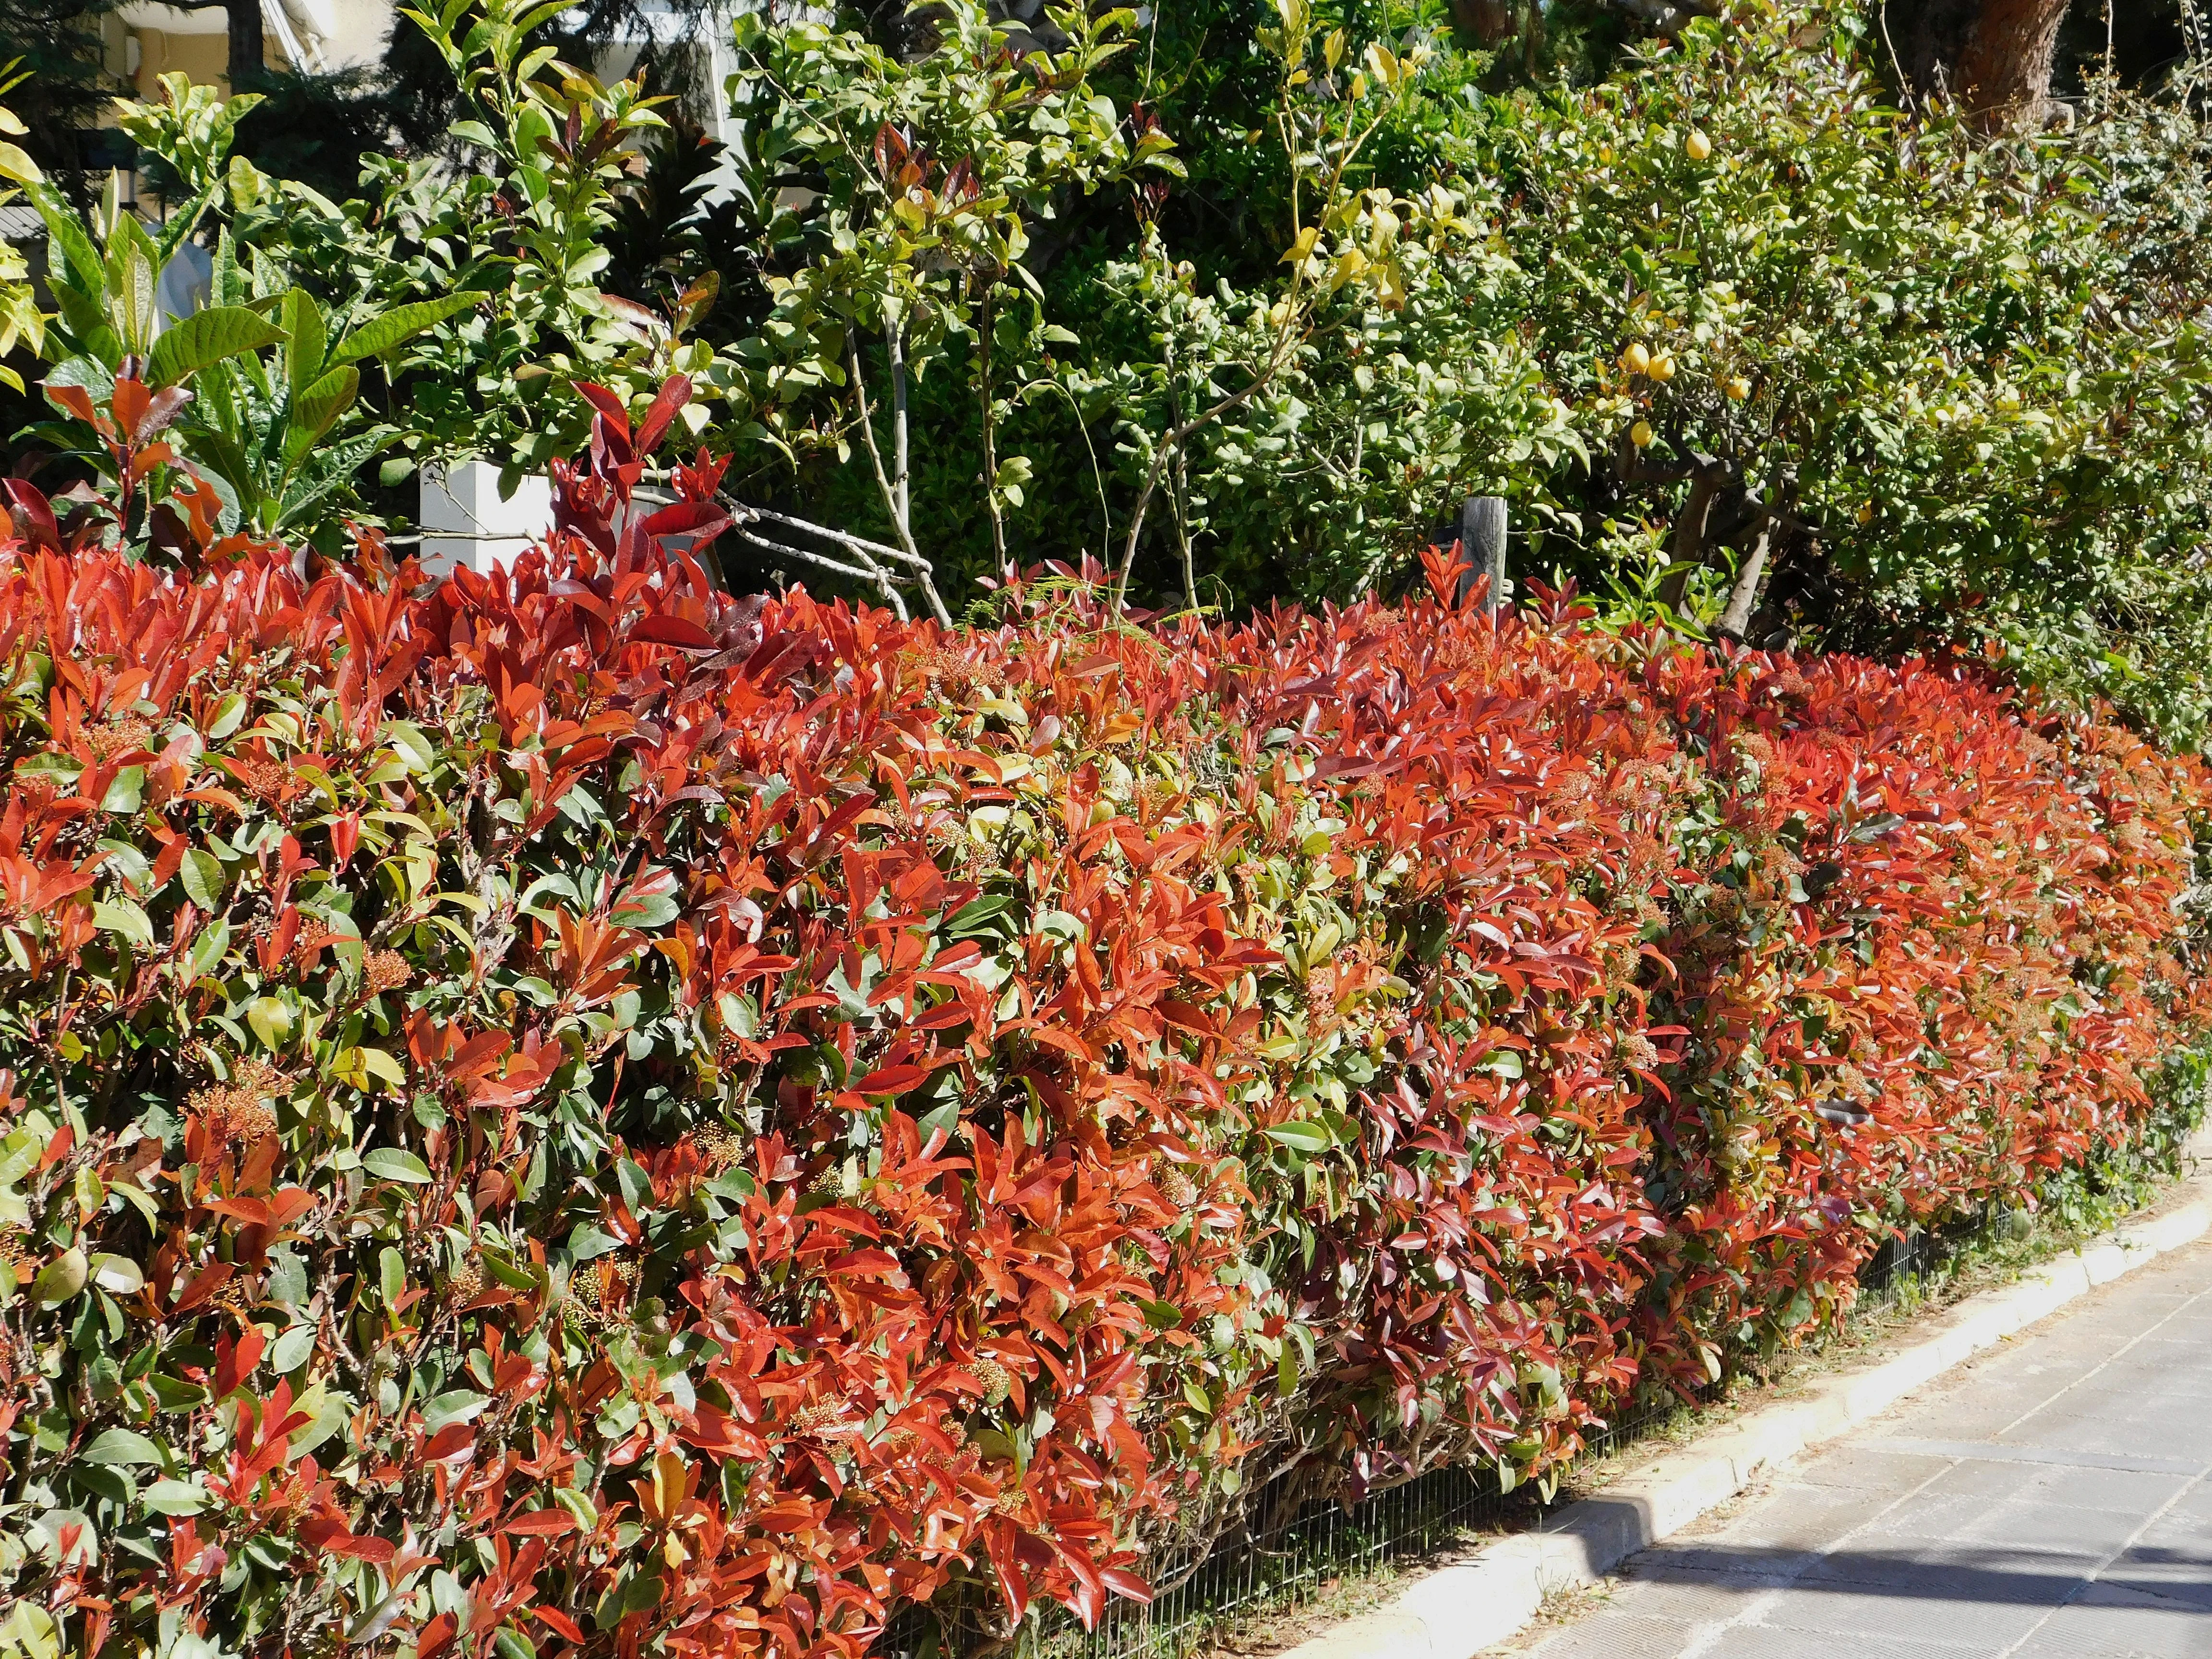
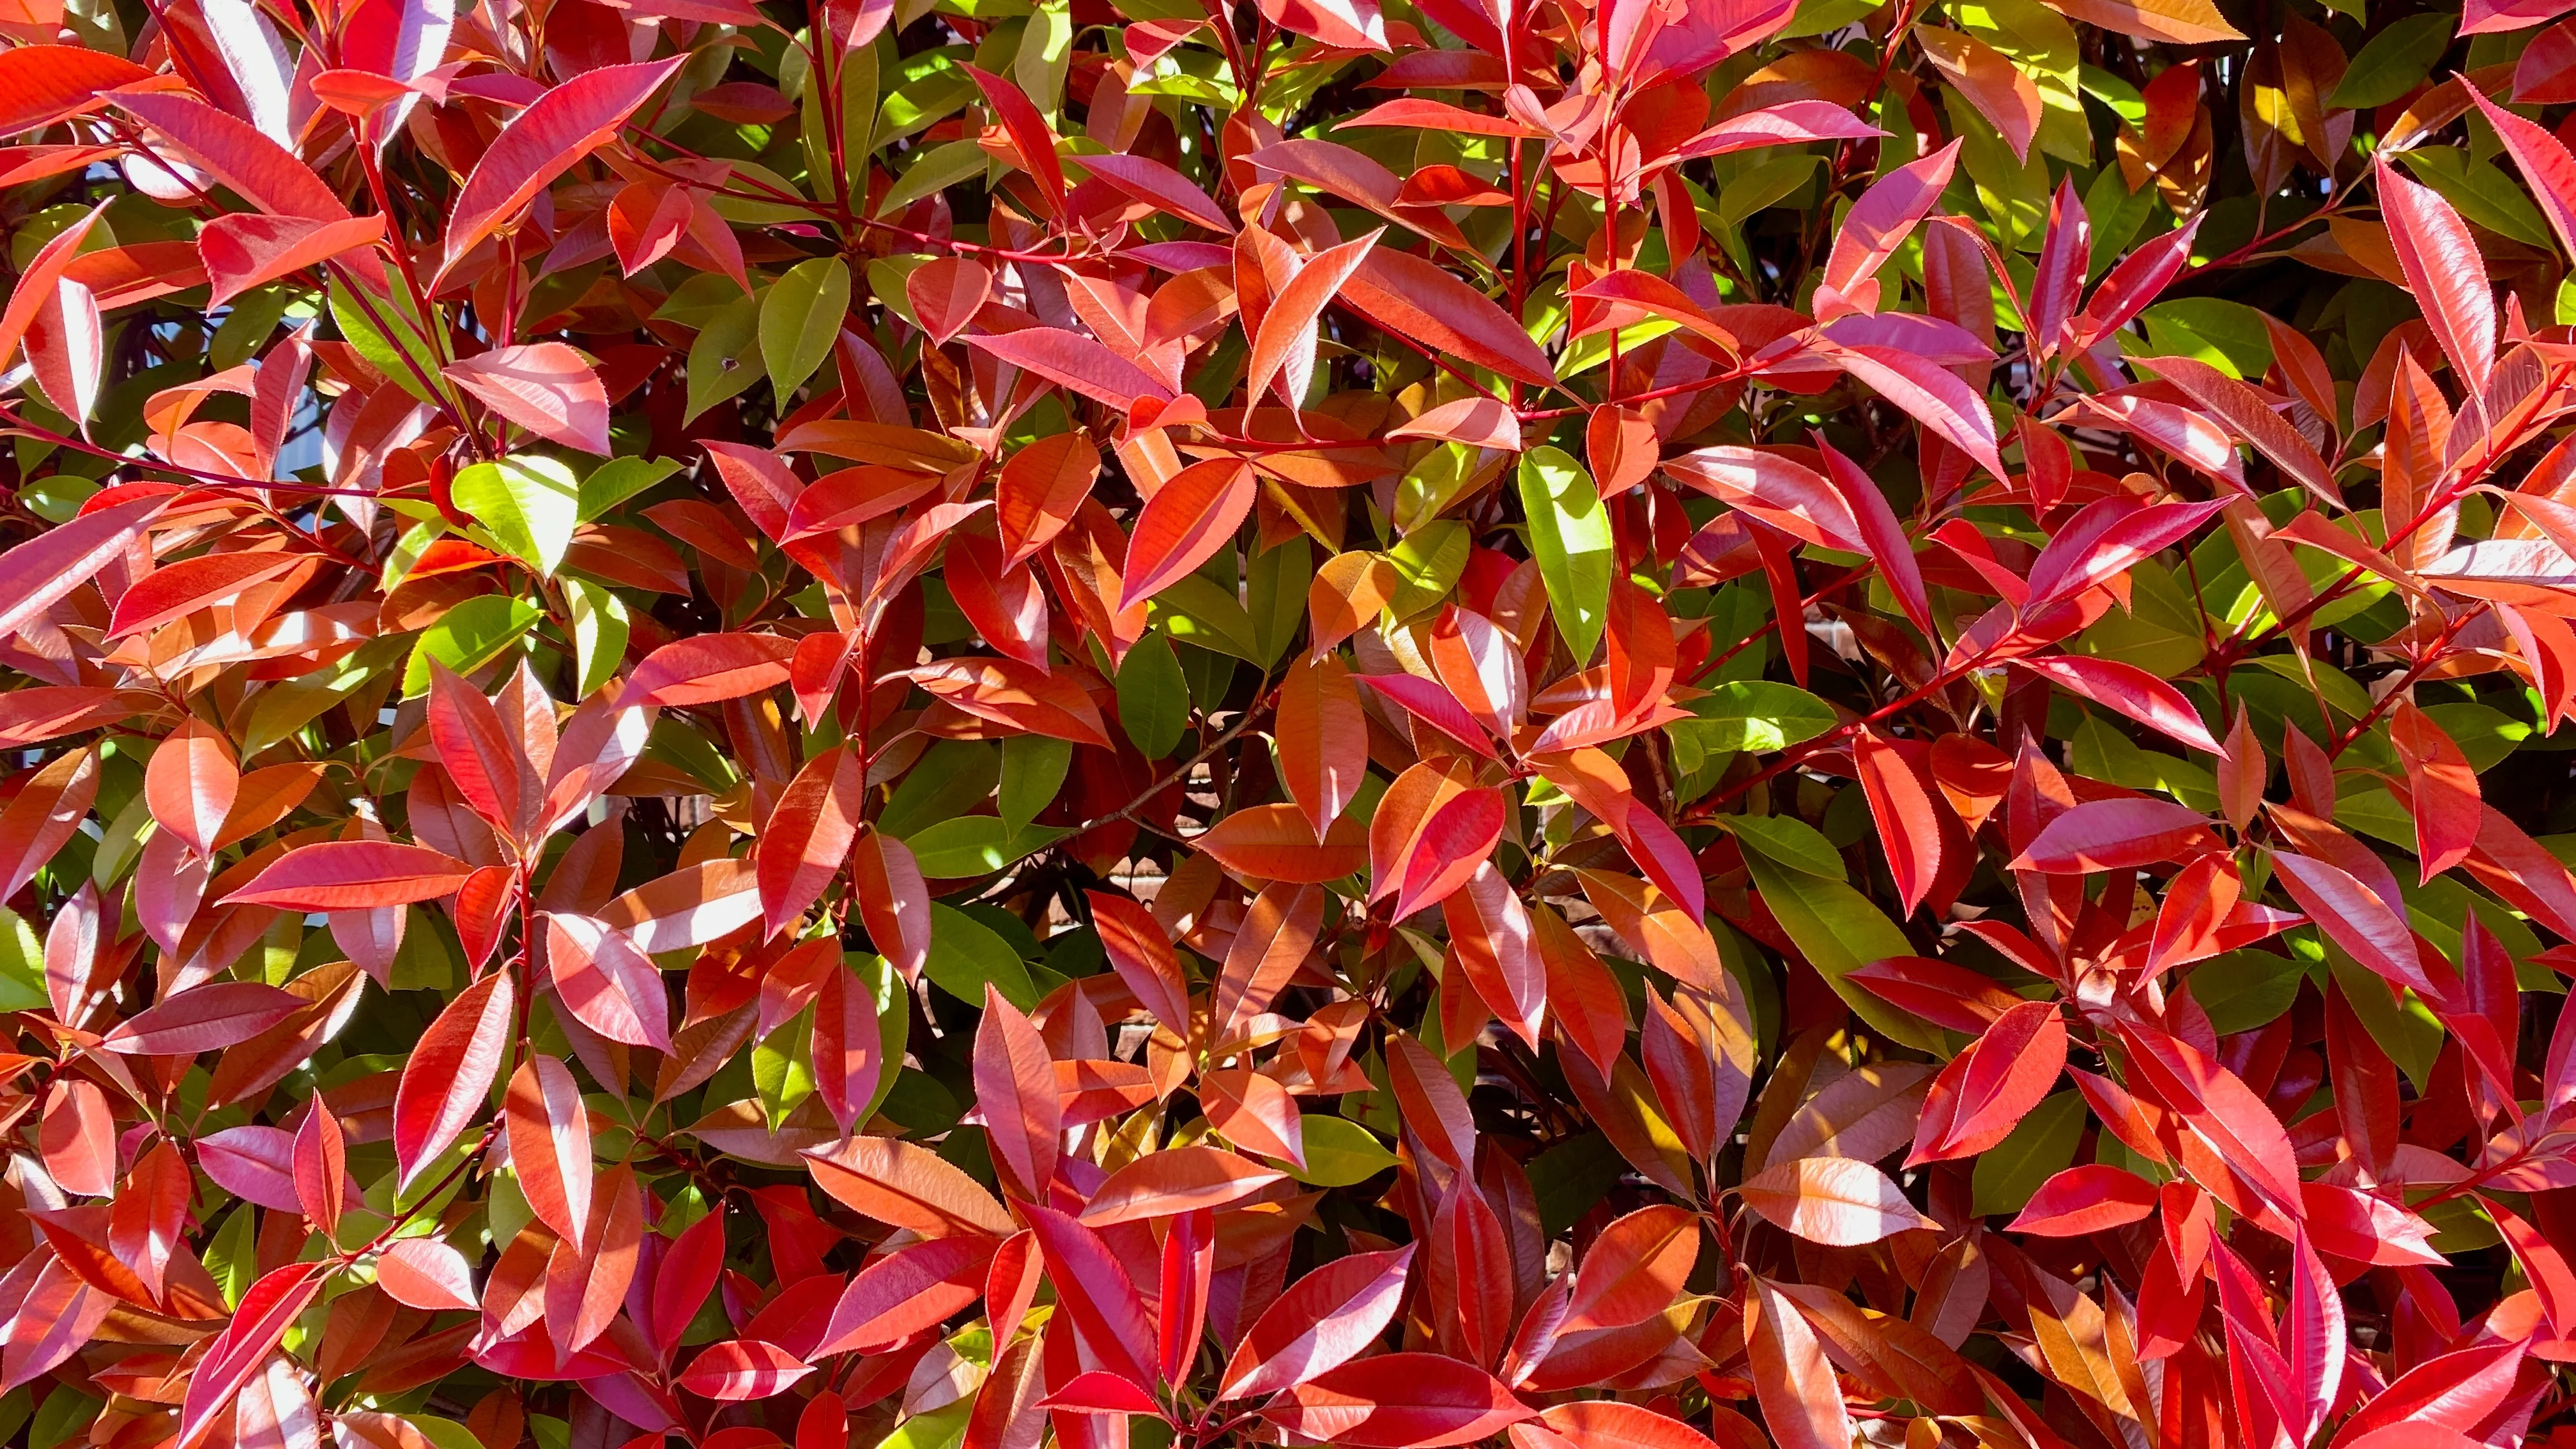
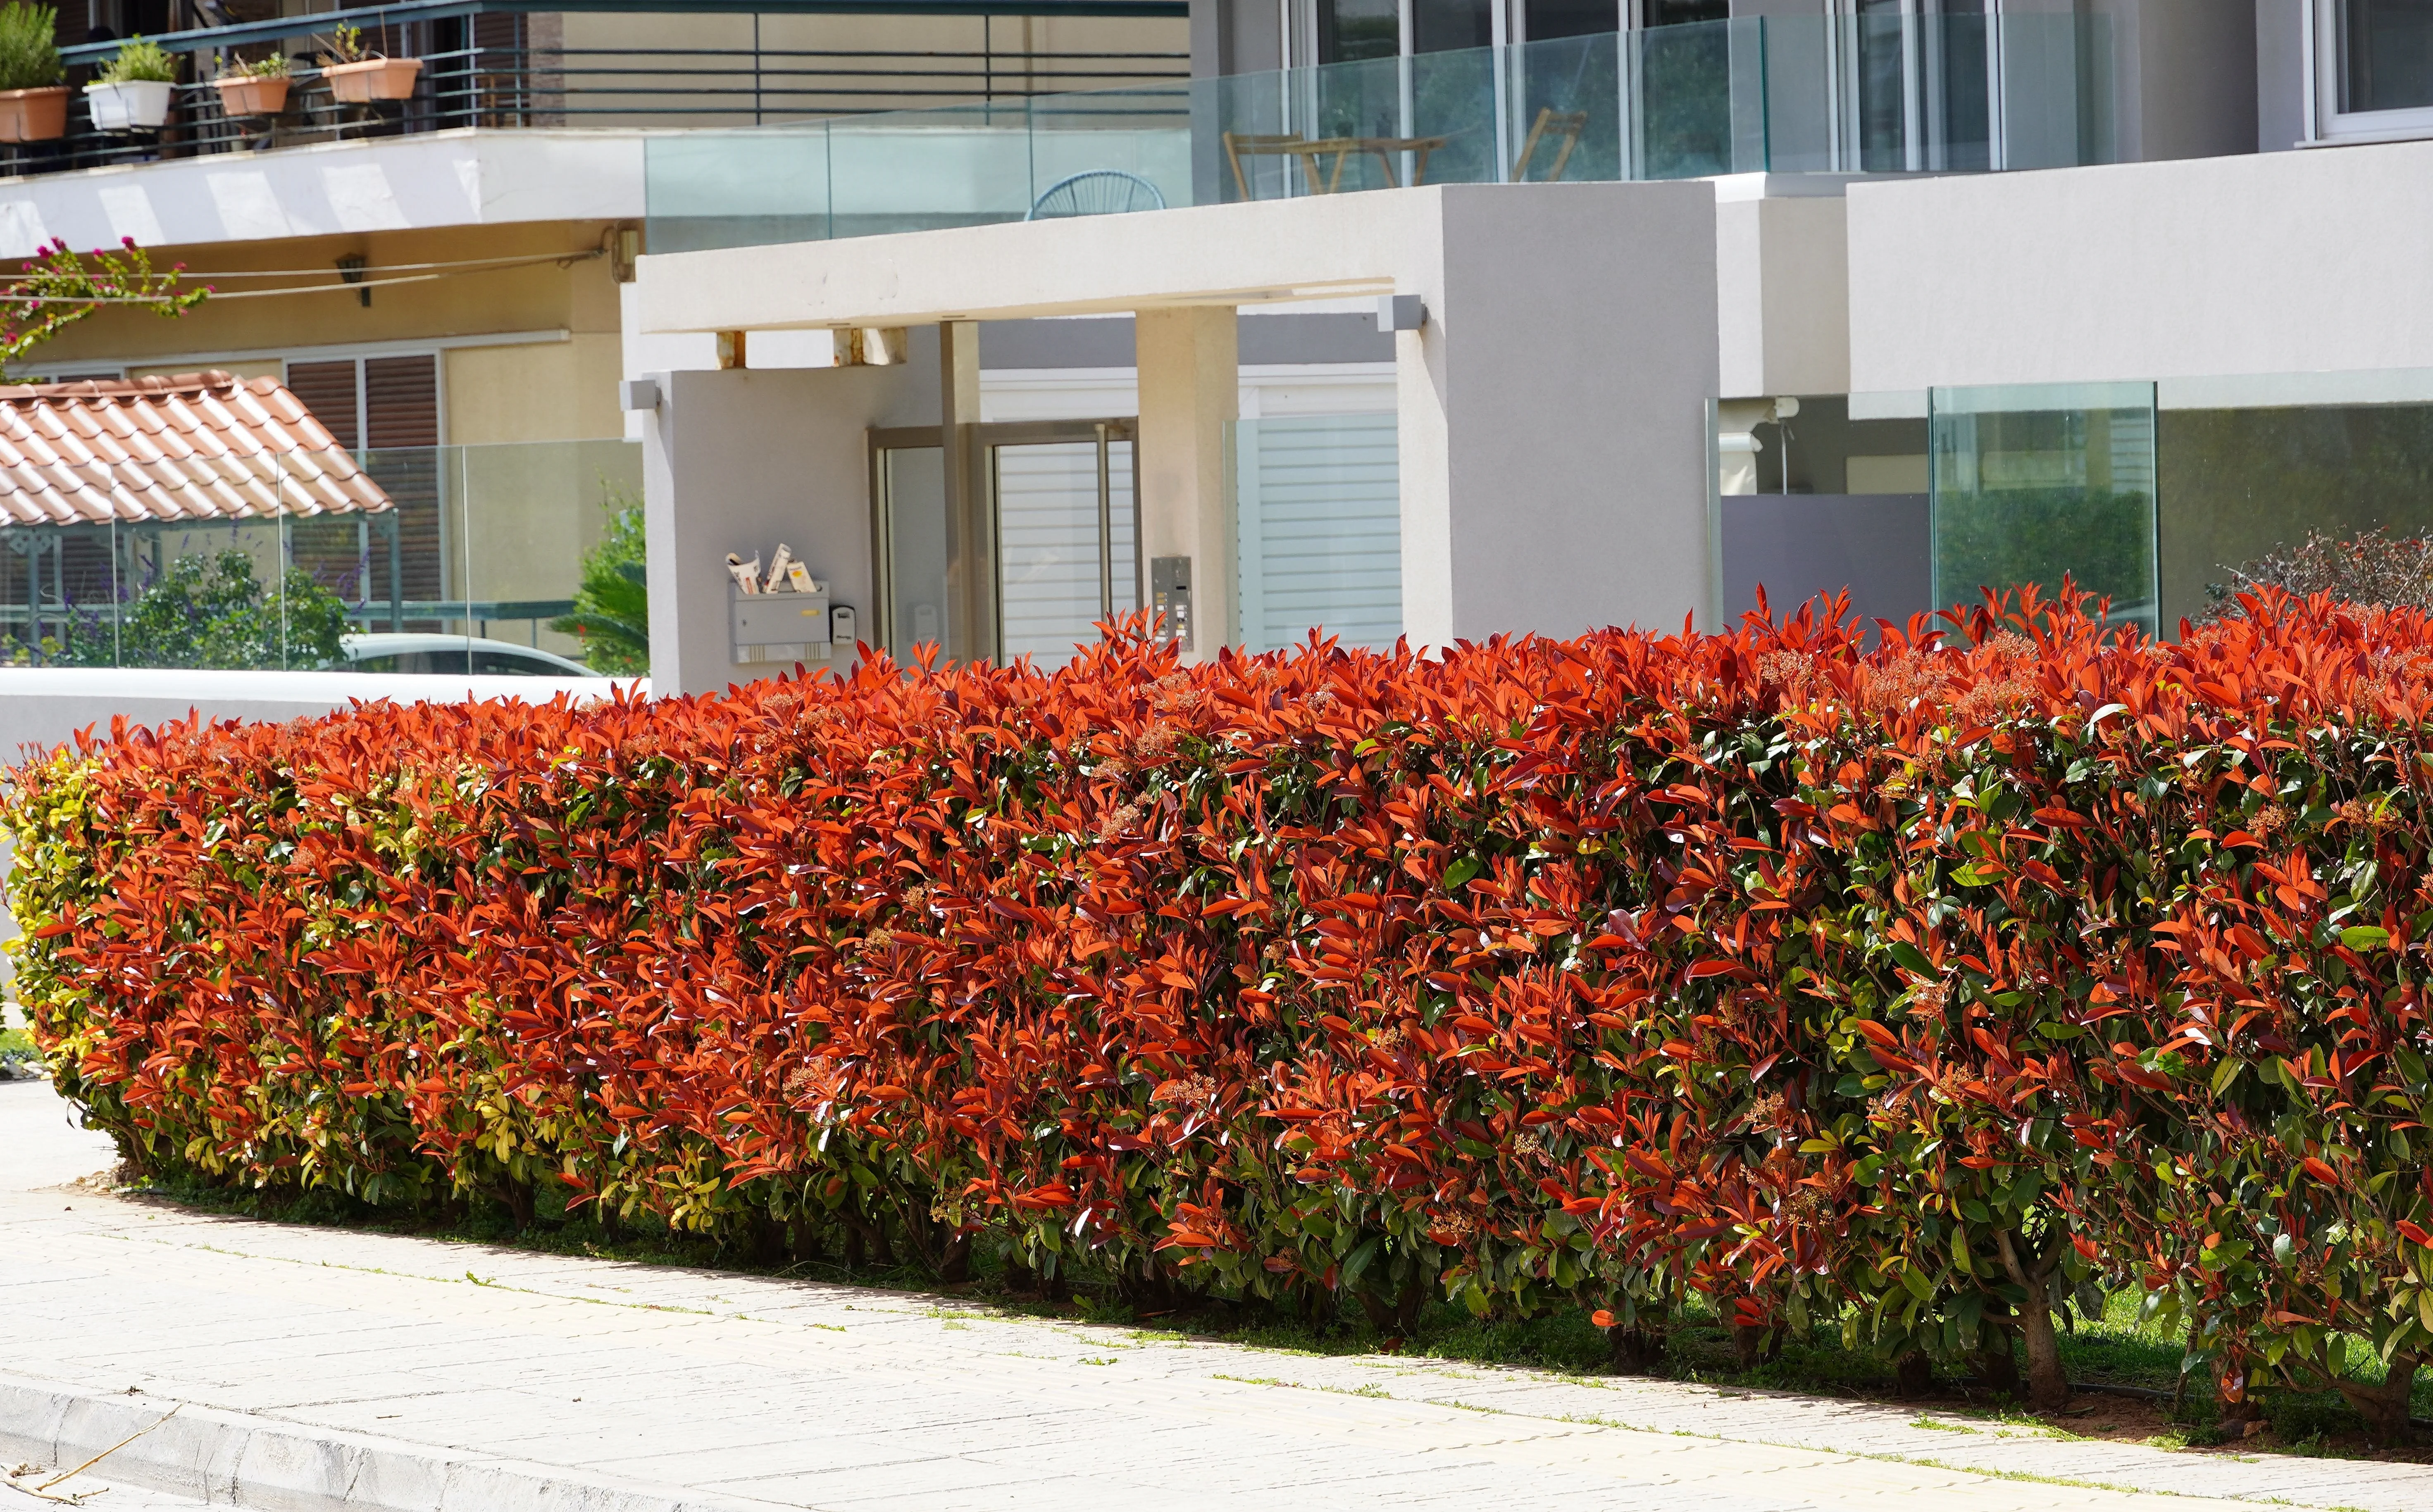
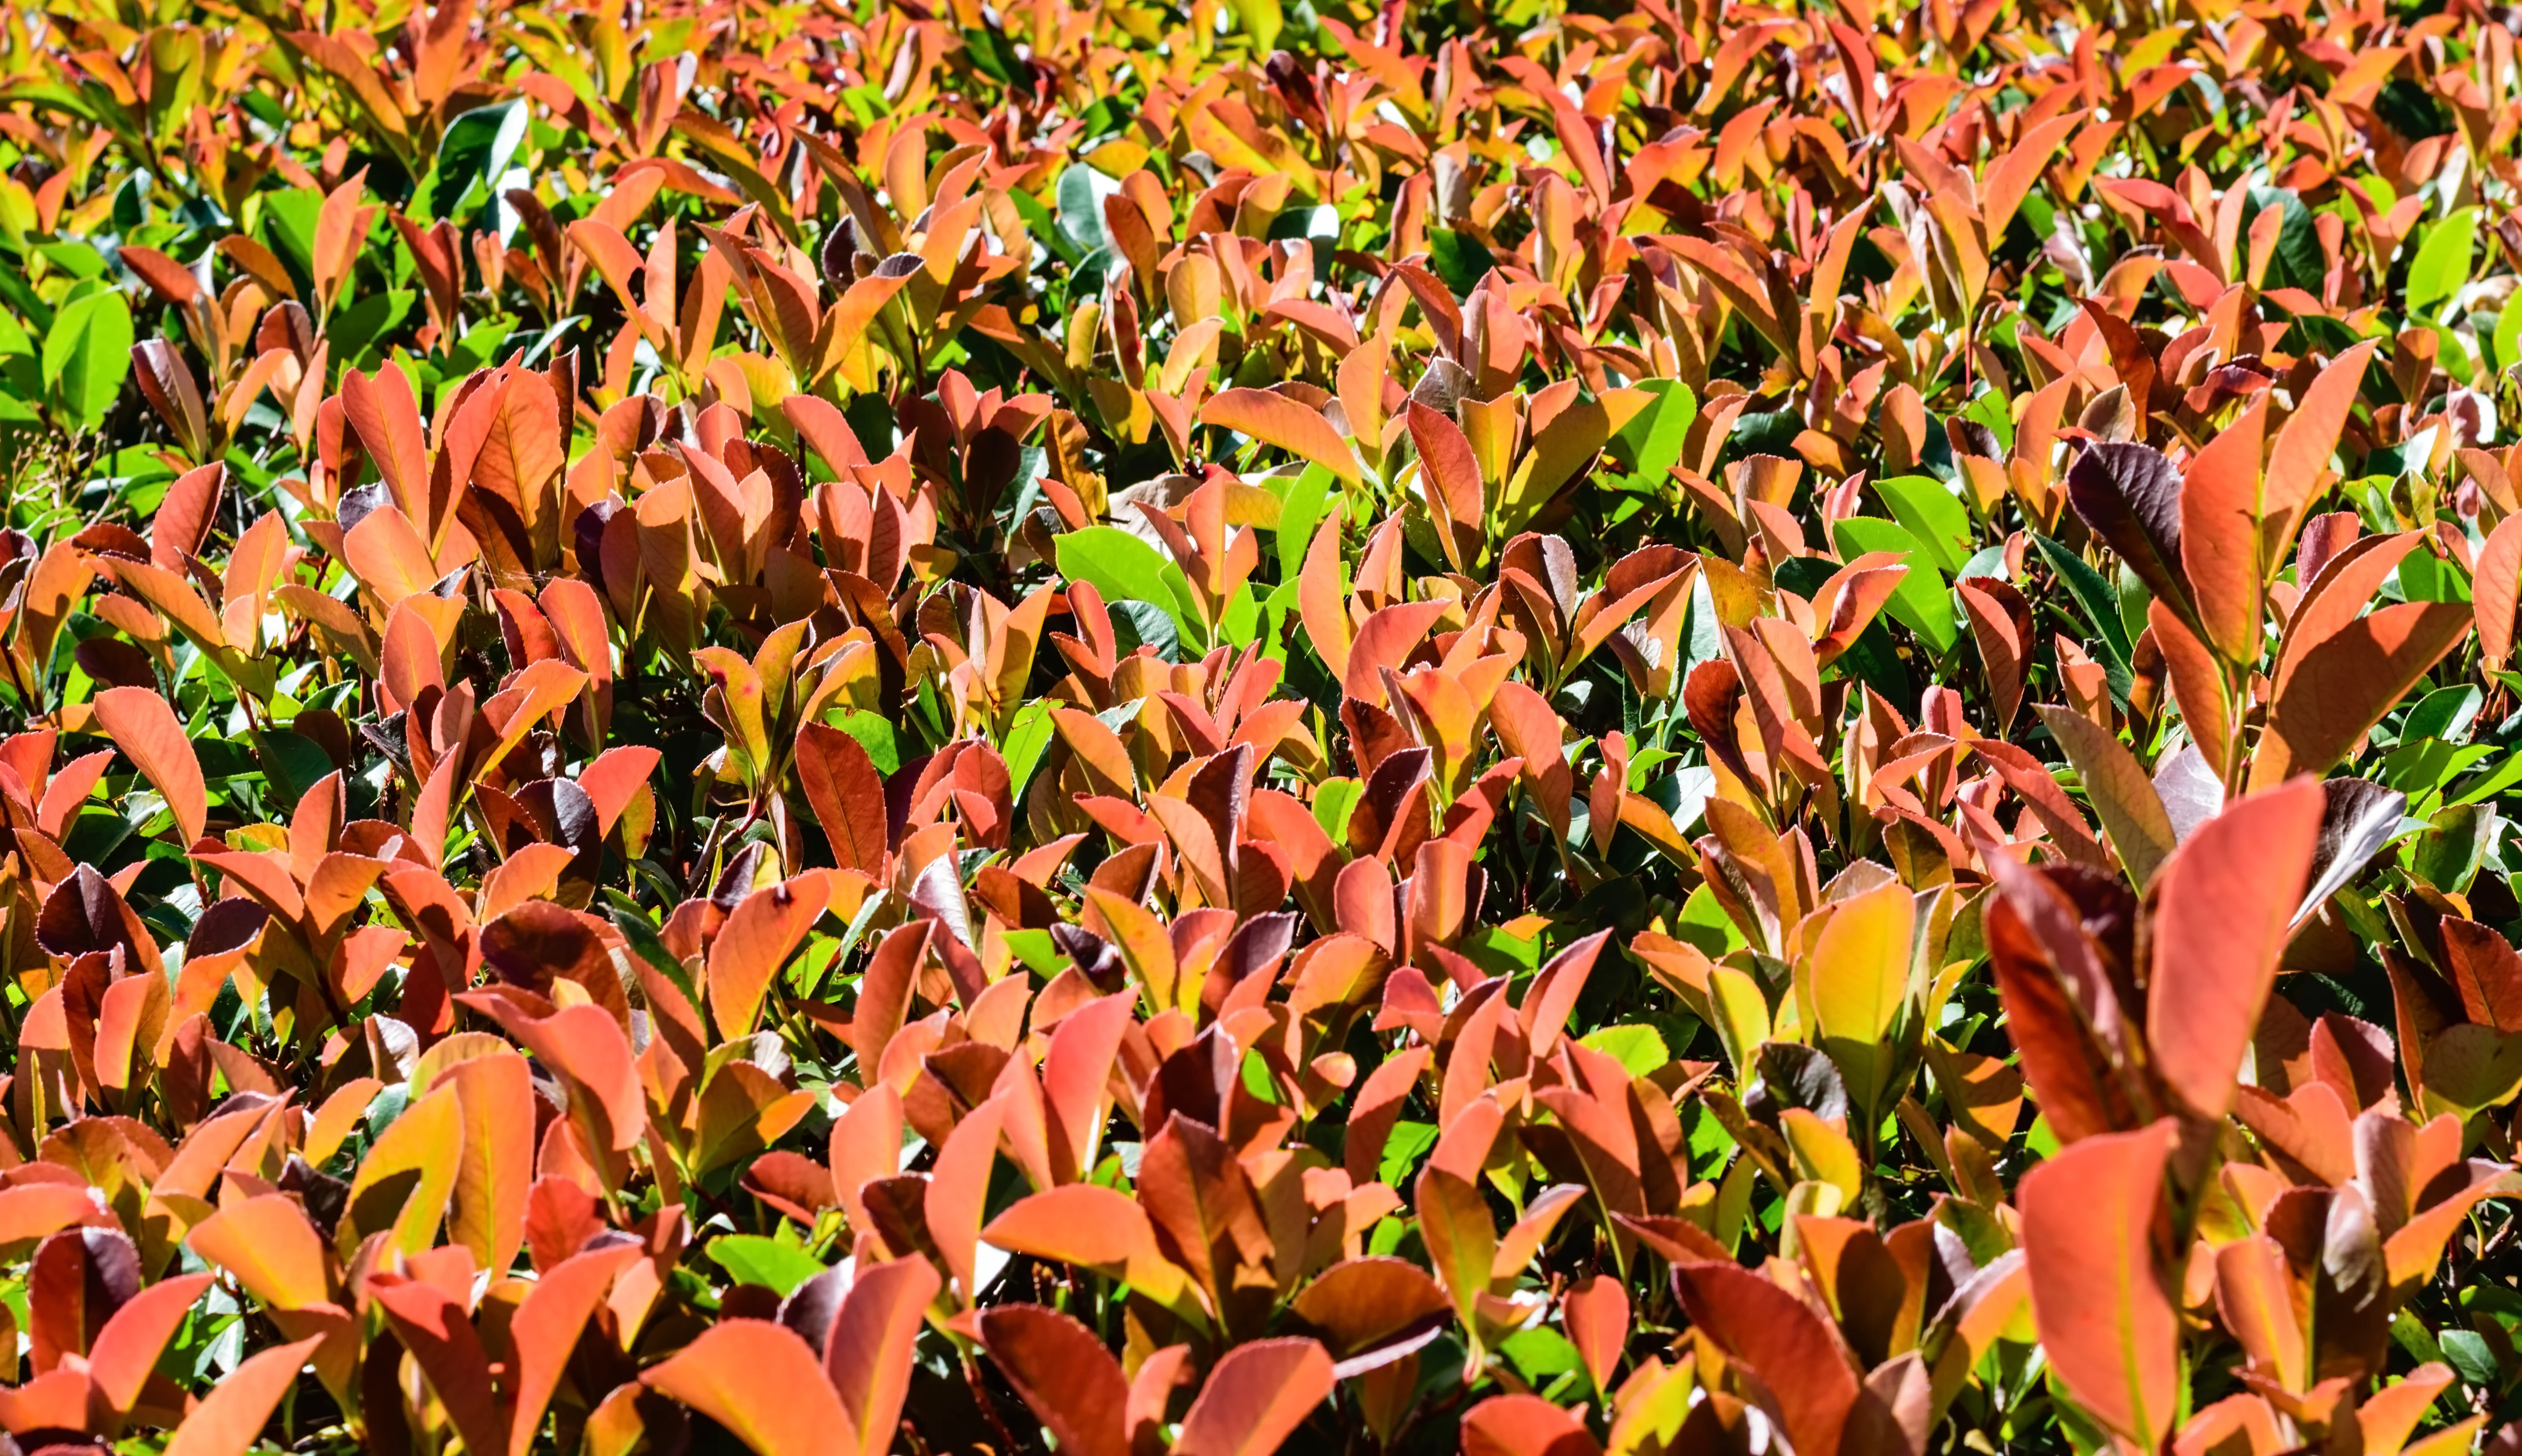
A Photinia Hedge is a popular choice for gardeners in the UK, offering a range of benefits that make it an ideal choice for any garden. Photinia Hedges are evergreen shrubs that are easy to maintain and provide a beautiful backdrop for any garden. They are fast-growing and can reach heights of up to 3 metres, providing a great source of privacy and protection from the elements. Photinia Hedges are also low-maintenance, requiring minimal pruning and trimming to keep them looking their best. They are also highly resistant to pests and diseases, making them a great choice for gardeners who want to keep their gardens looking healthy and vibrant. With their bright red foliage and lush green leaves, Photinia Hedges are sure to add a touch of colour and life to any garden.
Introducing a Photinia Hedge - Facts and Figures
A Photinia Hedge is a popular choice for gardeners in the UK, offering a range of benefits and features that make it an ideal addition to any landscape. With its glossy green leaves and vibrant red new growth, a Photinia Hedge can add a splash of colour and texture to any garden. It is also a great choice for privacy, as it can grow up to 3 metres tall and is fast-growing, making it an ideal choice for creating a natural boundary.
When planting a Photinia Hedge, it is important to consider the soil type and climate of the area. Photinia Hedges prefer well-drained soil and thrive in sunny spots, although they can tolerate some shade. They are also relatively low-maintenance, requiring only occasional pruning to keep them in shape. With the right care and attention, a Photinia Hedge can provide a beautiful and vibrant addition to any garden.
The History of a Photinia Hedge in the UK
The Photinia Hedge is a popular choice for gardeners in the UK, and its history in the country dates back centuries. It was first introduced to the UK in the late 1700s, and since then, it has become a staple of British gardens. The Photinia Hedge is known for its vibrant red foliage, which is a striking contrast to the lush green of the surrounding landscape. It is also known for its hardiness and resilience, making it an ideal choice for gardeners looking for a low-maintenance hedge. The Photinia Hedge is a great way to add a splash of colour to any garden, and its long-lasting beauty makes it a timeless addition to any landscape.
Photinia, a genus of around 30 species of small trees and large shrubs, is native to South and East Asia and North and Central America. Over the years, it has found its way across the globe, with Photinia x fraseri, also known as 'Red Robin', being a particularly popular choice in the UK.
Origin and Introduction to the UK: Photinia x fraseri is a hybrid cross of Photinia glabra and Photinia serrulata. Although there isn't any specific record about when Photinia was first introduced to the UK, it's likely that it arrived during the 19th century when plant hunting and collection was at its peak.
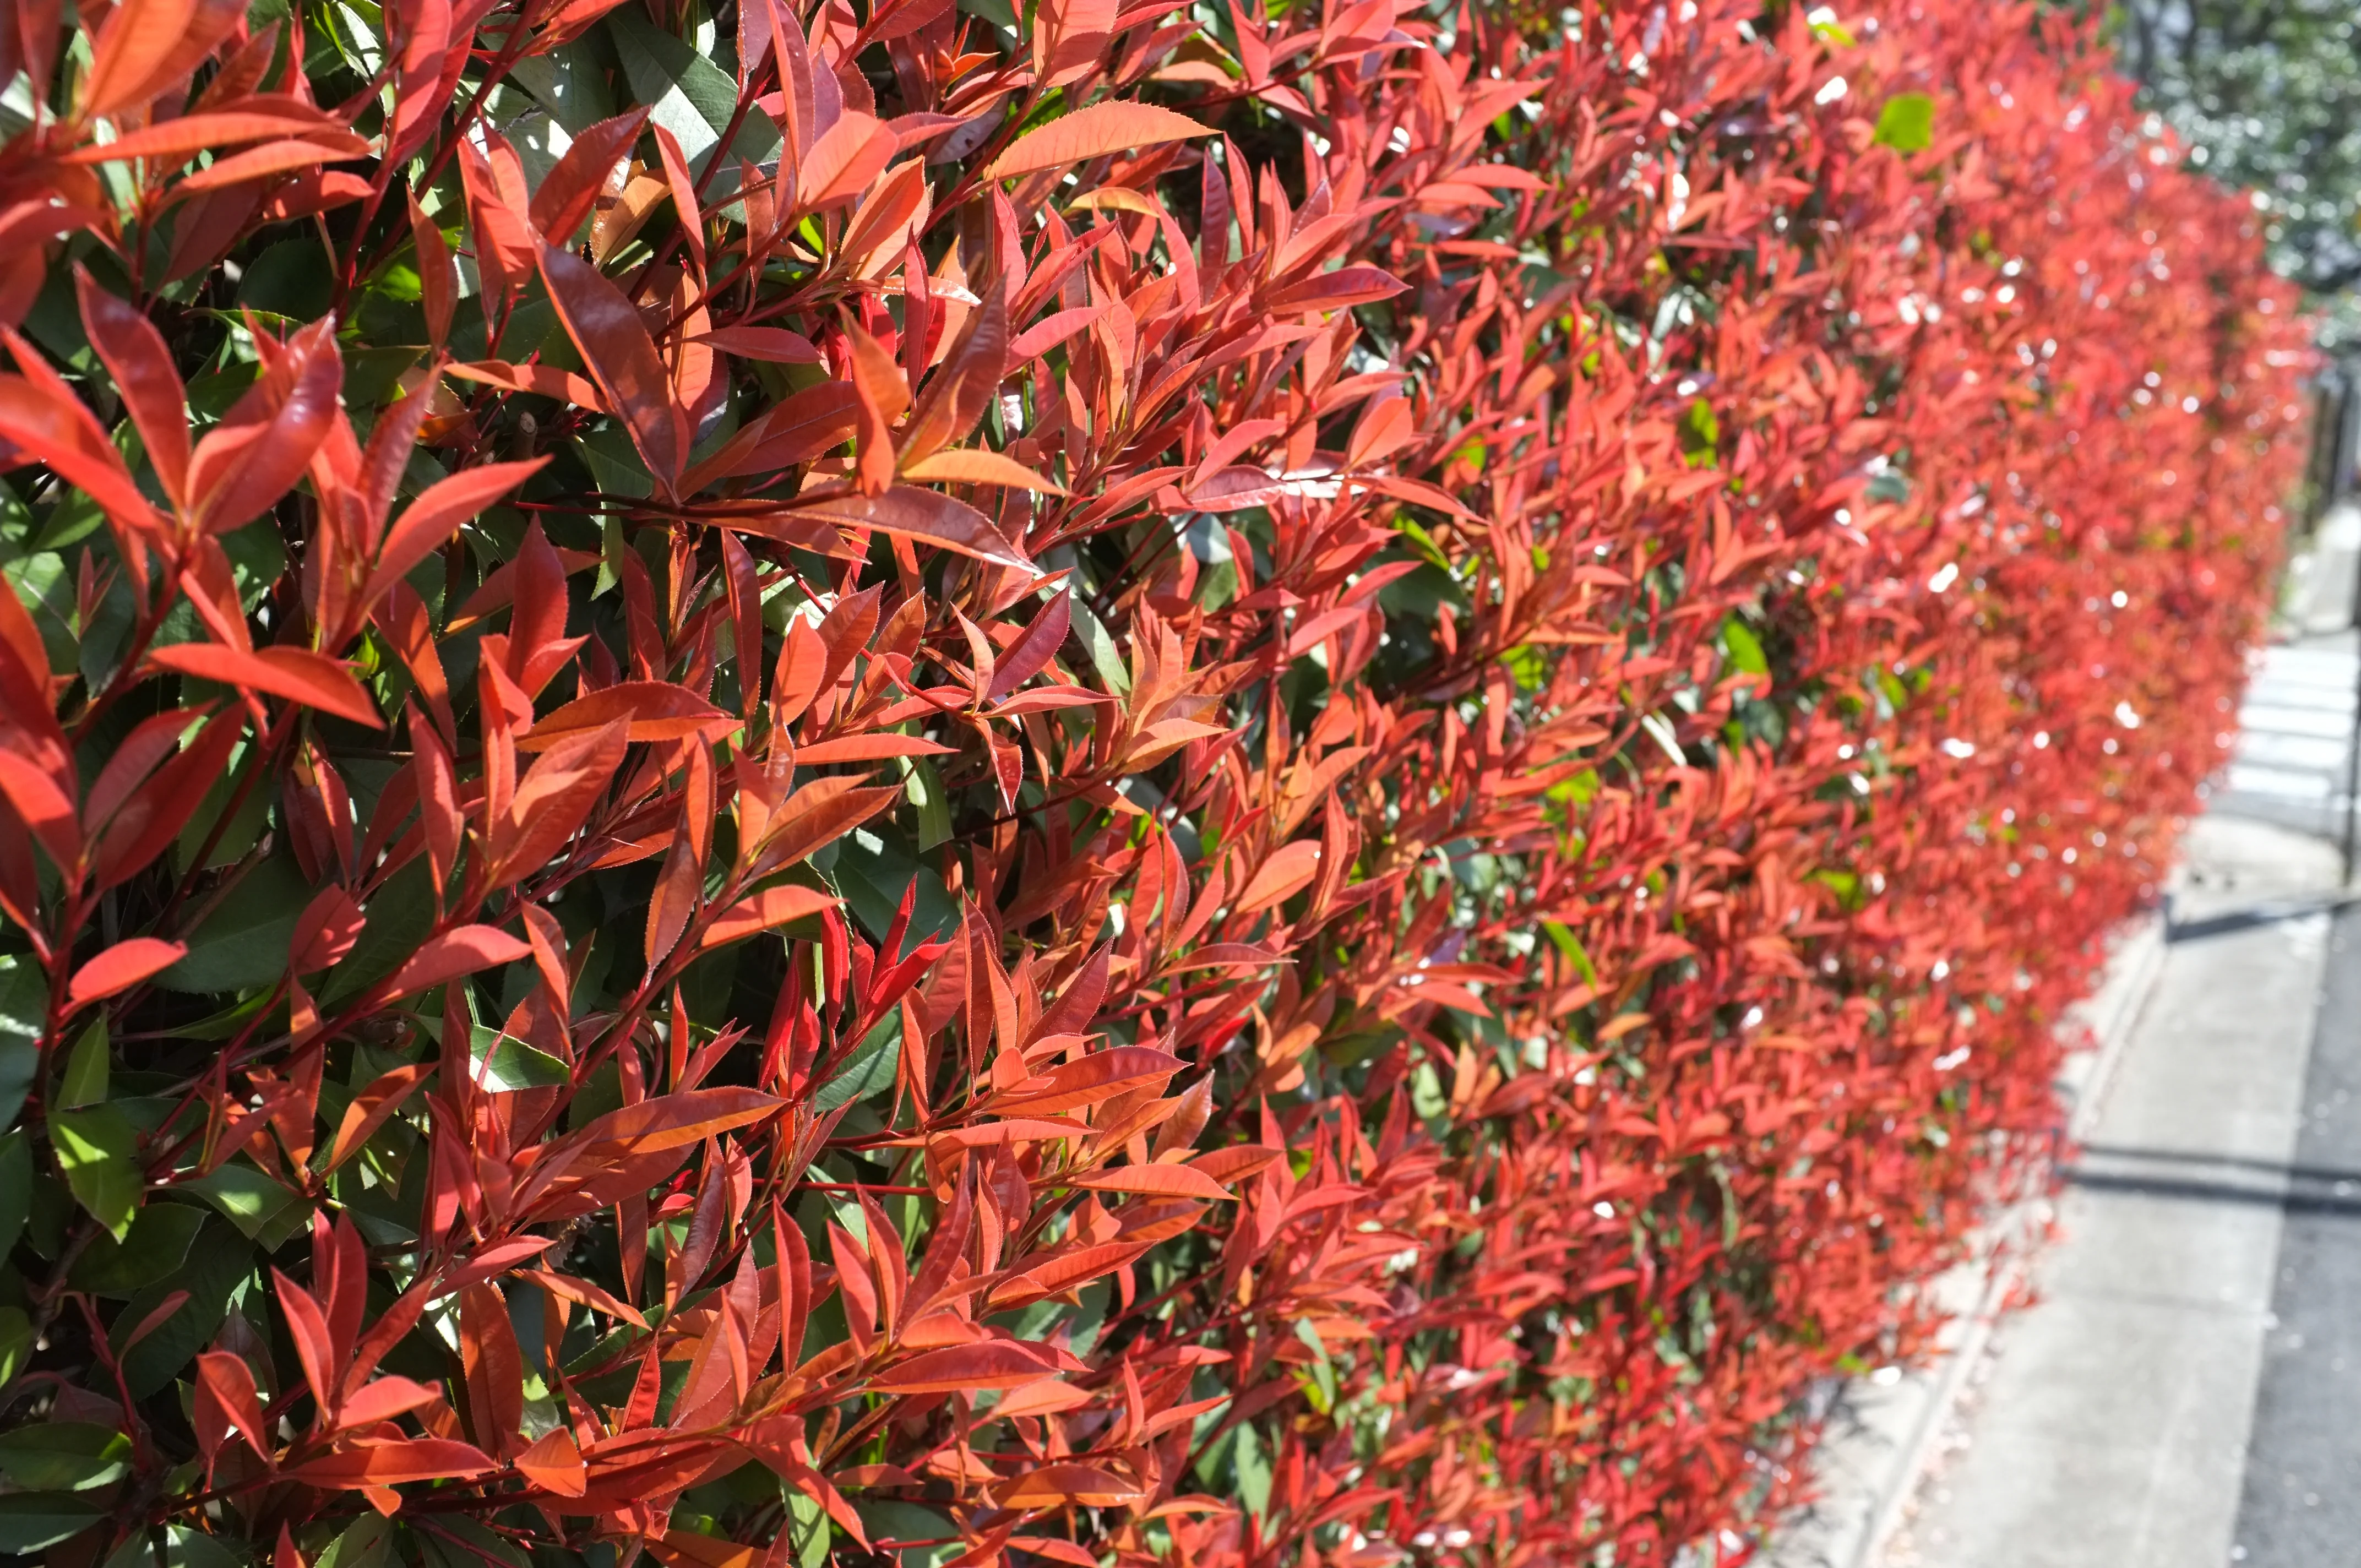
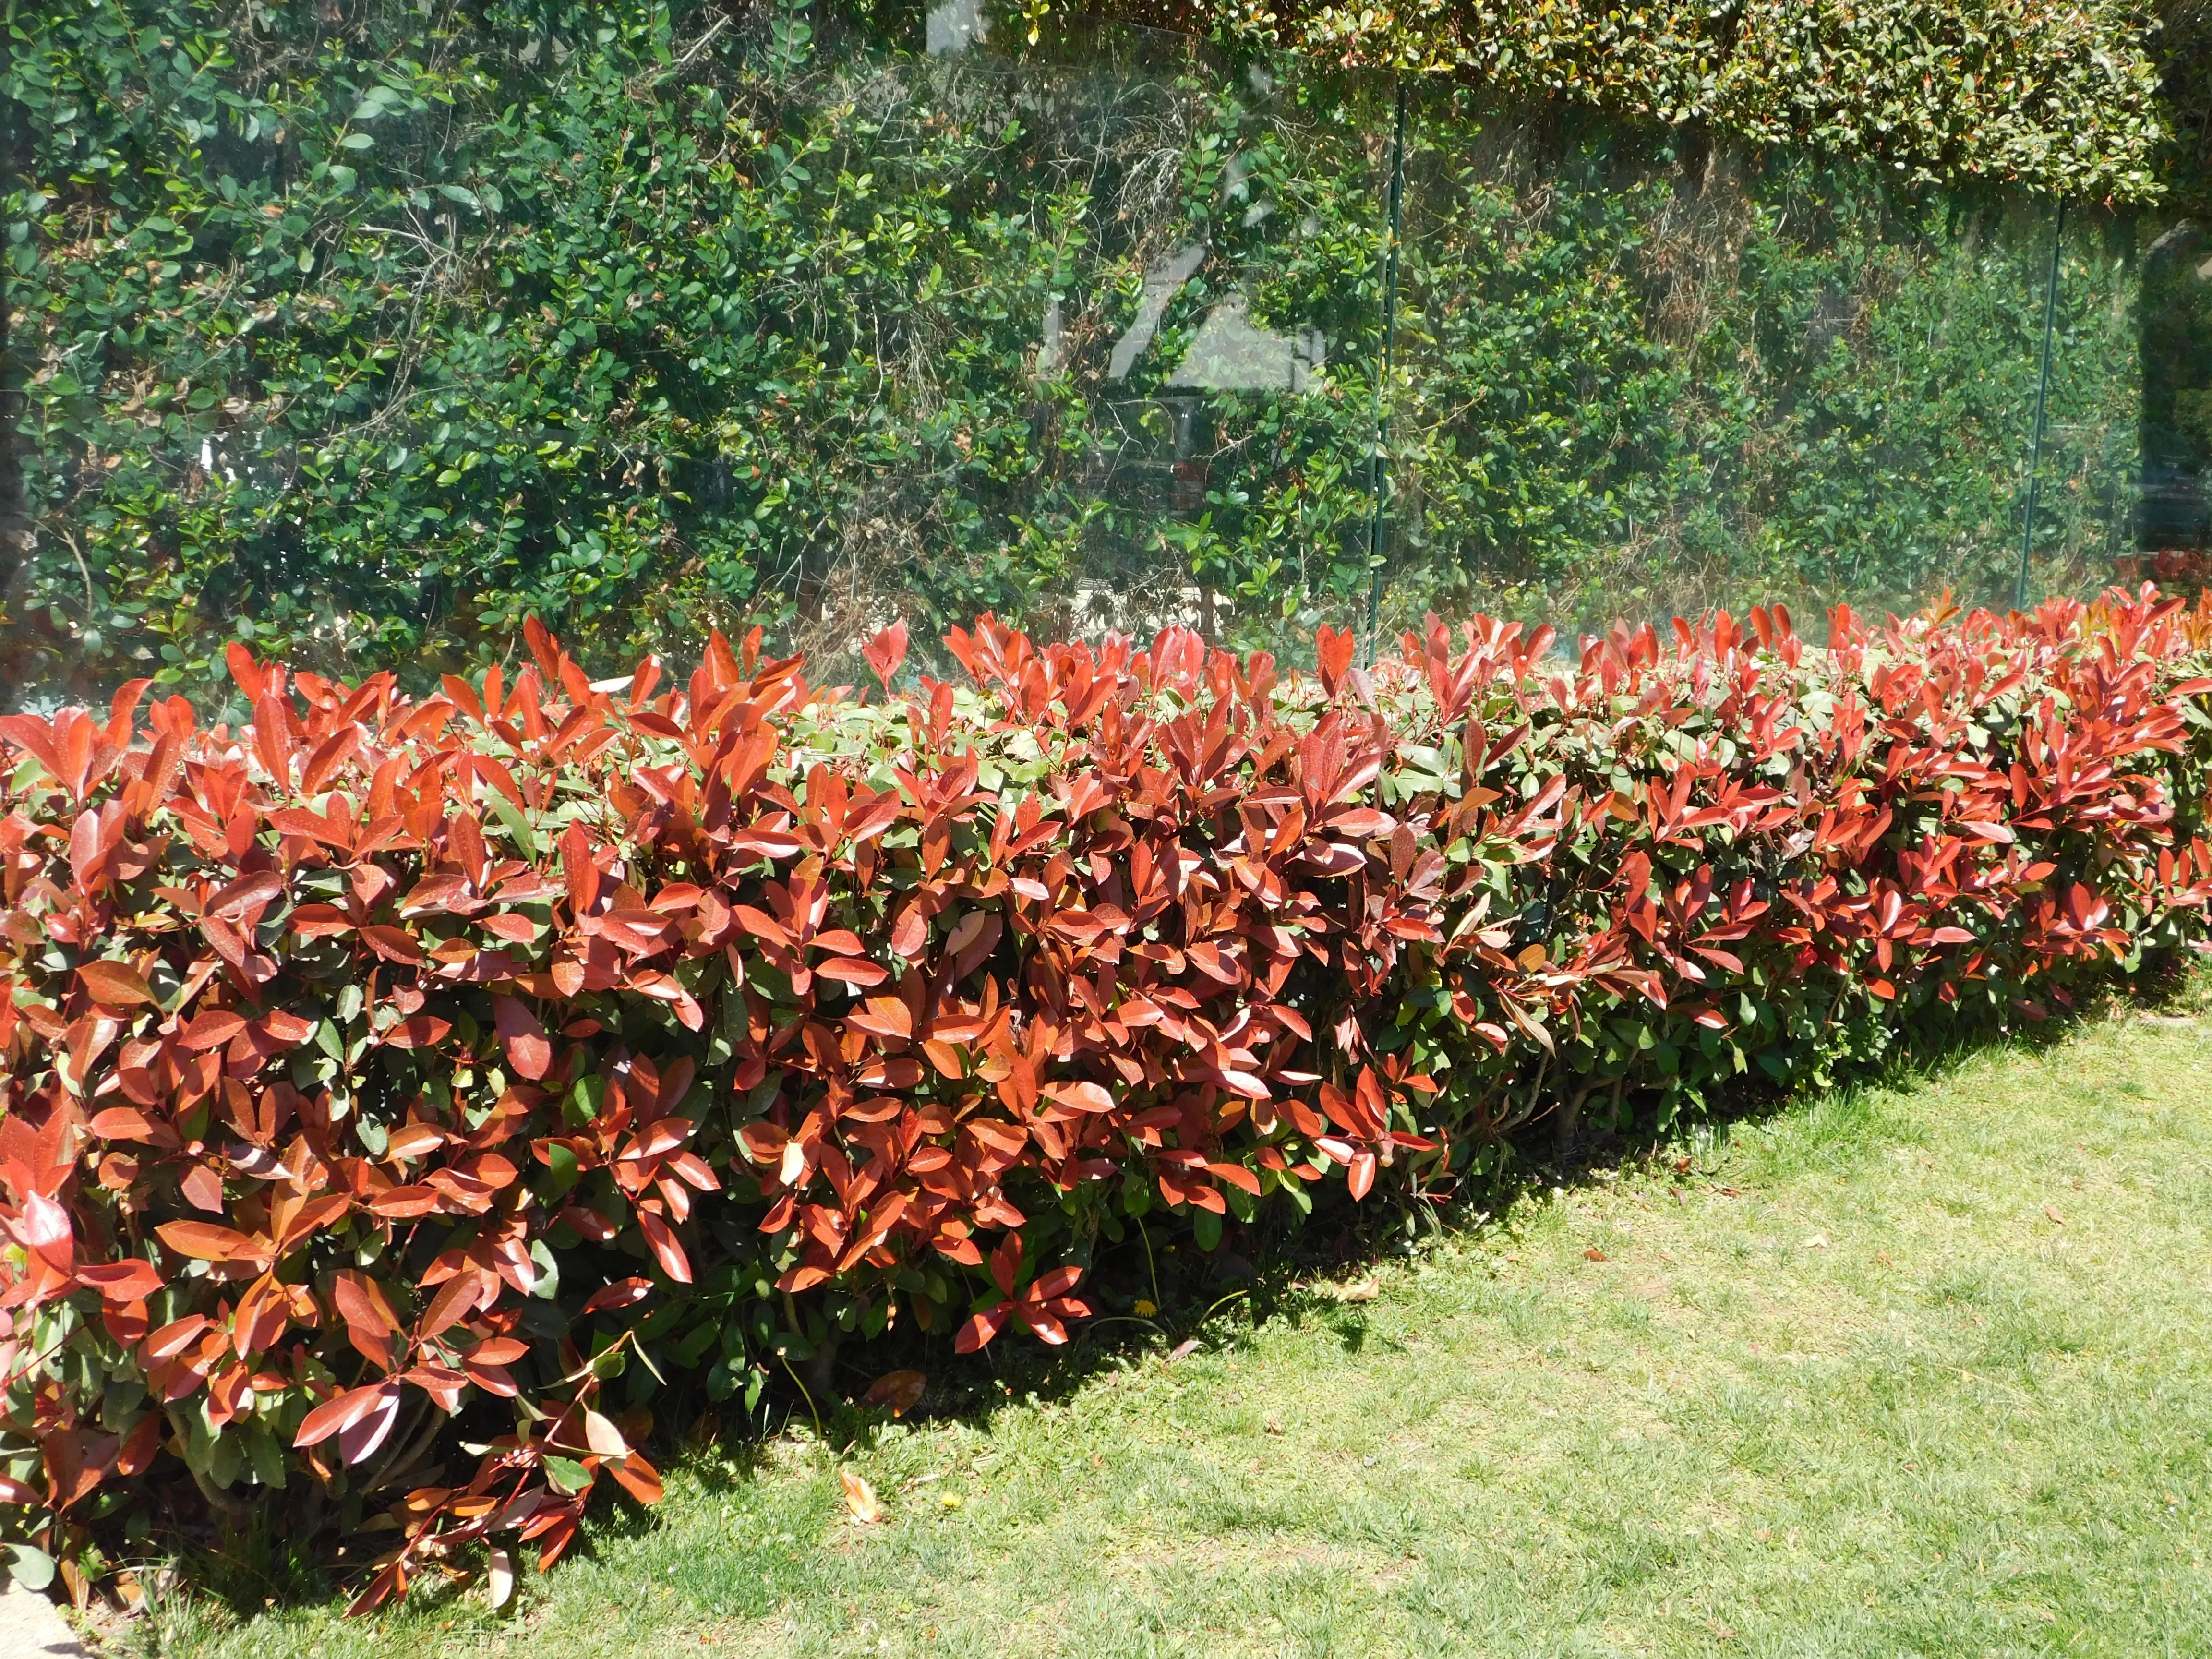
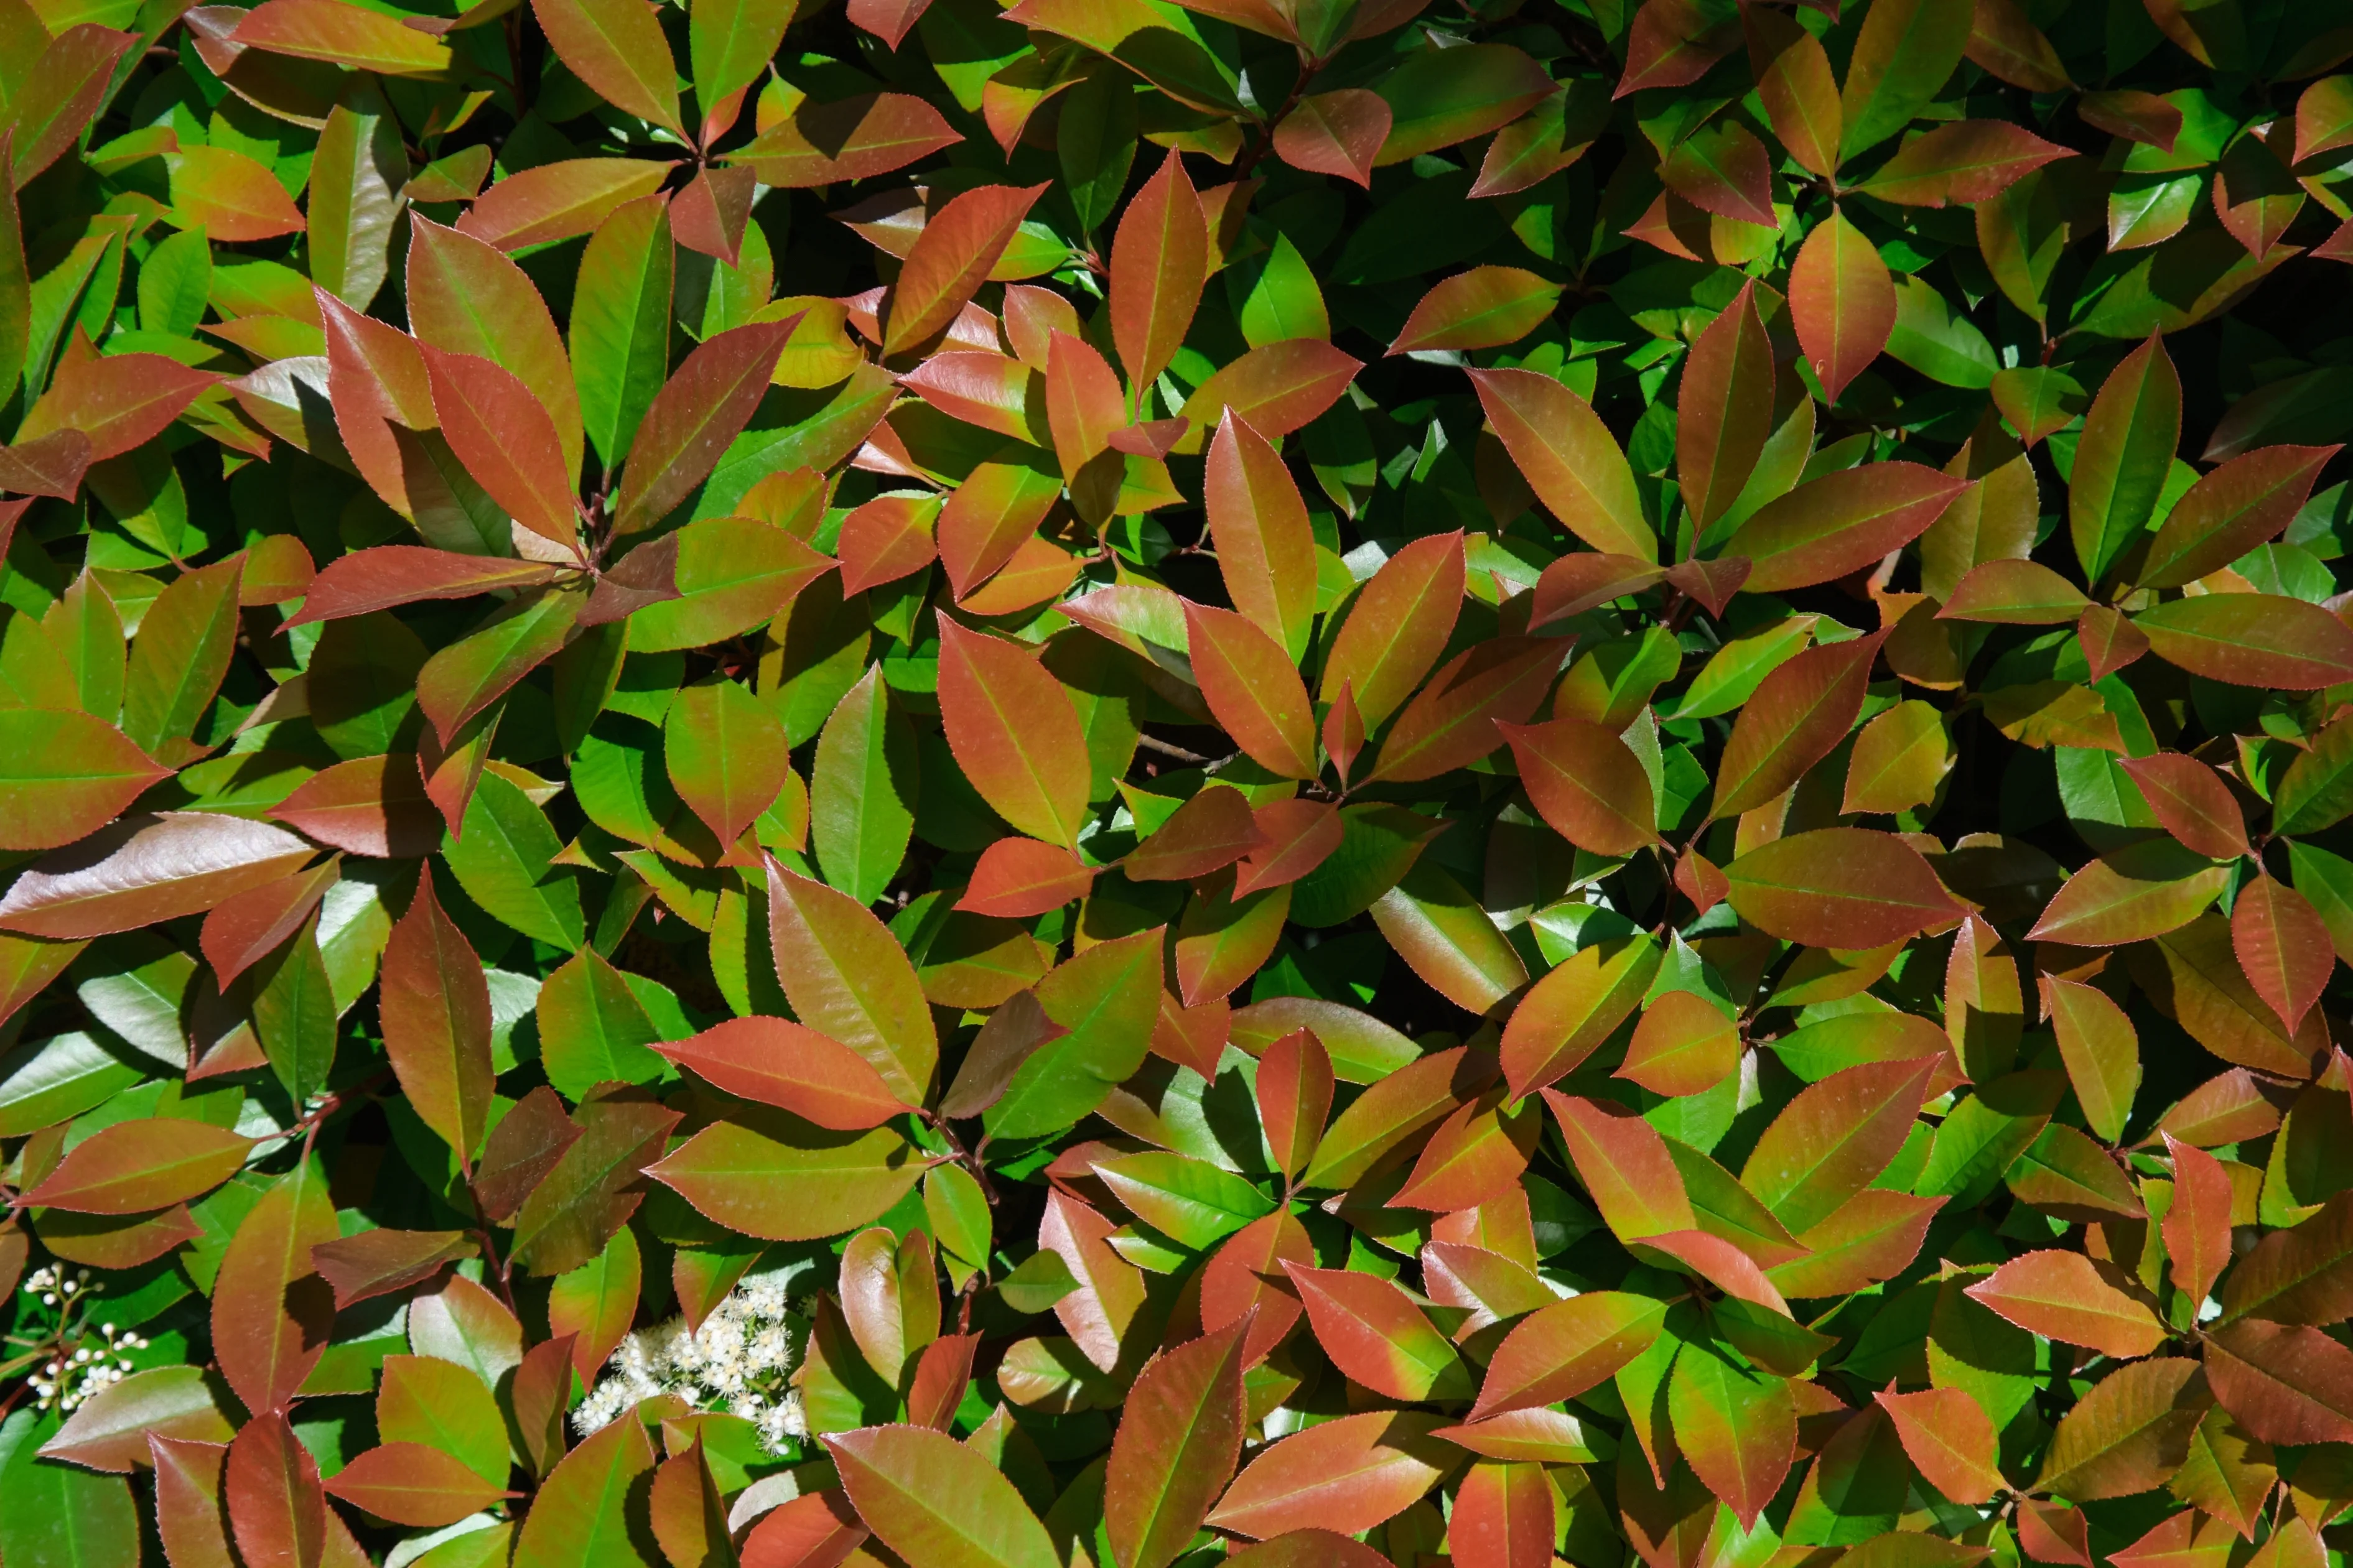
Cultivation and Popularity: Photinia x fraseri 'Red Robin' is loved for its distinctive red foliage, which emerges in the spring and gradually turns green as it matures. It's a fast-growing evergreen shrub with a compact upright habit, making it an ideal choice for hedging.
Photinia's popularity in the UK can be attributed to its versatility and striking appearance. It can be grown as a standalone tree or as part of a mixed hedge, and its vibrant colour adds interest to gardens throughout the year.
Historical Landmarks and Notable Uses: While there aren't specific historical landmarks featuring Photinia hedges, they have been widely used in public and private gardens across the UK for many years. They're often seen in parks, gardens, and streetscapes, contributing to the local green infrastructure.
Contemporary Uses and Innovations: Today, Photinia remains a popular choice for gardeners and landscapers across the UK. It's often used in modern planting schemes for its year-round interest and low maintenance requirements. Some gardeners are also experimenting with Photinia as a topiary plant, shaping it into interesting forms for an eye-catching garden feature.
Despite its long history and widespread use, new varieties of Photinia continue to be developed. For example, Photinia 'Carré Rouge' is a recent introduction with a more compact habit and even more vibrant red foliage, demonstrating that this classic plant still has plenty to offer contemporary gardeners.
Understanding the Different Variations of Species of a Photinia Hedge, ideal for UK Conditions
When it comes to understanding the different variations of species of a Photinia Hedge, ideal for UK conditions, there are a few key points to consider. Photinia Hedges are evergreen shrubs that are native to the UK and thrive in the temperate climate. They are easy to maintain and can be pruned to create a neat and tidy hedge. Photinia Hedges come in a variety of shapes and sizes, from low-growing varieties to tall, dense hedges. They are also available in a range of colours, from deep red to bright green. With the right care and maintenance, a Photinia Hedge can provide a beautiful and low-maintenance addition to any garden in the UK.
Photinias are a group of around 30 species of small trees and large shrubs, with some varieties being excellent for hedging purposes. Here, we will discuss a few popular Photinia species used in hedging:
- Photinia x fraseri 'Red Robin': This is the most popular variety, known for its vibrant red young leaves that turn dark green as they mature. It's a fast-growing evergreen shrub that can reach heights of 4-5 meters, but it can also be kept smaller through pruning. 'Red Robin' is ideal for creating privacy hedges and screens, and it performs well in full sun to part shade conditions. However, it can be susceptible to Leaf Spot, especially in damp conditions.
- Photinia 'Little Red Robin': A dwarf version of 'Red Robin', this variety grows to around 1-1.5 meters tall. Its compact size makes it a great choice for smaller gardens or borders. It shares the same vibrant red new growth and evergreen nature as 'Red Robin', making it an attractive year-round feature.
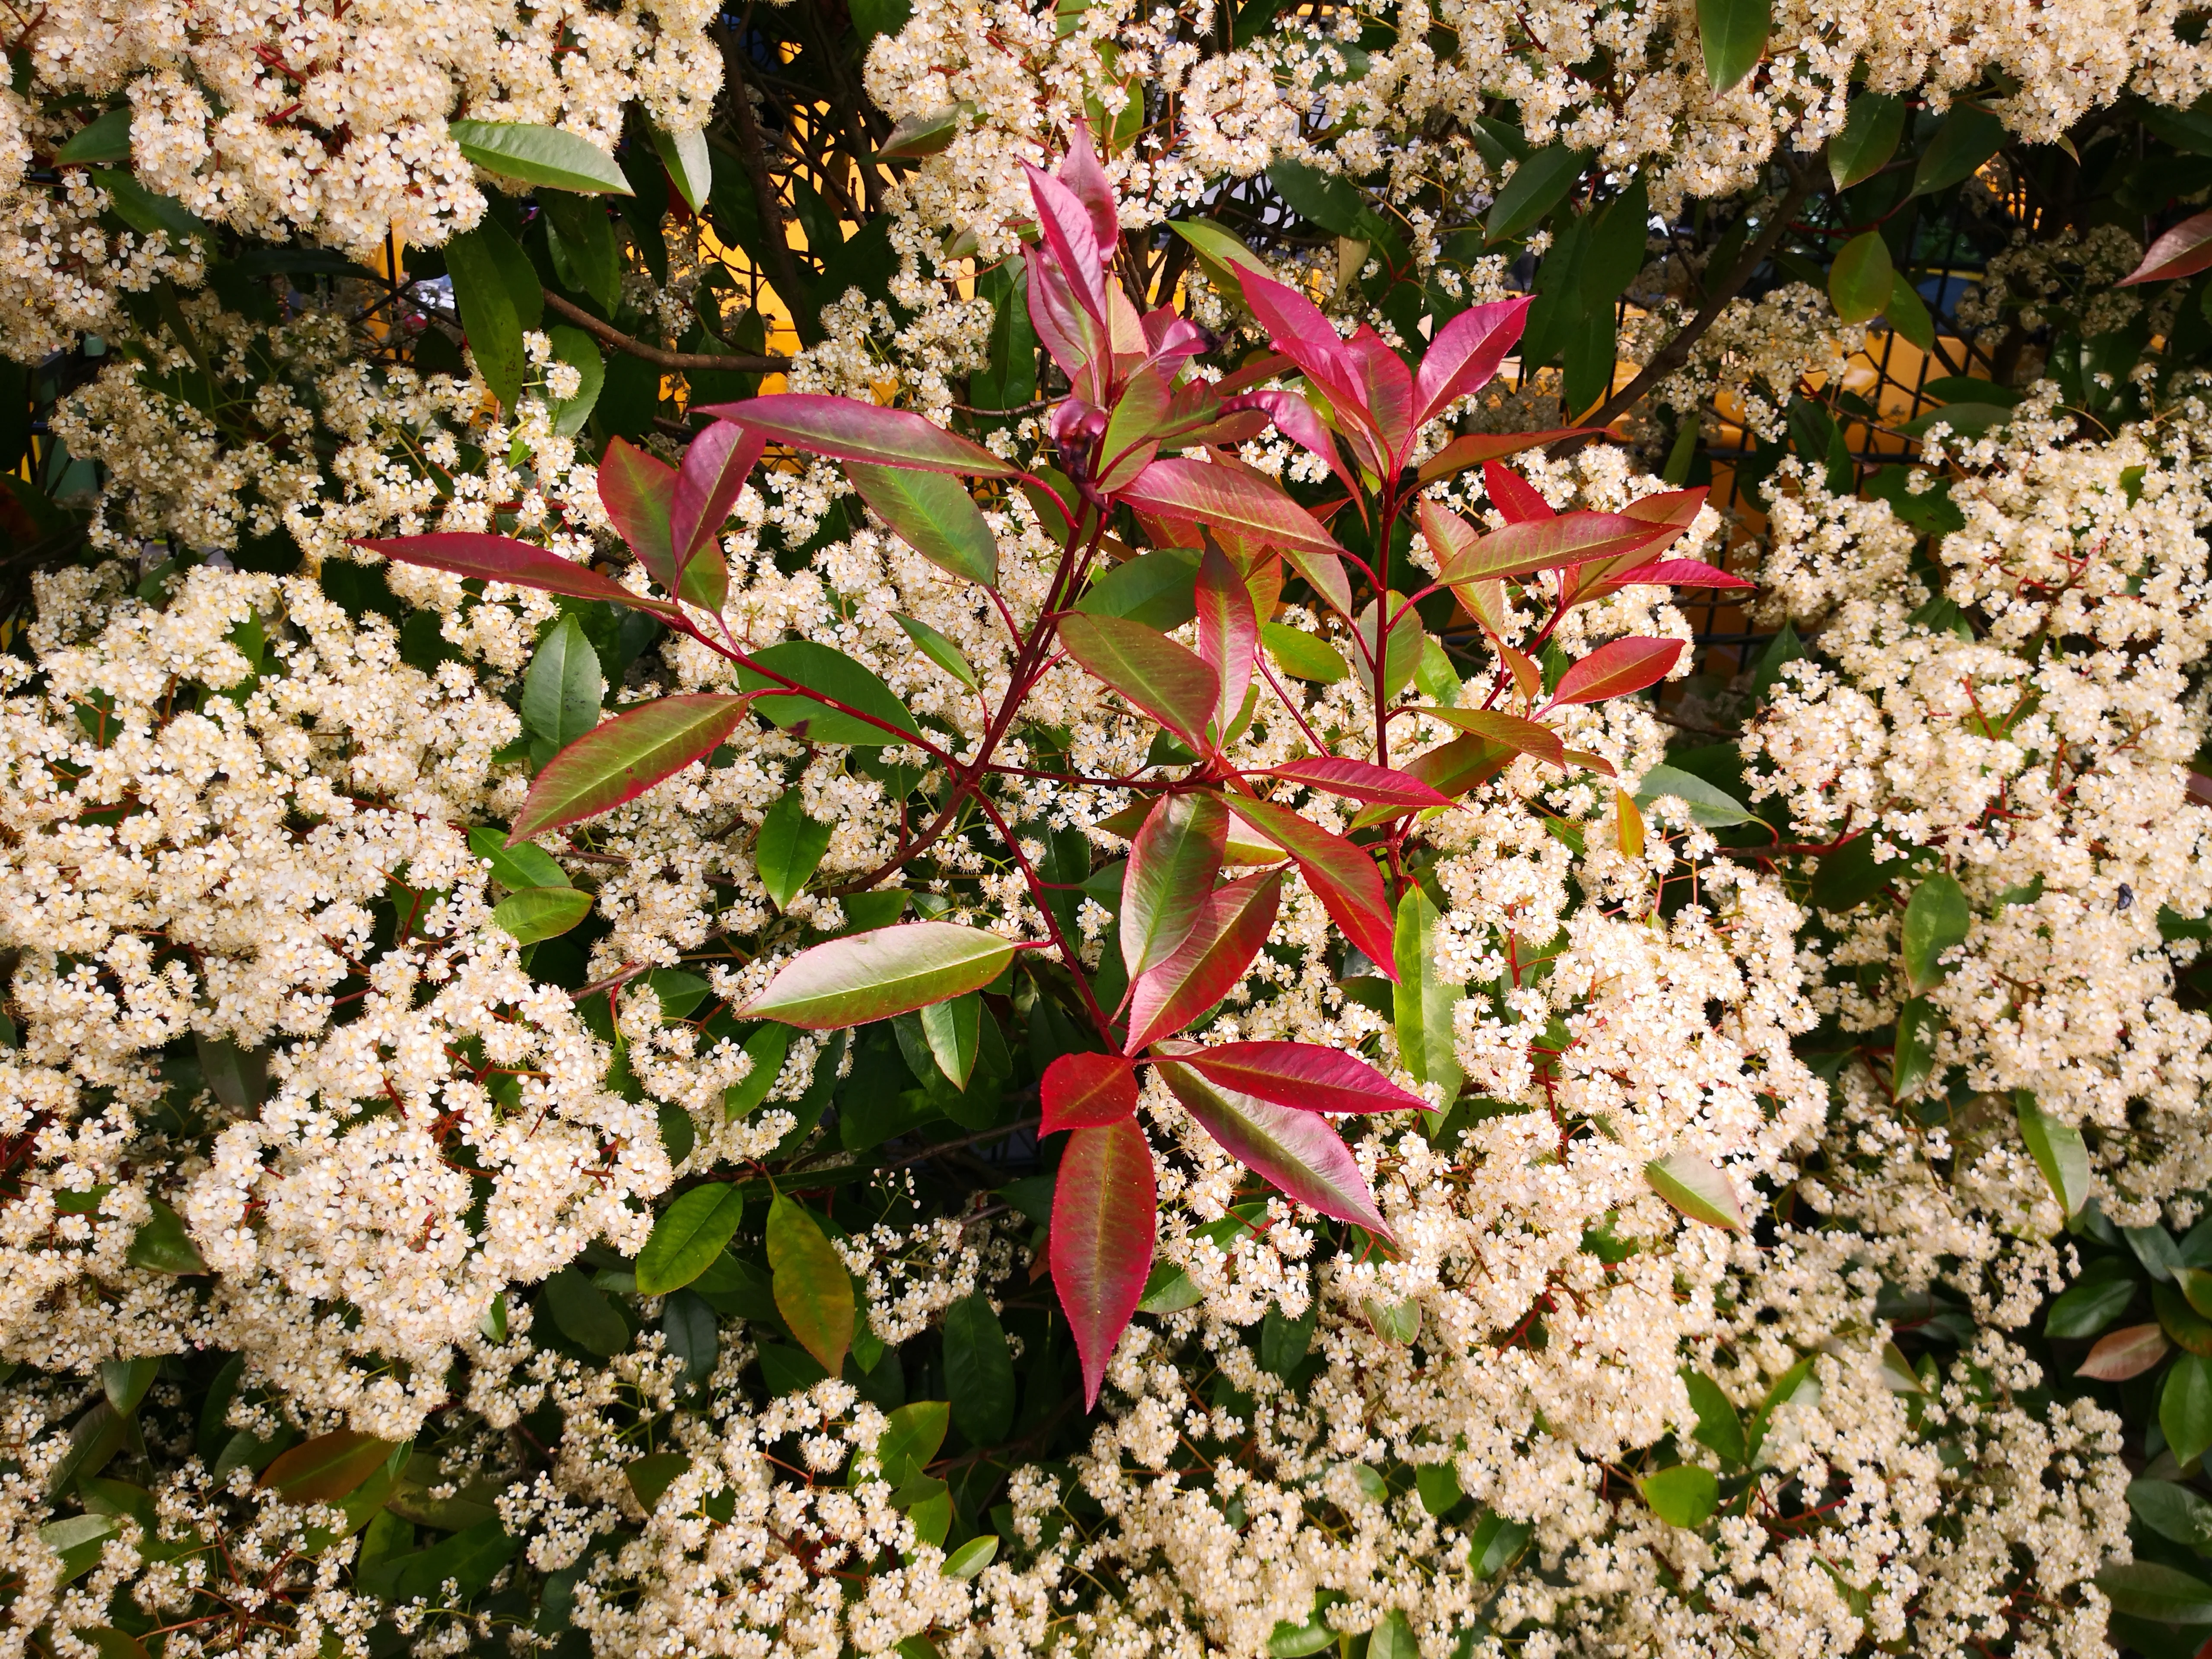
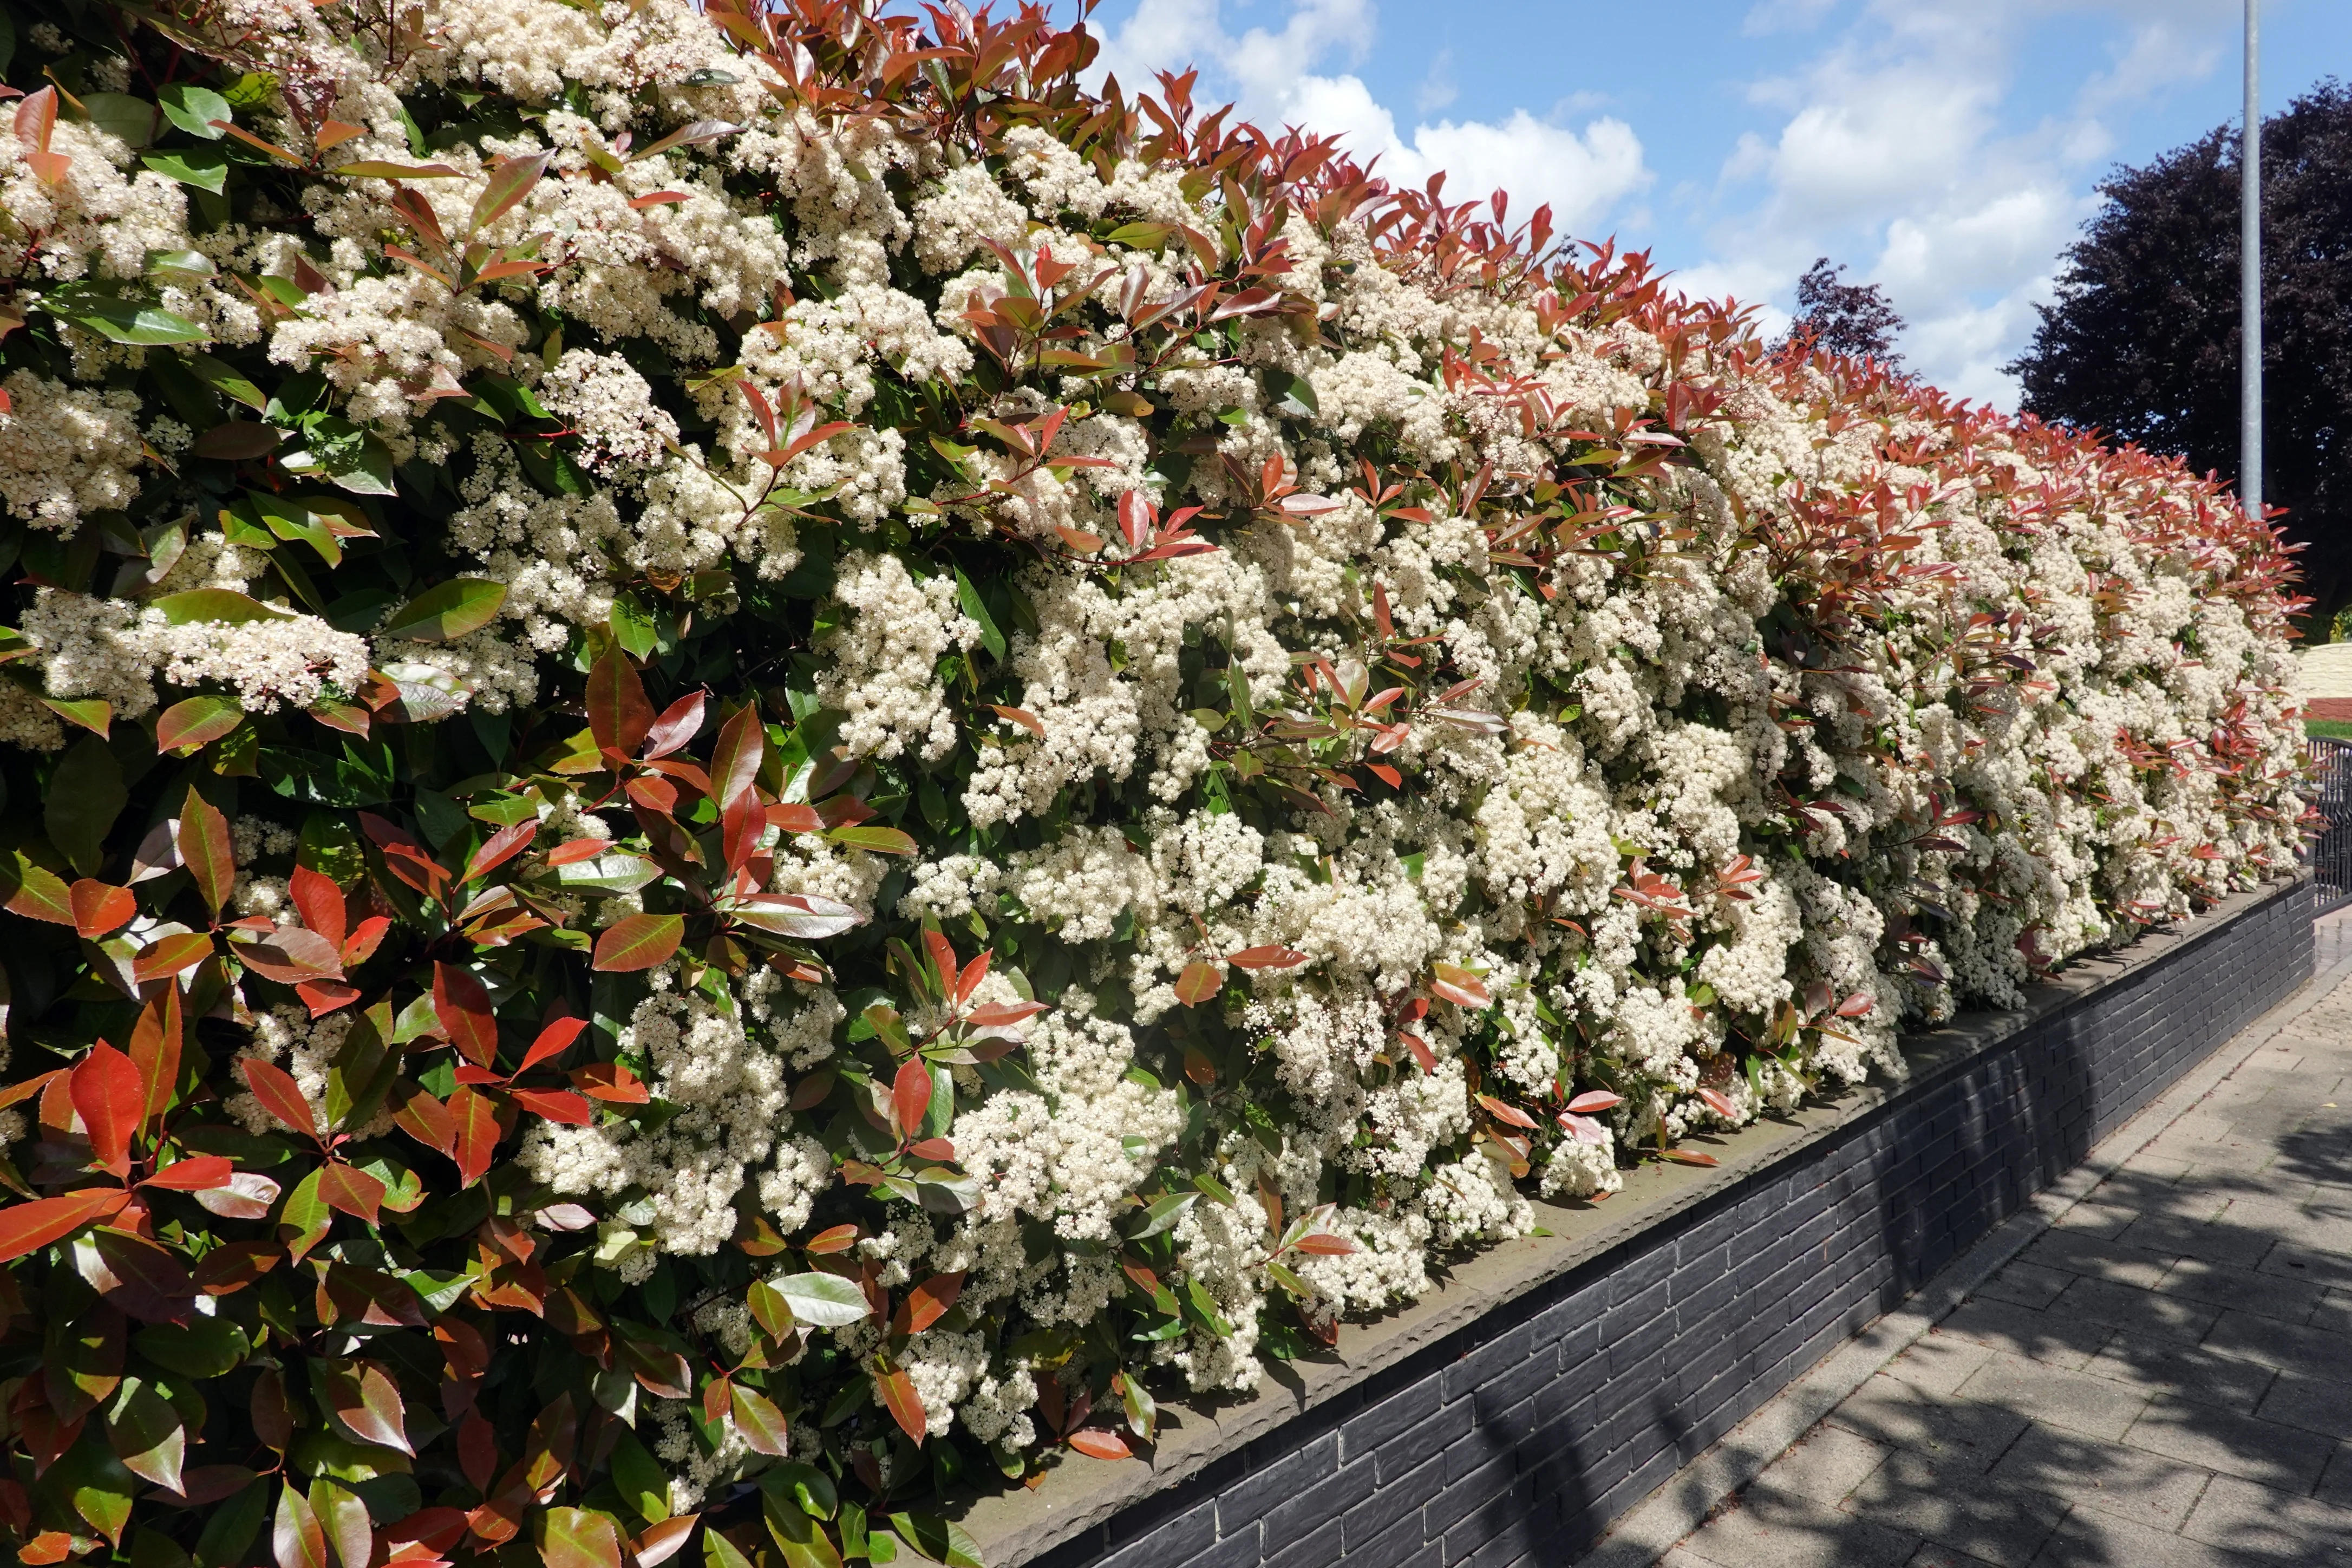
- Photinia serratifolia (Chinese Photinia): This species is a larger evergreen shrub or small tree that can grow up to 20 feet tall. It blooms in mid-spring, offering clusters of white flowers. It's less commonly used as a hedge but can make a striking specimen plant or screen.
- Photinia glabra (Japanese Photinia): This species is often used as a hedge or screen in warmer climates. It has glossy, evergreen leaves and produces clusters of white flowers in spring.
- Photinia villosa (Oriental Photinia): This deciduous shrub offers clusters of white flowers in late spring and vibrant red berries in autumn, providing seasonal interest. It's less commonly used as a hedge due to its deciduous nature.
Each Photinia species offers its unique characteristics, making them suitable for different settings and purposes. They are generally easy to grow and maintain, but they may be susceptible to Leaf Spot, particularly in damp or overcrowded conditions.
What is the Best Variety of Photinia Hedge to Grow in the UK?
When it comes to growing a Photinia Hedge in the UK, there are a few varieties to choose from. The most popular variety is the Red Robin Photinia, which is known for its vibrant red foliage and fast-growing nature. This variety is ideal for creating a dense hedge that can provide privacy and protection from the elements. Another popular variety is the White Diamond Photinia, which is known for its white flowers and glossy green leaves. This variety is perfect for creating a more formal hedge that can add a touch of elegance to any garden. Lastly, the Pink Marble Photinia is a great choice for those looking for a more subtle hedge with its pink and white variegated foliage.
No matter which variety you choose, a Photinia Hedge is a great addition to any UK garden. With its vibrant foliage and fast-growing nature, it can provide privacy and protection from the elements while adding a touch of elegance to your outdoor space. So, if you're looking for a hedge that is both beautiful and practical, a Photinia Hedge is the perfect choice.
Description of Photinia Red Robin:
Photinia x fraseri 'Red Robin' is a striking evergreen shrub that is highly appreciated for its vibrant foliage and easy maintenance.
Physical Appearance: Red Robin can grow up to 4-5 meters tall, but it's often kept smaller through pruning. The shrub has an upright, bushy growth habit, making it ideal for hedging or as a standalone specimen.
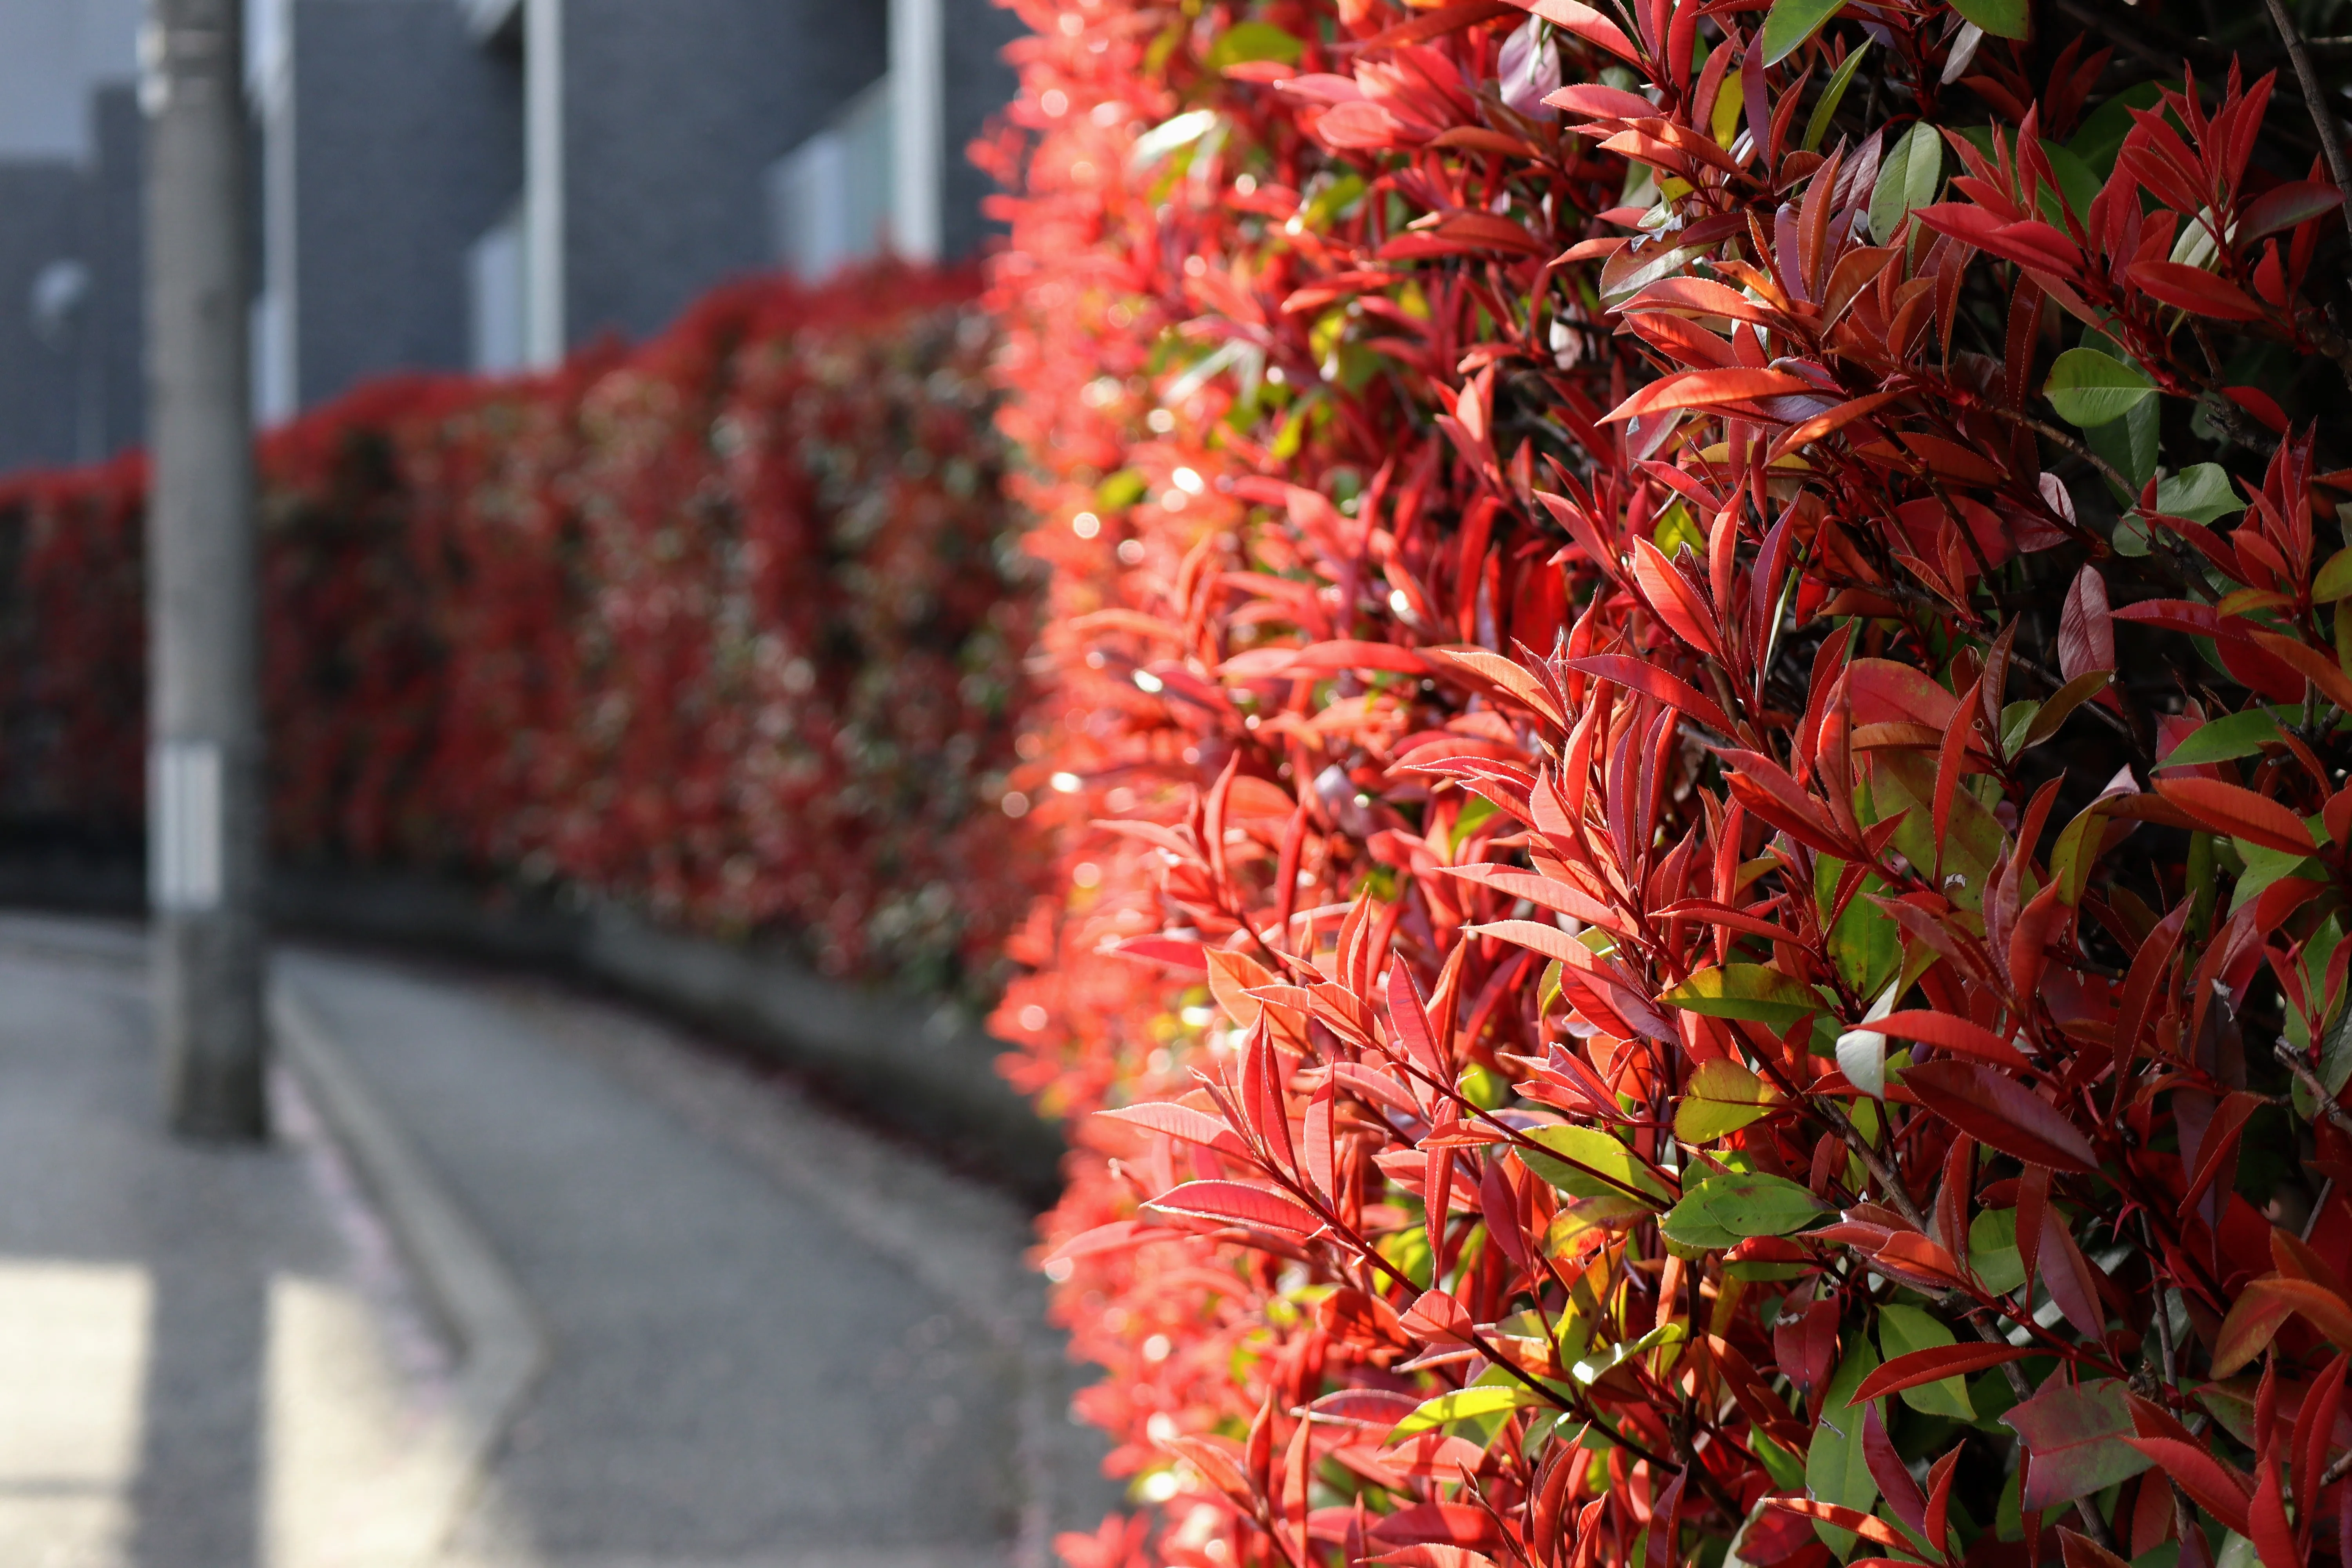
Its most notable feature is its glossy leaves, which emerge bright red in spring and gradually turn to dark green as they mature. This dramatic colour change adds year-round interest to the garden. The leaves are oval-shaped and can be up to 10 cm long.
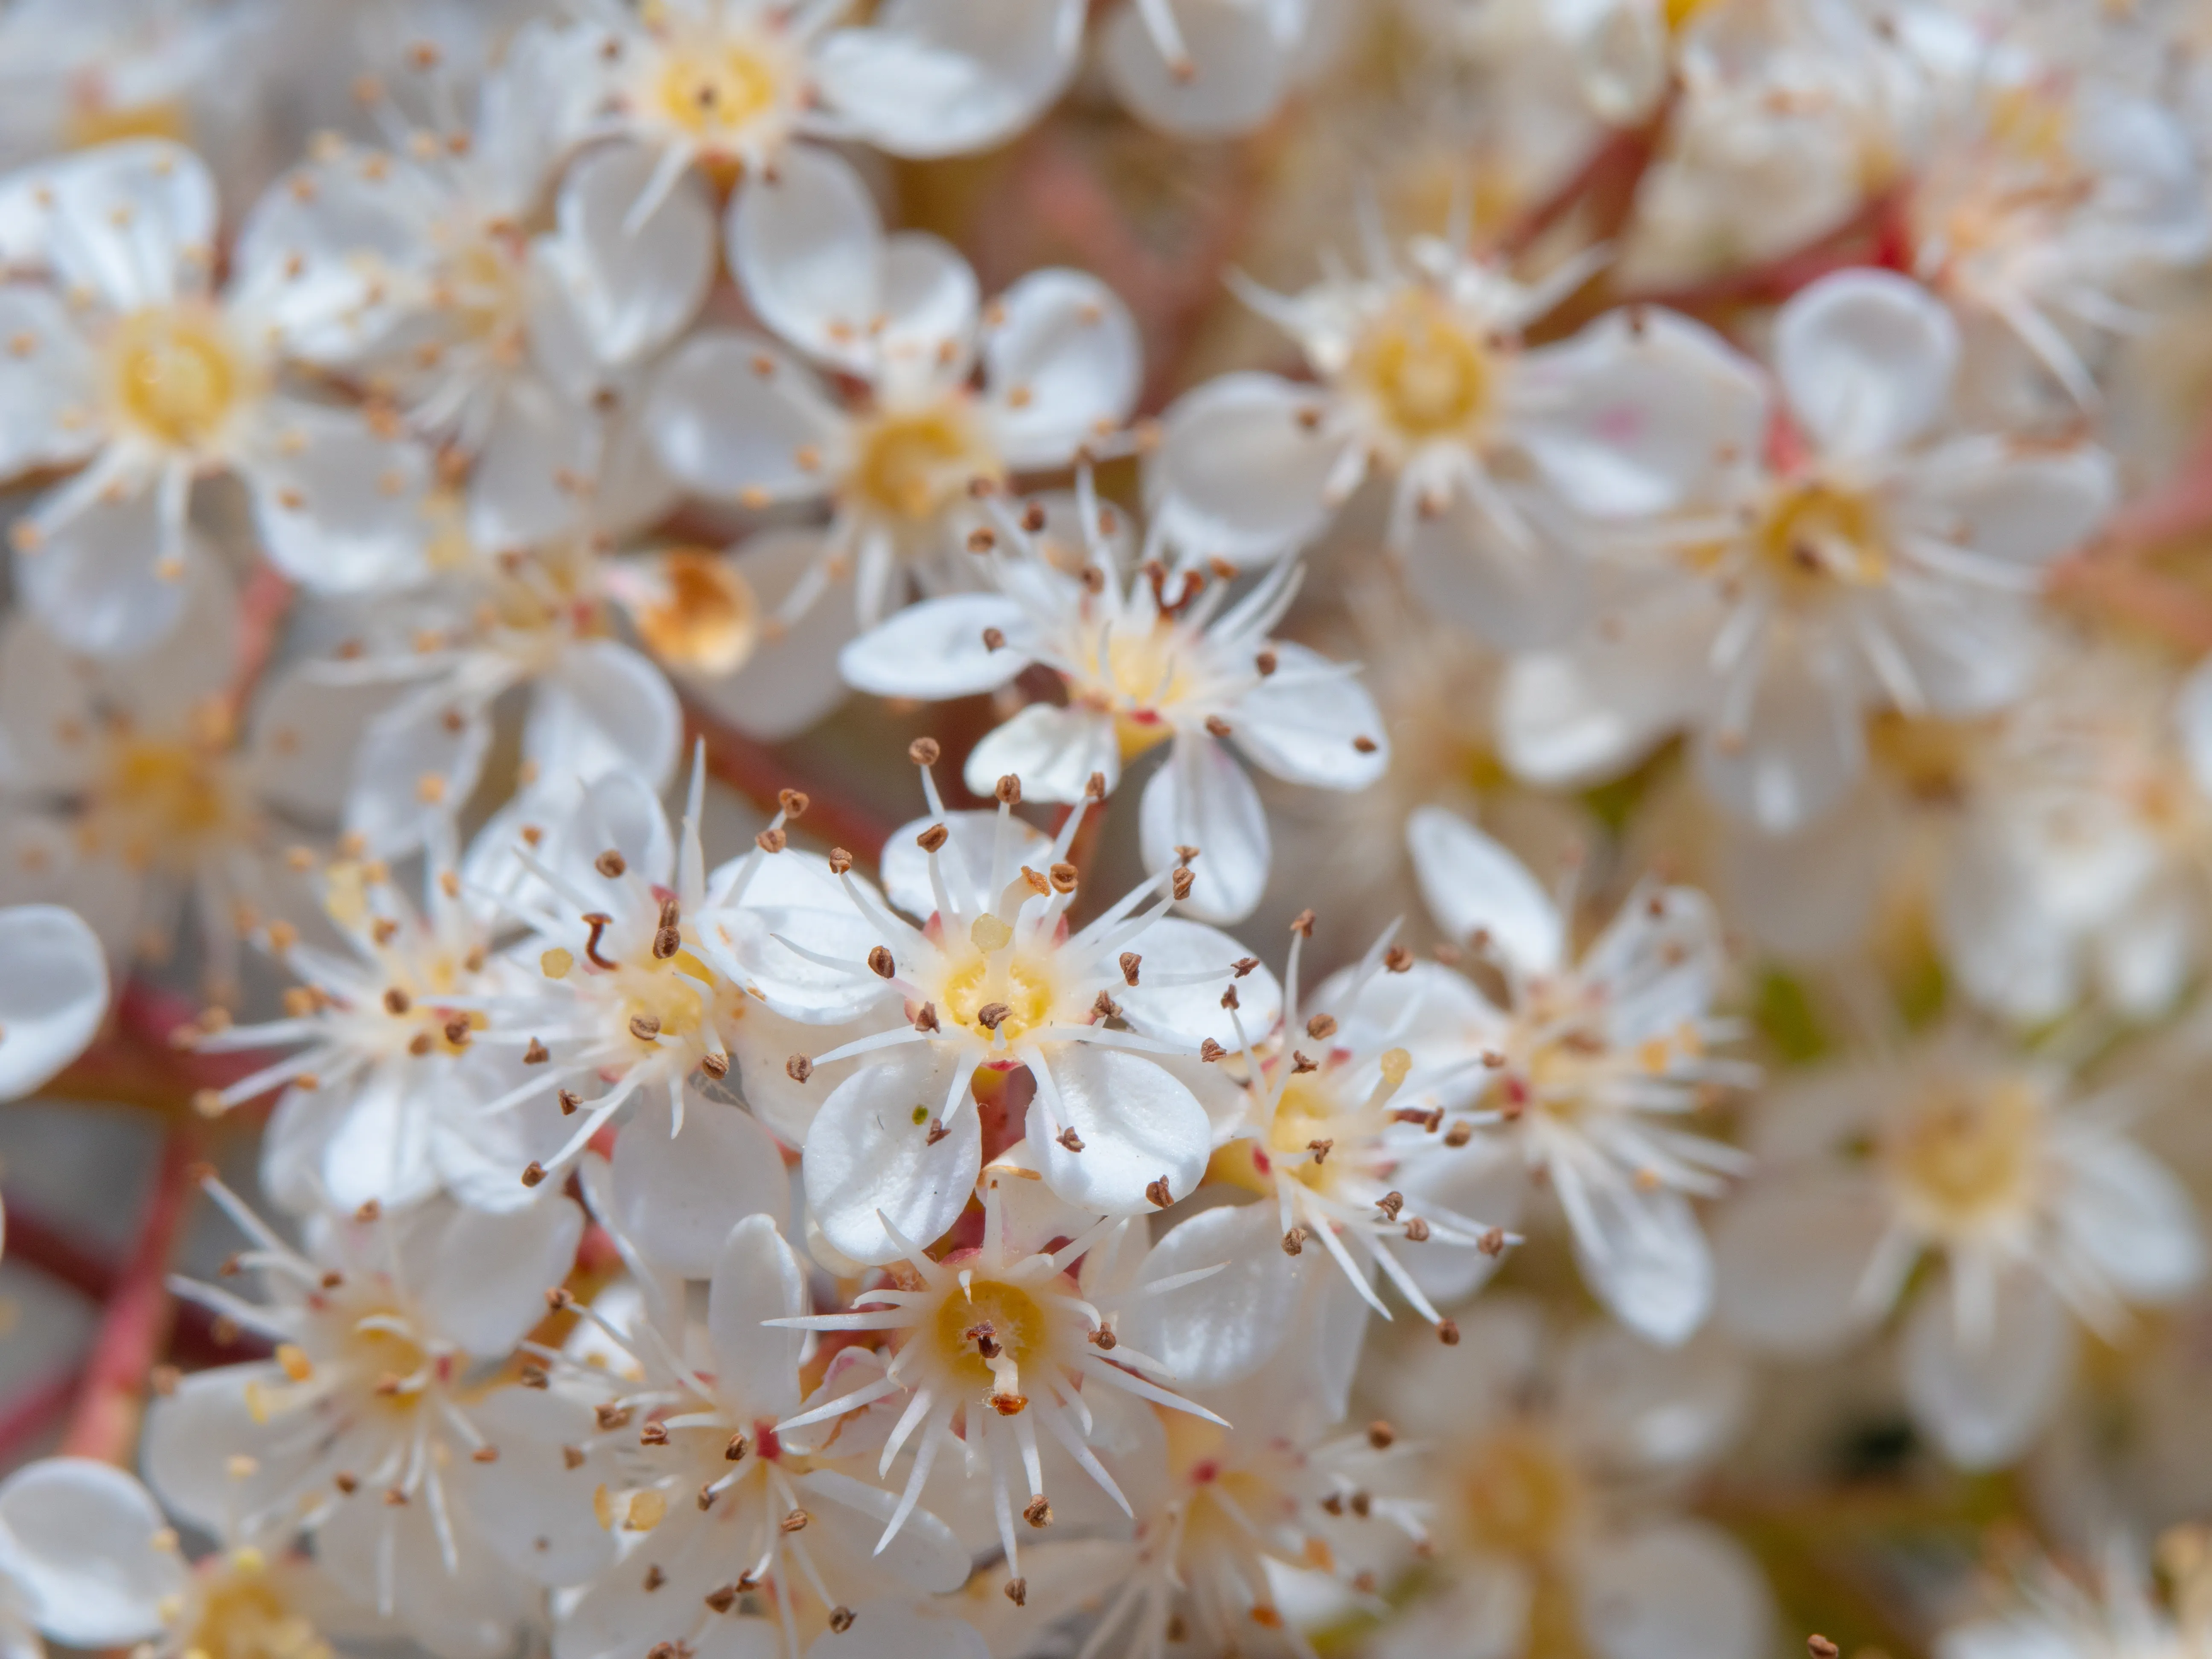
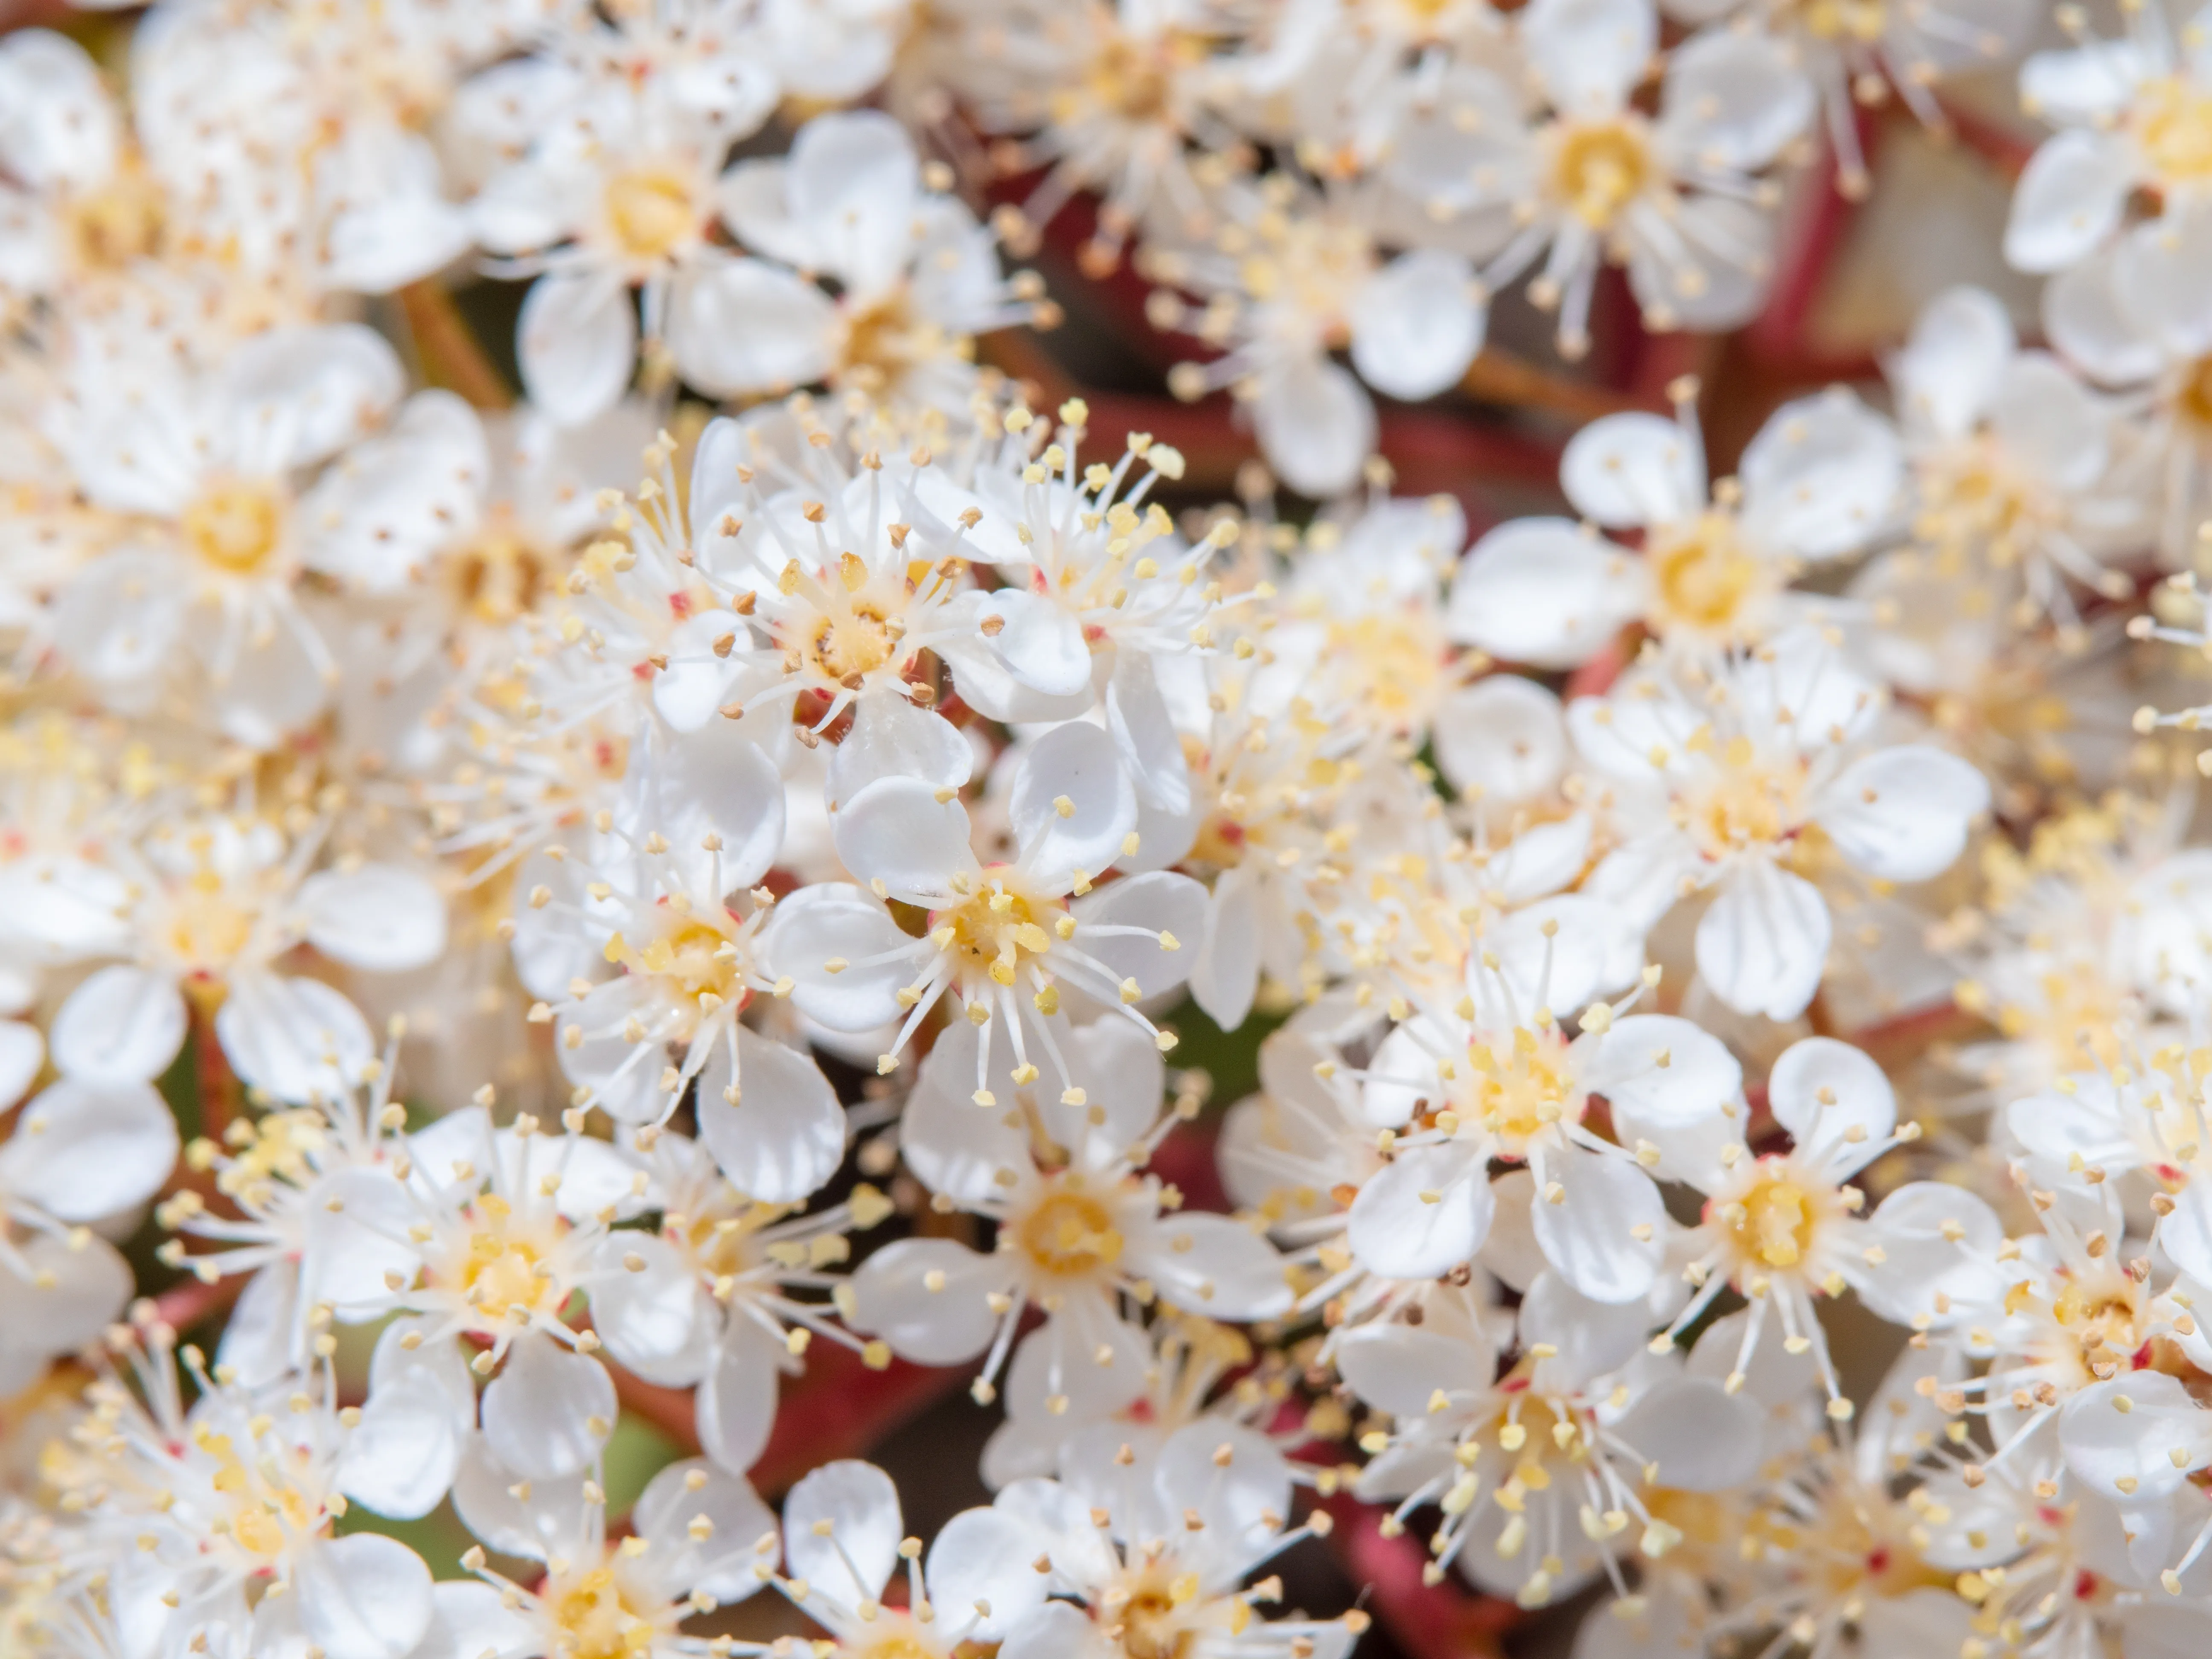
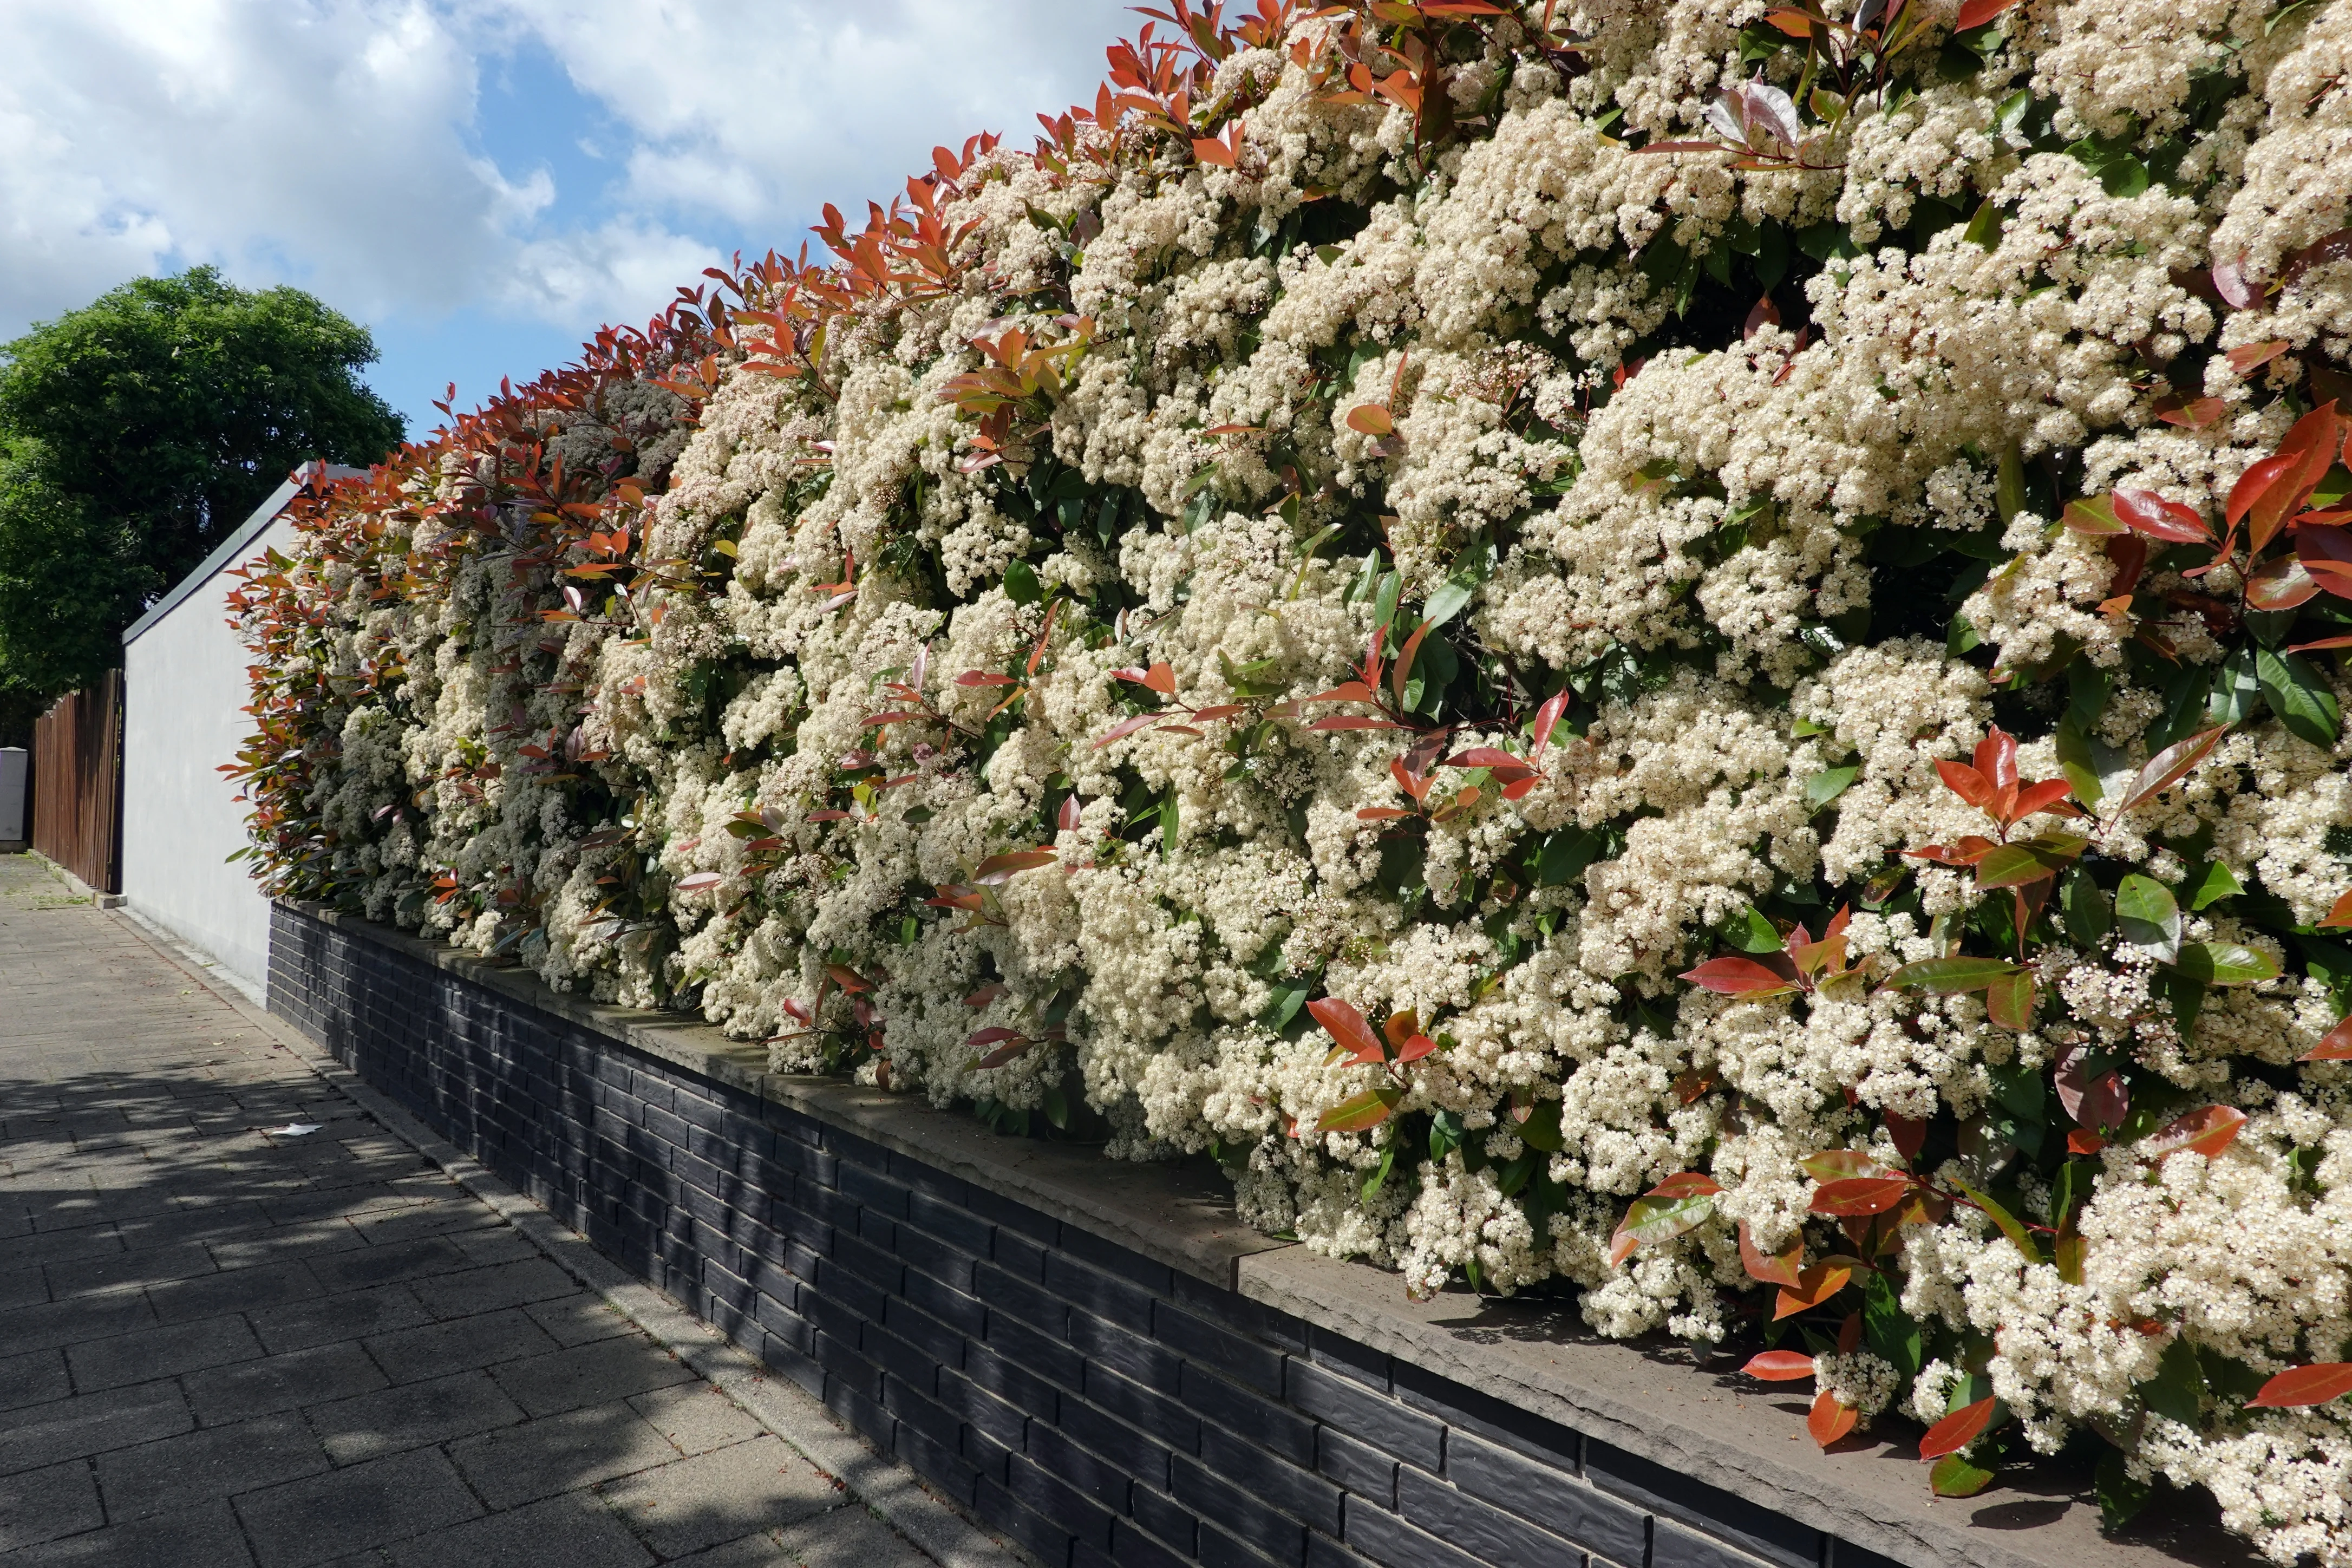
In late spring, Red Robin produces clusters of small, white flowers that add another layer of interest to the plant. These are followed by small, round fruits that turn from red to black as they mature.
Growth Habits: Photinia Red Robin is a fast-growing shrub, capable of adding 30-60 cm to its height each year. It responds well to pruning, which can be used to control its size and shape. Pruning is best done in early spring or late summer.
Hardiness and Disease Resistance: Red Robin is reasonably hardy and can tolerate temperatures down to -15°C. It's also resistant to most common pests and diseases, although it can be susceptible to Leaf Spot, particularly in damp conditions.
Environmental Factors: Photinia Red Robin prefers a sunny or partially shaded position with well-drained soil. It can tolerate a range of soil types, including clay, loam, and sand, provided they are well-drained.
Comparison with Similar Shrubs: Compared to other hedging shrubs, Red Robin stands out for its vibrant red foliage, which offers a distinctive alternative to the usual green. While many other evergreens provide year-round colour, few can match the intensity of Red Robin's spring flush.
Furthermore, its fast growth rate and tolerance of pruning make it a more versatile choice than slower-growing shrubs. The fact that it's evergreen also gives it an advantage over deciduous options, as it provides privacy and interest throughout the year.
In conclusion, Photinia Red Robin is a standout choice for any garden enthusiast looking for a versatile, colourful, and easy-to-maintain shrub.
Creative Ideas for Incorporating Photinia Hedge into Garden Designs
When it comes to incorporating a Photinia Hedge into your garden design, there are a variety of creative ideas to explore. Photinia Hedge is a popular choice for gardeners in the UK due to its vibrant foliage and low maintenance requirements. It can be used to create a stunning backdrop for a flower bed, or to create a privacy screen for a patio or outdoor seating area. Photinia Hedge can also be used to create a unique and eye-catching feature wall, or to line a pathway or driveway. With its bright red foliage, Photinia Hedge is sure to add a splash of colour and texture to any garden design.
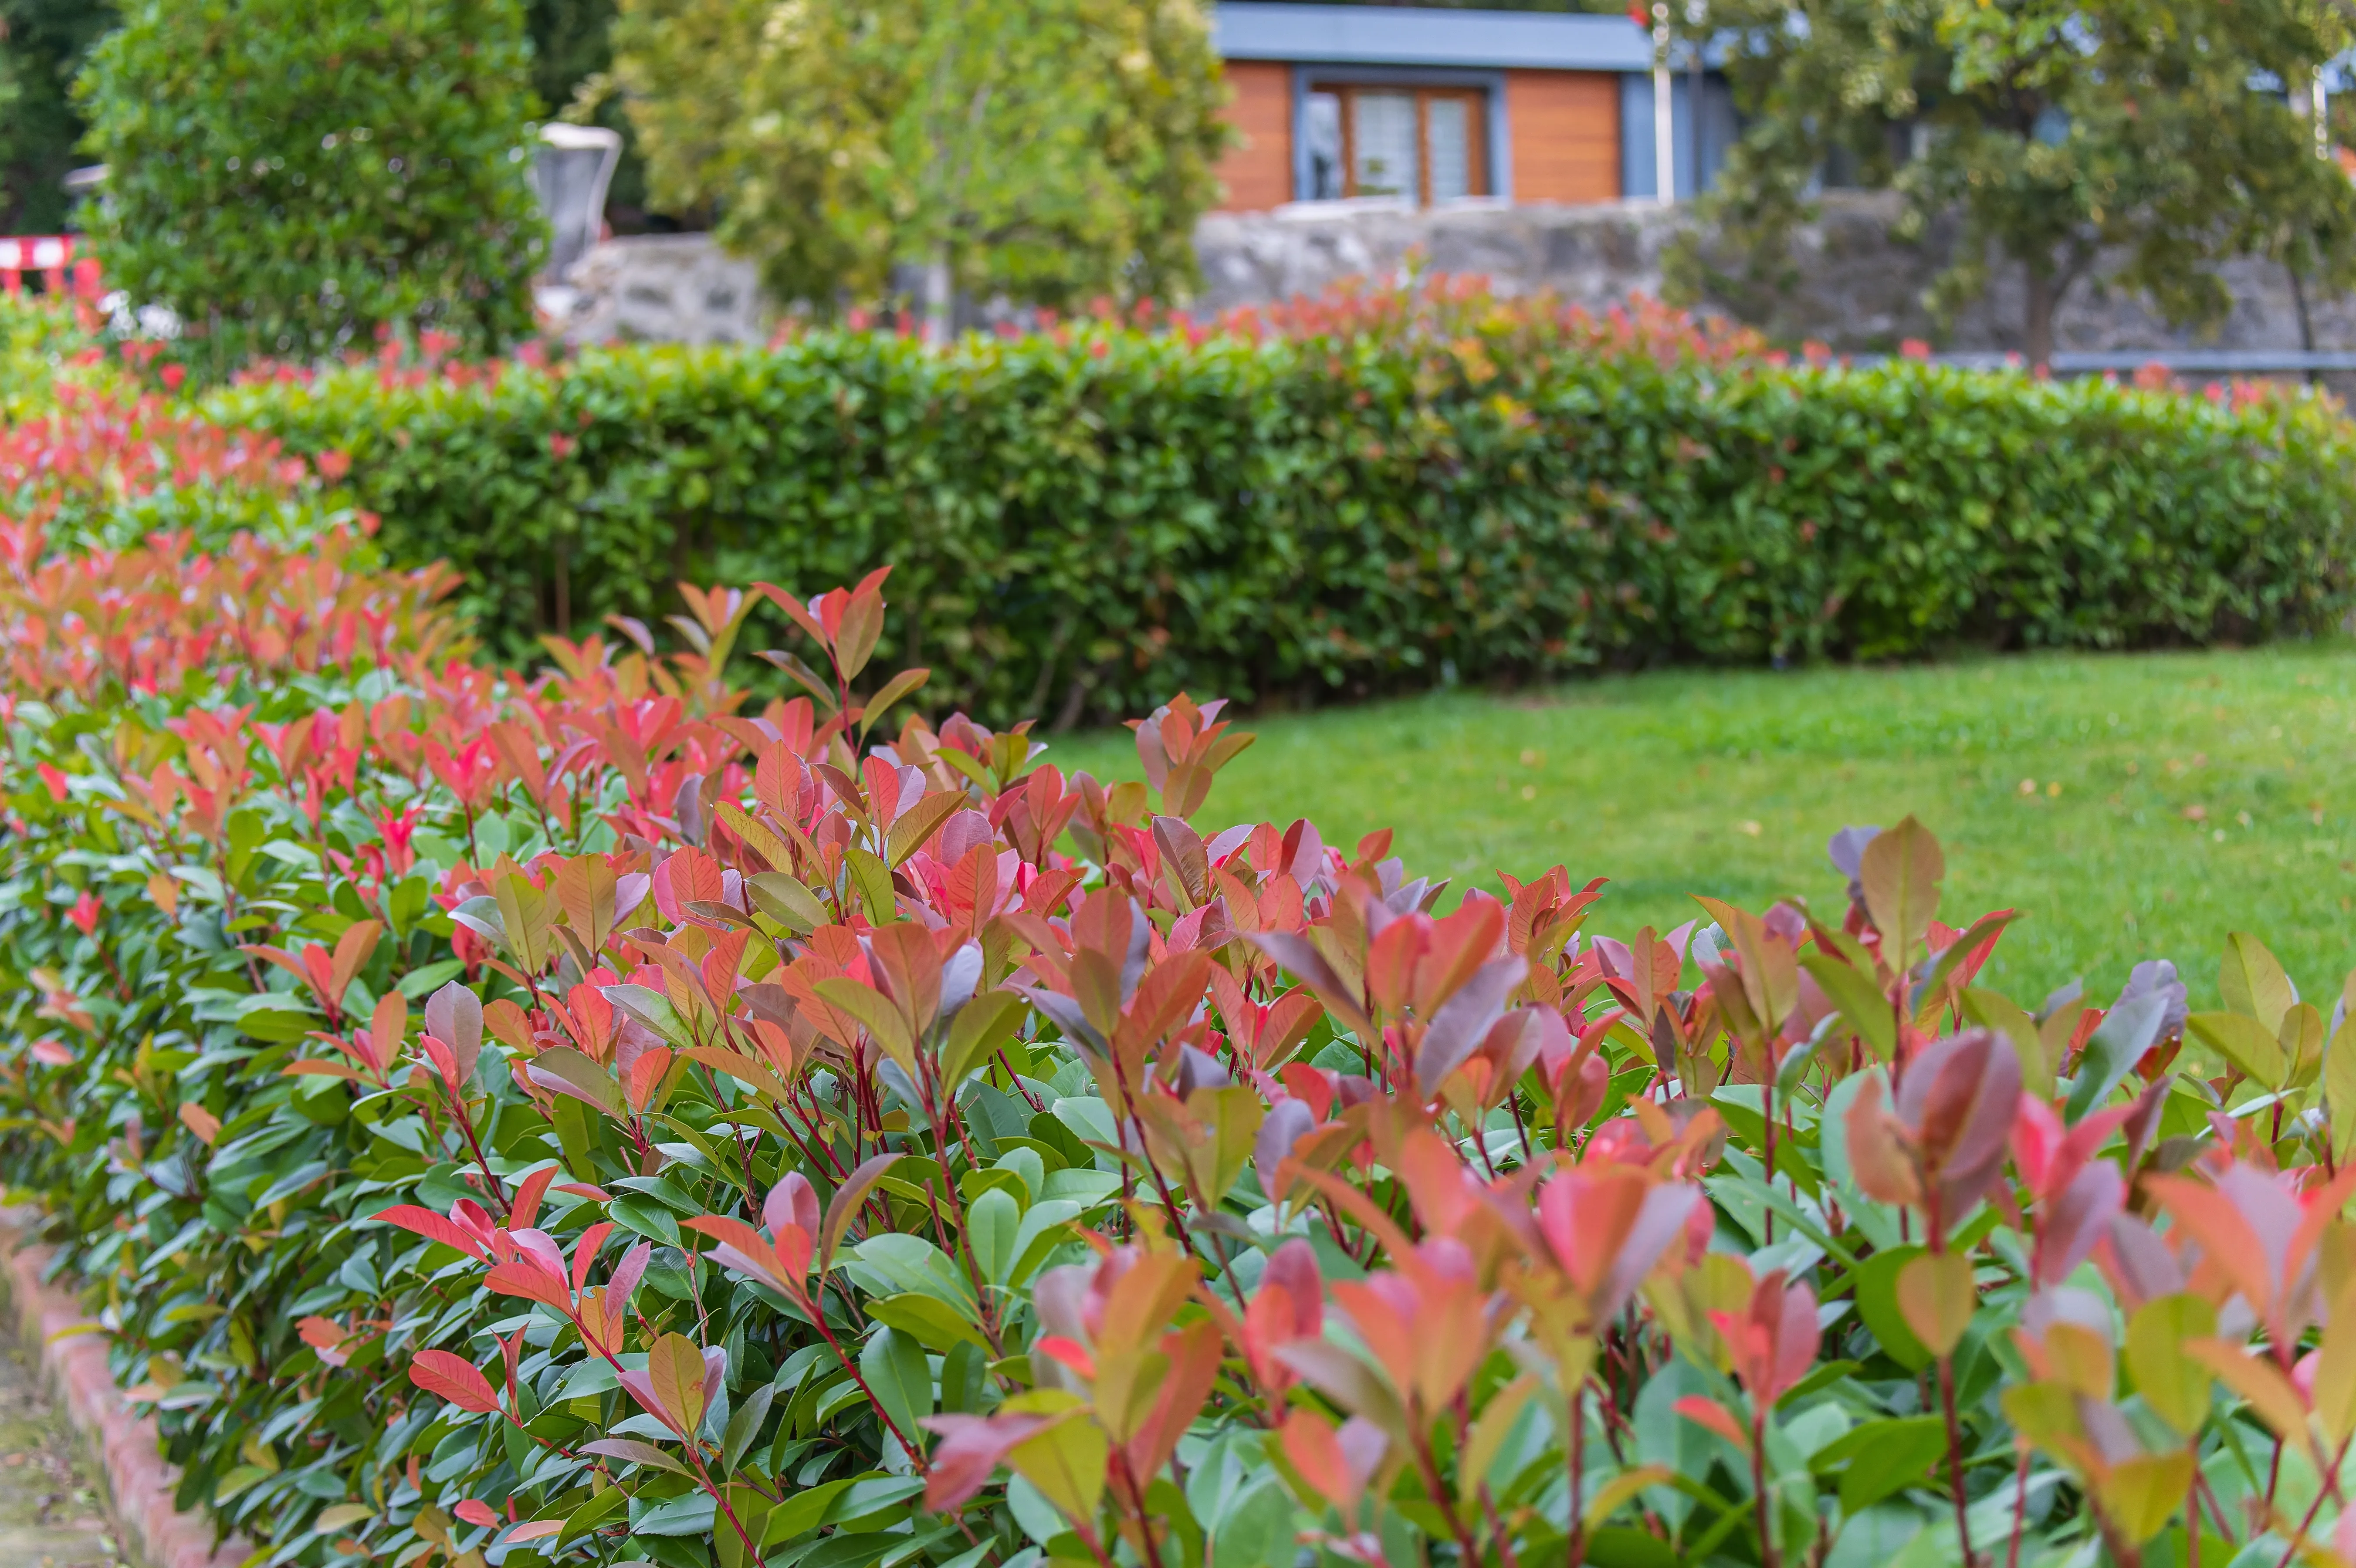
Design Ideas to Incorporate a Photinia Hedge into Garden Spaces- Privacy Screen: Photinia hedges, with their dense growth and tall stature, can make excellent privacy screens. Plant them along the boundary of your property or around a patio or pool area to create a natural, living wall.
- Pattern Play: Use Photinia hedges to create patterns in your garden. Their vibrant red new growth can add a pop of colour to a green landscape. Consider alternating Photinia with hedges of a different colour or texture for a checkerboard effect.
- Garden Rooms: Use Photinia hedges to divide your garden into 'rooms.' This not only adds structure to your garden but also creates separate areas for different activities like dining, relaxing, or playing.
- Focal Point: Photinia, with its bright red new growth, can be a stunning focal point. Consider planting one in a central location in your garden, surrounded by plants that complement its colour and form.
- Mixed Border: Incorporate Photinia into a mixed border with other shrubs, perennials, and annuals. This provides a variety of textures, colours, and heights, making the border interesting year-round.
- Topiary: Photinia is suitable for topiary, so consider training it into a specific shape or forms like spheres, cones, or even animal shapes for an engaging visual element.
- Windbreak: In more exposed gardens, a Photinia hedge can act as a windbreak, protecting more delicate plants and creating a microclimate.
- Tiered Garden: In a sloped garden, use Photinia hedges to create terraces. This not only makes the slope easier to manage but also adds depth and interest to the landscape.
- Wildlife Corner: Photinia produces small apple-like fruits that are attractive to birds. Plant a hedge in a quiet corner of your garden to attract wildlife.
- Container Gardening: If you have limited space, consider growing Photinia in large containers. This allows you to move the plant around as needed and also adds height to your patio or courtyard garden.
Tips: Remember to consider the mature size of Photinia when planning your landscape. It can grow quite large and may overshadow smaller plants if not given enough space. Photinia prefers well-drained soil and a sunny to partly shaded position. Make sure to consider these factors when choosing a location for your hedge.
When is the Best Time of the Year to Plant a Photinia Hedge in the UK
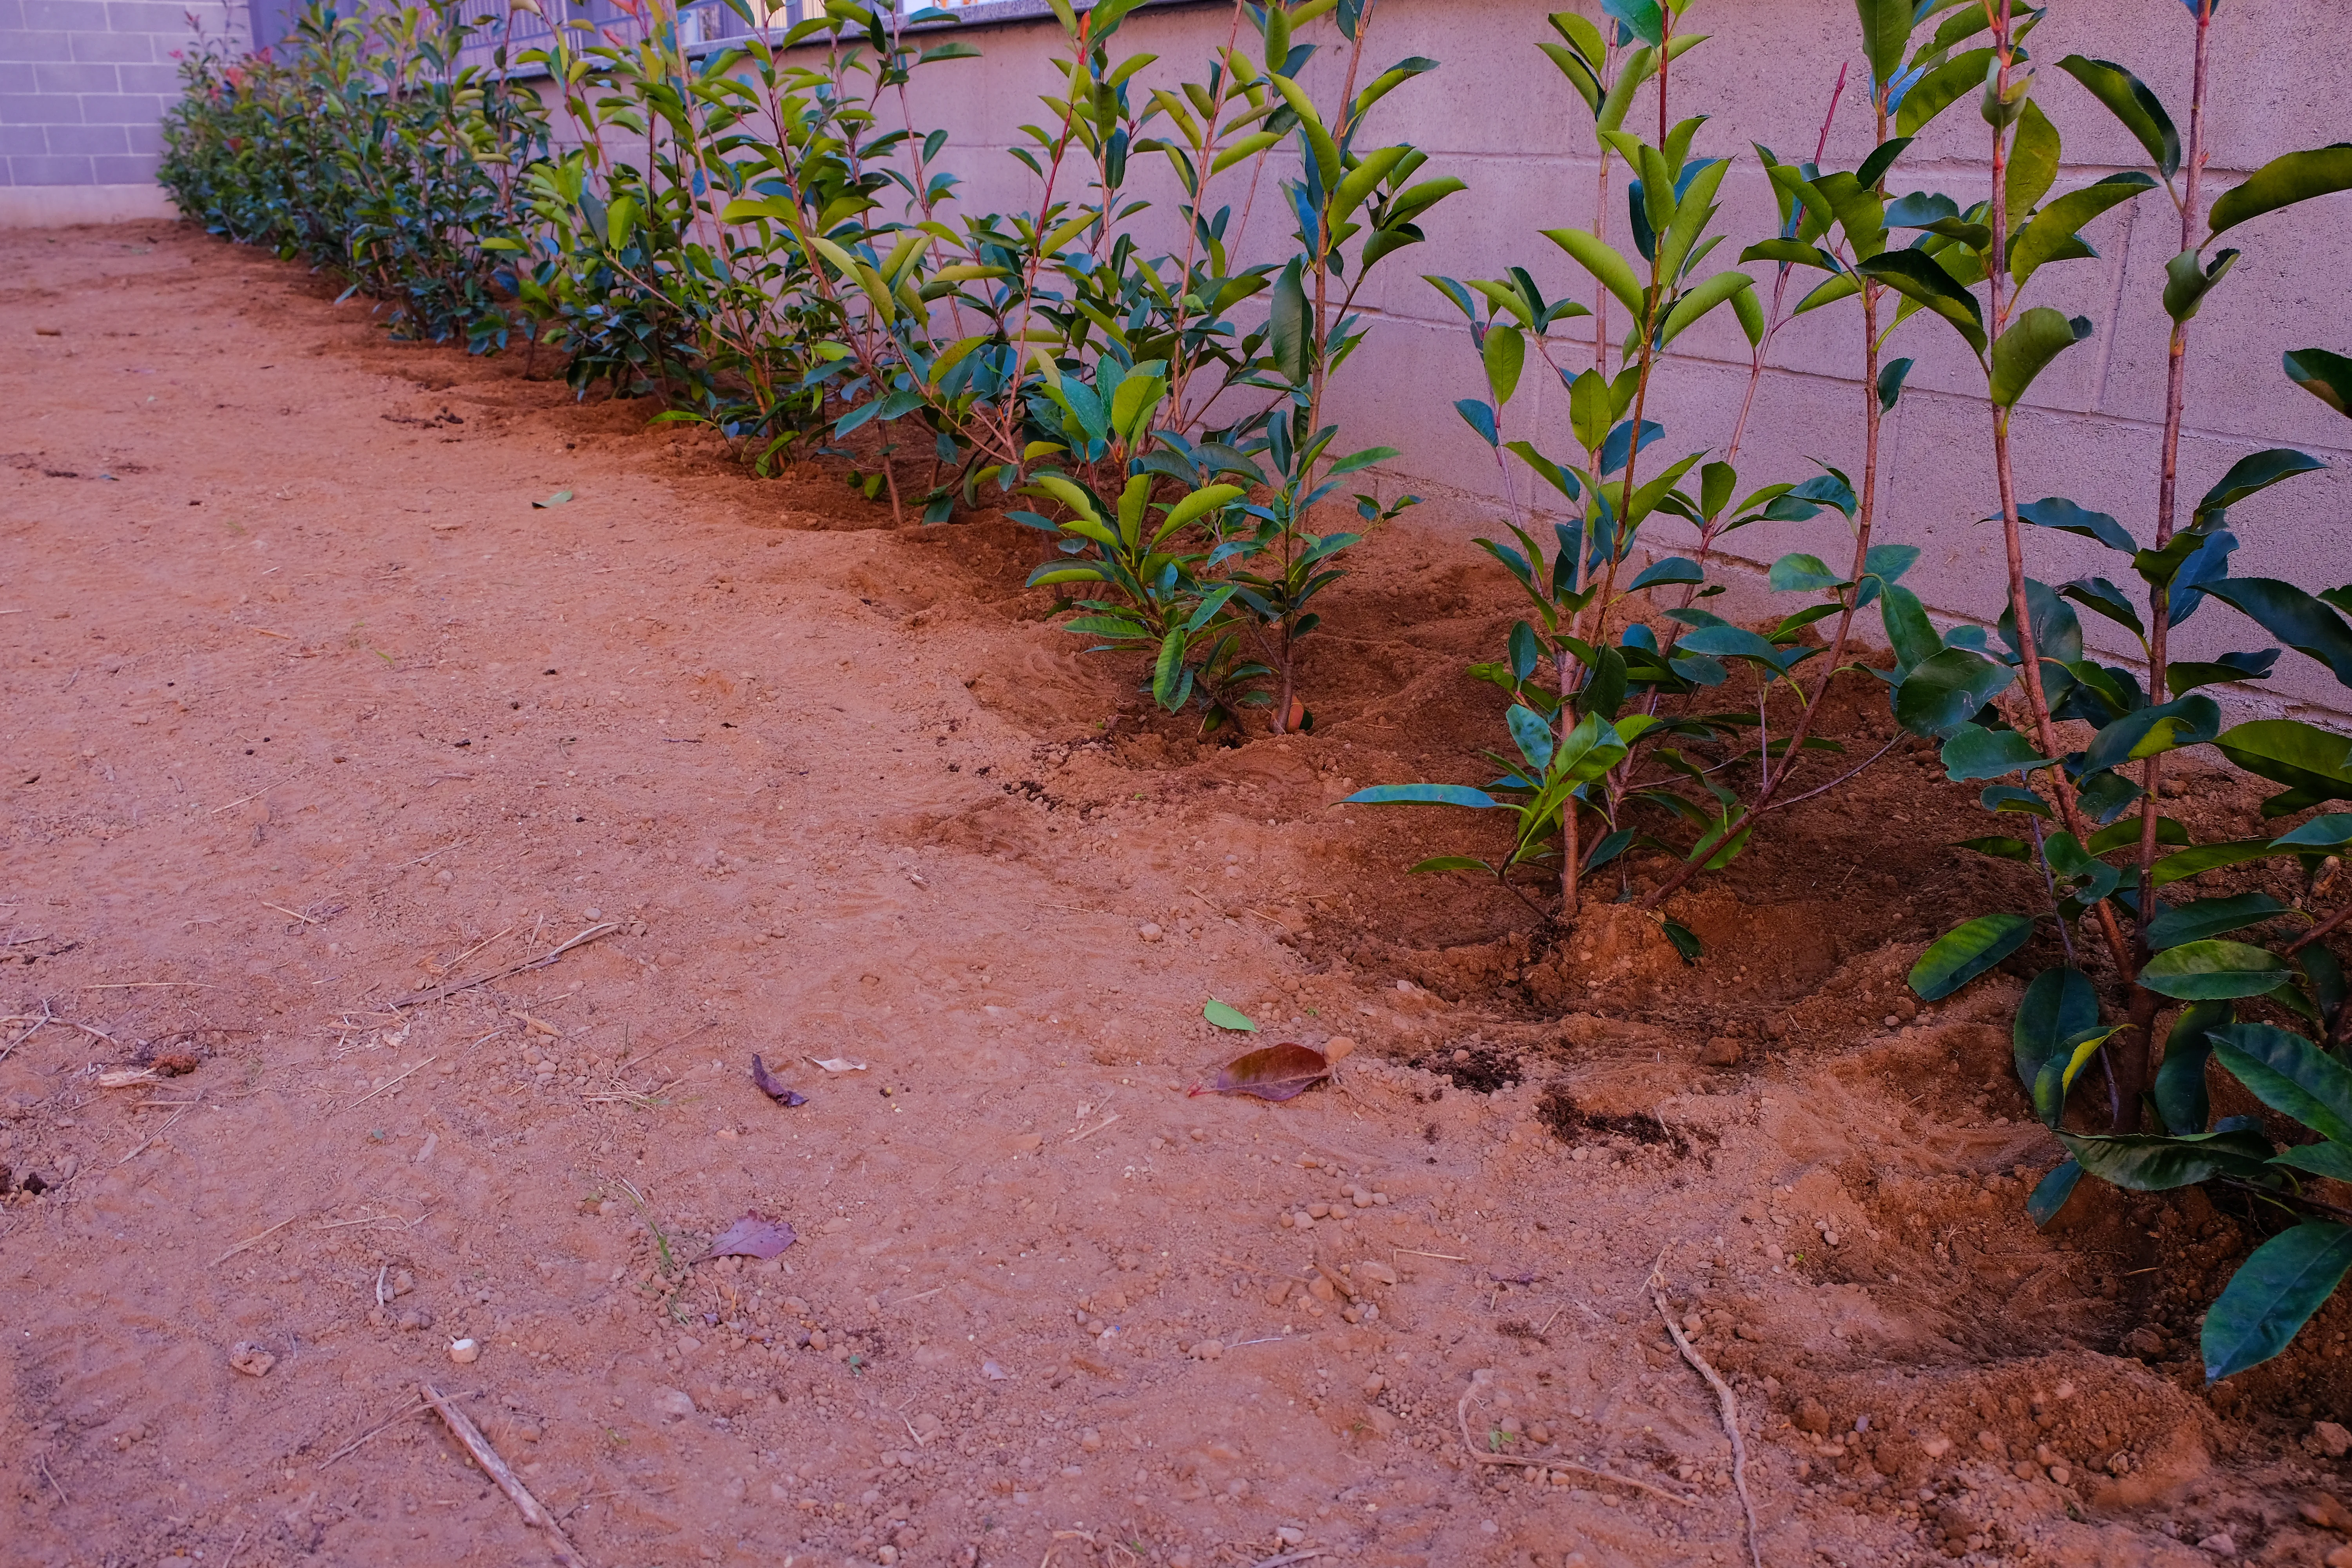
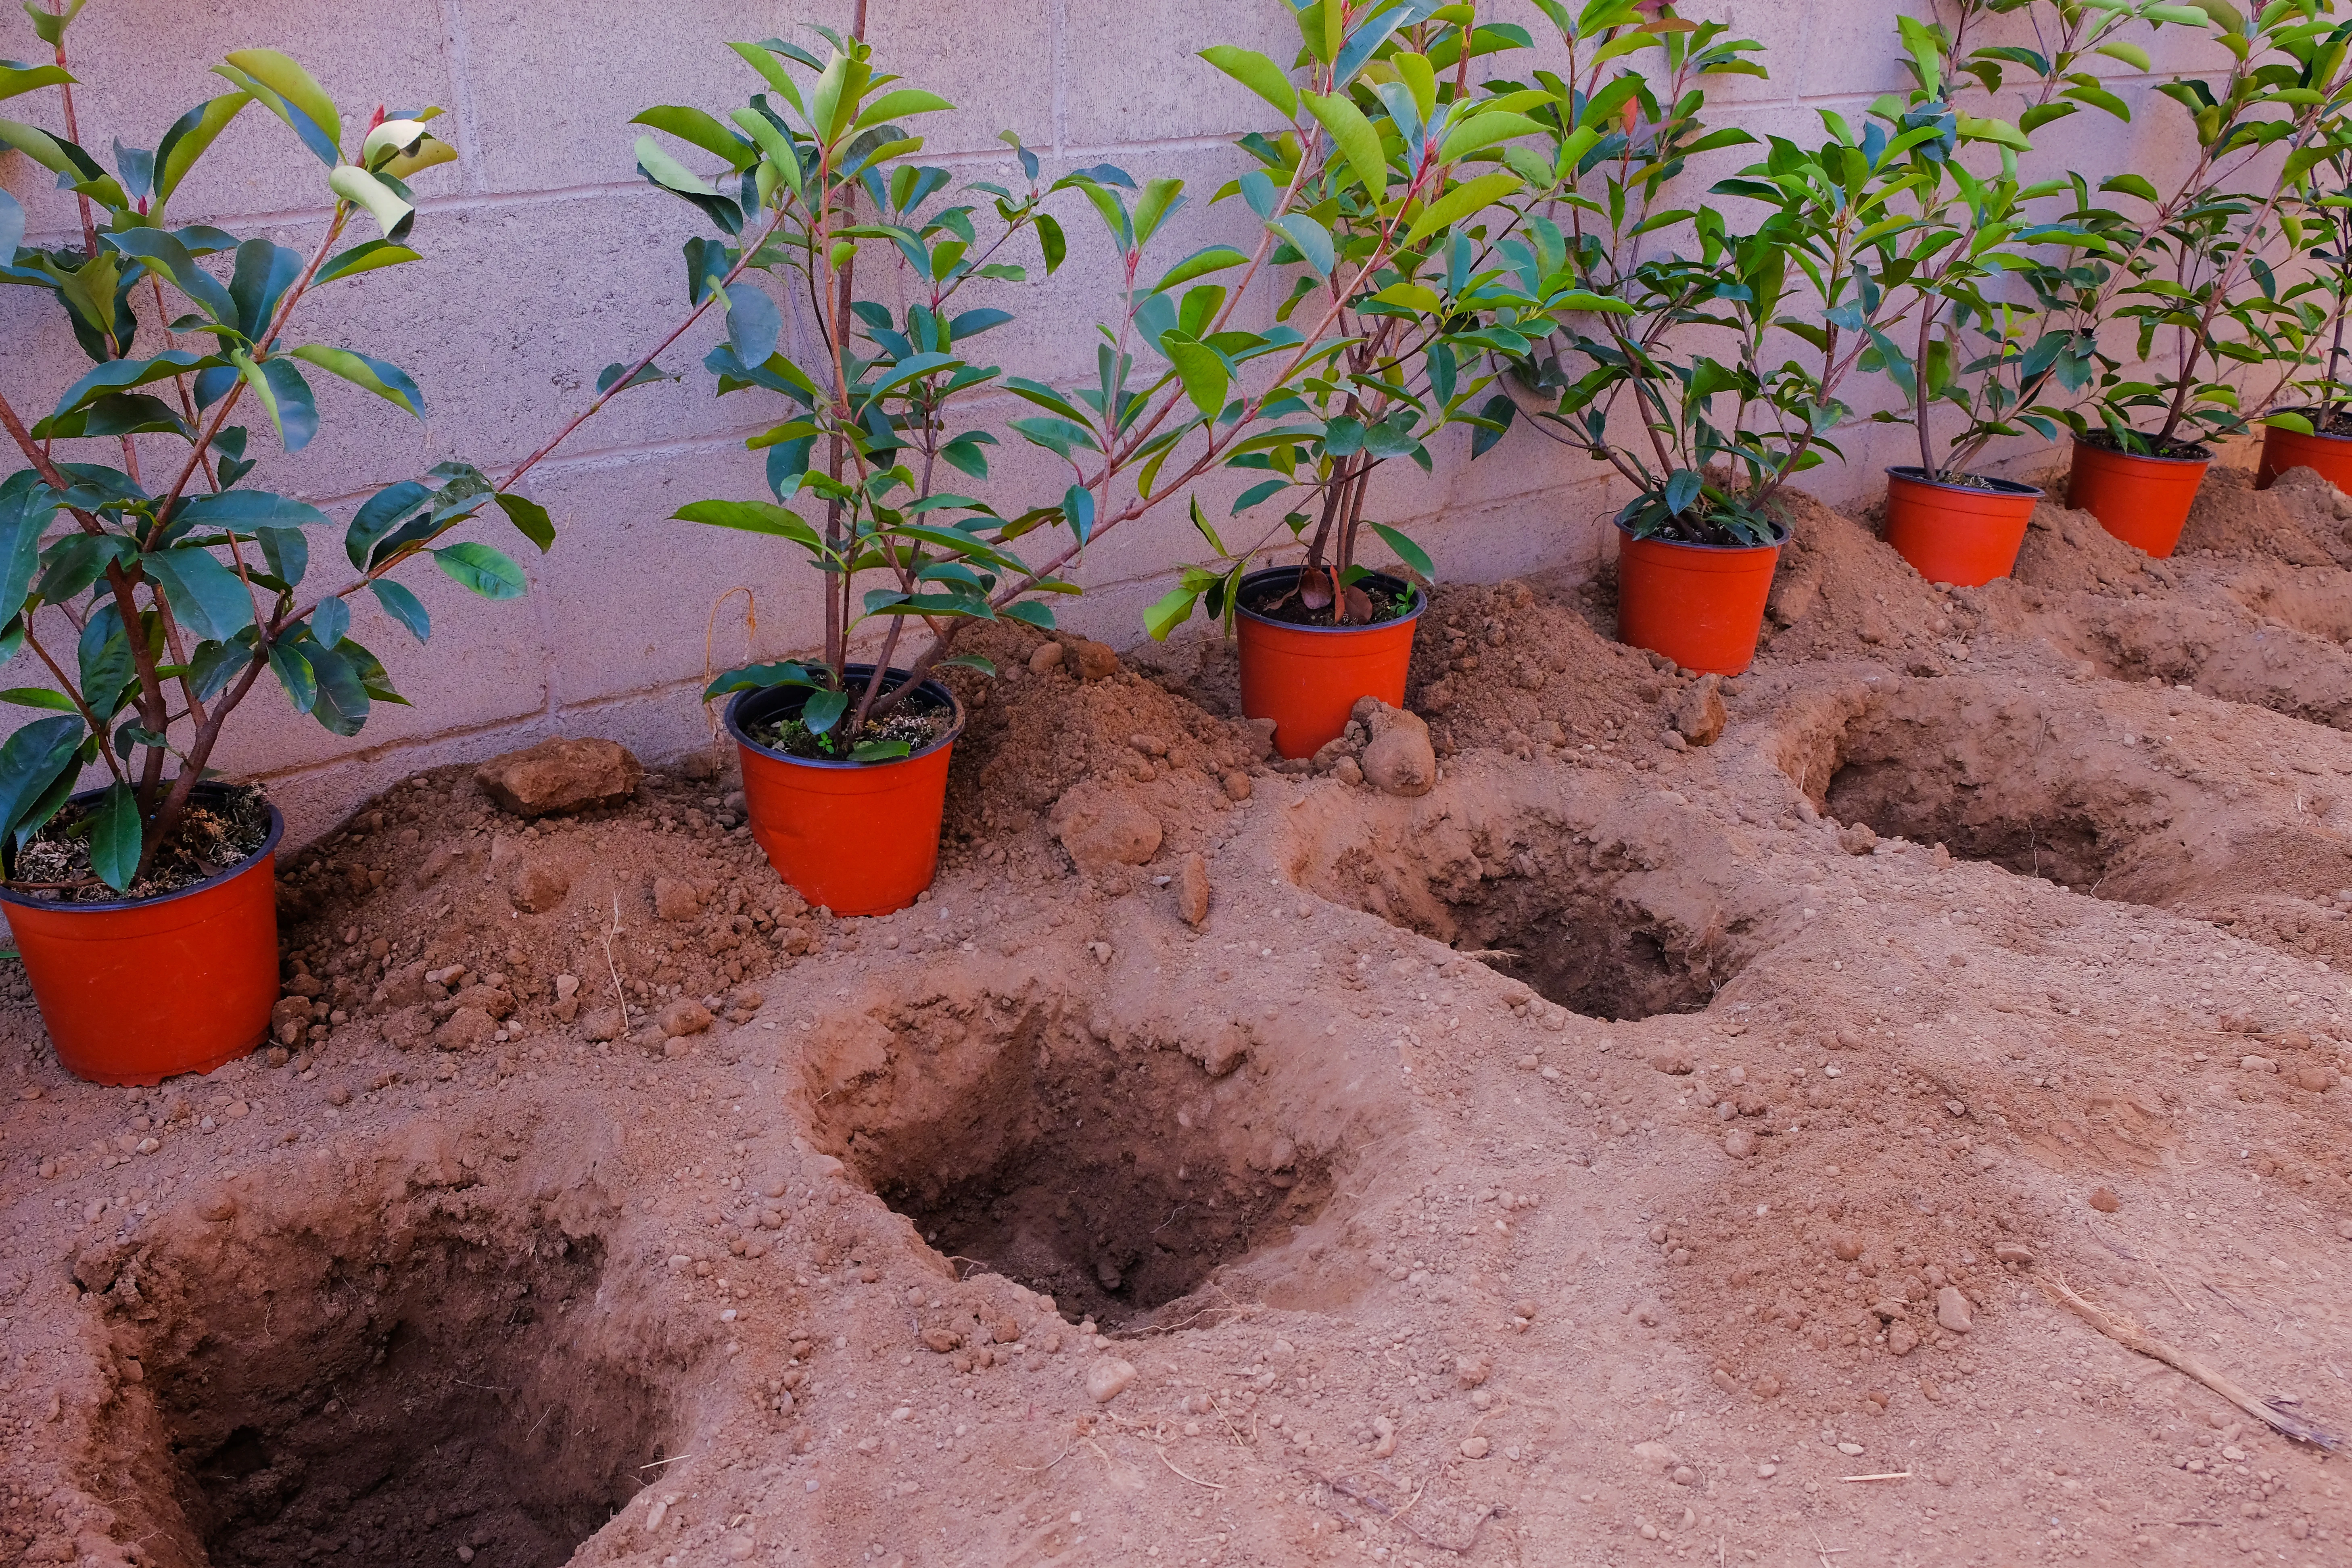
When it comes to planting a Photinia hedge in the UK, the best time of year to do so is during the spring months. Photinia hedges are hardy evergreen shrubs that thrive in the UK climate, and they are best planted in the spring when the soil is still moist and the temperatures are mild. Planting in the spring also allows the hedge to establish itself before the summer heat arrives. To ensure the best results, it is important to prepare the soil before planting. This includes removing any weeds, adding compost, and loosening the soil to ensure that the roots can spread easily. Once the soil is ready, dig a hole that is twice as wide as the root ball and just as deep. Place the root ball in the hole and backfill with soil, making sure to firm it down around the roots. Water the hedge thoroughly and mulch around the base to help retain moisture. With proper care and maintenance, your Photinia hedge will thrive and provide a beautiful evergreen backdrop to your garden.
Choosing the Right Location to Plant Out your a Photinia Hedge
When it comes to planting a Photinia Hedge in the UK, location is key. Photinia Hedges thrive in sunny, sheltered spots, so it's important to choose a spot that gets plenty of sunlight and is protected from strong winds. If you're planting in a garden, look for a spot that is away from trees and other large plants that could cast shade or block the wind. If you're planting in a container, make sure it's large enough to accommodate the hedge and is placed in a sunny spot. Additionally, it's important to ensure that the soil is well-draining and nutrient-rich, as this will help the hedge to thrive. With the right location and soil, your Photinia Hedge will be sure to flourish!
Preparing the Soil for Planting the an Photinia Hedge
When it comes to preparing the soil for planting a Photinia Hedge, the key is to ensure that the soil is well-drained and nutrient-rich. Start by digging a trench that is at least 30cm deep and wide enough to accommodate the roots of the hedge. Then, mix in a generous amount of compost or manure to the soil to provide essential nutrients. Finally, add a layer of mulch to the top of the soil to help retain moisture and suppress weeds. With these simple steps, you can create the perfect environment for your Photinia Hedge to thrive.
The Step-by-Step Guide on How to Plant a Photinia Hedge in the UK
If you're looking to add a touch of greenery to your garden, a Photinia Hedge is a great choice. This evergreen shrub is native to the UK and is easy to maintain, making it a popular choice for gardeners. Here's a step-by-step guide on how to plant a Photinia Hedge in the UK:
- Choose a sunny spot in your garden that has well-drained soil.
- Dig a hole that is twice as wide and deep as the root ball of the Photinia Hedge.
- Place the root ball in the hole and backfill with soil.
- Water the soil around the root ball to ensure it is evenly moist.
- Prune the Photinia Hedge to the desired shape and size.
- Apply a slow-release fertilizer to the soil around the hedge.
- Water the hedge regularly to keep the soil moist.
By following these steps, you can easily plant a Photinia Hedge in your garden and enjoy its lush foliage for years to come. With its evergreen leaves and vibrant red berries, a Photinia Hedge is sure to add a touch of beauty and colour to your garden. Plus, it's easy to maintain and requires minimal effort to keep it looking its best. So why not give it a try and add a Photinia Hedge to your garden today?
How Far apart must a Photinia Hedge be Planted to make a hedge?
When it comes to planting a Photinia Hedge, the key is to ensure that the plants are spaced far enough apart to allow for growth. Generally, for a short garden hedge, chose small plants (around 1-2 feet tall), space them about 2-3 feet apart. For a taller hedge, chose larger plants (3-4 feet tall), a spacing of 3-4 feet should be sufficient. The closer the plants, the quicker your hedge will fill in, but this might require more plants and increased costs. This will give the plants enough room to grow and fill out, creating a lush and full hedge. Additionally, it is important to ensure that the plants are planted at the same depth as they were in their original pot. This will help to ensure that the roots are able to establish themselves and the plants are able to thrive. With the right spacing and planting depth, a Photinia Hedge can be a beautiful addition to any garden.
Tips for Caring for Your Newly Planted a Photinia Hedge
If you’re looking to add a Photinia hedge to your garden, there are a few key tips to keep in mind. First, it’s important to choose the right variety of Photinia for your garden. Photinia hedges come in a variety of shapes and sizes, so it’s important to select one that will fit the space you have available. Additionally, it’s important to ensure that the soil is well-draining and that the hedge is planted in a sunny spot. Once planted, it’s important to water the hedge regularly and to prune it regularly to ensure that it grows in a neat and tidy shape. Finally, it’s important to use a fertilizer specifically designed for Photinia hedges to ensure that the hedge is healthy and thriving. With these tips in mind, you’ll be sure to have a beautiful and healthy Photinia hedge in your garden in no time!
What is the Best Fertilizer Feed for a Photinia Hedge and When to Apply it?
When it comes to caring for a Photinia Hedge in the UK, the best fertilizer feed to use is a balanced fertilizer with a ratio of 10-10-10. This fertilizer contains equal amounts of nitrogen, phosphorus, and potassium, which are essential for healthy plant growth. It should be applied in the spring and autumn months, when the hedge is actively growing. When applying the fertilizer, spread it evenly around the base of the hedge, avoiding contact with the leaves. Water the fertilizer in well to ensure that it is absorbed into the soil. This will help to promote healthy growth and ensure that the hedge is well nourished.
A Comprehensive Guide to Fertilizing the a Photinia Hedge
When it comes to fertilizing a Photinia hedge, it's important to understand the specific needs of the plant. Photinia hedges are evergreen shrubs that thrive in moist, well-drained soil and require regular fertilization to maintain their lush foliage. To ensure that your Photinia hedge is healthy and vibrant, it's important to use the right fertilizer and apply it correctly.
The best fertilizer for a Photinia hedge is a slow-release fertilizer that is specifically designed for evergreen shrubs. This type of fertilizer will provide the hedge with a steady supply of nutrients over a longer period of time, ensuring that the plant is well-nourished and healthy. When applying the fertilizer, it's important to spread it evenly around the base of the hedge and water it in thoroughly. This will ensure that the fertilizer is absorbed into the soil and reaches the roots of the plant. Additionally, it's important to fertilize the hedge at least once a year, preferably in the spring or early summer. This will ensure that the hedge has the nutrients it needs to grow and thrive.
By following these simple steps, you can ensure that your Photinia hedge is healthy and vibrant. With the right fertilizer and regular fertilization, you can enjoy a lush and beautiful hedge for years to come.
How Fast does a Photinia Hedge Grow
When it comes to a Photinia Hedge, UK gardeners have a lot to consider. A Photinia Hedge is a fast-growing evergreen shrub that can reach heights of up to 3 metres in just a few years. It is an ideal choice for creating a privacy screen or windbreak, and its glossy green foliage provides a beautiful backdrop for any garden. With proper care and maintenance, a Photinia Hedge can thrive in the UK climate and provide a stunning addition to any outdoor space.
How to Propagate a Photinia Hedge - List the most Common Methods
If you're looking to propagate a Photinia hedge in the UK, there are several methods you can use. The most common methods are layering, cuttings, and division. Layering is a simple and effective way to propagate a Photinia hedge. To do this, select a low-growing branch and bend it to the ground. Make a shallow cut in the stem and cover it with soil. The branch will then root and can be cut away from the parent plant. Cuttings are another popular method of propagating a Photinia hedge. Take a cutting from a healthy stem and place it in a pot of moist soil. Keep the soil moist and the cutting should root within a few weeks. Lastly, division is a great way to propagate a Photinia hedge. Dig up the parent plant and divide it into several sections. Each section should have a few roots and can be replanted in a new location.
By following these steps, you can easily propagate a Photinia hedge in the UK. With the right techniques and a bit of patience, you can create a beautiful and lush hedge that will last for years to come.
A Step-by-Step Guide on How to Propagate a Photinia Hedge Using the Layering Method
Step-by-Step Guide to Propagate a Photinia Hedge Using the Layering Method
Materials and Tools Needed:- A healthy Photinia plant
- Sharp, clean pruning shears
- U-shaped wire pins or wooden stakes
- High-quality potting soil
- Rooting hormone (optional)
- Identify the Right Stem: Look for a healthy, flexible stem that can easily be bent to the ground. The stem should be at least one year old but not more than two years old.
- Prepare the Soil: Clear a patch of soil beneath the stem you've chosen. Loosen the soil with a garden fork and work in some compost or well-rotted manure to improve its fertility.
- Bend and Scrape the Stem: Bend the stem gently down towards the prepared soil. Approximately halfway along the stem, make a small upward slanting cut about one-third of the way through the stem. You can apply some rooting hormone to this cut to encourage root growth, but this is optional.
- Pin the Stem: Press the cut part of the stem into the soil and secure it with a U-shaped wire pin or a wooden stake. Ensure the tip of the stem is still above ground.
- Cover and Water: Cover the pinned area with soil, leaving the tip of the stem exposed. Water the area thoroughly.
- Wait for Roots to Develop: Over the next few months, the stem should develop roots at the point where it was cut and buried. Keep the soil moist during this time.
- Separate the New Plant: Once the stem has developed a healthy set of roots, usually after a few months, you can cut it away from the parent plant using your pruning shears. Be sure to leave some foliage on the new plant.
- Planting: Plant the new Photinia in a desired location or pot. Water thoroughly and regularly until it's well-established.
- The best time to carry out this propagation method is in late winter or early spring.
- Keep an eye out for pests or diseases, especially Leaf Spot, which can affect Photinias.
- Patience is key – this process can take several months to a year before you have a new, fully rooted plant.
Potential Problems: If the stem does not stay in contact with the soil, it may not develop roots. Make sure it's securely pinned down. Overwatering can lead to Root Rot. Ensure your soil is well-draining.
Step-by-Step Guide on How to Grow a Photinia Hedge from Seed
Now that you know the brand voice, let's dive into the topic of growing a Photinia Hedge from seed. Photinia Hedge is a popular choice for gardeners in the UK, as it is easy to grow and provides a beautiful backdrop for any garden. To get started, you'll need to purchase Photinia seeds from a reputable supplier. Once you have the seeds, you'll need to prepare the soil for planting. Make sure to mix in plenty of compost and fertilizer to ensure that the soil is nutrient-rich and well-draining. Once the soil is ready, you can begin planting the seeds. Plant the seeds about 1/4 inch deep and cover them with a thin layer of soil. Water the seeds regularly and keep the soil moist until the seedlings emerge. Once the seedlings have grown to about 6 inches tall, you can begin to prune and shape the hedge. Prune the hedge regularly to maintain its shape and encourage healthy growth. With the right care and attention, you can have a beautiful Photinia Hedge in your garden in no time!
A Comprehensive Guide to Growing a Photinia Hedge from Seed
- Introduction to Photinia: Photinia is a genus of evergreen shrubs, known for their vibrant red and green foliage. They make an excellent hedge due to their dense growth and attractive appearance. They're also quite hardy and can withstand a variety of climates, though they prefer milder temperatures.
- Optimal Conditions for Growth: Photinia thrives in well-drained soil and full sun to partial shade. They are tolerant of a range of soil types, including clay, loam, and sandy soils. The ideal pH is somewhat acidic to neutral (5.5 to 7).
- Seed Selection and Storage: Choose fresh, high-quality seeds from a reputable supplier. Store them in a cool, dry place until you're ready to plant.
- Soil Preparation: Before planting, prepare the soil by removing weeds and other debris. If your soil is heavy clay or very sandy, add compost or well-rotted manure to improve its structure and fertility.
-
Planting Your Seeds:
- Sow your seeds in a seed tray filled with good quality compost.
- The seeds should be planted about 1/8 inch deep and spaced at least 2 inches apart.
- Cover the seeds lightly with compost and water gently but thoroughly.
- Watering and Fertilizing: Water regularly, keeping the compost moist but not waterlogged. Once the seedlings have developed their first set of true leaves, apply a balanced liquid fertilizer every two weeks.
- Common Problems: Photinia is relatively pest-resistant, but watch out for Leaf Spot—a fungal disease that causes red or Black Spots on the leaves. Prevent this by ensuring good air circulation around your plants and avoid overhead watering. If Leaf Spot does occur, remove and dispose of affected leaves and consider applying a fungicide.
- Pruning and Maintenance: Once your Photinia plants are established, prune them in early spring or late summer to maintain their shape and encourage bushier growth. Regularly remove any dead or diseased branches.
- Final Step – Transplanting: When your seedlings are about a foot tall, and the risk of frost has passed, they can be transplanted into their final position. For a hedge, plant them 2-3 feet apart (for small plants) or 3-4 feet apart (for larger plants).
Remember, growing a Photinia hedge from seed requires patience—it will likely take several years before you have a fully grown, dense hedge. But with proper care and attention, you'll eventually have a beautiful, vibrant addition to your garden.
A Step-by-Step Guide on How to Propagate a Photinia Hedge Using the Cutting Method
If you're looking to propagate a Photinia hedge in the UK, then you've come to the right place. Photinia hedges are a popular choice for gardeners in the UK, as they are easy to maintain and provide a beautiful backdrop for any garden. To propagate a Photinia hedge using the cutting method, you'll need to follow a few simple steps. First, select a healthy stem from the existing hedge and cut it at a 45-degree angle. Then, remove any leaves from the lower half of the stem and dip it in rooting hormone. Finally, plant the stem in a pot filled with moist soil and keep it in a warm, sunny spot. With the right care and attention, your Photinia hedge will be thriving in no time!
Step-by-Step Guide to Propagate a Photinia Hedge Using the Cutting Method
Materials and Tools Needed:- A healthy Photinia plant
- Sharp, clean pruning shears or a knife
- Rooting hormone (optional but recommended)
- A pot or container with drainage holes
- High-quality potting soil or a mix of perlite and peat moss
- A plastic bag or propagator
- Select the Right Time: The best time to take cuttings from Photinia is in late summer or early autumn.
- Prepare the Pot: Fill your pot with the potting soil or perlite-peat moss mix. Water it thoroughly until it's evenly moist.
- Take Your Cuttings: Select a healthy, vigorous branch on your Photinia plant. Using your shears or knife, cut a 4-6 inch section from the end of the branch, just below a leaf node. Make sure your cutting has at least 3-4 leaves at the top. Remove any lower leaves.
- Apply Rooting Hormone: Dip the cut end of your cutting into rooting hormone. This step is optional but can significantly increase your chances of successful root development.
- Plant the Cutting: Make a hole in your potting mix with a pencil or your finger. Insert the cut end of your cutting into the hole, burying about half of it. Firm the soil around the cutting.
- Cover the Pot: Place a plastic bag over the pot to create a mini greenhouse, or use a propagator if you have one. This helps maintain humidity around the cutting.
- Care for Your Cutting: Place the pot in a location with bright, indirect light. Keep the soil moist, but not waterlogged. After 4-6 weeks, check for root development by gently tugging on the cutting. If it resists, roots have likely formed.
- Transplant the Cutting: Once a healthy root system has developed, the new Photinia plant can be transplanted into a larger pot or directly into the garden.
- Keep your tools clean to prevent the spread of disease.
- Be patient. Root development can take several weeks.
- Once your new Photinia plants are established, care for them as you would any Photinia shrub, with regular watering and annual pruning for shape.
Potential Problems When Growing a Photinia Hedge in the UK and Solutions
When it comes to growing a Photinia Hedge in the UK, there are a few potential problems that gardeners should be aware of. Firstly, Photinia Hedges are prone to fungal diseases, such as Leaf Spot and dieback, which can cause the leaves to turn yellow and drop off. To prevent this, it is important to ensure that the hedge is planted in well-draining soil and is not over-watered. Additionally, Photinia Hedges require regular pruning to maintain their shape and size. Pruning should be done in late winter or early spring, before the new growth begins. Finally, Photinia Hedges are susceptible to pests, such as Aphids and scale insects. To protect the hedge from pests, it is important to regularly inspect the leaves and branches for signs of infestation and take appropriate action if necessary.
By following these simple steps, gardeners in the UK can successfully grow a Photinia Hedge and enjoy its beautiful foliage for years to come. With the right care and attention, a Photinia Hedge can be a stunning addition to any garden.
The Common Diseases and Pests which Affect a Photinia Hedge
When it comes to a Photinia Hedge, one of the most common issues gardeners in the UK face is the presence of pests and diseases. These can range from fungal diseases such as Leaf Spot and Powdery Mildew, to pests like Aphids and scale insects. To protect your Photinia Hedge from these common issues, it is important to regularly inspect the plants for signs of damage and take action as soon as possible. Pruning away affected branches and leaves can help to reduce the spread of disease, while using insecticidal soap or horticultural oil can help to control pests. Additionally, providing adequate water and nutrients to the plants can help to keep them healthy and strong, making them more resistant to disease and pests.
Common Diseases and Pests Affecting Photinia Hedge
- Leaf Spot (Entomosporium mespili): This is a fungal disease that causes red or brown spots on the leaves, which can lead to leaf drop. To treat, remove and dispose of affected leaves, avoid overhead watering, and apply a fungicide if necessary. Prevent it by ensuring good air circulation around your plants.
- Powdery Mildew: This fungus appears as a white, powdery coating on leaves and stems. It can cause leaf curling and yellowing. Treat by removing affected parts and applying a fungicide. Avoid overcrowding and ensure good air circulation to prevent it.
- Fire Blight: This bacterial disease causes wilting, blackening, and a 'burned' appearance. Prune and dispose of infected branches well below the infected area. Ensure tools are sterilized before and after use to prevent spread. Regularly check for symptoms, especially in spring.
- Scales: These tiny pests attach themselves to the stems and leaves, sucking sap and weakening the plant. They excrete a sticky substance called honeydew, which can lead to sooty mold. Control them by introducing natural predators, using horticultural oil, or applying an insecticide.
- Spider Mites: Notable for their tiny size and ability to spin fine webs, these mites damage plants by piercing leaves and sucking sap. Infected leaves may turn yellow and fall off. Use a strong spray of water to dislodge mites or use a miticide if infestation is severe.
- Aphids: These small, soft-bodied insects suck sap from the plant, causing distorted growth and a sticky residue which may lead to sooty mold. They can be controlled by natural predators like ladybugs, or by using insecticidal soap or neem oil.
- Caterpillars: Caterpillars can defoliate a Photinia hedge if present in large numbers. Handpick caterpillars off plants when possible or use a biological control like Bacillus thuringiensis (Bt), a naturally occurring bacterium that kills caterpillars but is safe for other wildlife.
A Complete Guide to Pruning a Photinia Hedge in the UK
When it comes to pruning a Photinia hedge in the UK, there are a few key steps to follow. First, it's important to assess the size and shape of the hedge. This will help you determine the best pruning technique for your particular hedge. Next, use sharp pruning shears to trim the hedge, making sure to cut at an angle to encourage new growth. Be sure to remove any dead or diseased branches, as well as any branches that are growing in an undesirable direction. Finally, use a hedge trimmer to shape the hedge and give it a neat and tidy appearance. Following these steps will ensure that your Photinia hedge is healthy and thriving.
Why Do we Need to Prune a Photinia Hedge?
When it comes to pruning a Photinia hedge, it's important to understand why it needs to be done in the first place. Photinia hedges are a popular choice for gardeners in the UK, as they are easy to maintain and provide a beautiful backdrop for any garden. However, they do require regular pruning to keep them looking their best. Pruning a Photinia hedge helps to promote healthy growth, encourages new foliage, and keeps the hedge looking neat and tidy. It also helps to prevent the hedge from becoming overgrown and unmanageable. Pruning a Photinia hedge is a simple process that can be done with a pair of garden shears or a hedge trimmer. Start by removing any dead or damaged branches, then trim the sides of the hedge to create a neat and even shape. Finally, trim the top of the hedge to the desired height. With regular pruning, you can keep your Photinia hedge looking its best and ensure that it remains a beautiful feature in your garden.
When is the Best Time to Prune a Photinia Hedge?
When it comes to pruning a Photinia Hedge, timing is everything. Pruning at the wrong time can cause damage to the hedge and reduce its lifespan. To ensure that your Photinia Hedge remains healthy and vibrant, it is important to prune it at the right time. The best time to prune a Photinia Hedge in the UK is during the late winter or early spring, when the hedge is dormant. This will ensure that the hedge is not damaged by the cold weather and will promote healthy growth in the spring. Pruning during this time will also help to maintain the shape of the hedge and keep it looking neat and tidy. It is important to remember to use sharp pruning shears and to remove any dead or diseased branches to ensure that the hedge remains healthy. With the right timing and proper pruning techniques, you can ensure that your Photinia Hedge remains healthy and vibrant for years to come.
A Step by Step Guide on How to Prune a Photinia Hedge
Now that you know the brand voice, let's get into the specifics of pruning a Photinia hedge. Pruning a Photinia hedge is a great way to keep it looking neat and tidy, and it's a relatively simple process. To begin, you'll need to gather the necessary tools: a pair of sharp pruning shears, a pair of loppers, and a pruning saw. Once you have the tools, you can start pruning. Start by removing any dead or diseased branches, then trim the hedge to the desired shape and size. Finally, use the pruning shears to trim the sides of the hedge to create a neat and even look. With these simple steps, you can easily maintain a healthy and attractive Photinia hedge in your garden.
A Comprehensive Guide to Pruning a Photinia Hedge
Necessary Tools:- Sharp, clean pruning shears for small branches
- A pruning saw for larger branches
- A hedge trimmer for shaping (optional but helpful)
- Gloves to protect your hands
- Prepare Your Tools: Make sure your tools are sharp and clean. Dirty or blunt tools can damage your plants and spread disease.
- Choose the Right Time: The best time to prune Photinia is in early spring or late summer. Avoid pruning in late fall or winter as the new growth may be damaged by frost.
- Identify Old Growth: Start by identifying old growth (thick, woody stems) and new growth (young, green stems). It's important to maintain a balance between the two.
- Remove Dead or Diseased Branches: Before shaping the hedge, remove any dead or diseased branches. Cut these back to healthy wood, making your cut just above a leaf node or bud.
- Trim for Shape: Use your hedge trimmer (or shears, if you don't have a trimmer) to shape your hedge. Cut back new growth to a point that allows light to reach the inner and lower parts of the plant. The base of the hedge should be wider than the top to allow light to reach all parts of the plant.
- Thin Out the Hedge: If your hedge is very dense, thin it out by removing some of the branches entirely. This improves air circulation and overall plant health.
- Clean Up: After pruning, collect and dispose of all cuttings. Leaving them in place can encourage disease.
- Don't prune more than one-third of the plant at a time. If your hedge is overgrown, it may take several seasons to get it back to the desired size and shape.
- To maintain a dense, bushy hedge, trim little and often rather than doing a heavy prune once a year.
- After pruning, give your Photinia a feed with a balanced fertilizer to help it recover faster.
How Much can I Prune Away a Mature a Photinia Hedge
When it comes to pruning a mature Photinia hedge, it's important to understand the basics of pruning and the specific needs of the plant. Photinia hedges are evergreen shrubs that can grow up to 3 metres in height and width, making them an ideal choice for creating a privacy screen or boundary. Pruning is essential for maintaining the shape and size of the hedge, and it should be done at least once a year. When pruning a mature Photinia hedge, it's important to remember that you can only prune away up to one-third of the foliage. Pruning too much can damage the plant and reduce its lifespan. To ensure the health of the hedge, use sharp pruning shears to make clean cuts and avoid cutting too close to the stem. Additionally, it's important to prune the hedge evenly on both sides to maintain its shape and symmetry. With the right pruning techniques, you can keep your Photinia hedge looking healthy and vibrant for years to come.
How to Hard Prune a Mature a Photinia Hedge
When it comes to hard pruning a mature Photinia hedge, it's important to understand the basics of the process before getting started. Photinia hedges are a popular choice for gardeners in the UK, as they are easy to maintain and provide a beautiful backdrop for any outdoor space. However, if left unchecked, they can become overgrown and unruly. Hard pruning is a great way to keep your Photinia hedge looking neat and tidy. Here's a step-by-step guide to hard pruning a mature Photinia hedge:
A Detailed Guide to Hard Pruning an Overgrown Photinia Hedge
Necessary Tools:- Sharp, clean pruning shears for small branches
- A pruning saw for larger branches
- Loppers for medium-sized branches
- Gloves to protect your hands
- Choose the Right Time: The best time to hard prune Photinia is in early spring, just before the plant begins its main growth period.
- Prepare Your Tools: Make sure your pruning tools are sharp and clean. Dirty or blunt tools can damage your plants and spread disease.
- Plan Your Prune: Before you start cutting, take a moment to decide on the shape and size you want your hedge to be. Remember, it's better to prune a little at a time – you can always cut more later.
- Start Pruning: Begin by removing any dead or diseased branches. Cut these back to the base of the plant or to healthy wood, making your cut just above a leaf node or bud.
- Prune for Size: Once the unhealthy wood is removed, start reducing the size of your hedge. Cut the longest branches back to a point that aligns with your desired hedge size. If your hedge is extremely overgrown, you may need to do this over several seasons.
- Thin Out the Hedge: If your hedge is very dense, remove some of the older, inner branches. This improves air circulation and allows light to reach the center of the hedge, encouraging new growth.
- Clean Up: After pruning, collect and dispose of all cuttings. Leaving them in place can encourage disease.
- Encourage New Growth: After hard pruning, water your Photinia well and apply a balanced fertilizer. This encourages strong, healthy new growth.
- Maintain Your Hedge: Throughout the growing season, keep an eye on your hedge. Trim off any growth that's out of place, and remove any dead or diseased wood as soon as you spot it.
- Always make your cuts at a slight angle to prevent water from sitting on the cut surface, which can lead to rot.
- If your Photinia hedge is extremely overgrown, consider hiring a professional. Hard pruning can be a big job, and doing it incorrectly can harm or even kill your plants.
By following these steps, you can easily hard prune a mature Photinia hedge and keep it looking neat and tidy. Hard pruning is an effective way to maintain the shape and size of your hedge, while also promoting healthy growth. With regular pruning, your Photinia hedge will remain a beautiful and vibrant addition to your garden for years to come.
How to Care for a Photinia Hedge after Pruning
When it comes to caring for a Photinia Hedge after pruning, there are a few key steps to follow. First, it's important to prune the hedge at the right time of year. Photinia Hedges should be pruned in late winter or early spring, before new growth begins. This will ensure that the hedge remains healthy and vigorous. After pruning, it's important to fertilize the hedge to promote healthy growth. Use a balanced fertilizer that is specifically designed for Photinia Hedges and apply it according to the instructions on the package. Finally, water the hedge regularly to keep the soil moist and promote healthy growth. Water the hedge deeply and evenly, ensuring that the soil is moist but not soggy. Following these steps will help ensure that your Photinia Hedge remains healthy and vigorous for years to come.
How to avoid Pruning too Much off my a Photinia Hedge
When it comes to pruning a Photinia hedge, it's important to avoid pruning too much. Photinia hedges are a popular choice for gardeners in the UK, as they are easy to maintain and provide a beautiful backdrop for any garden. However, if you prune too much, you can damage the hedge and reduce its lifespan. To avoid this, start by removing any dead or diseased branches, then prune the hedge back to the desired shape. Make sure to use sharp pruning shears and cut at a 45-degree angle to ensure a clean cut. Prune the hedge in the spring or summer, as this is when the hedge is most active and can recover quickly from pruning. Finally, avoid pruning more than one-third of the hedge at a time, as this can cause shock and damage the plant. By following these simple steps, you can ensure that your Photinia hedge remains healthy and vibrant for years to come.
An Overview of Pruning a Photinia Hedge
When it comes to pruning a Photinia hedge, the brand voice provides clear and concise instructions to ensure that readers can easily follow and implement the advice. Photinia hedges are a popular choice for gardeners in the UK, as they are easy to maintain and provide a beautiful backdrop for any garden. Pruning a Photinia hedge is essential to keep it healthy and looking its best. To begin, it is important to identify the shape and size of the hedge that you would like to achieve. Once you have determined the desired shape and size, you can begin pruning. Start by removing any dead or diseased branches, then trim the sides of the hedge to create a neat and even shape. Finally, trim the top of the hedge to the desired height. With regular pruning, you can ensure that your Photinia hedge remains healthy and looking its best.
In conclusion, a Photinia Hedge is a great addition to any garden in the UK. When planted in the right location and cared for properly, it can provide a beautiful and lush backdrop to any outdoor space. When choosing the best type of Photinia Hedge to grow, consider the climate and soil conditions of the area. Planting out your Photinia Hedge in the right location and at the right time of year is essential for its success. Additionally, it is important to understand how to propagate, prune, and care for your Photinia Hedge in order to ensure its health and longevity. With the right knowledge and care, a Photinia Hedge can be a stunning and low-maintenance addition to any garden.
Frequently Asked Questions About a Photinia Hedge
FAQ Questions and Answers:
- Q: What is the best type of Photinia Hedge to grow in the UK? A: The best type of Photinia Hedge to grow in the UK is the Red Robin Photinia, which is a fast-growing evergreen shrub with glossy, dark green leaves and bright red new growth. It is a popular choice for hedges due to its hardiness and ability to tolerate a wide range of conditions.
- Q: When is the best time of the year to plant a Photinia Hedge in the UK? A: The best time of the year to plant a Photinia Hedge in the UK is in the spring or autumn, when the soil is moist and temperatures are mild. Planting in the spring will give the hedge plenty of time to establish itself before the winter months.
- Q: Choosing the right location to plant out your Photinia Hedge? A: When choosing a location for your Photinia Hedge, it is important to consider the amount of sunlight and shade the area receives, as well as the soil type and drainage. Photinia Hedges prefer full sun and well-drained soil, so it is best to avoid areas that are prone to waterlogging.
- Q: How far apart must a Photinia Hedge be planted to make a hedge? A: When planting a Photinia Hedge, it is important to space the plants at least 1.5 metres apart to ensure that the hedge will be dense and full.
- Q: How fast does a Photinia Hedge grow? A: A Photinia Hedge can grow up to 1 metre per year, making it a fast-growing evergreen shrub.
- Q: How to propagate a Photinia Hedge - list the most common methods? A: The most common methods of propagating a Photinia Hedge are by taking cuttings, layering, or dividing the rootball. Taking cuttings is the easiest and most successful method, as it requires minimal effort and produces the best results.
- Q: What are the common diseases and pests which affect a Photinia Hedge? A: Common diseases and pests which affect a Photinia Hedge include Aphids, scale insects, and Powdery Mildew. It is important to regularly inspect your hedge for signs of disease or pests, and take action to treat any infestations as soon as possible. Additionally, ensuring proper air circulation and avoiding over-watering can help prevent these issues. Overall, the Photinia Hedge is a resilient plant that is relatively low maintenance, making it a popular choice for gardeners in the UK. With proper care and attention, your Photinia Hedge will provide a beautiful addition to your garden for years to come.
How to Prune Climbing Vines
List by Variety
- How to Prune Actinidia
- How to Prune Akebia
- How to Prune Bougainvillea
- How to Prune Campsis
- How to Prune Celastrus
- How to Prune Chilean Glory Vine
- How to Prune Clematis Armandii
- How to Prune Clematis Montana
- How to Prune Climbing Rose
- How to Prune Hedera GoldHeart
- How to Prune Honeysuckle
- How to Prune Hydrangea Petiolaris
- How to Prune Ivy
- How to Prune Japanese Wisteria
- How to Prune Morning Glory
- How to Prune Parthenocissus
- How to Prune Persian Ivy Hedera Colchica
- How to Prune Schisandra
- How to Prune Star Jasmine
- How to Prune Sweet Peas
- How to Prune True Jasmine
- How to Prune Virginia Creeper
- How to Prune Wisteria
How to Prune Hedges
List by Variety
- How to Prune an Arborvitae Hedge
- How to Prune a Barberry Hedge
- How to Prune a Beech Hedge
- How to Prune a Boxwood Hedge
- How to Prune a Butterfly Bush Hedge
- How to Prune a Cotoneaster Hedge
- How to Prune an English Lavender Hedge
- How to Prune an Escallonia Hedge
- How to Prune an Euonymus-Hedge
- How to Prune a Firethorn Hedge
- How to Prune a Forsythia Hedge
- How to Prune a Griselinia Hedge
- How to Prune a Hawthorn Hedge
- How to Prune a Holly Hedge
- How to Prune a Hornbeam Hedge
- How to Prune a Laurel Hedge
- How to Prune a Leylandii Hedge
- How to Prune a Lilac Hedge
- How to Prune a Maple Leaf Viburnum Hedge
- How to Prune a Photinia Hedge
- How to Prune a Pink Ramanus Rose Hedge
- How to Prune a Privet Hedge
- How to Prune a Pyracantha Hedge
- How to Prune a Spirea Hedge
- How to Prune a Thuja Hedge
- How to Prune a Viburnum Hedge
- How to Prune a Western Red Cedar Hedge
- How to Prune a Yew Hedge
How to Prune Shrubs
List by Variety
- How to Prune an Abelia Shrub
- How to Prune an Abutilon
- How to Prune an Acer / Japanese-Maple
- How to Prune an Amelanchiers
- How to Prune an Apple-Tree
- How to Prune an Arbovitae Shrub
- How to Prune an Arbutus
- How to Prune an Aucuba
- How to Prune a Azalea Mollis
- How to Prune Azaleas
- How to Prune a Bay Tree Shrub
- How to Prune a Berberis Darwinii
- How to Prune Berberis Deciduous Types
- How to Prune a Boxwood Shrubs
- How to Prune a Brachyglottis Senecio
- How to Prune a Buddleia Alternifolia
- How to Prune Buddleias Butterfly Bushes
- How to Prune a Buddleja Globosa
- How to Prune a Callicarpa
- How to Prune a Camellia
- How to Prune a Caryopteris
- How to Prune a Catalpa Bignonioides Aurea
- How to Prune Ceanothus Deciduous Types
- How to Prune Ceanothus Evergreen Types
- How to Prune a Ceratostigma
- How to Prune a Chaenomeles
- How to Prune a Choisya
- How to Prune a Cistus
- How to Prune a Clematis
- How to Prune a Cornus
- How to Prune a Cotinus Royal Purple
- How to Prune a Cytisus Scoparius
- How to Prune a Exochorda x Macrantha
- How to Prune a Forsythia
- How to Prune a Hebe
- How to Prune a Hydrangeas
- How to Prune Juniper Shrubs
- How to Prune a Lavatera
- How to Prune Lilac Bushes
- How to Prune a Mugo Pine
- How to Prune Rose Bushes
- How to Prune Spirea Shrubs
- How to Prune Viburnum Shrubs
- How to Prune a Weigela
- How to Prune a Yew
How to Prune Trees
List by Variety
- How to Prune a Apple Tree
- How to Prune a Apricot Tree
- How to Prune a Ash Tree
- How to Prune a Birch Tree
- How to Prune a Cherry Tree
- How to Prune a Elm Tree
- How to Prune a Fig Tree
- How to Prune a Grape Tree
- How to Prune a Hickory Tree
- How to Prune a Maple Tree
- How to Prune a Oak Tree
- How to Prune an Olive Tree
- How to Prune a Peach Tree
- How to Prune a Pear Tree
- How to Prune a Plum Tree
- How to Prune a Poplar Tree
- How to Prune a Walnut Tree
Gallery

Michael Carter
Vestibulum ante ipsum primis in faucibus orci luctus et ultrices posuere cubilia curae; Donec vel erat in nulla efficitur tempor non ut nisl. Integer venenatis eros ut dui viverra fermentum.
Sophie Wilson
Nam ut turpis hendrerit, varius nunc vel, elementum dui. Morbi vulputate dolor sit amet scelerisque egestas. Vestibulum eleifend nunc ut bibendum fermentum.
Alex Morgan
Cras non velit nec purus tempor rhoncus. Sed non mauris vitae erat consequat auctor eu in elit. Class aptent taciti sociosqu ad litora torquent per conubia nostra.