Everything You Need to Know About Parthenocissus in the UK
An Overview of the Parthenocissus and its benefits in the UK
Parthenocissus is a type of climbing plant that is native to the UK and is known for its decorative and ornamental foliage. It is a fast-growing plant that can quickly cover walls, fences, and other structures, making it a great choice for gardeners who want to add a touch of greenery to their outdoor space. The plant is also known for its hardiness and can survive in a variety of climates, making it a great choice for those who live in the UK. The foliage of the Parthenocissus is also quite attractive, with its bright green leaves and clusters of small white flowers. The plant is also known for its ability to attract birds and other wildlife, making it a great addition to any garden. With its hardiness and decorative foliage, Parthenocissus is a great choice for any UK garden.
Introducing the Parthenocissus - Facts and Figures
Parthenocissus is a genus of climbing plants native to the UK. It is a deciduous plant, meaning it will lose its foliage in the winter months. The foliage of the Parthenocissus is a deep green colour, and it produces small white flowers in the summer. The plant is a great addition to any garden, as it can be used to cover walls and fences, and it can also be trained to climb up trees. It is a fast-growing plant, and it can reach heights of up to 10 metres in just a few years. The Parthenocissus is also a great choice for those looking for a low-maintenance plant, as it requires minimal care and attention. It is also a great choice for those looking to add a bit of colour to their garden, as the foliage of the Parthenocissus can be quite striking. So if you're looking for a climbing plant that is easy to care for and adds a bit of colour to your garden, then the Parthenocissus is the perfect choice.
The History of the Parthenocissus in the UK
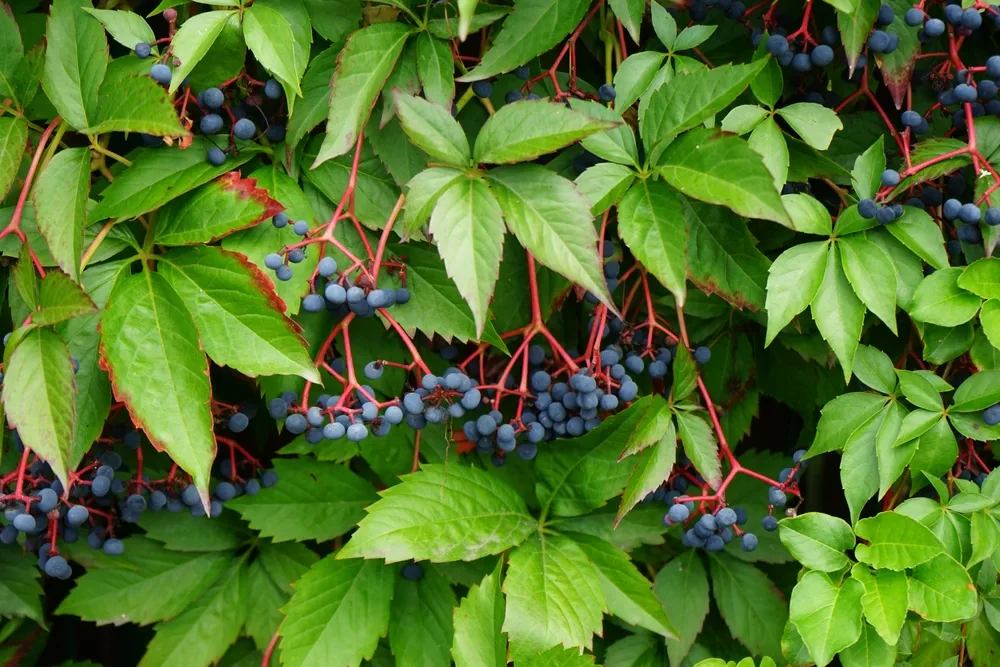
Parthenocissus is a genus of climbing plants native to the UK. It is a member of the Vitaceae family, which includes grapes, and is known for its ability to climb walls and other structures. The genus is composed of several species, including Parthenocissus quinquefolia, Parthenocissus tricuspidata, and Parthenocissus henryana. The plants are known for their attractive foliage and berries, which can be used to make jams and jellies.
Parthenocissus has been a part of the UK landscape for centuries. It was first recorded in the 16th century, when it was used to decorate the walls of castles and other grand buildings. It was also used to create living walls and trellises, and was often planted in gardens to provide a natural barrier against intruders. Today, Parthenocissus is still used in gardens and parks, and is a popular choice for climbers and gardeners alike. Its ability to climb walls and other structures makes it a great choice for creating a unique and attractive landscape.
The history of Parthenocissus, specifically the species known as Parthenocissus quinquefolia or Virginia Creeper, in the United Kingdom is a fascinating tale of botanical exploration, cultivation, and eventual naturalization.
Parthenocissus quinquefolia was introduced to the United Kingdom in 1629, as noted by Pilkington in his 2011 publication. The origin of this introduction is not explicitly mentioned, but it's likely that the plant was brought over from its native North America by early explorers or settlers who were captivated by its vibrant autumnal foliage and its ability to climb and cover structures rapidly.
Despite its introduction in the 17th century, the Virginia creeper wasn't recorded in the wild until almost three centuries later, in 1927. This suggests that for a long time, the species was primarily cultivated in gardens and other controlled environments, rather than being allowed to grow freely in the wild. However, once it had escaped into the wild, it quickly established itself and became naturalized.
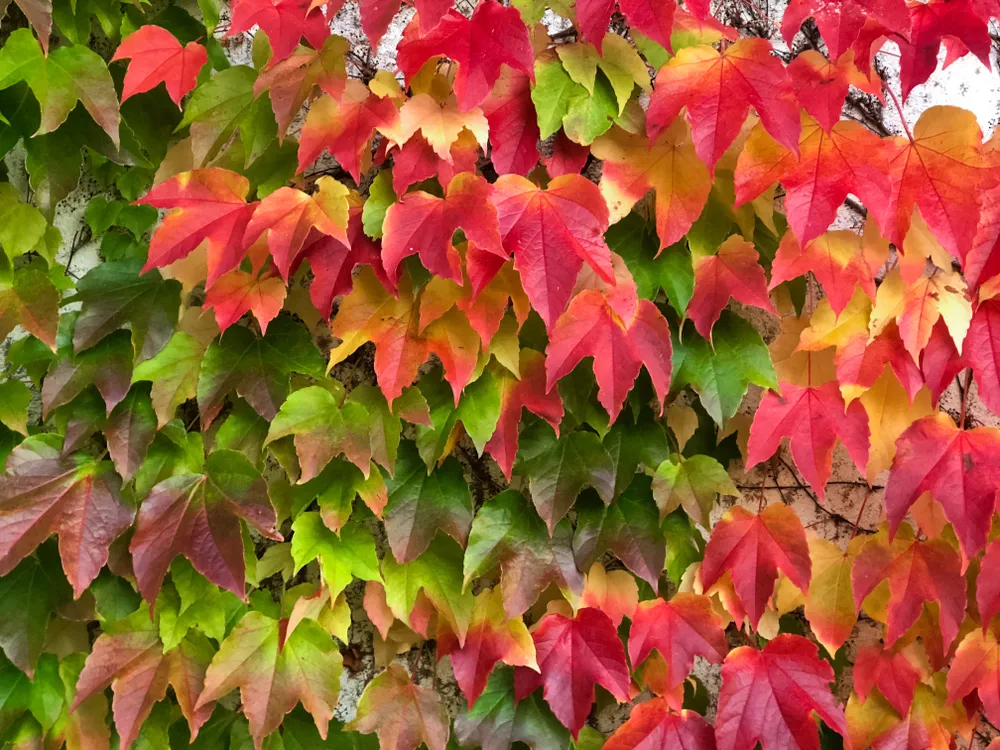
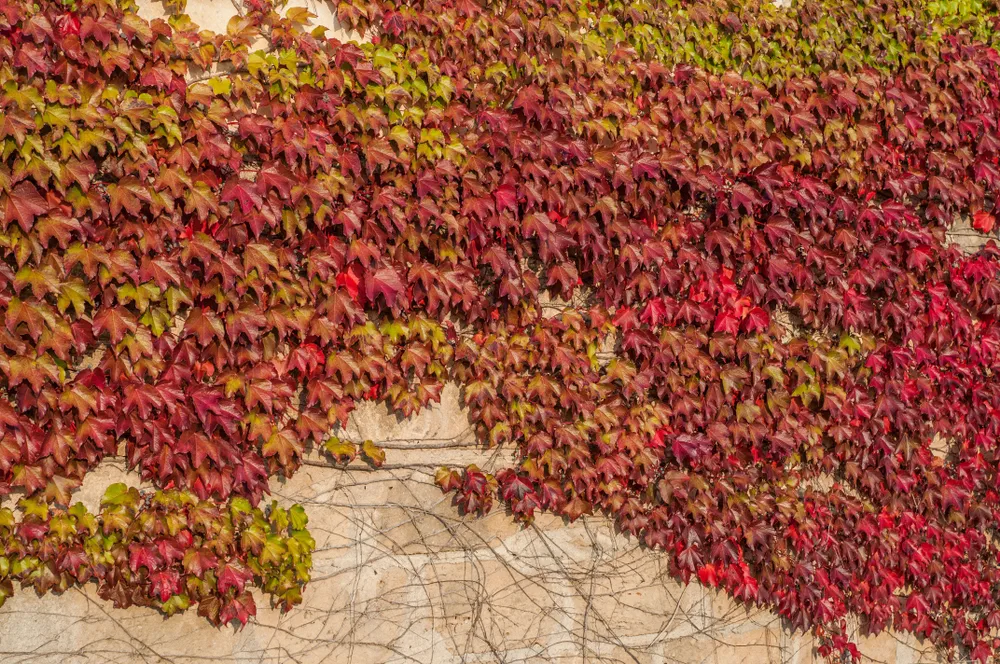
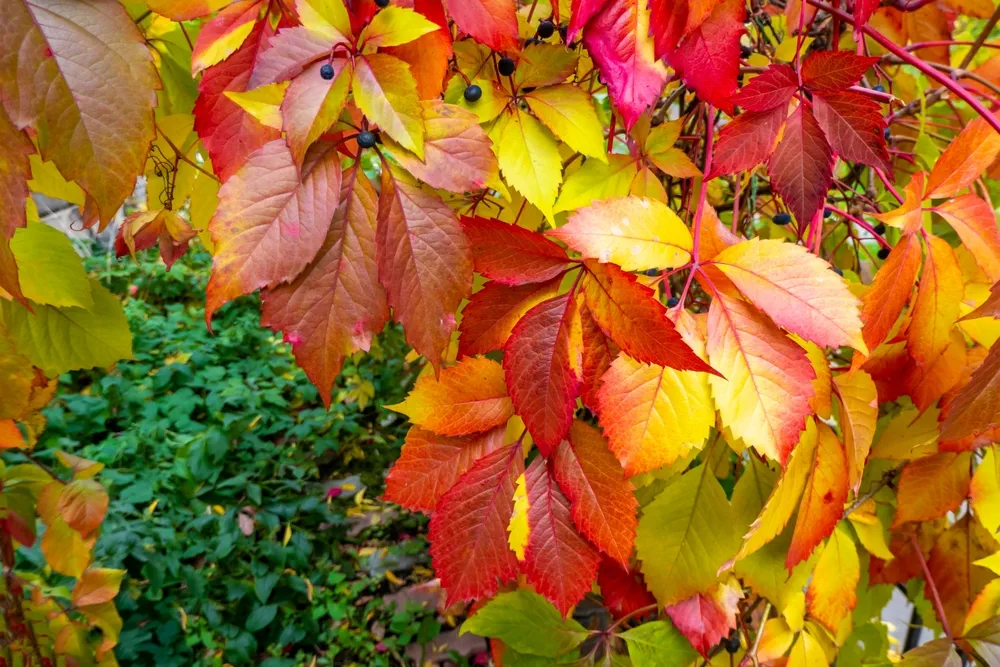
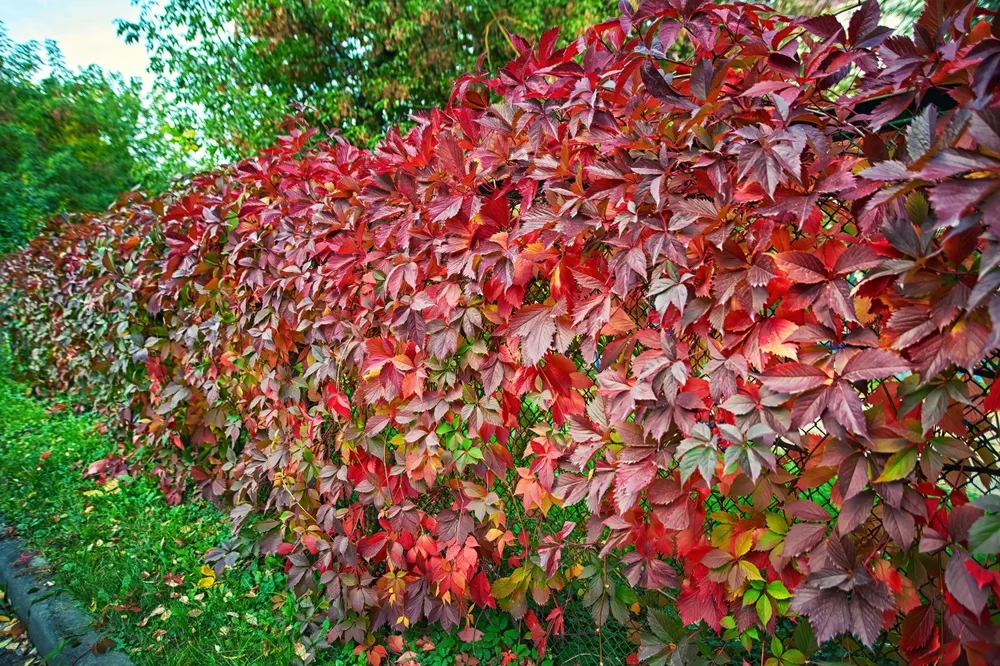
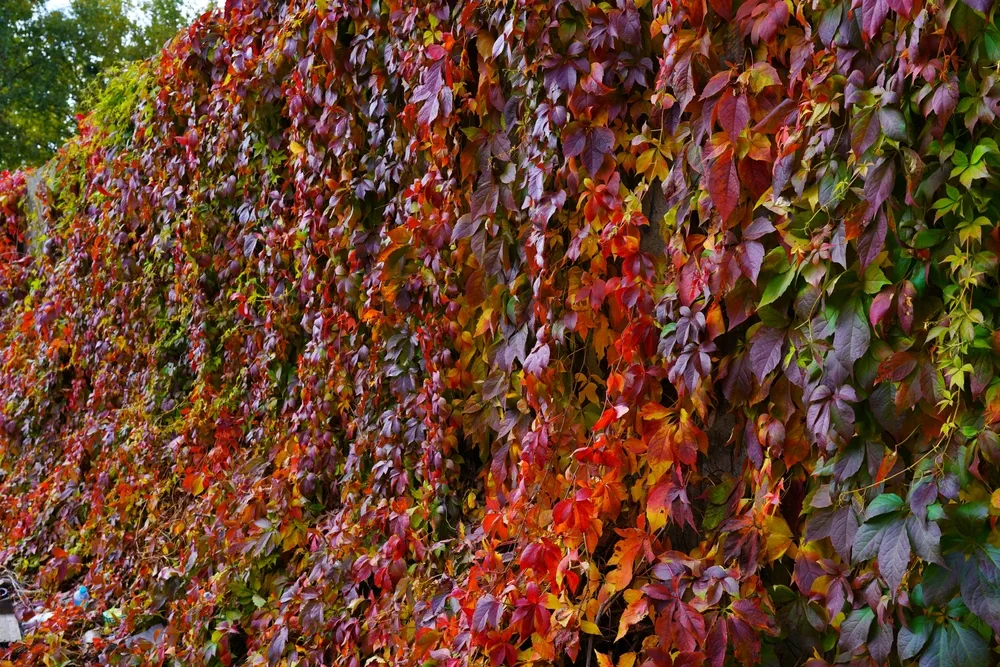
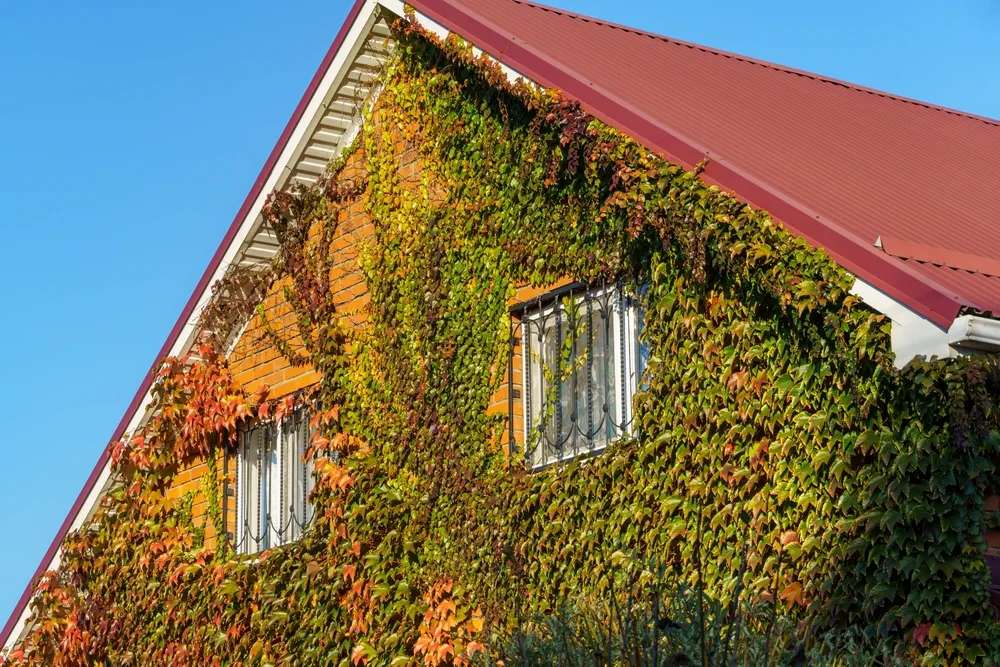
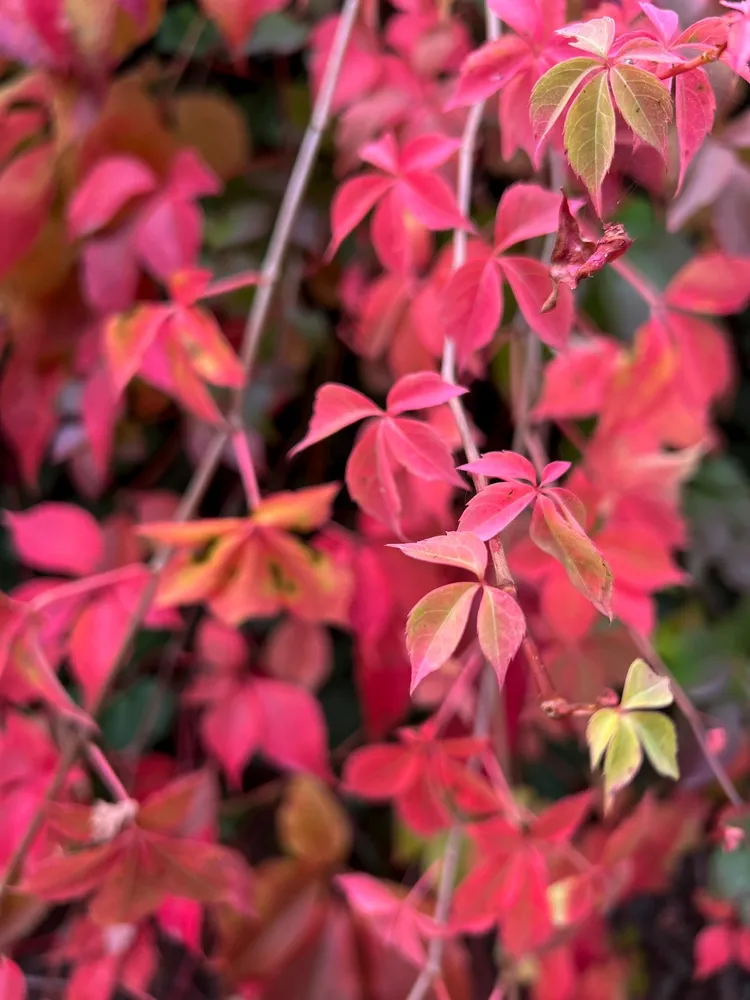
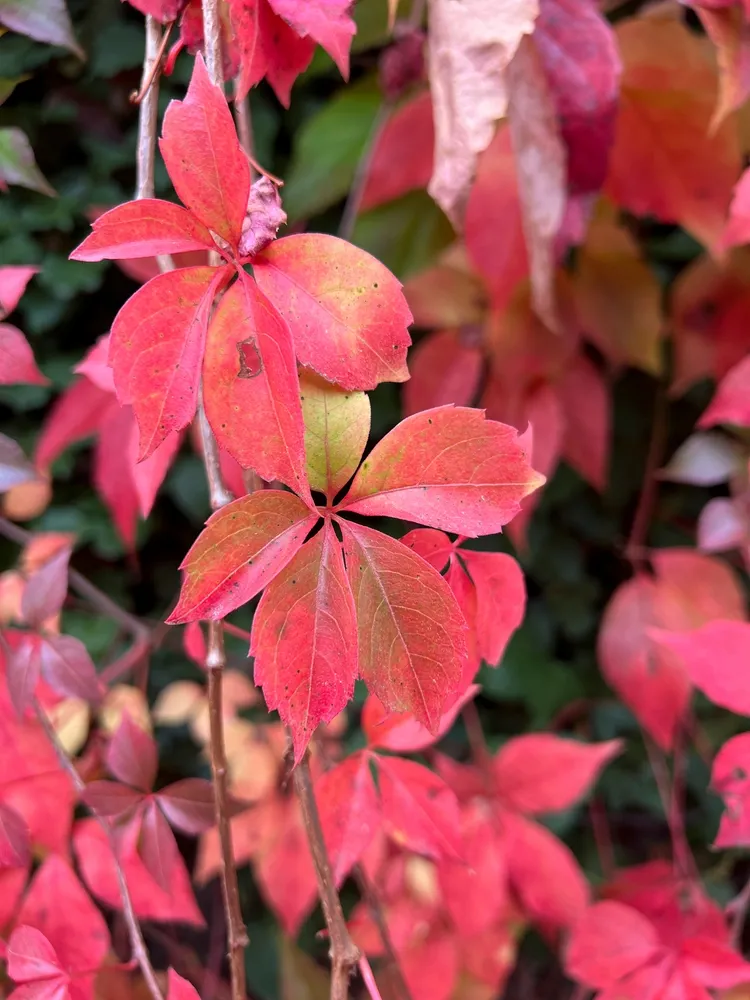
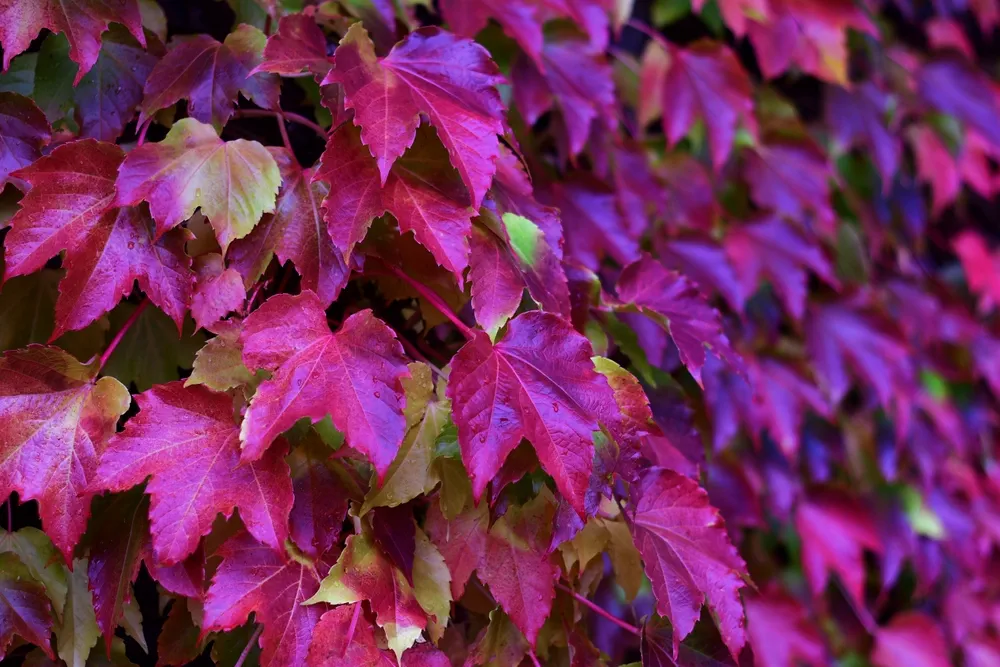
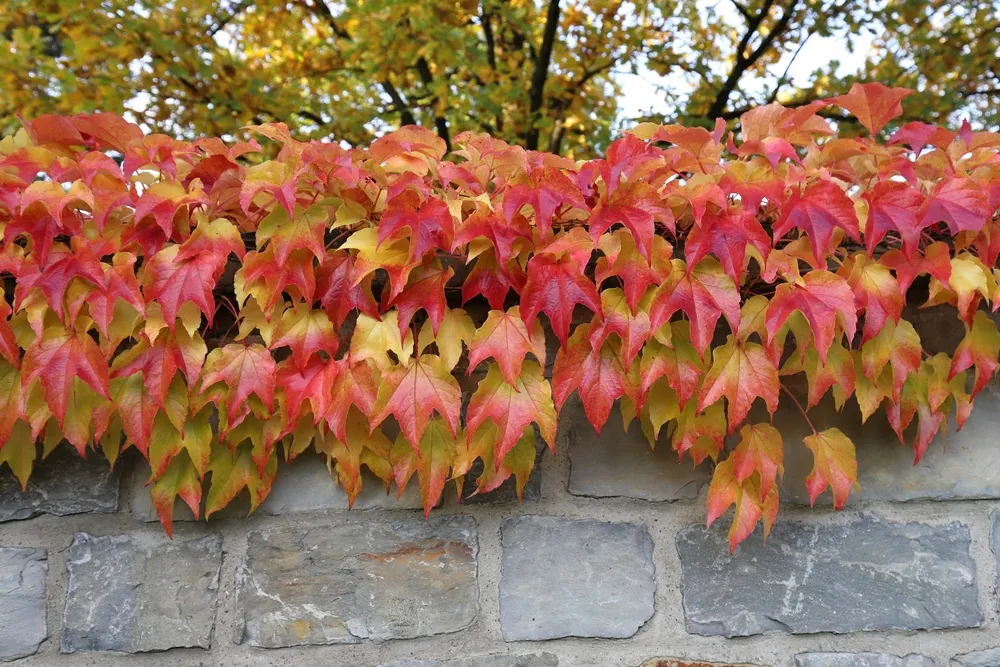
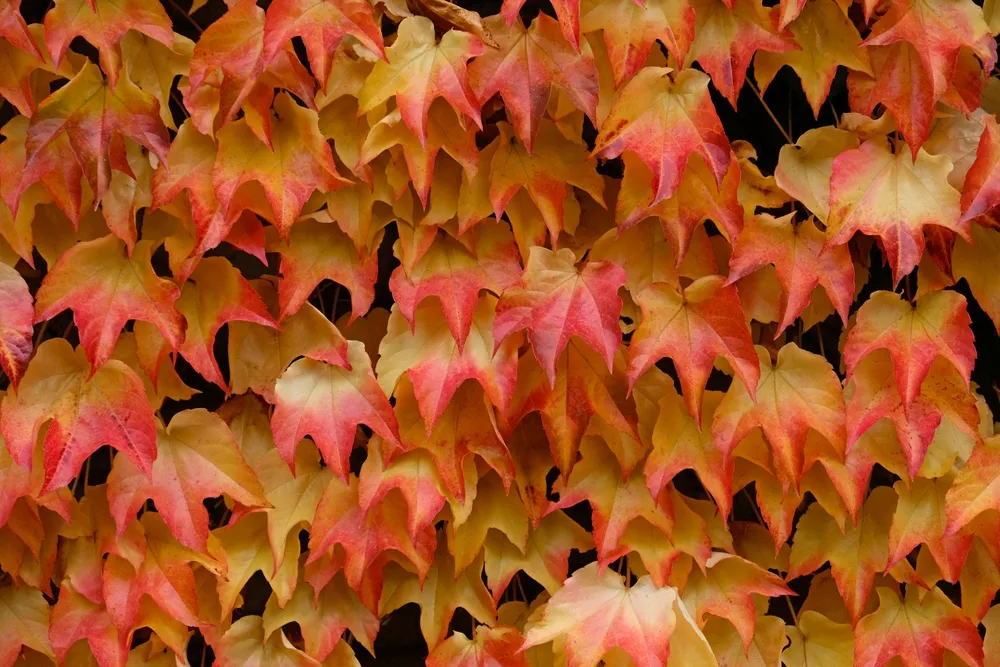
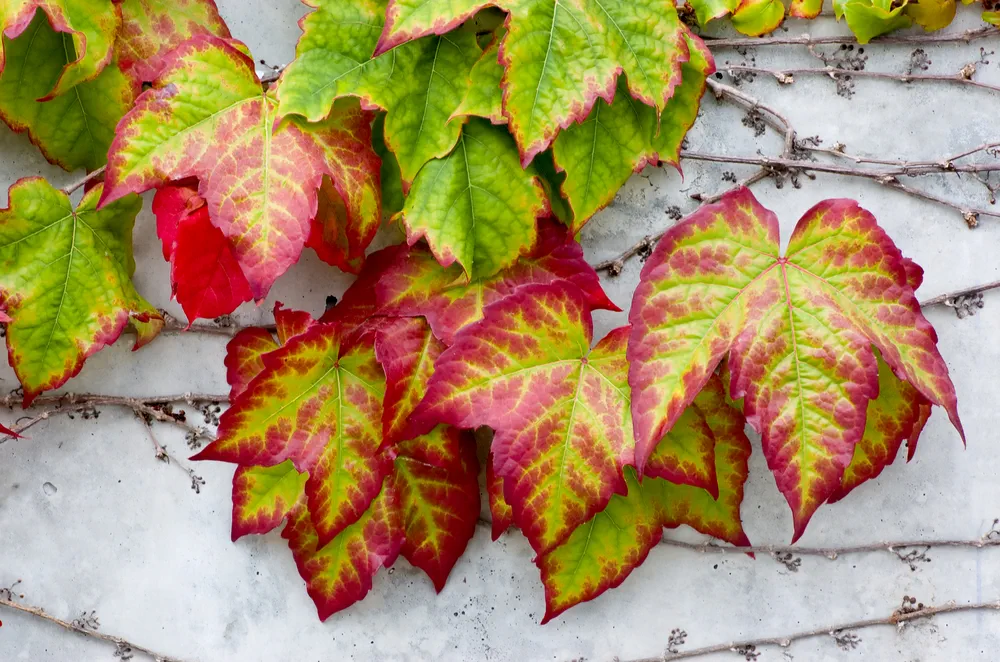
Parthenocissus quinquefolia has been used extensively in landscape design for its aesthetic appeal and its practical qualities. Its small, greenish flowers that appear in spring are quite inconspicuous, but it's the foliage that truly shines. The leaves turn from a lush green in summer to a stunning red in autumn, providing a spectacular display of seasonal Colour. Furthermore, its ability to climb makes it an excellent choice for covering walls, fences, or other structures, adding a touch of natural beauty to both public and private settings.
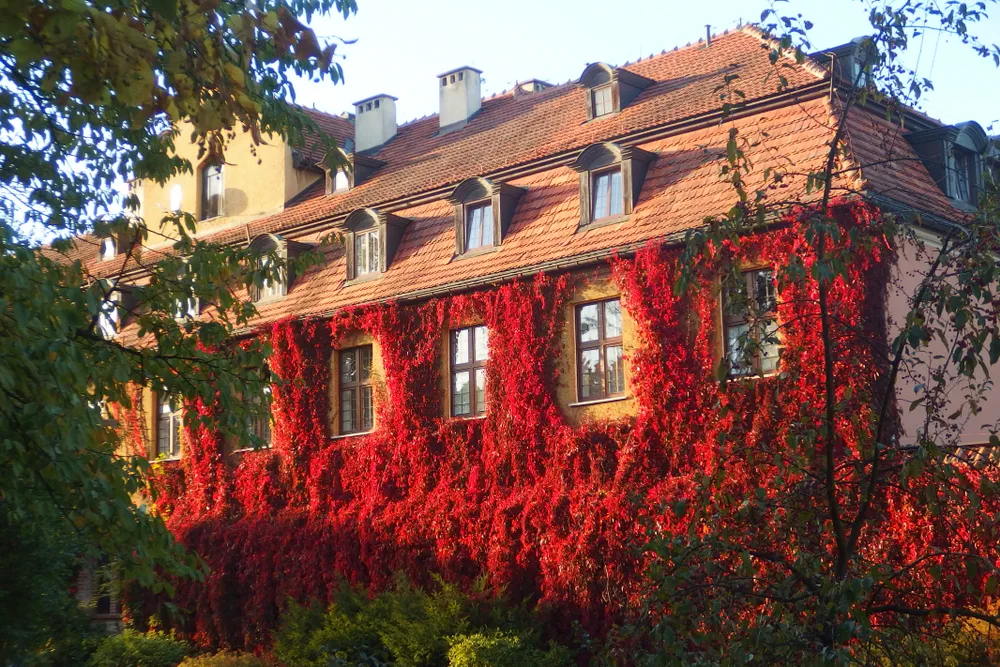
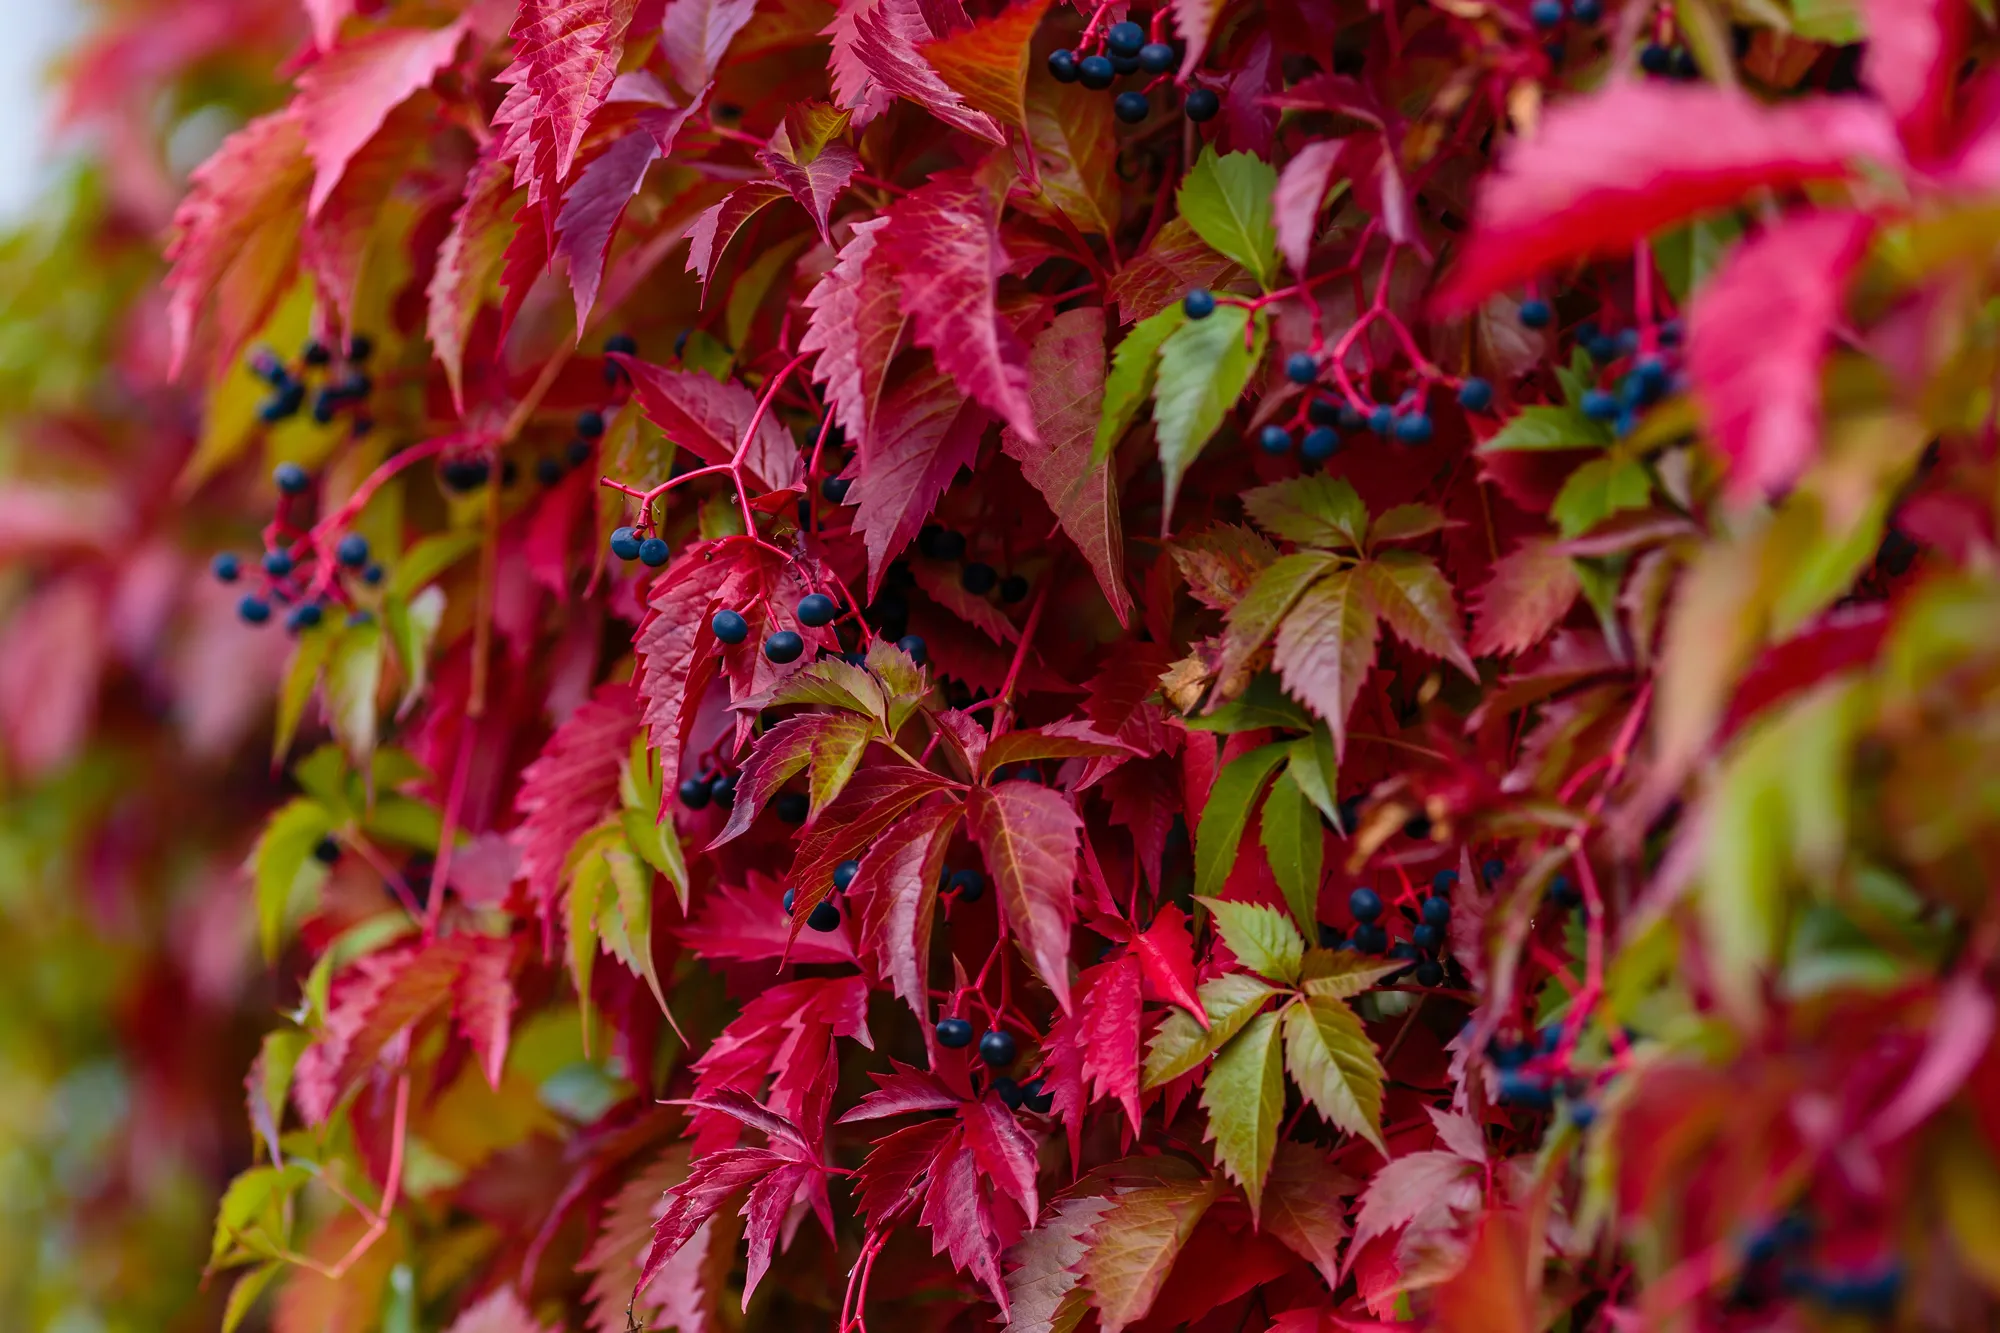
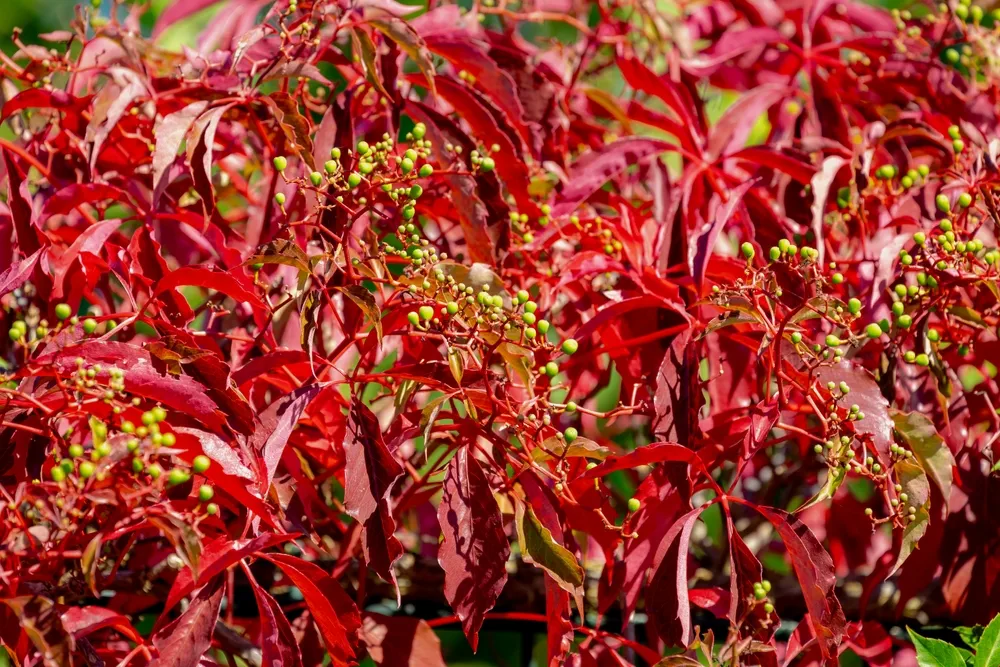
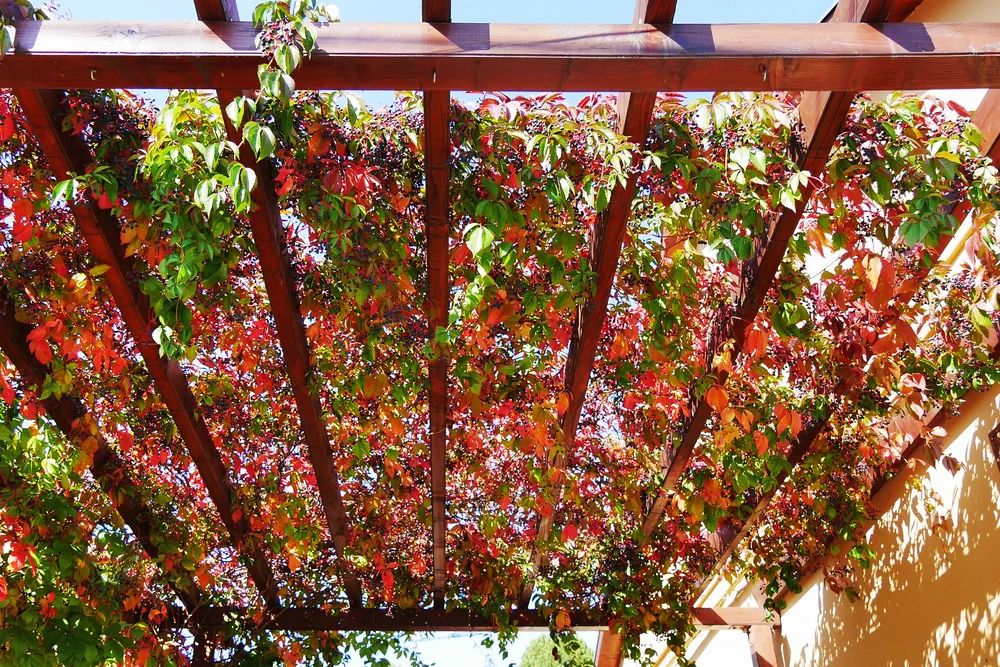
In terms of architecture, the Virginia creeper has been used to soften the appearance of buildings, create natural screens for privacy, and reduce heat absorption by shading walls during the summer. Its fruit, which is bluish and about 1/4 inch in diameter, also adds to its ornamental value.
Today, the Virginia creeper continues to be a popular choice for landscape and garden design in the UK. Its rapid growth and stunning autumn Colour make it a favorite amongst gardeners. However, its potential to spread and become invasive needs to be carefully managed to prevent it from overtaking native flora.
Looking into the future, as climate change alters our landscapes, the Virginia creeper's adaptability and resilience may see it growing in popularity. However, its potential impact on local ecosystems will need to be monitored closely to ensure that this foreign introduction doesn't become an ecological problem.
In conclusion, the history of Parthenocissus quinquefolia in the UK is a testament to the enduring appeal of this versatile plant. From its introduction in the 17th century to its naturalization and widespread use today, it has firmly established itself as a cherished part of the British landscape.
Understanding Variations of Species of Parthenocissus ideal for UK Conditions
Parthenocissus is a genus of climbing plants that are ideal for the UK climate. These plants are known for their hardiness and ability to thrive in a variety of conditions. They are also known for their attractive foliage and flowers, making them a great addition to any garden. Parthenocissus species come in a variety of shapes and sizes, so it is important to understand the different types and how they will fare in the UK climate.
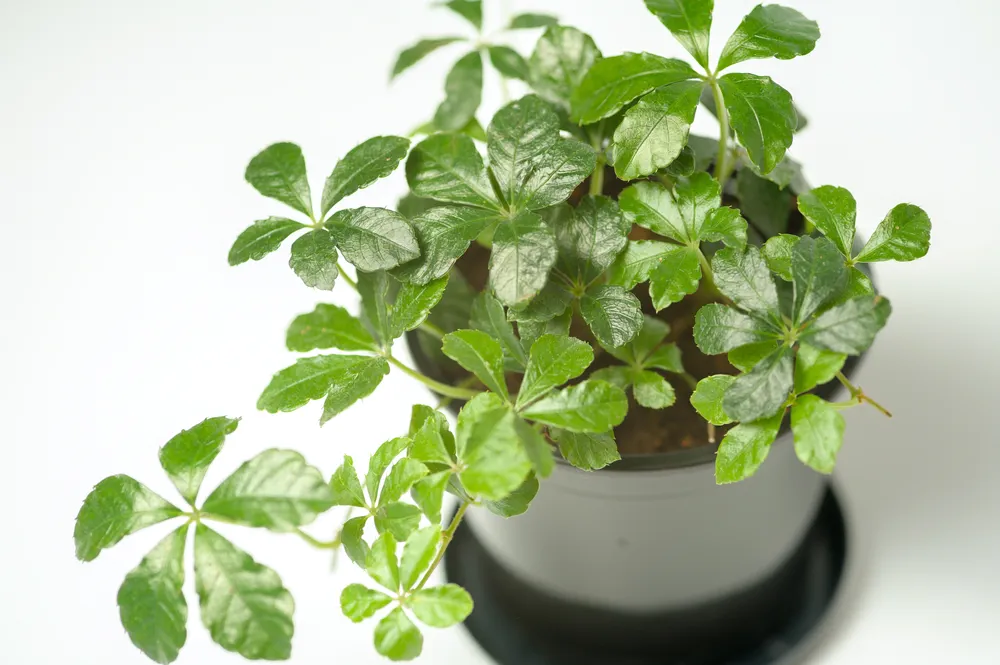
Parthenocissus quinquefolia, also known as Virginia creeper, is a popular choice for UK gardens. This species is known for its hardiness and ability to thrive in a variety of conditions. It is also known for its attractive foliage and flowers, making it a great addition to any garden. Parthenocissus tricuspidata, also known as Boston ivy, is another popular choice for UK gardens. This species is known for its hardiness and ability to thrive in a variety of conditions. It is also known for its attractive foliage and flowers, making it a great addition to any garden.
Parthenocissus henryana is another species of Parthenocissus that is ideal for UK conditions. This species is known for its hardiness and ability to thrive in a variety of conditions. It is also known for its attractive foliage and flowers, making it a great addition to any garden. Parthenocissus inserta is another species of Parthenocissus that is ideal for UK conditions. This species is known for its hardiness and ability to thrive in a variety of conditions. It is also known for its attractive foliage and flowers, making it a great addition to any garden.
When choosing a Parthenocissus species for your UK garden, it is important to consider the climate and conditions in which the plant will be growing. Different species of Parthenocissus have different requirements, so it is important to understand the different types and how they will fare in the UK climate. With the right care and attention, Parthenocissus can be a great addition to any garden.
Parthenocissus, commonly known as the Virginia Creeper, is a genus of about 12 species of flowering plants. Two of the most common species within this genus that are suited to the UK's climate are Parthenocissus quinquefolia and Parthenocissus tricuspidata. Let's delve into the specifics of these species.
-
1. Parthenocissus quinquefolia (Virginia Creeper):
This species is known for its fast growth and striking autumnal Colour.
- Sunlight: It can tolerate partial shade but thrives best in full sun where its fall Colour will be most spectacular.
- Water: It enjoys moist but well-drained soil and can tolerate periods of drought once established.
- Soil: It grows well in a wide range of soil types, including clay, loam, and sand, provided the soil is well-drained.
- Pest/Disease Resistance: It's generally disease-resistant but can occasionally suffer from mildew. It's also resistant to deer.
- Growth Patterns: This climber can reach up to 20-30m high, climbing by means of tendrils with disks that fasten onto surfaces.
-
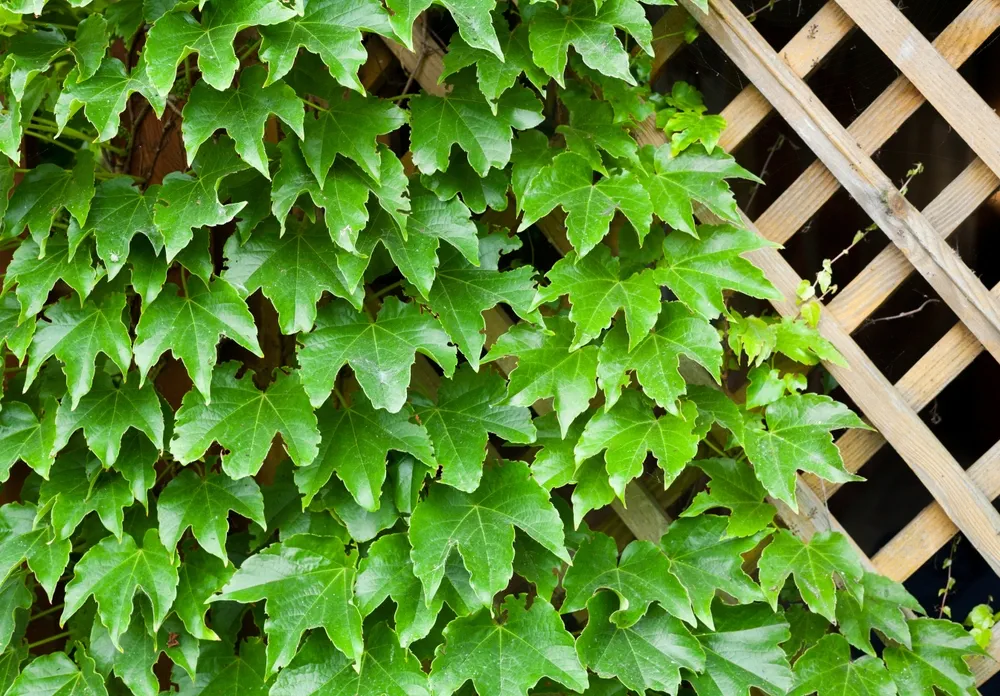
2. Parthenocissus tricuspidata (Boston Ivy):
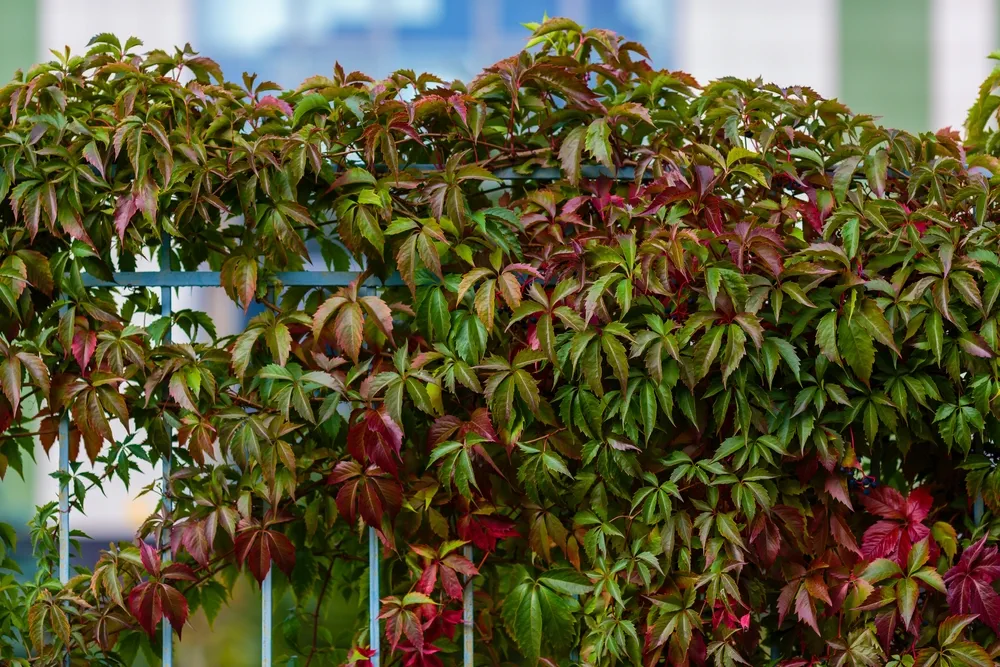
Less vigorous than the Virginia creeper, Boston Ivy is nonetheless a strong climber and has a more refined appearance with its three-lobed leaves.
- Sunlight: It prefers full sun or partial shade.
- Water: It requires average to evenly moist conditions, but it won't tolerate standing water.
- Soil: It is not particular about soil type or pH level, making it a highly adaptable plant.
- Pest/Disease Resistance: Generally free from serious pests and diseases, although it can be affected by Leaf Spots and Powdery Mildew.
- Growth Patterns: It can grow up to 15-20m high, also climbing with tendrils and adhesive disks.
Both of these species would do well in most parts of the UK, given the country's temperate climate. However, they might struggle in very exposed or coastal regions due to their preference for sheltered locations.
Planting and Care Instructions:- Location: Choose a location with good sunlight exposure and well-drained soil. Make sure there's enough space for the plant to grow and climb.
- Planting: Dig a hole twice as wide and deep as the root ball. Place the plant in the hole, ensuring that the top of the root ball is level with the surrounding soil. Backfill the hole and firm the soil gently around the base of the plant.
- Watering: Water thoroughly after planting. Continue to water regularly during dry periods until the plant is well established.
- Pruning: Prune in late winter or early spring to control growth and maintain shape. Both species can become invasive if not kept in check.
- Fertilizing: Apply a balanced fertilizer in spring to encourage vigorous growth.
- Pest/Disease Control: Monitor regularly for signs of disease or pest activity. Treat with a suitable fungicide or pesticide if necessary.
Both Parthenocissus quinquefolia and Parthenocissus tricuspidata are excellent choices for adding interest and coverage to walls, fences, or trellises in the UK. With the right care, they can provide a stunning display of foliage throughout the year.
The best time to plant the Parthenocissus in the UK
Parthenocissus is a beautiful climbing plant that is native to the UK and can be found in many gardens. It is a great addition to any garden, as it adds a touch of colour and texture to the landscape. When it comes to planting Parthenocissus in the UK, the best time to do so is in either spring or autumn.
In the spring, the soil is warm and moist, making it the perfect environment for the Parthenocissus to take root and begin to grow. The mild temperatures also help the plant to establish itself quickly and start to thrive. In the autumn, the cooler temperatures help the plant to become dormant and prepare for the winter months. This is also a great time to plant Parthenocissus, as the soil is still warm and moist, allowing the plant to take root and begin to grow.
No matter what time of year you choose to plant Parthenocissus in the UK, it is important to ensure that the soil is well-drained and that the plant is given plenty of sunlight. With the right care and attention, Parthenocissus can be a beautiful addition to any garden in the UK.
Choosing the Right Location to Plant Out your Parthenocissus
When it comes to choosing the right location to plant out your Parthenocissus, there are a few key factors to consider. Firstly, Parthenocissus is a type of climbing plant, so you need to make sure that you have a suitable structure for it to climb up. This could be a trellis, a wall, or even a fence. Secondly, Parthenocissus needs plenty of sunlight to thrive, so make sure that the location you choose is in a sunny spot. Thirdly, the soil needs to be well-draining and nutrient-rich, so you may need to add some fertiliser to the soil before planting. Finally, make sure that the location you choose is sheltered from strong winds, as this can damage the plant. With these tips in mind, you can be sure that your Parthenocissus will thrive in its new home.
Preparing the Soil for Planting the Parthenocissus
Preparing the soil for planting the Parthenocissus is an important step in ensuring a successful garden. The soil should be well-draining and rich in organic matter. To achieve this, it is recommended to mix in a generous amount of compost to the soil. This will help to improve the soil structure and provide essential nutrients for the Parthenocissus. Additionally, the pH of the soil should be tested to ensure it is within the ideal range for the plant. If the pH is too high or too low, it can be adjusted by adding lime or sulfur to the soil. Once the soil is prepared, the Parthenocissus can be planted and will thrive in its new home.
Step-by-Step Guide on How to Plant the Parthenocissus in the UK
Parthenocissus is a beautiful and hardy climbing plant that is native to the UK. It is a great choice for gardeners looking to add a touch of greenery to their outdoor space. Planting Parthenocissus is relatively easy and can be done in a few simple steps.
First, you will need to choose a spot in your garden that receives plenty of sunlight. Parthenocissus needs at least six hours of direct sunlight each day to thrive. Once you have chosen the perfect spot, you will need to prepare the soil. Parthenocissus prefers soil that is rich in organic matter and well-draining. You can add compost or manure to the soil to help improve its quality.
Next, you will need to plant the Parthenocissus. Dig a hole that is twice as wide as the root ball and just as deep. Place the root ball in the hole and fill it with soil. Make sure to press down firmly to ensure the roots are secure. Water the soil thoroughly and add a layer of mulch to help retain moisture.
Finally, you will need to provide the Parthenocissus with regular water and sunlight. Water the plant every few days and make sure to keep the soil moist. Additionally, make sure the plant is getting enough sunlight by pruning any branches that are blocking the sun. With the right care, your Parthenocissus will thrive and bring beauty to your garden.
Step-by-Step Guide to Planting Parthenocissus in the UK
- Step 1: Choose the Right Location Parthenocissus species, whether it's Virginia Creeper (Parthenocissus quinquefolia) or Boston Ivy (Parthenocissus tricuspidata), are climbing plants that love sunlight. However, they can also tolerate partial shade. Choose a location that gets plenty of sunlight but is also protected from harsh winds.
- Step 2: Determine the Ideal Time to Plant The best time to plant Parthenocissus in the UK is in late autumn or early spring when the soil is moist and the weather is relatively mild. This allows the plant to establish its roots before the hot summer or cold winter.
- Step 3: Understand the Soil Requirements Parthenocissus isn't too picky about soil types. It can grow in clay, loam, or sandy soil. However, it prefers well-drained soil. The ideal pH is between 6.0 and 7.5, which is slightly acidic to neutral.
-
Step 4: Check Moisture Levels
These plants like moist but well-drained soil. They can tolerate periods of drought once established, but regular watering will help them thrive.
Planting Process:
- Step 5: Choose the Right Size of Pot or Area of Ground If you're planting in a pot, choose one that's at least twice the size of the root ball. If you're planting directly into the ground, ensure there's enough space for the plant to spread - both these species can grow up to 20-30m high.
- Step 6: Prepare the Soil Dig a hole that's twice as wide and deep as the root ball. If your soil is heavy clay or sand, amend it with organic matter like compost or well-rotted manure to improve its texture and nutrient content.
- Step 7: Plant at the Right Depth and Spacing Place the Parthenocissus in the hole, making sure the top of the root ball is level with the soil surface. Space multiple plants about 2-3 meters apart to give them room to spread.
- Step 8: Water and Fertilize the Plant After planting, water thoroughly. Continue to water regularly during dry periods. In spring, apply a balanced fertilizer to encourage growth.
Parthenocissus requires little maintenance. Prune in late winter or early spring to control growth and maintain shape. Monitor for pests and diseases - while generally resistant, they can occasionally suffer from mildew or Leaf Spots.
Remember, the key to growing Parthenocissus successfully is choosing the right location, providing well-drained soil, and watering and feeding regularly. With the proper care, these climbers can create a stunning display in your garden all year round.Tips for Caring for Your Newly Planted Parthenocissus
Parthenocissus is a beautiful and hardy climbing plant that is perfect for the UK climate. It is a great choice for adding a touch of greenery to your garden, and with the right care, it can thrive for many years. To ensure your Parthenocissus is healthy and happy, it is important to provide it with the right amount of sunlight, water, and fertiliser.
When it comes to sunlight, Parthenocissus prefers a spot that gets plenty of direct sunlight throughout the day. This will help it to grow and flower, and will also help to keep it healthy. If you are planting your Parthenocissus in a shaded area, make sure to provide it with some artificial light to supplement the natural sunlight.
Watering your Parthenocissus is also important. It should be watered regularly, but not too much. Too much water can cause the roots to rot, so make sure to check the soil before watering. If the soil is dry, then it is time to water.
Finally, fertiliser is also important for keeping your Parthenocissus healthy. Fertiliser should be applied every few weeks during the growing season, and can help to promote healthy growth and flowering. Make sure to use a balanced fertiliser that is specifically designed for Parthenocissus.
By following these simple tips, you can ensure that your Parthenocissus will thrive in the UK climate. With the right care, your Parthenocissus will be a beautiful addition to your garden for many years to come.
What is the Best Fertilizer Feed for the Parthenocissus and When to Apply it?
Parthenocissus is a beautiful climbing plant that is native to the UK and can be found in many gardens. To ensure that your Parthenocissus is healthy and thriving, it is important to provide it with the right fertilizer feed. The best fertilizer feed for Parthenocissus is one that is high in nitrogen, phosphorus, and potassium. These three nutrients are essential for the plant's growth and development. Additionally, it is important to ensure that the soil is well-drained and that the fertilizer is applied at the right time. The best time to apply fertilizer is in the spring and summer months when the plant is actively growing. This will ensure that the plant has access to the necessary nutrients to grow and flourish.
A Comprehensive Guide to Fertilizing the Parthenocissus
Parthenocissus is a beautiful and hardy climbing plant that is native to the UK. It is a popular choice for gardeners looking to add a touch of greenery to their outdoor space. However, in order to keep your Parthenocissus healthy and thriving, it is important to fertilize it regularly. Fertilizing your Parthenocissus will help to ensure that it has access to the essential nutrients it needs to grow and flourish.
When fertilizing your Parthenocissus, it is important to consider the type of soil it is planted in. If the soil is nutrient-rich, then you may not need to fertilize as often. However, if the soil is lacking in nutrients, then you should fertilize more frequently. You can also add organic matter such as compost or manure to the soil to help boost its nutrient content. Additionally, you can use a liquid fertilizer to give your Parthenocissus an extra boost of nutrients.
Fertilizing your Parthenocissus is an important part of keeping it healthy and happy. By ensuring that it has access to the essential nutrients it needs, you can ensure that your Parthenocissus will thrive in your garden for years to come.
How Fast does Parthenocissuss Grow
Parthenocissus is a genus of climbing plants that are native to the UK. These plants are fast-growing and can quickly cover walls, fences, and other structures. They are also known for their attractive foliage and flowers, making them a popular choice for gardeners. Parthenocissus can grow up to 10 feet in height and spread up to 20 feet in width. They are also known for their hardiness and can survive in a variety of climates. Parthenocissus is a great choice for gardeners who want to add a bit of Colour and texture to their outdoor space. With proper care and maintenance, these plants can thrive and provide years of enjoyment.
How to Propagate the Parthenocissus
Parthenocissus is a type of climbing plant that is native to the UK and can be found in many gardens. It is a hardy plant that can thrive in a variety of conditions, making it a great choice for gardeners of all levels. To propagate Parthenocissus, you will need to start with a healthy cutting from an existing plant. The cutting should be about 10-15 cm long and should have at least two leaves. Once you have your cutting, you will need to prepare the soil. Parthenocissus prefers a well-draining soil that is rich in organic matter. You will also need to make sure the soil is moist but not soggy. Once the soil is ready, you can plant the cutting and water it thoroughly. Parthenocissus needs plenty of sunlight to thrive, so make sure to place it in an area that gets at least 6 hours of direct sunlight per day. With the right care, your Parthenocissus will soon be thriving and growing up your walls or trellises.
Propagation Guide for Parthenocissus Vines
Parthenocissus, commonly known as Virginia Creeper or Boston Ivy, is a genus of vigorous, deciduous climbers that are native to North America and East Asia. They are known for their spectacular fall Colour, their ability to climb via adhesive tendrils, and their adaptability to various soil and light conditions.
Propagation of Parthenocissus vines can be achieved through several methods, including rooting stem cuttings, growing from seed, layering, and grafting. Here, we'll cover each method in detail:
-
1. Rooting Stem Cuttings
This is perhaps the easiest and most common method of propagation for Parthenocissus. The best time to take cuttings is in late spring or early summer.
Materials: Sharp knife or pruners, pot with drainage holes, potting mix, rooting hormone (optional), plastic bag or propagator
Steps:- Select a healthy shoot and cut off a 4-6 inch section, making sure it has at least two sets of leaves.
- Remove the lower leaves and dip the cut end in rooting hormone, if using.
- Fill a pot with fresh potting mix and insert the cut end into the soil.
- Water well, then place a plastic bag over the pot or move the pot into a propagator to maintain high humidity.
- Keep the cutting in a warm place with indirect light and keep the soil slightly moist.
- After a few weeks, the cutting should have rooted. At this point, you can remove the bag or move the pot out of the propagator and grow on as normal.
-
2. Growing from Seed
Parthenocissus seeds need a period of cold stratification before they will germinate.
Materials: Seeds, pot, potting mix, refrigerator
Steps:- Soak the seeds in water for 24 hours.
- Fill a pot with fresh potting mix and scatter the seeds on top, then cover lightly with more soil.
- Water well, then place the pot in a plastic bag and move it to the refrigerator for 60-90 days.
- After this cold stratification period, move the pot to a warm place with indirect light.
- Keep the soil moist and the seedlings should start to appear in a few weeks.
-
3. Layering
This method involves encouraging a stem that's still attached to the parent plant to form roots.
Materials: Healthy vine, wire or twist ties, pot, potting mix
Steps:- Choose a long, healthy vine and bend it towards the ground.
- Fill a pot with fresh potting mix and place it next to the parent plant.
- Make a small wound on the underside of the stem where it touches the soil, then secure the stem to the soil with a piece of wire or twist tie.
- Keep the soil moist and after a few months, the stem should have formed roots.
- At this point, you can cut the new plant free from the parent plant and grow it on as normal.
-
4. Grafting
Grafting is a more advanced technique that involves attaching a piece of one plant (the scion) to the root system of another plant (the rootstock).
Materials: Healthy vine (for scion), compatible rootstock, sharp knife or grafting tool, grafting tape or wax, stake for support
Steps:- Choose a healthy vine to serve as the scion and cut off a 4-6 inch section.
- Make a matching cut in the rootstock.
- Fit the two cuts together and secure with grafting tape or wax.
- Support the graft with a stake if necessary.
- Keep the graft in a warm, humid place and it should start to grow together in a few weeks.
Remember, successful propagation requires patience and practice. Don't be discouraged if not all your cuttings or seeds take - just keep trying and you'll soon have plenty of new Parthenocissus vines to enjoy!
A Step-by-Step Guide on How to Grow the Parthenocissus using the Rooting Stem Cutting Method
Practical Guide to Growing Parthenocissus from Stem Cuttings
Parthenocissus, commonly known as Virginia Creeper or Boston Ivy, is a hardy deciduous vine that's native to North America and East Asia. It's well-loved for its beautiful leaves, which turn brilliant shades of red and purple in the fall. It's also a vigorous climber, using adhesive tendrils to grip onto surfaces.
Here's a step-by-step guide on how you can propagate this stunning plant using stem cuttings:
- Step 1: Preparation of Plant Material You'll need to begin with a healthy Parthenocissus vine. In late spring or early summer, when the plant is actively growing, choose a vigorous shoot and cut off a 4-6 inch section. Ensure it has at least two sets of leaves.
- Step 2: Preparation of Cutting Remove the lower leaves from your cutting. This reduces water loss and encourages roots to form. You can also dip the cut end in rooting hormone to stimulate root growth, although this isn't strictly necessary.
- Step 3: Planting the Cutting Fill a pot with fresh, well-draining potting mix. Make a hole in the soil with a pencil or your finger, then insert the cutting, making sure the node (the point where the leaves were removed) is buried. Firm the soil around the cutting.
- Step 4: Care for the Cutting Water the cutting well, then cover the pot with a clear plastic bag or place it in a propagator. This creates a humid environment that helps the cutting take root. Place the pot in a warm, bright place out of direct sunlight.
- Step 5: Wait for Roots to Form This is where patience comes in! Keep the soil slightly moist and after a few weeks, you should see new growth. This is a sign that roots have formed. At this point, you can remove the plastic bag or take the pot out of the propagator.
If your cuttings are wilting despite being kept humid, they may be too hot. Try moving them to a cooler location.
If mold is forming on the soil surface, your environment may be too humid. Try removing the cover for a few hours each day to let some moisture escape.
Maintenance TipsOnce your cutting has rooted, care for it as you would any Parthenocissus vine. This means:
- Location: Plant in a location with full sun to partial shade. These vines are climbers, so provide a wall, fence, or trellis for them to grip onto.
- Watering: Water regularly until the plant is established. After that, it will tolerate some drought, but growth and Colour are best with consistent moisture.
- Feeding: Apply a balanced fertilizer in spring to promote vigorous growth.
- Pruning: Prune as needed to control size and shape. These vines can become invasive if not kept in check, so don't be afraid to cut them back hard in late winter or early spring.
With a little patience and care, you can easily propagate your own Parthenocissus vines and enjoy their spectacular fall Colour year after year!
Step-by-Step Guide on How to Grow the Parthenocissus from Seed
Parthenocissus is a beautiful climbing plant that is native to the UK and can be grown from seed. It is a great addition to any garden, providing a lush green backdrop to any outdoor space. To get started, you will need to purchase Parthenocissus seeds from a reputable supplier. Once you have the seeds, you can begin the process of planting and growing your Parthenocissus.
The UK climate is ideal for growing Parthenocissus, as it is a hardy plant that can tolerate a wide range of temperatures. When planting your Parthenocissus, make sure to choose a spot that gets plenty of sunlight and has well-draining soil. Plant the seeds in the spring, and water them regularly to ensure they get enough moisture. As the plant grows, you may need to prune it to keep it from becoming too large. Pruning should be done in the late summer or early fall, when the plant is dormant.
With the right care and attention, your Parthenocissus will thrive in the UK climate. With its lush foliage and vibrant flowers, it will be a beautiful addition to your garden. Follow these steps and you will be well on your way to growing a healthy and vibrant Parthenocissus from seed.
Comprehensive Guide to Growing Parthenocissus from Seeds
Parthenocissus, commonly known as Virginia Creeper or Boston Ivy, is a beautiful and vigorous climbing plant that exhibits spectacular fall Colour. Although it can be propagated from cuttings, starting it from seeds can also be rewarding. In this guide, we will walk you through the process of growing Parthenocissus from seeds.
Equipment Needed:- Parthenocissus seeds
- Seed trays or pots
- Potting mix
- Plastic bag or propagator
- Refrigerator
- Trowel
- Watering can
- Step 1: Preparation of Seeds Parthenocissus seeds have a hard outer shell, so they need to be soaked in warm water for 24 hours before planting. This helps to soften the shell and stimulate germination.
- Step 2: Cold Stratification Parthenocissus seeds require a period of cold stratification to break dormancy. After soaking, place the seeds in a bag of damp peat moss or sand, seal the bag and put it in the refrigerator for about 60-90 days.
- Step 3: Planting the Seeds After the cold stratification period, prepare your seed trays or pots by filling them with a well-draining potting mix. Plant the seeds on the surface of the soil and lightly cover them with more soil.
- Step 4: Care for the Seeds Place the seed trays or pots in a plastic bag or propagator to maintain a high level of humidity, and keep them in a warm, bright place out of direct sunlight. The soil should be kept moist, but not soggy. Germination can take several weeks, so patience is key!
- Step 5: Transplanting Seedlings Once the seedlings have developed their first set of true leaves, they can be gently transplanted into individual pots. Continue to keep them in a warm, bright location and water regularly.
- Step 6: Planting Out When the risk of frost has passed and the seedlings have grown strong, they can be planted out in the garden. Choose a location with full sun to partial shade, and well-drained soil. Dig a hole large enough to accommodate the root ball, place the plant in the hole, and backfill with soil. Water thoroughly.
If your seeds are not germinating, they may not have been stratified long enough. Try another round of cold stratification.
If your seedlings are wilting or yellowing, they may be getting too much water. Let the top of the soil dry out slightly between waterings.
Precautions:Parthenocissus is a vigorous grower and can become invasive in some areas. Be prepared to prune regularly to keep it in check.
The berries of Parthenocissus are toxic if ingested, so keep them out of reach of children and pets.
With patience and the right care, you can enjoy the spectacular beauty of Parthenocissus grown from your own seeds!
A Step-by-Step Guide on How to Propagate the Parthenocissus Using the Cutting Method
Propagating the Parthenocissus using the cutting method is a great way to add a touch of greenery to your garden. This step-by-step guide will help you get started.
First, you will need to select a healthy stem from the Parthenocissus. Cut the stem at a 45-degree angle, making sure it is at least 10 cm long. Then, remove the leaves from the lower half of the stem.
Next, prepare the soil for the cutting. The soil should be well-draining and rich in organic matter. Place the cutting in the soil and water it thoroughly. Make sure to keep the soil moist, but not soggy.
Finally, place the cutting in a warm, sunny spot and wait for it to take root. Once the cutting has taken root, you can transplant it to its permanent location. With proper care and attention, your Parthenocissus will thrive in the UK climate.
A Detailed Guide to Propagating Parthenocissus Using Cuttings
Parthenocissus, known as Virginia Creeper or Boston Ivy, is a deciduous climber renowned for its beautiful fall Colour and remarkable adaptability. The propagation of Parthenocissus using cuttings is a fairly straightforward process. Here's a step-by-step guide:
Materials and Tools Required:- A healthy Parthenocissus vine
- Sharp knife or pruners
- Pot with drainage holes
- Fresh potting mix
- Rooting hormone (optional)
- Plastic bag or propagator
The best time to take cuttings from your Parthenocissus vine is during the late spring or early summer when the plant is actively growing.
Factors That Could Affect Growth:The health of the parent plant, the timing of your cuttings, and the care you provide can all affect the success of your propagation. Be sure to choose a healthy vine for your cuttings, and keep the newly planted cuttings in a warm, humid environment away from direct sunlight.
Preparing the Cuttings:- Select a Healthy Shoot: Choose a vigorous shoot from your Parthenocissus vine. The shoot should be free of any disease or damage.
- Make Your Cut: With your sharp knife or pruners, cut off a 4-6 inch section of the shoot. Make sure this cutting includes at least two sets of leaves.
- Prepare the Cutting: Remove the lower leaves from your cutting, leaving only a couple of leaf sets at the top. This helps to reduce water loss and directs more energy to root formation.
- Apply Rooting Hormone (Optional): Dip the cut end of your cutting into rooting hormone. Although not necessary, this can help to stimulate root growth.
- Plant the Cutting: Fill your pot with fresh potting mix and create a hole for the cutting. Insert the cut end of your cutting into the hole, ensuring that the node (where the leaves were removed) is buried. Firm the soil around the cutting.
- Provide Proper Care: Water the cutting well, then place a clear plastic bag over the pot or move it into a propagator. This creates a humid environment which helps the cutting take root. Place the pot in a warm, bright place out of direct sunlight.
- Wait for Roots to Form: Keep the soil slightly moist but not waterlogged. After a few weeks, you should see new growth, indicating that roots have formed. At this point, remove the plastic bag or take the pot out of the propagator.
With patience and proper care, you'll soon have a new Parthenocissus vine to enjoy!
Guide to Propagating Parthenocissus by Grafting
Grafting is a horticultural technique that involves joining two plants together so they grow as one. This method is often used to combine the best characteristics of two different plants, such as a hardy rootstock and a desirable top growth.
Parthenocissus, also known as Virginia Creeper or Boston Ivy, is a vigorous climber with stunning fall Colours. It's typically propagated from cuttings or seeds, but can also be grafted onto a compatible rootstock.
Materials and Tools Required:- A healthy Parthenocissus vine (scion)
- A compatible rootstock
- Sharp grafting knife
- Grafting tape or wax
- Rooting hormone (optional)
The best time for grafting Parthenocissus is during late winter or early spring, while the plant is still dormant but about to enter a period of active growth.
Step-by-Step Process:- Prepare the Grafting Materials: Choose a healthy shoot from your Parthenocissus vine to serve as the scion. This should be a straight, vigorous shoot from last year's growth. Cut a 4-6 inch piece, ensuring it has several buds.
- Prepare the Rootstock: Select a compatible rootstock of similar diameter to your scion. This could be another Parthenocissus plant, or a closely related species. Make a straight cut across the top of the rootstock.
- Prepare the Scion: Make a sloping cut on one side of the base of your scion, then a shorter cut on the other side to create a wedge shape.
- Join the Scion and Rootstock: Align the cut surfaces of the scion and rootstock and join them together. The cambium layers (just under the bark) of both plants need to be in contact for the graft to take.
- Secure the Graft: Wrap the graft union tightly with grafting tape or wax to hold the pieces together and prevent moisture loss.
- Aftercare and Maintenance: Keep the grafted plant in a sheltered location out of direct sunlight. Maintain high humidity and keep the soil moist but not waterlogged. Once the scion starts to grow, gradually expose it to more light.
If your graft fails to take, it may be because the cambium layers weren't in contact, or the graft dried out. Try again with fresh materials.
If the scion wilts despite the graft taking, it may be getting too much sun too soon. Gradually acclimate it to brighter conditions.
Potential Problems When Growing the Parthenocissus in the UK and Solutions
When it comes to growing the Parthenocissus in the UK, there are a few potential problems that gardeners should be aware of. The UK climate can be a challenge for this particular species, as it prefers warmer temperatures and more sunlight than the UK typically offers. To ensure the Parthenocissus thrives, it is important to provide it with plenty of sunlight and to prune it regularly. Pruning helps to keep the plant healthy and encourages new growth. Additionally, fertilizing the Parthenocissus is essential for its growth and health. Fertilizing helps to provide the plant with the nutrients it needs to thrive in the UK climate. With the right care and attention, the Parthenocissus can be a beautiful addition to any garden in the UK.
The Common Diseases and Pests which Affect the Parthenocissus
Parthenocissus is a genus of climbing plants native to the UK, and is a popular choice for gardeners looking to add a touch of greenery to their outdoor space. However, it is important to be aware of the common diseases and pests which can affect the Parthenocissus.
The most common disease which affects Parthenocissus is Powdery Mildew, which is caused by a fungus and can cause the leaves to become discoloured and covered in a white powdery substance. To prevent this, it is important to ensure that the plant is not over-watered and is given plenty of sunlight. Additionally, it is important to prune the plant regularly to ensure that air can circulate around the leaves.
Pests can also be a problem for Parthenocissus, with Aphids and Spider Mites being the most common. Aphids can cause the leaves to become distorted and discoloured, while Spider Mites can cause the leaves to become yellow and mottled. To prevent this, it is important to regularly check the plant for signs of pests and to use an insecticidal soap or neem oil to treat any infestations.
By taking the necessary precautions, it is possible to keep Parthenocissus healthy and free from common diseases and pests. With the right care, this beautiful plant can be a great addition to any garden.
Common Diseases and Pests that Affect Parthenocissus Plants
Parthenocissus, also known as Virginia Creeper or Boston Ivy, is a relatively hardy plant but can still be susceptible to certain diseases and pests. Let's explore the most common issues and how to combat them.
Diseases:- Powdery Mildew: This is a fungal disease that appears as a white powdery substance on the leaves. It's often caused by high humidity and poor air circulation. To prevent it, ensure your plant has plenty of space for air movement. If infected, remove affected leaves and treat the plant with a fungicide.
- Leaf Spot: This disease causes spots on the leaves that may be red, brown, or black. It's usually caused by a fungus or bacteria. To prevent it, avoid overhead watering which can spread the disease. If infected, remove and destroy affected leaves and apply a suitable fungicide.
- Aphids: These tiny insects suck sap from the plant, causing yellowing and curling of the leaves. They also excrete a sticky substance called honeydew which can lead to the growth of sooty mold. You can prevent aphid infestations by regularly inspecting plants and introducing beneficial insects like ladybugs. If an infestation occurs, treat the plant with insecticidal soap or neem oil.
- Japanese Beetles: These beetles eat the leaves of the Parthenocissus, causing a skeleton-like appearance. They are most active in the morning and evening. To prevent them, use a combination of methods such as hand-picking (dropping them into soapy water), using pheromone traps, and introducing beneficial nematodes that attack the beetle grubs.
- scale insects: These pests appear as small, immobile bumps on the leaves and stems. They suck sap from the plant, causing yellowing and wilting of the leaves. To prevent scale, maintain good plant health and inspect regularly. If an infestation occurs, treat the plant with horticultural oil or insecticidal soap.
One nuance of Parthenocissus is its vigorous growth habit. While not a disease or pest issue, it can become invasive if not managed properly. Regular pruning is recommended to keep the plant in check.
A Complete Guide to Pruning the Parthenocissus in the UK
Parthenocissus is a beautiful climbing plant that is native to the UK. It is a popular choice for gardeners and landscapers alike, as it is easy to maintain and provides a stunning backdrop to any outdoor space. Pruning is an important part of keeping Parthenocissus healthy and looking its best. In the UK, pruning should be done in late winter or early spring, when the plant is dormant. This will help to promote new growth and encourage the plant to produce more flowers. When pruning, it is important to remove any dead or damaged branches, as well as any that are growing in an undesirable direction. It is also important to thin out the foliage to allow more light and air to reach the inner branches. With proper pruning, Parthenocissus can be a beautiful addition to any garden in the UK.
Why Do we Need to Prune the Parthenocissus?
Pruning is an essential part of caring for Parthenocissus, a type of climbing plant native to the UK. Pruning helps to keep the plant healthy and encourages new growth. It also helps to keep the plant in a manageable size and shape. Pruning can be done at any time of the year, but it is best done in late winter or early spring when the plant is dormant.
When pruning Parthenocissus, it is important to remove any dead or damaged branches, as well as any branches that are growing in an undesirable direction. This will help to keep the plant looking neat and tidy. It is also important to remove any suckers, which are small shoots that grow from the base of the plant. These can be removed with a sharp pair of secateurs.
Pruning Parthenocissus is a simple and straightforward task that can help to keep the plant healthy and looking its best. With regular pruning, you can ensure that your Parthenocissus will remain a beautiful addition to your garden for many years to come.
When is the Best Time to Prune the Parthenocissus?
Parthenocissus is a beautiful climbing plant that is native to the UK and can be found in many gardens. Pruning is an important part of keeping the plant healthy and looking its best. The best time to prune the Parthenocissus is in the late winter or early spring, when the plant is dormant. This is because pruning during this time will help to encourage new growth in the spring. Pruning should be done carefully, as it can be damaging to the plant if done incorrectly. It is important to take into account the UK climate when pruning the Parthenocissus, as the weather can have an effect on how the plant responds to pruning. For example, if the weather is particularly cold, it is best to wait until the temperatures rise before pruning. Additionally, pruning should be done with sharp tools to ensure a clean cut and to avoid damaging the plant.
A Step by Step Guide on How to Prune the Parthenocissus
Pruning is an essential part of caring for Parthenocissus, a type of climbing plant native to the UK. Pruning helps to keep the plant healthy and encourages new growth. To get started, you'll need a pair of sharp pruning shears and a ladder if the plant is too tall to reach. Begin by removing any dead or damaged branches, then trim back any branches that are growing too long or too close together. This will help to keep the plant looking neat and tidy. Next, thin out any overcrowded areas to allow more light and air to reach the inner parts of the plant. Finally, prune back any branches that are growing in an undesirable direction. With these steps, you can keep your Parthenocissus looking its best.
A Comprehensive Guide to Pruning Parthenocissus (Virginia Creeper)
Parthenocissus, or Virginia Creeper, is a vigorous deciduous climber known for its stunning fall foliage. Its rapid growth can easily get out of control if not properly managed, making regular pruning essential.
Introduction: This vine grows by attaching itself to surfaces via tendrils with adhesive tips, enabling it to climb up and over fences, walls, and other structures. It can reach heights of 30 to 50 feet if left unchecked.
Correct Time to Prune: The best time to prune Virginia Creeper is in late winter or early spring while the plant is still dormant but before the new growth begins.
Tools Needed:- Sharp pruning shears
- Loppers for thicker branches
- Gardening gloves to protect your hands
- Safety goggles to protect your eyes from falling debris
- Inspect the Vine: Start by identifying any dead, diseased, or damaged vines. These should be your first priority when pruning.
- Remove Unwanted Vines: Using your pruning shears, cut away any vines that are growing where you don't want them. Make clean cuts close to the base of the vine.
- Prune for Size Control: If your Virginia Creeper is growing too large, you can cut back the entire plant to within a few feet of the ground. Don't worry about being too harsh; this plant is very resilient and will bounce back quickly.
- Thin Out the Vine: To improve air circulation and reduce the risk of disease, remove some of the interior vines. This is particularly important if the plant has become very dense.
- Shape the Vine: Lastly, prune the remaining vines to achieve your desired shape. You can also train the vine to grow in a certain direction by gently bending young vines and tying them to a support.
Always use sharp tools for clean cuts that heal quickly.
Dispose of any diseased or infested vines properly to prevent the spread of disease or pests.
Safety Precautions:Wear gardening gloves and safety goggles to protect yourself from sharp vines and falling debris.
Be aware that Virginia Creeper can cause skin irritation for some people, so it's best to wear long sleeves and pants when pruning.
Conclusion: Regular pruning of your Virginia Creeper will keep it healthy and manageable. Don't be afraid to cut it back hard; this vigorous vine will come back stronger and more beautiful than ever!
How Much can I Prune Away the Mature Parthenocissus
Pruning is an important part of keeping Parthenocissus healthy and looking its best. In the UK, the climate is mild enough to allow for pruning of mature Parthenocissus vines. Pruning should be done in late winter or early spring, when the vine is still dormant. This will help to keep the vine healthy and encourage new growth. When pruning, it is important to remove any dead or diseased branches, as well as any branches that are growing in an undesirable direction. It is also important to remove any branches that are crossing over each other, as this can cause damage to the vine. Pruning should be done carefully, as too much pruning can damage the vine and reduce its vigor.
A Comprehensive Guide to Hard Pruning a Mature Parthenocissus Plant
Parthenocissus, commonly known as Virginia Creeper, is a vigorous climber that can become unruly if not properly managed. Hard pruning is an effective method to control its size, stimulate new growth, and maintain its health. Tools Needed for Pruning:- A pair of sharp pruning shears for smaller stems
- Loppers for larger branches
- A pruning saw for the thickest branches
- Protective gloves and safety glasses
- Inspect the Plant: Start by examining the plant to identify any dead, diseased, or damaged vines that should be removed first.
- Remove Old Growth: Use your pruning shears or loppers to cut back old, woody vines to about 2 feet from the ground. Make clean, diagonal cuts just above a bud to encourage new growth.
- Shape the Plant: After you've removed the old growth, you can further prune the plant to your desired shape. Keep in mind that Parthenocissus is a vigorous grower, so don't be afraid to cut it back quite hard.
- Best Time to Prune: The best time to hard prune a mature Parthenocissus plant is in late winter or early spring, while the plant is still dormant but before new growth begins.
- How Much to Prune: When hard pruning, you can remove up to 90% of the plant's growth. This might seem drastic, but remember that Parthenocissus is a vigorous grower and will quickly regenerate.
- Watering: After pruning, give the plant a good watering to help it recover from the stress of pruning.
- Fertilizing: A few weeks after pruning, apply a balanced fertilizer to provide the nutrients needed for new growth.
- Monitor Growth: Keep an eye on the plant as new growth emerges, and continue to prune as necessary to maintain your desired shape.
Remember, hard pruning is a great way to rejuvenate a mature Parthenocissus plant and stimulate new, vigorous growth.
How to Care for the Parthenocissus after Pruning
Pruning is an important part of caring for Parthenocissus in the UK. Pruning should be done in late winter or early spring, when the plant is dormant. This will help to keep the plant healthy and encourage new growth. When pruning, it is important to remove any dead or diseased branches, as well as any branches that are growing in an undesirable direction. After pruning, it is important to fertilise the plant to help it recover and promote healthy growth. A balanced fertiliser should be used, and it should be applied at the base of the plant.
In addition to pruning and fertilising, Parthenocissus also needs to be watered regularly. The soil should be kept moist, but not soggy. Watering should be done in the morning, so that the leaves have time to dry before nightfall. This will help to prevent fungal diseases from developing. If the soil is allowed to dry out completely, the plant may suffer from drought stress.
How to avoid Pruning too Much off my Parthenocissus
Pruning is an important part of keeping your Parthenocissus healthy and looking its best. However, it is important to be careful not to prune too much off your Parthenocissus. Pruning too much can cause the plant to become weak and unhealthy. To avoid pruning too much, it is important to understand the UK climate and the needs of your Parthenocissus. In the UK, Parthenocissus is best pruned in late winter or early spring, when the plant is dormant. This will help ensure that the plant has enough time to recover before the growing season begins. Additionally, it is important to prune only the dead or damaged branches, as pruning too much can cause the plant to become weak and unhealthy. By following these tips, you can ensure that your Parthenocissus stays healthy and looks its best.
An Overview of Pruning the Parthenocissus
Pruning is an important part of caring for Parthenocissus plants in the UK. Pruning helps to keep the plant healthy and encourages new growth. It is important to prune the Parthenocissus regularly, as it is a climbing plant and can quickly become overgrown. Pruning should be done in the spring and summer months, when the plant is actively growing. When pruning, it is important to remove any dead or damaged branches, as well as any branches that are growing in an undesirable direction. This will help to keep the plant looking neat and tidy. It is also important to prune the Parthenocissus to encourage new growth and to keep the plant healthy. Pruning should be done carefully, as the plant is delicate and can be easily damaged.
Parthenocissus is a popular choice for UK gardens, as it is a hardy and attractive plant. It is a great choice for covering walls and fences, as it is a fast-growing climber. It is important to prune the Parthenocissus regularly to keep it healthy and to encourage new growth. Pruning should be done carefully, as the plant is delicate and can be easily damaged. With regular pruning, the Parthenocissus can be a beautiful addition to any UK garden.
In conclusion, Parthenocissus is a great addition to any garden in the UK. It is a hardy and resilient plant that can thrive in a variety of climates and conditions. Planting the Parthenocissus in the right location, at the right time, and with the right care can ensure that it will grow and flourish. Pruning is an important part of caring for the Parthenocissus, and should be done carefully and with consideration for the plant's health. With the right knowledge and care, the Parthenocissus can be a beautiful and rewarding addition to any garden.
Frequently Asked Questions About the Parthenocissus
- Q1: What is Parthenocissus? A1: Parthenocissus is a genus of flowering plants in the grape family, Vitaceae. It is native to the temperate regions of the Northern Hemisphere and is commonly known as Virginia creeper, woodbine, or Boston ivy.
- Q2: What are the best conditions for growing Parthenocissus in the UK? A2: Parthenocissus is best grown in full sun or partial shade in moist, well-drained soil. It prefers a slightly acidic soil with a pH of 6.0-7.0.
- Q3: What is the best time to plant Parthenocissus in the UK? A3: The best time to plant Parthenocissus in the UK is in the spring or early summer.
- Q4: How fast does Parthenocissus grow? A4: Parthenocissus can grow up to 30 cm per year, depending on the conditions.
- Q5: How can I propagate Parthenocissus? A5: Parthenocissus can be propagated by cuttings or layering. Cuttings should be taken in the spring or early summer and should be about 10 cm long. Layering can be done in the spring or summer by burying a stem in the soil and covering it with a layer of mulch.
- Q6: What are some potential problems when growing Parthenocissus in the UK and how can they be solved? A6: Potential problems when growing Parthenocissus in the UK include Powdery Mildew, Leaf Spot, and Aphids. These can be solved by providing adequate air circulation, avoiding overhead watering, and using insecticidal soap or neem oil to control Aphids.
- Q7: What is the best way to care for Parthenocissus after pruning? A7: After pruning, it is important to water the plant deeply and mulch around the base to help retain moisture. It is also important to fertilize the plant with a balanced fertilizer to help promote healthy growth. Additionally, regularly checking for pests and diseases can help ensure the plant's health.
- Q8: Can Parthenocissus be grown in containers? A8: Yes, Parthenocissus can be grown in containers. However, it is important to choose a large enough container and provide adequate support for the climbing vines. Additionally, regular watering and fertilizing are necessary for container-grown Parthenocissus.
- Q9: How often should I prune my Parthenocissus? A9: The frequency of pruning depends on the growth rate and desired shape of the plant. However, it is generally recommended to prune in late winter or early spring when the plant is dormant, followed by regular maintenance pruning throughout the growing season as needed.
- Q10: Can Parthenocissus be grown indoors? A10: No, Parthenocissus is an outdoor plant and requires full sun or partial shade to thrive. It also needs the support of a structure to climb on, which may not be available indoors. Additionally, being in a confined space can lead to pest and disease issues. Therefore, it is not recommended to grow Parthenocissus indoors.
Remember to always research and follow specific care instructions for your particular Parthenocissus plant and consult a gardening expert if you have any concerns or questions. With proper care and attention, your Parthenocissus can be a stunning addition to your UK garden. Happy pruning!
How to Prune Climbing Vines
List by Variety
- How to Prune Actinidia
- How to Prune Akebia
- How to Prune Bougainvillea
- How to Prune Campsis
- How to Prune Celastrus
- How to Prune Chilean Glory Vine
- How to Prune Clematis Armandii
- How to Prune Clematis Montana
- How to Prune Climbing Rose
- How to Prune Hedera GoldHeart
- How to Prune Honeysuckle
- How to Prune Hydrangea Petiolaris
- How to Prune Ivy
- How to Prune Japanese Wisteria
- How to Prune Morning Glory
- How to Prune Parthenocissus
- How to Prune Persian Ivy Hedera Colchica
- How to Prune Schisandra
- How to Prune Star Jasmine
- How to Prune Sweet Peas
- How to Prune True Jasmine
- How to Prune Virginia Creeper
- How to Prune Wisteria
How to Prune Hedges
List by Variety
- How to Prune an Arborvitae Hedge
- How to Prune a Barberry Hedge
- How to Prune a Beech Hedge
- How to Prune a Boxwood Hedge
- How to Prune a Butterfly Bush Hedge
- How to Prune a Cotoneaster Hedge
- How to Prune an English Lavender Hedge
- How to Prune an Escallonia Hedge
- How to Prune an Euonymus-Hedge
- How to Prune a Firethorn Hedge
- How to Prune a Forsythia Hedge
- How to Prune a Griselinia Hedge
- How to Prune a Hawthorn Hedge
- How to Prune a Holly Hedge
- How to Prune a Hornbeam Hedge
- How to Prune a Laurel Hedge
- How to Prune a Leylandii Hedge
- How to Prune a Lilac Hedge
- How to Prune a Maple Leaf Viburnum Hedge
- How to Prune a Photinia Hedge
- How to Prune a Pink Ramanus Rose Hedge
- How to Prune a Privet Hedge
- How to Prune a Pyracantha Hedge
- How to Prune a Spirea Hedge
- How to Prune a Thuja Hedge
- How to Prune a Viburnum Hedge
- How to Prune a Western Red Cedar Hedge
- How to Prune a Yew Hedge
How to Prune Shrubs
List by Variety
- How to Prune an Abelia Shrub
- How to Prune an Abutilon
- How to Prune an Acer / Japanese-Maple
- How to Prune an Amelanchiers
- How to Prune an Apple-Tree
- How to Prune an Arbovitae Shrub
- How to Prune an Arbutus
- How to Prune an Aucuba
- How to Prune a Azalea Mollis
- How to Prune Azaleas
- How to Prune a Bay Tree Shrub
- How to Prune a Berberis Darwinii
- How to Prune Berberis Deciduous Types
- How to Prune a Boxwood Shrubs
- How to Prune a Brachyglottis Senecio
- How to Prune a Buddleia Alternifolia
- How to Prune Buddleias Butterfly Bushes
- How to Prune a Buddleja Globosa
- How to Prune a Callicarpa
- How to Prune a Camellia
- How to Prune a Caryopteris
- How to Prune a Catalpa Bignonioides Aurea
- How to Prune Ceanothus Deciduous Types
- How to Prune Ceanothus Evergreen Types
- How to Prune a Ceratostigma
- How to Prune a Chaenomeles
- How to Prune a Choisya
- How to Prune a Cistus
- How to Prune a Clematis
- How to Prune a Cornus
- How to Prune a Cotinus Royal Purple
- How to Prune a Cytisus Scoparius
- How to Prune a Exochorda x Macrantha
- How to Prune a Forsythia
- How to Prune a Hebe
- How to Prune a Hydrangeas
- How to Prune Juniper Shrubs
- How to Prune a Lavatera
- How to Prune Lilac Bushes
- How to Prune a Mugo Pine
- How to Prune Rose Bushes
- How to Prune Spirea Shrubs
- How to Prune Viburnum Shrubs
- How to Prune a Weigela
- How to Prune a Yew
How to Prune Trees
List by Variety
- How to Prune a Apple Tree
- How to Prune a Apricot Tree
- How to Prune a Ash Tree
- How to Prune a Birch Tree
- How to Prune a Cherry Tree
- How to Prune a Elm Tree
- How to Prune a Fig Tree
- How to Prune a Grape Tree
- How to Prune a Hickory Tree
- How to Prune a Maple Tree
- How to Prune a Oak Tree
- How to Prune an Olive Tree
- How to Prune a Peach Tree
- How to Prune a Pear Tree
- How to Prune a Plum Tree
- How to Prune a Poplar Tree
- How to Prune a Walnut Tree
Gallery


Michael Carter
Vestibulum ante ipsum primis in faucibus orci luctus et ultrices posuere cubilia curae; Donec vel erat in nulla efficitur tempor non ut nisl. Integer venenatis eros ut dui viverra fermentum.
Sophie Wilson
Nam ut turpis hendrerit, varius nunc vel, elementum dui. Morbi vulputate dolor sit amet scelerisque egestas. Vestibulum eleifend nunc ut bibendum fermentum.
Alex Morgan
Cras non velit nec purus tempor rhoncus. Sed non mauris vitae erat consequat auctor eu in elit. Class aptent taciti sociosqu ad litora torquent per conubia nostra.